Tools and materials
Sealing the seams on the ceiling will require the preparation of tools and materials. They should be prepared before starting work on the ceiling slabs.
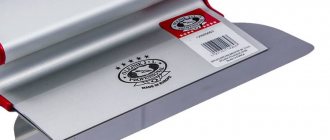
Spatula with flexible elastic blade
How to seal the seams on the ceiling between the slabs? This type of work requires:
- deep penetration primer, better concrete contact. The soil is intended to improve the adhesion of the concrete surface and the material with which it is planned to seal the cracks;
- cement brand NTs, it is used to eliminate deep recesses. The main difference from the standard composition is the ability to expand and fill holes during the solidification process;
- for wide cracks, thermal insulation material is useful; the filler is construction foam, polyurethane or polyethylene foam;
- putty with elastic material (latex);
- sealant;
- reinforced mesh with a width of 4-5 cm, if the width of the crack allows you to place a metal base inside;
- starting and finishing putty.
When treating the ceiling, as well as the floor and walls, you will need basic electrical appliances. The type of tool depends on the seam sealing technology; usually it is enough:
- spatulas of various sizes;
- metal brush;
- spray bottle;
- construction knife;
- hammer drill, easy to replace with a drill with impact mode;
- sandpaper.
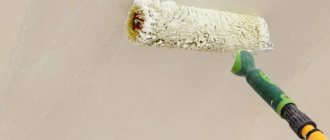
What tools will be useful to us
Before closing the joints of the slabs on the ceiling, you should take care of personal safety: eye protection glasses, a respirator, comfortable gloves and overalls.
Work technology
Stage 1
Ceiling seam
The seams on the ceiling are most often sealed simultaneously with the repair of the entire ceiling. This is much more convenient, since such repairs are quite labor-intensive and dusty. Therefore, it is better to do this as a whole.
- First you need to prepare the surface. To do this, you need to remove old whitewash or remaining water-based paint from the ceiling. This is done very simply. Using a spray bottle, water is sprayed onto the ceiling. It is necessary to thoroughly spray the entire ceiling so that there are no dry areas left. Then, you need to let the surface absorb the water for 15 minutes.
- After this, using a spatula, preferably a wide one, remove the layer to the plaster. If there are traces of paint, rust or other materials on the ceiling, they must be removed with a chemical solution. You also need to ensure that the surface is free of chips and holes, as this can interfere. You need to work especially carefully on the seams. They need to be embroidered, removed from old putty, plaster, paint and whitewash. It is better to clean with a narrow spatula to get into all areas of the seam.
- If you cannot remove the solution manually, you can use a hammer drill. The most important thing is that the seam ends up being U-shaped, so the adhesion to the putty will be stronger.
- After the seam is ready, it needs to be cleaned of dust. This can be done with a brush. You also need to blot it with water.
Stage 2
Sealing ceiling joints
When the preparation of the ceiling is completed, you need to inspect it and decide how to remove the seams on the ceiling, that is, which method to use. If the seam width is more than 3 cm, and the recess is not very large, then such a seam can be sealed using ordinary polyurethane foam.
- To begin with, you need to slightly moisten the seam with a clean liquid, and then apply foam and spray. You need to wait several hours for the foam to expand and harden.
- After drying, it is necessary to very carefully cut off excess foam. It is better to cut with a stationery knife, because it has a thinner blade and the cut will look more accurate. You need to make sure that there is a small depression in the shape of a triangle left at the cut site. But, this recess should not be more than 0.5 cm. If the seam on the ceiling is deep enough, but not very wide, then it is better to reinforce it with polystyrene foam, and polyethylene foam will also do.
- Before this, the seams must be thoroughly treated with a primer and dried. This is important because if you apply the material to a wet surface, it will not stick and will soon fall off. You can secure the seal with a sealant; be sure to choose a moisture-resistant one. Remember that the surface must be dry. The sealant is placed in the seam of the slab, and then the seams are sealed from the outside with cement mortar. At the joints, you should get a small depression, just like in the first case. After this, the cement must be allowed to dry thoroughly.
Stage 3
Sealing ceiling seams with your own hands
- As mentioned earlier, it is better to choose latex putty on a recess in which a layer of putty is applied on hardened foam or cement mortar. It is necessary to carefully level the solution with the surface of the slab. This is not an easy task, so you have to work hard. It is important that there are no unevenness, because otherwise the ceiling will be uneven.
- It is better to apply putty using large and narrow spatulas. Apply a sufficient amount of solution to the large one, and spread it onto the seam with the narrow one. At the same time, do not forget to strengthen and smooth the mortar inside the entire seam. You need to make sure that there is no empty space left in the seams, as this could cause the solution to crumble and fall out.
- After this, use a wide spatula to smooth the surface and remove excess putty.
Stage 4
Plastered seam on the ceiling
- The seams must be allowed to dry for 15-20 hours. And only after this you need to start re-puttying.
- The first layer of putty is applied to the seams and the area next to the seam. On top of the layer it is necessary to glue serpyanka or a special mesh. You need to glue using force so that the mesh is pressed into the layers of putty. This is done to strengthen the surface, so there is a greater chance that the putty will not fall off over time. The layer of putty and mesh must be carefully ironed to get rid of unevenness.
- After this, the surface should be allowed to dry. As soon as the putty has dried, you need to go over it with sandpaper or a special mesh. This is done to get rid of roughness and unevenness. When sanding the ceiling surface, you should use a face mask and special glasses, as this is a very dusty job. And dust from putty is very harmful to the human respiratory system.
- After the surface has been cleaned, you need to apply a second layer of putty, but this time to the entire area of the ceiling. The principle of application is the same. Using a large spatula, apply a layer to the ceiling and level it. After drying, go over the surface with sandpaper.
- Then comes the final stage - applying the finishing layer of putty. It is applied in the same way as the preliminary one. Only after drying it should be sanded with a special fine-grained mesh so as not to scratch or damage the surface. After this, the ceiling can be painted or wallpaper glued to it.
Serpyanka sticker
How to remove seams on the ceiling: preparatory stage
Before sealing the seams on the ceiling, it is important to carry out the coating preparation stage. The surface should be durable and primed. It is better to remove any coatings with weak fixation: old putty, paint, wallpaper, cement, lime, etc.
It is better to seal the seams of floor slabs in a clean room (after wet cleaning). To achieve better adhesion and normal mineralization of the working solution, the room must be dry. Primer is applied on top of the cleaned ceiling surface.
Before proceeding to apply the next layer, it is important to wait until the previous one has hardened. The amount of time depends on the temperature and type of material.
How to cover the seams of OSB boards
For rooms finished with OSB boards, it is necessary to carry out thorough preparation before painting. It is not possible to seal the seams of OSB boards with any material. This type of ceiling cladding has a moisture-resistant coating that does not allow water to pass through. Therefore, water-based compounds are not suitable for working with OSB boards. Acrylic sealants are optimal for working with such materials. You can also use silicone compounds, but they paint over much worse. The sealant is applied to the cleaned surface and then covered with decorative material.
Working with a wide, shallow joint
If there are shallow cracks between floor slabs with a width of 3 cm or more, it is better to use filler, polyurethane foam.
Repairing a seam is quite a labor-intensive job that must be done scrupulously, otherwise the bad work will be visible later
How to seal a seam between ceiling tiles using foam? For this:
- A mounting gun is inserted into the recess and the hole is filled with foam.
- Wait for the foam to dry, usually takes about 2-4 hours.
- All protruding parts are removed with a construction knife; it is better to make a recess of a few millimeters for better grip, but the depth should not exceed 5 mm.
- The recess is treated with elastic putty. It is convenient to use the material using 2 spatulas: narrow and wide. The mixture is stored on a wide tool, and the putty is applied with a narrow spatula.
- Cover the seams on the ceiling with a wide spatula, removing excess and other defects.
Required accessories
High-quality sealing of tile joints is impossible without materials and tools that allow you to cope with ceiling joints. For the upcoming work you will need:
- Serpyanka mesh.
- Polyurethane foam or acrylic sealant.
- Latex putty.
- Leveling mixture.
- Special impregnation or primer.
The use of these materials allows you to reliably seal and hide the cavity. Tools you will need:
- A hammer drill or drill with a special attachment.
- Several wide and narrow spatulas.
- Sandpaper.
- Gun for sealant.
Having decided how to cover the seams between the slabs on the ceiling and what tools you will need, buy them in advance at a specialized store.
Attention: when choosing, do not forget to pay attention to their quality, carefully read the instructions.
Working with a wide joint of great depth
If you have to seal a seam between tiles on a ceiling with a width of more than 3 cm and a relatively large depth, you should not use foam.
Work algorithm:
- Filling the recess with heat-insulating material. Foamed polyethylene and polyurethane foam are suitable for this purpose.
- Fixing the insulation using a sealant with maximum resistance to moisture.
- After sealing the crack, the gap is sealed with NC cement, but a small groove with a depth of up to 5 mm is left.
- After the cement has completely hardened, a latex type of putty is applied on top, and the plane of the slab is leveled with it.
- Using a spatula, remove the excess layer of preliminary putty and level it as much as possible.
Instead of foam, you can use ceramic tile adhesive to seal deep cracks.
Sealing the seam
The repair begins with an inspection of the resulting recess. If its width does not exceed 3 centimeters and its depth is small, foam and putty will be enough for sealing. The cavity is moistened with water from a spray bottle and filled with foam approximately halfway. After the foam has dried and expanded in volume, its excess is cut off with a sharp knife, leaving a small triangular recess in the center, about 5 millimeters deep.
With deep and narrow cracks they act differently. Foam plastic, foamed polyethylene or sealant is placed into the gap itself. The filler is covered with cement mortar on top, also leaving a half-centimeter recess. After this, in both cases, latex putty is applied to level the surface. When it dries, the surface can be lightly sanded and a layer of primer applied.
The final leveling begins after the applied materials have completely dried. First, a thin layer of finishing putty is applied to the entire surface of the damage and a small area around this area. It is enough to retreat about five centimeters in all directions. We attach a reinforcing mesh to this thin layer of putty, pressing it into the created layer and at the same time removing excess material with a spatula. After this, all that remains is to prime the entire surface again and apply a finishing layer of putty mixture, followed by sanding.
Working with deep and narrow joints
It is better to seal narrow but deep seams between floor slabs using the same method as in the previous case.
How to seal the seams on the ceiling between the slabs? The sequence of work is as follows:
- A sealant is applied to a piece of insulation and placed inside the groove. The material should be pushed firmly into the recess.
- After high-quality compaction with insulation, there should be about 1 cm of depth left for adding NC cement. It is important to leave a 5mm recess.
- Latex putty is applied to the hardened cement mortar and leveled with a spatula.
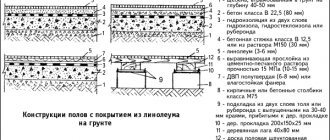
We seal non-design joints up to 300 mm
If the width of the seams between adjacent slabs does not exceed 300 mm, sealing such a seam is relatively simple ; there are several methods for filling the seams to choose from.
Method 1
- At the bottom of the adjacent slabs, using spacers, we install a board or sheet of plywood that bridges the gap - this is formwork;
- You can lay a piece of roofing material or film on top of the formwork, then there will be no traces of concrete left on the formwork, and it can continue to be used;
- Fill the gap between the plates with mortar;
- We wait for the concrete to gain strength within 3-4 weeks and remove the formwork.
Method 2
If it is not possible to install the formwork from below, you can make permanent formwork from galvanized roofing steel 0.8-1 mm thick according to the size of the gap between the slabs , resting on the upper edge of the slab (trough). The profile of the side surface of the slabs will provide additional expansion and rigidity to the monolithic section.
Method 3
Another way to seal seams with permanent formwork is to make mounting parts from steel strips 4 mm thick and 5 cm wide along the gap profile , as in the previous case, resting on the front surface of the slabs, lay these mounting parts every 0.5 m along the length of the slab. On the bottom (in the plane of the lower edge of the slabs) we place a strip of galvanized roofing steel, plywood or plastic, and concrete it. This method ensures reliable adhesion of the monolithic section to the slabs.
Method 4
If you come across a pair of defective slabs with incorrectly positioned side locks, when the recess is at the bottom, they can be installed next to a gap of 2-3 cm. Place the formwork from below using method 1 and pour concrete through the provided gap.
Next steps
Sealing the seams between the panels is not completed in the previous steps. It is important to carry out the entire processing complex so that defects do not appear in the future. Otherwise, when the soil and the base of the building move, the floor seams will crack again, and all work will be in vain.
The reason for the appearance of cracks may be incorrect calculation of the load on the structure or neglect of construction technology, which causes the building to shrink. At the stage of building a house, it is important to take into account the weight of the house’s insulation and lay the water supply system in advance to prevent the destruction of load-bearing walls and foundations later.
Latex putty. This kind of putty is more suitable for sealing seams.
Protection of joints between floor slabs from destruction is carried out in stages:
- Wait for the latex putty to harden; complete drying takes about 2 days.
- Preparation for reinforcement of the recess. Apply a starting layer of putty, it is laid with a small protrusion beyond the edges of 4-5 cm.
- A reinforcing mesh is pressed into the material; a roller or narrow spatula will do.
- Use a spatula to run along the putty to remove excess.
- After the material has hardened, the surface should be treated with fine or medium-grain sandpaper.
- Repeated application of the starting putty will help create an ideal plane; cleaning is done with fine-grained sandpaper.
- A finishing putty coating is applied on top.
- After hardening, re-treat with sandpaper.
- The final stage is painting or gluing the ceiling.
The subtleties of masking seams between floor slabs using hanging systems
Agree, it is very tempting to close the old unsightly ceiling with one movement of the hand by stretching a modern stretch ceiling over it. A lot of issues are resolved in one fell swoop - the seams between the slabs and the appearance of the ceiling itself. It is for these qualities (the ability to level and create a beautiful surface) that suspended ceiling systems are valued - even drywall, which needs to be brought to condition by putty and painting, cannot compare with them. There are not too many such technologies that allow you to quickly and easily solve the issue of sealing seams on the ceiling. To be more specific, there is only one, which we are talking about. Besides this, there are other options - they are, of course, less effective, but, nevertheless, they cope with the task of masking the seams between the floor slabs. Such technologies include almost all types of suspended ceiling systems.
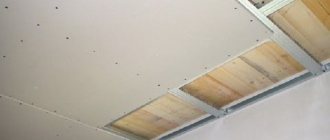
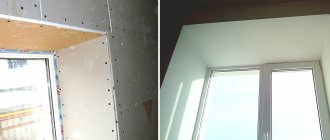
- Plasterboard ceilings. With their help, you can cover both the entire unsightly surface of the ceiling and individual, particularly problematic areas, fitting them into any pattern or complex structure of a multi-level ceiling. As a last resort, the seams can simply be covered with figured plasterboard elements, thereby creating a structure on the ceiling.
- Plastic ceiling. Naturally, it is not suitable for all rooms - for example, it will not look good in the living room or bedroom. A corridor, kitchen or bathroom with toilet - this is its area of application in residential buildings or apartments.
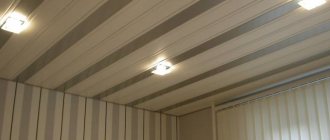
- Slatted ceilings of all stripes and types. These are mainly aluminum or mirror systems, the purpose of which, again, is to use them in the bathroom, toilet, kitchen and hallway.
- Cassette ceilings, among which we can mention systems such as grilyato or the same Armstrong, which is considered an office option. Grilyato looks great, but also has some limitations - it is suitable for spacious and high rooms, but not for small apartments. Alternatively, you can see its combination with other ceiling systems - for example, it goes well with plasterboard.
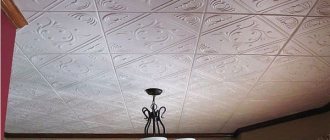
- Foam ceiling tiles. The option, as they say, is cheap and cheerful. Although, who knows, there are also high-quality and, most importantly, attractive-looking foam ceiling tiles on sale, by installing which you can easily solve the issue of sealing seams and decorating the ceiling.
In general, there are options, and, as you already understand, it is not necessary to look for all kinds of mixtures for sealing the seams between the floor slabs. By the way, about the latest, special mixtures for sealing joints in floors, of which so many have appeared recently, only one thing can be said - a waste of money and time. Not in the sense that they are ineffective - that’s not what they care about. It’s just that ordinary tile adhesive is not much inferior to them, and costs several times less - in addition, the technology for their use is practically no different from that described above.
And in conclusion of the topic, I would like to remind you once again that the sealing of seams between floor slabs must be carried out in full accordance with the technological process, an important stage of which is the primer. It needs to cover everything and everyone - each applied layer must be primed. Firstly, the primer strengthens the surface layer of the material and, secondly, helps to increase adhesion between materials. This is the most important rule of the builder - apply glue or putty, prime it, apply it again and prime it again after drying.
Plastering
If, parallel to the damaged seams, there is a significant slope in the ceiling in any direction, it should be leveled. The best method is plaster compositions; their installation is preceded by the installation of the mesh. The entire working surface is covered with concrete contact soil; it contains hard, large particles to improve adhesion to concrete. To cover the ceiling, a mixture of cement and gypsum is prepared.
The seams on the ceiling are most often sealed simultaneously with the repair of the entire ceiling
Closing the hole
As a result of ignoring building codes, defects may appear on the ceiling; one of the most dangerous is a hole. Sealing ceiling joints between slabs is done using one of two methods.
First way:
- Use a brush with an extended handle to clean the hole from the inside.
- It is important to remove loose dust, creating a strong adhesion; to do this, thoroughly spray the entire surface with a spray bottle containing soil.
- Polyurethane foam is blown inside.
- After complete hardening, cut off areas with excess material using a sharp knife.
- Cut out a cone-shaped recess with a height of 4-5 cm.
- The recess is sealed with NTs grade cement and the material is allowed to harden.
- The surface is leveled with a layer of putty, and a sickle mesh is placed inside.
- Subsequent operations are no different from sealing the seams on the ceiling between the slabs.
There is a second method for sealing the joints of floor slabs with holes:
- An improvised frame is created that fits flush into the hole, and it is placed inside the defective area. Any metal wire can be used.
- The frame is fixed using sealant; it is better to use one intended for repairing plumbing fixtures and walls in wet rooms. If the purpose of the material is damp walls, its use for ceiling repair often leads to a better result.
- After hardening, a lattice is formed in the cavity; it will ensure strong fixation of the solution.
- Prepare a mixture of NC solution; you can use the classic composition, but it is better to add an additive that will improve the setting of the solution. To prevent the cement from falling out, it is supported from below with a piece of plywood.
- The plywood is secured from below with a support; it will hold the cement in the required position until it dries.
- The wooden board is removed only after hardening, then finishing is carried out.
The most important thing is to strictly follow the sequence and be careful
Features of suture restoration
Defects on floor tiles are different, and each of them requires a special approach:
- For narrow deep cracks, use NTs grade solution. The peculiarity of this cement is that when applied it expands, which increases its adhesion to the floor slab. Cracks covered with such a solution do not crumble, and most importantly, do not continue to expand.
- Wide defects are sealed using polymer-based sealants (mounting foams, foamed plastics, etc.). A decorative composition is already applied on top of the material.
Joint between wall and ceiling: sealing methods
Characteristically, there are not only noticeable defects in the joints between the floor slabs, but also in the walls. It will not be possible to properly finish the surface without eliminating cracks.
To remove defects it is recommended to use:
- construction foam;
- gypsum mortar;
- synthetic putty;
- putty for exterior use.
The simplest and most effective material is foam, which expands during the hardening process and fills voids.
If the joints are quite large, it is worth taking care of further protection against cracking. Reinforcing mesh and alternative materials - cotton, linen fabrics that are soaked in an adhesive solution will help prevent the appearance of cracks. The fabrics are laid over the hole. At the final stage, a layer of plaster is laid.
How to seal cracks in other rooms?
In principle, the essence of the work does not change much from changing places. If the floors in your garage have also come apart, you can repeat the procedure completely. This must be done to prevent water from leaking onto your beloved car.
There are also gaps on a concrete balcony or loggia. Here the cracks are much more voluminous and it is inconvenient to seal them simply with foam. If the hole is large, use pieces of polystyrene foam, but pour foam into the gap between it and the concrete.
What to do if joints are visible on the ceiling: final leveling of the surface
Regardless of the method used to remove defects, it is important to create a high-quality finishing coating. Abrasive mixtures are used to level the surface.
The process of applying latex putty
To create a perfectly smooth and even surface, it is recommended to use non-woven fabric. It is glued to the ceiling up to the finishing layer of putty. The material helps eliminate small irregularities.
It is important to cover the ceiling with primer after the final leveling layer; this will help prevent the destruction of the coating and increase the durability of the putty layer. Now you can paint the ceiling, paste it over or whitewash it.
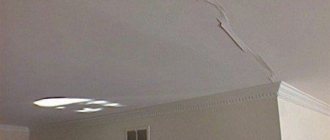
Types of cracks and reasons for their formation
The amount of work to seal cracks depends not only on the size of the damage, but also on the factors causing crack formation. If you do not neutralize the cause of the cracks, then the work to seal them may be done in vain.
To find the cause of cracking, it is necessary to analyze the following factors:
- duration of operation of the building;
- location of the crack on the plane;
- type of floor (if prefabricated, the orientation of the cracks relative to the floor slabs);
- crack width;
- localization material and depth;
- dynamism.
After the building is put into operation, the foundation is subject to shrinkage for at least another year, during which the prefabricated floor slabs may move slightly relative to each other, forming cracks along the joints between themselves and with the walls. Therefore, in apartments of new buildings, it is not advisable to carry out thorough finishing for the first 2-3 years; during this time, it would be reasonable to observe the appearance and further behavior of cracks in order to make sure that the structures are stabilized before starting repairs.
Layers of finishing applied on top of a concrete ceiling are also susceptible to cracking caused by a number of factors: vibration and temperature effects, physical wear and tear of materials, and exposure to moisture. And the concrete of the floor slabs under the ceiling finishing may also have hairline, technological and deformation cracks that formed in it before the installation of the products.
From all this it follows that cosmetic repair of cracks without analyzing the causes of crack formation often does not solve the problem and is even dangerous, since it hides the signs of ongoing structural destruction.
Since repairing a crack in the ceiling is a responsible operation, we will consider in more detail effective ways to eliminate these damages in the most common situations.
Recommendations
Construction of a building and creation of an attractive appearance is a complex task that requires taking into account many factors:
- creating a reliable foundation will prevent cracks from appearing at corners and between floor slabs. Before making a slab foundation, it is important to carefully carry out the preparatory work: examining the soil, studying the level of soil freezing, creating the correct markings and compacting the surface. The construction of the foundation slab ensures a service life of up to 150 years only if the laying technology is followed;
- To maintain heat in the room, it is worth eliminating the leakage of thermal energy through the floor. One of the best ways is a USHP foundation;
- in multi-storey buildings, it is better to first study the plan of the floor slabs, this will help to identify potential vulnerabilities of the structure and eliminate them at the repair stage;
- when building housing, it is better to use composite concrete, it has high technical characteristics and is absolutely safe for health;
- working with concrete in the cold season with a standard cement composition is unacceptable by the manufacturer, but not all companies are ready to stop construction for the winter. So is it possible to pour concrete in winter? – Yes, but you will need to add special mixtures to the composition or electrically heat the concrete;
- if you plan to build a house from aerated concrete, be sure to reinforce it every 2-3 rows. The reinforcement is placed inside the block recesses that are created by the wall chaser for aerated concrete;
Holes of various sizes can be sealed if the technology is followed correctly. It is recommended to choose one of the existing methods for eliminating ceiling defects; they are easy to use and durable.
Where do you start sealing cracks?
First of all, you need to thoroughly clean the surface. Even if the gap is very small in appearance, the ceiling next to it must be cleaned very well with a spatula. Most likely, as soon as you remove the layer of putty, you will see the actual size of the gap, which may not be small at all.
Next, you need to continue cleaning the gap with a spatula, knife, in general, with any tool suitable for these purposes. Builders call this procedure “joint jointing.”
You need to completely free the gap from old, dried out mortar. When building a house, the cracks are filled with ordinary cement, but over time it loses its strength: rains, temperature changes, and again shrinkage... It is advisable not to leave a single extra pebble or piece of cement, since it will not allow the new material to “grab” well. .
After you have completed this work, we move on to another stage, also preparatory.