12538 0 0
Icer September 19, 2016Specialization: master in the construction of plasterboard structures, finishing work and laying floor coverings. Installation of door and window units, finishing of facades, installation of electrical, plumbing and heating - I can give detailed advice on all types of work.
Tell me, did you know that finishing the slopes costs 2-3 times more than the materials needed for this? When I talk about this fact, many developers are very surprised and think that since this work is so expensive, it means that their implementation requires high qualifications and experience. In fact, almost anyone can make slopes from plasterboard on windows; I will tell you two technology options, and you need to choose the more suitable one and repeat all the steps described in the corresponding section.
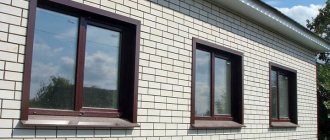
In the photo: here's how you can transform a window with your own hands
Choosing drywall
Drywall installation
If you make slopes from plasterboard, then this choice may be due to the following advantages:
- During installation there is no such amount of debris and waste as, say, during puttying and plastering the surface;
- Do-it-yourself plasterboard slopes are perfectly smooth;
- Installing gypsum boards is so simple that even a beginner can do it.
Disadvantages of this type of finish compared to other options:
- The material is quite fragile;
- In terms of strength, gypsum board is significantly inferior to its plastic counterpart;
- Increased hygroscopicity is also a minus.
When choosing drywall for finishing slopes with your own hands, you need to be guided by the following rules:
- The standard one can be taken if the humidity in the room does not exceed 70;
- Moisture-resistant has increased hydrophobic and antifungal properties, which makes it possible to use even in the bathroom;
- For rooms where building codes indicate an increased risk of fire, it is better to use gypsum plasterboard with the addition of fiberglass and reduced mineral wool particles.
Well, choosing a slope option is much easier than choosing a double-glazed window. Although this can be done quickly, especially if you read the basic rules of this process and understand the main types.
Standard plasterboard sheet (GKL)
Designed for dry rooms with low or normal humidity (not higher than 68 degrees). Created for:
- decoration of walls in office buildings, children's rooms;
- ceiling decoration;
- creating partitions and other decorative elements.
The sheets consist of a gray cardboard shell surrounding a gypsum core.
Moisture resistant (GKLV)
Green sheets with blue abbreviation. Behind the standard cardboard shell, in addition to the gypsum core, there is a layer of silicone granules and hydrophobic compounds that prevent the formation and proliferation of fungus. Due to this property, sheets are used for finishing rooms with humidity above 70%:
- kitchens;
- public catering places;
- bathrooms;
- swimming pools;
- unheated premises.
A topcoat is required after installation.
Fire resistant (GKLO)
Sheets are gray or pink with red markings.
Attention: By adding clay and fiberglass additives to gypsum, fire resistance is achieved. During a fire, such a sheet does not ignite for 55 minutes.
Used for finishing:
- kitchen blocks;
- electrical panels;
- boiler rooms in production.
Approved for finishing all types of premises.
Moisture-resistant (GKLVO)
The material combines the properties of moisture-resistant and fire-resistant plasterboard, it is universal. The sheets are painted green and have red markings. In addition to gypsum, the core contains:
- silicone granules;
- fiberglass;
- clay.
This composition makes such drywall the most durable and durable. Used for finishing industrial premises and other buildings with high humidity levels that require separate fire safety standards. Suitable for finishing residential premises.
There is also facade plasterboard, but due to the high price it is rarely used.
Flexible
The sheets are light gray in color, the middle consists of a gypsum base supplemented with fiberglass, which explains its flexibility. Designed for creating curved lines, for example, when installing:
- multi-level ceilings;
- radius surfaces;
- arched structures.
Thanks to the sheet thickness of 6.5 mm, it bends well, can be deformed, and is easy to cut. When dry bending, a bend radius of 1 meter is achieved. Wet bending allows you to build a structure with a radius of 300 mm. The weight with a size of 1.2x2.5 m is only 16.4 kg. Designed for interior work only.
Advice Unscrupulous sellers often try to sell packaging gypsum boards under the guise of ordinary ones. These are edge plates to protect the stack of sheets during transportation. This measure is provided by the manufacturer, as indicated on the packing list.
When purchasing drywall, it is recommended to pay attention to the condition of the material - the presence of uneven, broken corners, or damage to the integrity of one of the cardboard layers indicates that the packing list is for sale. This is also indicated by the markings.
How to choose drywall and screws
The main characteristic of gypsum plasterboard is the material of manufacture. Natural gypsum is considered the most favorable. The artificial mixture contains a small proportion of radioactive particles.
There is also the opportunity to purchase standard, fire- or moisture-resistant material. Here everything depends on the purpose of the room.
Among the most popular and reputable manufacturers are:
Now let’s talk about which screws to use to secure the drywall to the profile. It is best to choose metal fittings with screw threads as often as possible and with a drill at the end.
Properties of drywall
When planning to make window slopes from plasterboard with your own hands, you need to learn about the advantages and properties of the material. The first thing to notice is the ability to carry out work with your own hands, without the help of craftsmen. The final result will please you and meet all repair requirements.
After cladding, the material can be sheathed, the opening can be decorated with tiles and other finishing materials, for example, using painting or wallpapering. The main properties of drywall when designing slopes are presented in the table:
Properties: Description:
| Decent level of sound insulation and thermal insulation: | If you need a window opening and window sill, you can not only cover it with plasterboard, but also lay an additional layer of insulating materials to strengthen the structure and insulation qualities. |
| A light weight: | Due to the small mass of plasterboard, there is no need to use special technologies for installation; installation is carried out on a metal profile from which the metal frame is created or on adhesive mixtures. |
| Ideal plane: | The plasterboard sheets are perfectly flat, due to which the slopes on windows and doors will be smooth, which greatly facilitates the process of finishing with putty, and also speeds up the creation of slopes. |
| Breathability: | Due to its properties, the slope does not allow deformation, even if there are strong temperature changes or there is high humidity in the rooms. |
| Environmental friendliness: | Although plasterboard sheets may contain additives, the material is environmentally friendly and slopes can be made in children's rooms. Drywall does not emit toxic substances. |
| Minimum amount of garbage: | During installation work, there is almost no waste, dust and other debris from the plasterboard material. |
For window slopes made of plasterboard, it is necessary to choose the right sheets, which will have certain types of additives and other additives:
Drywall window slope
- To design slopes in a normal environment, in a residential building or apartment, standard drywall is used, which can withstand humidity up to 70%.
- When using plasterboard on the street side or in the bathroom and other damp places, moisture-resistant plasterboard is used; the material additionally contains antifungal and hydrophobic impurities.
- To reduce the likelihood of fire, fire-resistant material is used for the slopes of windows and doors, which already contains admixtures of mineral wool and fiberglass. This type of plasterboard sheet is rarely used, but it is very durable in itself.
Important! Drywall is a breathable material, due to which it can absorb moisture and, if necessary, release it into the atmosphere without changing its shape.
What is required for work
In order to properly install plasterboard slopes on windows, you will need to prepare additional materials and tools. First of all, it is recommended to pay attention to the drywall itself - it is better to take a moisture-resistant version with a thickness of 12.5 mm.
Also for work you will need:
- Special gypsum glue. Required if the gluing method is used.
- Profiles. Will be required when installing slopes on plasterboard windows using the frame method.
- Polyurethane foam. Used for self-gluing or as an auxiliary material.
- Sealant. Necessary for processing joints.
- Special corners. Allows you to protect corners from mechanical damage.
- Plaster and putty made of gypsum. Required to eliminate holes at the joints between the wall and the sheets.
- Primer. Used for better adhesion when using the adhesive method.
In addition to the materials described, you will need various tools, without which it will be difficult to complete such work.
It is recommended to prepare:
- screwdriver;
- a drill with special attachments that will help you quickly prepare glue (mixer);
- a mounting knife for cutting drywall;
- level to secure all sheets evenly;
- various spatulas;
- hammer and chisel;
- roulette.
You may need additional tools - a grinder or metal scissors to cut the metal profile.
Advantages of plasterboard cladding
The material has been used for window and door slopes for quite some time. This is not surprising, because it has a number of advantages:
- Environmental friendliness and safety for human health.
- Low material cost.
- Easy to install.
- Minimal maintenance of ready-made slopes.
- Stylish look.
- The ability to make an arched opening and other complex shapes.
- Long service life of plasterboard slopes.
- Possibility of additional insulation of windows or doors.
- Versatility: used not only for windows and doors, but also used for leveling ceilings and walls.
Important! Although plasterboard material has a number of advantages, it also has a disadvantage: the sheets are easily damaged mechanically, even material protected from water can be destroyed due to prolonged contact with it.
Beautiful window slopes made of plasterboard: assembly stages
There is a method for installing slopes using a metal profile. Its essence is to create a metal frame on which drywall is installed.
Main stages of profile installation:
- Installation of vertical and horizontal profiles.
- Take measurements of parts.
- Lay insulation.
- Attach the drywall to the profile, preferably using self-tapping screws.
- Seal the joints with special tape and cover them with putty.
- Shape the corners. Putty. To ensure a smooth surface, the putty is rubbed down.
- Finishing and decor.
Work using drywall and profiles is carried out quickly, and a minimum of construction waste is generated. This method significantly reduces the space of the window opening, and the cavity between the drywall and the wall must be closed with insulation. This method of finishing is good because the sides of the windows are perfectly insulated.
Why should you use drywall?
Today, plasterboard is one of the most popular materials for finishing walls, installing partitions and constructing multi-level ceilings. It can be used to create decorative elements of complex shapes; it is multifunctional and affordable. Therefore, many people wonder how to attach drywall to a profile.
Among the important positive properties of the material it is worth noting:
- High thermal insulation qualities . This is one of the “warmest” finishing materials. And if you supplement it with penoplex or mineral wool, you can significantly save on heating.
- The flexibility of gypsum plasterboard is an important quality that helps it be easily and simply attached to any surface and given a complex shape. Even semicircular arches can be created from such material.
- The fire resistance of even ordinary drywall has a good effect on the fire safety of the room. There are also fireproof sheets that do not burn at all.
- The water resistance of gypsum plasterboard allows the material to be used as a coating even in bathrooms.
Among the disadvantages of the material, one can note its fragile structure and poor sound insulation. But these problems can be solved by creating a frame and laying additional insulating materials.
Finishing by gluing
Judging by reviews on construction forums, gluing gypsum boards is the simplest and most common method of cladding slopes. Since the technology does not provide for fastening drywall with screws, to fix the upper part you need to prepare a support consisting of a wooden plank and a board. The dimensions of these parts are selected according to the height and width of the opening.
Having completed the preparatory work, proceed to finishing according to the instructions:
- Cut out some of the foam around the window frame. The width of the groove should be enough to insert the plasterboard blank into it.
- Prepare the adhesive according to the instructions on the package.
- Measure the dimensions of the top panel and cut the gypsum board to size.
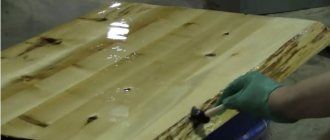
- Using a spatula, apply glue to the edge of the opening, as shown in the photo.
- Insert the workpiece inside the cut groove. Holding it with one hand, blow out the inner cavity with polyurethane foam from a gun.
- Press the panel onto the adhesive layer and secure it with a vertical support. Check the horizontal level.
- Remove any excess mixture with a spatula (you can fill the remaining cracks).
Recommendation. Pour a minimal amount of foam into the cavity. Otherwise, when it expands, the composition will move the plasterboard sheet and prevent it from sticking.
The side slopes are finished in a similar way. When finished, install perforated corners along the edges and apply a layer of finishing putty. When the building mixtures have hardened, you can proceed to grouting and further painting. Watch the video for a master class on gluing slopes.
Preparatory activities
Installation of plasterboard slopes is impossible without preliminary preparation. For window and door openings the process is almost identical. But in the latter case, it is necessary to pay attention to the following nuances:
- Availability of various communications. This could be twisted pair for the Internet, electricity cable, bell wires. Therefore, it is advisable to take care of their installation in advance.
- Possibility to install a second entrance door. This need arises when the first door is not insulated and does not have sound insulation.
The general preparation technology is as follows:
Preparing the opening
Regardless of the chosen fastening method, it is necessary to perform a number of preparatory work:
- Remove old plaster from the walls. There is no point in attaching drywall to it; after a few years, the finish may come off.
- Trim the protruding foam blown in earlier by the installers, as shown in the photo below.
- Remove remnants of old insulation and other foreign objects (protruding nails, screws, etc.). Try to remove as much dust as possible.
- Treat the ends of the opening with a deep-penetrating primer with an antiseptic additive and let the surface dry.
If fungus was previously observed on the slopes, the corners should be thoroughly dried using a heat gun, then a special primer should be applied. After completing the repair, take care to organize air exchange in the room, otherwise mold will appear again.
In general, there is no need to level the surface, but cracks and large potholes should be sealed with cement-sand mortar. The large gap between the window frame and the building structures is closed as follows: cut out pieces of foam plastic and place them on the foam. Cut off any excess material with a knife.
Measures to reduce the size of the window opening with a large width of the foamed space
Often measurements of window openings are carried out by non-professionals. Because of this, the width of the foamed space after installing a metal-plastic window can reach 10 cm.
In accordance with the recommendations of the technology under consideration, the boundary of the plasterboard slope should overlap the edges of the frame, leaving the foam out of sight. Therefore, the distance between the drywall and the base surface can be quite large. This will require applying a thick layer of mounting compound, which will make it difficult to get the drywall pieces into the correct position.
Working with drywall
To get ideal plasterboard slopes with your own hands, you need to correctly measure all areas. The procedure requires special care. If you make mistakes during measurements, it will no longer be possible to correct the damaged parts.
Metering
The order of work is as follows:
- The distance from the door frame or window frame to the corner is measured. This must be done in at least three places.
- The height of each of the vertical posts and the length of the horizontal fragment are determined. Each surface area is checked separately.
- All calculations are transferred to a piece of paper. A diagram of all elements is drawn. The received data is checked.
When working with plasterboard, it is important to take all measurements correctly. It is important to take into account that finishing window slopes with plasterboard can be done using various methods, but initially it is necessary to cut the material.
cutting
GKL boards are quite easy to cut, the procedure is as follows:
- The required dimensions are transferred to the sheet.
- An iron ruler is applied to the drawn line. It will serve as a stiffening rib along which the knife is drawn. It is necessary to ensure that the cardboard and part of the plaster are cut through.
- A block is placed under the place where the trimming was done. A few blows on the edge, and the slab breaks along the cut. The bottom of the cardboard is cut off.
- Curvilinear sections are cut with a hacksaw and an electric jigsaw.
Procedure for cutting plasterboard sheet
On a note! For the installation of plasterboard window slopes and finishing of doorways, the general rules for measuring and cutting are used.
Installation of slopes
There are three main methods for installing gypsum plasterboard slopes.
Method one - using an L-shaped profile to join the plastic frame
Advantages:
- lack of joint between plastic and plaster;
- easy and quick installation.
Flaws:
- If the slope is not white, then it is difficult to choose the right profile.
The first method uses a plastic L-shaped profile. It is attached with self-tapping screws to the edge of the frame.
An L-shaped plastic profile is attached to the frame. Self-tapping screw pitch 150-200mm
To fix the drywall sheet, sealant is squeezed into the profile. Insulation is attached (glued) to the slope on the side of the window. It is convenient to use mineral wool, but you can also take polystyrene foam or polystyrene, giving them the desired shape.
Slope insulation with polystyrene
Drywall adhesive is applied to the other part of the slope. Drywall is inserted into the profile and pressed against the edge of the slope. By tapping on the panel, you achieve its correct location. Check the level for correct installation.
It is recommended to start from the top panel. For more correct installation of the top sheet and its fixation on the side surfaces, you can install special beacons and clamps. You can put guide rails on the wall, which will serve as a template for the correct placement of boxes. Place supports under the panel while the glue hardens. For better fixation, you can secure the drywall with self-tapping screws.
The side panels are installed in the same way. A plastic profile is placed on the lower edge of the side panel, this creates a neat joint with the window sill.
Method two - direct connection
Advantages:
- there is no plastic profile;
- beautiful appearance.
Flaws:
- a seam appears between the plastic frame and the putty slope.
In this method, the drywall is inserted behind the frame profile. For ease of installation of the sheet, it is recommended to make small grooves in the joint foam into which the drywall will be inserted. The rest is the same as method 1.
How to attach drywall to a profile frame
In order for a wall finished with gypsum board to serve for a long time and without complaints, it is necessary to follow all the technology for working with the material. In general, attaching drywall to a frame is quite difficult and, if you are not confident in your abilities, it is better to entrust this task to professionals.
How to attach a profile under drywall
First you need to figure out how to attach the profile itself to the wall. In order to fix the frame elements, you need to follow this sequence of actions:
- A PN guide profile is fixed at the junction of the floor and wall
- A plumb line is lowered and another guide is attached to it on the ceiling.
- A corner is assembled from PS brand profiles, which is attached to the back of the frame element
- The resulting frame element is inserted into the guides and secured with self-tapping screws
- For strength, the rack profiles are reinforced on both sides with hangers
Now let’s talk about which screws to use to attach the profile to the wall: it’s best to take long fittings, at least 150 mm. The distance between two such screws should not exceed 20 cm.
How to achieve horizontality of the upper slope?
To achieve strict horizontality of the upper slope of plasterboard, it is necessary to check its location during installation using a level in two directions.
If any place needs to be brought closer to the wall of the opening, this can be done by lightly hitting the drywall. But you shouldn’t pull the plate in the opposite direction. The mixture does not have the properties of rubber and will not return to its previous state. Therefore, it is better to apply a layer of the mixture with a reserve, and the excess substance will spontaneously distribute between the surfaces being connected, partially filling the voids.
Some craftsmen, for the upper slope of plasterboard, come up with supports or use dowels to fix the slab in the desired position. In most cases, this is not necessary. Surface tension forces can easily hold the drywall, preventing it from changing its spatial location.
Various installation options
Finishing slopes with plasterboard is carried out in three main options:
- Installation using polyurethane foam.
- Pasting on putty.
- Frame mounting.
Various options for installing plasterboard slopes. Each of these methods is suitable for independent use and gives a complete idea of how to make slopes in different situations. These methods are used for finishing all types of surfaces.
Is it possible to plant slopes on foam?
The simplest options for facing slopes are discussed above. However, there is another one, the most difficult to perform - fastening drywall with foam. The technology itself is easy to understand. Problems arise when planting a slope on foam - as it expands, it complicates the process of fixing a sheet of drywall in the desired position.
They resort to it when there are narrow gaps between the wall and the frame (up to 3 cm) and there is a need to insulate the window between the profile of the window structure and the wall material - the foam simultaneously functions as insulation. The method is also good for correcting the curved surface of the wall of a window opening.
Let's look at the whole process step by step.
- All holes and gouges in the wall of the opening are sealed - if this operation is ignored, the drywall may fail in these places. Use foam, cement-sand mortar or starting type of plaster.
- After the holes and potholes are completely dry, polyurethane foam up to 1 cm thick is applied to the back side of the gypsum board using a snake.
- The slope is placed against the wall and pressed against it with force - the foam should adhere to the wall material.
- A sheet of drywall comes off. If everything was done correctly, the foam remains on the wall. After 10 minutes it will begin to expand.
- After the process of foam expansion begins, the gypsum board is again pressed against the wall and fixed with spacers.
Here it is important to set the slope correctly according to the geometry. If necessary, the sheet can be pressed in a little by tapping it. The main thing is not to overdo it - you won’t be able to squeeze it off the wall, since the foam does not have the properties of rubber.
Landing on putty
But how can you make plasterboard slopes more reliable so that no problems arise? The option with putty is perfect for this.
Sequence of operations
The decision on how to seal the opening - on one or 2 sides - has more influence on the amount of materials than on the variety of installation operations.
The complete sequence of necessary work looks like this:
- Dismantling doors, trim and door frames. If the door threshold is part of the floor, it is cut down to the level of the flooring.
- Cleaning the opening from the adjacent finishing wall covering and plaster, leveling the opening to a regular rectangle by removing protruding fragments of masonry.
- Installation of edging frames to the wall. The profile must be recessed into the opening by the thickness of the plasterboard sheet in order to obtain a flat wall plane for the overall finishing coating.
- In a wide passage (from 1.2 m), intermediate posts are installed for structural rigidity (for inward deflection).
- The cross members are mounted, the plane of the front ribs is controlled by the building level.
- A piece of drywall cut to shape and size is attached. The screw heads are recessed 1 - 2 mm into the dry plaster.
- If the seal is made from 2 sides, then after assembling one side, soundproofing material (stone wool) is laid and the other side is covered.
- Along the perimeter of the sheet, seal the cracks with mortar and primer. Before finishing, the material is puttied. For more information about sealing the opening, watch this video:
When performing dismantling work, preparing the opening and using power tools, it is necessary to use hand and face protection.
Mixed method
You can also install window slopes made of plasterboard yourself using a combined method, which has several interesting varieties.
- 1. A metal L-shaped profile is attached to the window frame (see photo) and immediately lubricated with acrylic sealant. After this, a plasterboard slope is placed along the marks on the frame and window sill and secured with self-tapping screws - in a vertical position, the gypsum board sheet is held with sealant.
- Combined method.
- After screwing in the screws, the space between the wall and the slope closest to the window is filled two-thirds with insulation (mineral wool). The remaining part of the empty space is covered with putty or glue.
- 2. A PP (CD) ceiling profile is taken and cut to the height of the slope. On the floor, drywall is laid on it, also cut to height (it should be larger in width). The gypsum board is attached to the profile with self-tapping screws in increments of 25-30 cm. The resulting structure is turned over or placed vertically.
- A damper tape is inserted into the PP groove. The corner of the window opening is foamed with a small layer of foam. The slope together with the profile is pressed into the foam close to the window frame. The vertical is checked with a level. If necessary, the protruding side is slightly knocked down with the handle of a spatula or a rubber hammer.
- Then everything is the same as in the first option: insulation and glue (can be replaced with putty or foam). After the adhesive has dried, use a knife to cut off the part of the drywall protruding into the room flush with the wall. The work is done quickly and without complications.
Final finishing work
After the plasterboard base is completed, the final finishing begins. To do this, the ends, between the walls and the slope, are filled with plaster mixture. If the fastening was carried out on the sheathing, plaster the places with recessed screw heads. To strengthen the edges, a perforated corner is installed on the plaster mortar. Acrylic or silicone sealant is used along the perimeter of the junction of the window and the slope, which guarantees the absence of cracks in the future. a thin layer of sealant between the joints of the plasterboard strips.
After the first layer has dried, using the finishing plaster mixture, begin to apply it to the entire surface of the drywall and ends. At the same time, a transition is made to the inner wall of the opening. The final stage is cleaning the plastered areas with sandpaper and sanding. In the future, the entire slope can be painted, covered with wallpaper, or any other type of finishing material can be used.
Photo gallery of finished works
Installation of a perforated corner
Then you need to mix a little finishing putty (it is better to use Knauf multifinish, which will provide more time to work with the mixture). The putty must first be applied to the corner of the slope.
After this, the corner is installed.
Application to drywall surface
Next, use the same gypsum mixture. Then proceed to apply it to the surface of the drywall. It is important not to forget that this surface must be primed in advance. Leveling the slope surface is carried out in two stages.
The first stage is to apply the mixture in sufficient quantity with a spatula. It must be applied perpendicular to the plasterboard element.
The second stage is to tighten the putty with a wide spatula along the slope.
Preparing slopes for painting
If the slopes will be painted, it is better to apply the putty in two layers. With a drying period in between. After the surface of the plasterboard window slopes takes on an aesthetic appearance and dries sufficiently, all that remains is to sand it. This is done using a special abrasive mesh. After sanding, remove the beads. Then comes painting.
As can be seen from this story, making slopes from plasterboard with your own hands is not difficult. It is important to measure everything carefully and follow the technological order. This should be observed both during preparatory work and during the installation and finishing of the main parts. Don't forget to prime hard surfaces before applying mixtures. And also, do not mix too much glue so that you have time to work it out before it hardens.
Installation using putty
Finishing putty can be used as an adhesive material - it has better adhesion. The putty should have a paste-like consistency.
Finishing slopes with plasterboard with your own hands using putty is done in the following way:
- when the surface is cleaned of dirt and dust, it is moistened with water;
- on parts made in advance, putty should be applied in the form of separate islands;
The putty is applied to the panel with strokes, the product is placed in the required position and moved so that the adhesive mass spreads. In this position, the slope is left for 12 hours, supported if necessary;
After installing the drywall, install a support
- After a while, the support can be removed and wait for the adhesive mixture to dry completely.
Adviсe
Installation of window or door openings using plasterboard is a simple and affordable type of work for novice craftsmen. By following the order of work and the rules of the technological process, the installation will be carried out efficiently and in a short time, the structure will last for many years.
Professional advice from experts will help you achieve your goals:
- Accurate measurements of the window opening are the key to quality work.
- The formation of gaps between joining surfaces must be avoided.
- The gypsum boards are fastened to the metal profile using special plasterboard screws.
- Antifungal solutions will help prevent the appearance of mold under the installed structure.
- High-quality putty and painting will protect the surface from moisture and make it more durable.
- By applying the rule to the cut site, you can get perfectly smooth edges of the parts.
- Drywall is a durable material, but a strong impact can lead to its destruction.
- Moisture-resistant sheets are a universal material for interior work, which should be given preference when installing slopes.
Plasterboard construction cannot withstand heavy loads, so it is not recommended to use ceramic tiles or wooden panels for finishing work. Before painting the surface with paint from different cans, it must be mixed to obtain a uniform tone.
Strict adherence to all the norms and rules of the technological process of installing slopes will help to avoid the appearance of fungus and mold, and will maintain a neat and attractive appearance of the structure.