Step-by-step instructions for wallpapering corners
Internal corner
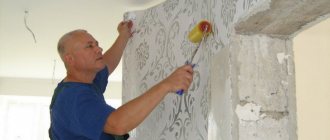
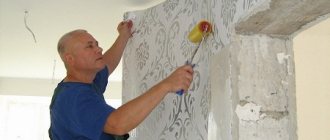
Depending on the type of wallpaper chosen, it may be necessary to pre-apply adhesive to the surface of the adjacent walls. This can be done using a synthetic roller, lubricating it with an adhesive mixture from a paint bath and “walking” it over all surfaces that will be sealed. In the deepest corners, where the roller cannot reach, you should use a brush and also thoroughly coat everything with glue. Try not to apply too much mixture to avoid the formation of smudges, which can cause bubbles to appear under thin rolls of wallpaper. Make sure that there is an even layer of adhesive in all areas.
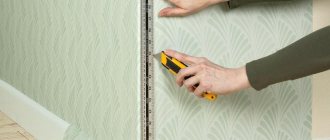
To harmoniously apply wallpaper in the inner corners, experts recommend using the method of cutting the roll to the desired thickness. The goal is that it can be applied in a strip that will cover the entire corner and extend onto the adjacent wall by no more than 50 mm. To prevent this from being visible in the future, a strip of wallpaper on the adjacent wall needs to be glued overlapping and closed with it to cover the resulting seam. If you notice that two layers of wallpaper do not fit on the corner, you should use a different method. Using a break-blade knife, make a straight, vertical cut around the perimeter of the corner so that it goes evenly through both layers of sheets. To prevent the cutting line from moving, you can press the strip with a level, rule, or strong ruler, along which it is convenient to guide with a knife blade.
External corner
Otherwise, a preliminary calculation of the length of the wallpaper strips takes place, taking into account the spare distance in order to go around the outer corner without loss. Exceptions include examples of the use of wallpaper with a high density of material. It is not always possible to bend these without loss of appearance and integrity. Therefore, a knife is again used to cut a strip up to 6 mm thick from the edge of the canvas, which will be laid over the seam between two scraps on the adjacent walls of the outer corner.
Wallpapering with a pattern
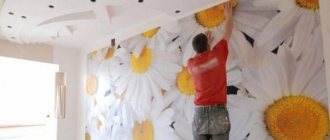
The task of pasting corners is even more difficult if the wallpaper is decorated not with a matte monochromatic color, but with decorative images, be it drawings or photographs. In this case, an unsuccessful “passing” of the corner can disrupt the composition and significantly spoil the appearance of the room’s interior. The reason for such difficulties is the use of the method of overlapping the edge of a corner strip of wallpaper with an adjacent overlapping trim, which displaces the image. This gluing technology is also used here, but requires increased care in order not to spoil the appearance of the products.
Simple tips for choosing
Thanks to the availability of modern technology, there are a huge number of options available at points of sale. You can even do the work using photo wallpaper. What kind of wallpaper should you put on uneven walls? Among the main options are:
- Choose a material without a clear pattern. It is better to provide an option with diverging stripes and patterns, as well as with different textures of the material.
- It is better to choose bright accents that will be mounted on defects.
- The palette must be selected either in one shade or with bright transitions.
- You cannot resort to geometric shapes.
- It is better to choose a multiple pattern.
- Liquid wallpaper for walls can be chosen either for all surfaces or for individual areas.
Consider the thickness. With greater density, defects will be hidden better.
How to glue, features
Useful video instructions showing the DIY gluing technique:
As a rule, before starting renovations in an apartment, many people who are not high-level professionals are interested in how to properly glue non-woven paper wallpaper. In fact, as already noted, there is nothing complicated in the gluing process. In general, it coincides with the way any other roll wallpaper is applied.
Stages of wallpapering
So, here are the main steps:
- First of all, you need to collect all the selected tools and devices necessary for preparation and gluing: scissors or a knife, a container for glue, brushes (large and small), a plumb line, a pencil, an assembly table, a ruler, a dry clean cloth and a plastic comb for leveling the glued canvases
- Then, using a plumb line, mark a vertical line. Such a plumb line can be purchased at any hardware store. As a last resort, you can make it yourself quite simply. To do this you will need a simple thread and a large nut. Any other weighty, but at the same time, non-volume cargo will do.
- We cut several canvases and begin to spread them with a pre-prepared adhesive composition. The glue is applied using a special brush.
- We glue the first strip, align it with a plastic comb and begin preparing and gluing the second sheet. As a rule, it is glued directly butt to the previous one.
- We continue gluing the sheets in exactly the same sequence.
Ideal for new buildings
In some cases, painting such wallpaper is allowed. More details about how this is done can be found in the manufacturers’ descriptions and instructions, and also from the consultants in the store.
Pasting non-woven wallpaper in the corners
To know the exact rules for gluing non-woven wallpaper in the corners, we recommend watching the corresponding video instructions. The gluing technique is no different from other types of wallpaper:
External corners
In addition to internal corners, any room also has external ones. Often these are window slopes or niches and protrusions that cannot be ignored. They have their own characteristics of pasting. With the help of small secrets, gluing will become easy, and the corners will be neat and beautiful. The algorithm for pasting external corners is as follows:
- be sure to eliminate all irregularities and chips. Remember, you must glue the wallpaper at a perfectly even angle. Only in this case will the corner line look beautiful. To do this, use plaster and primer;
- the first strip should be glued with a slight overlap of 2-3 cm. If the wall is uneven and folds have formed on the wallpaper, you need to make horizontal cuts, thus eliminating the unevenness;
- the second strip is glued end-to-end to the corner. Be careful, only an evenly attached canvas guarantees a visually even angle. Otherwise, even a straight wall will touch a curve;
- In order for the edges to stick better and to avoid air pockets, you need to carefully roll both sheets with a special rubber roller. Otherwise, the wallpaper may soon peel off the wall.
You can watch the video for some more tips and interesting solutions for correctly gluing wallpaper, including non-woven wallpaper, on uneven walls:
In the end, I would like to say that non-woven wallpaper, even on a non-woven base, is a fairly dense and practical material that is very easy to glue. It cleans well and will please the eyes of its owners for a long time.
Do-it-yourself gluing of non-woven wallpaper
The walls should be marked. Non-woven wallpaper has a good edge and is glued end-to-end.
It is best to start marking from the corner. In these places, the panels will be glued overlapping in order to process them correctly (this was mentioned above).
With a roll width of 1.06 meters, you need to put 1 meter on both sides of the corner.
Using a pencil and a level (plumb line), you need to draw a vertical line to a height equal to your height. Using a tape measure, you need to mark 1.06 meters from the drawn line. So, we line all the walls.
Then we spread plastic film on the floor. A roll of wallpaper will roll out face down on it. If there is a pattern on the wallpaper, it must be taken into account when the panels are cut.
If there is no drawing, you need to measure the height of the room with a tape measure in the place where the piece will be glued, and you need to add another 10 cm.
The roll must be bent onto the rolled part so that the edges coincide, then the bend will be even. You need to run your hand along the bend, then cut with a knife. You can use a new utility knife. This way you can prepare wallpaper for the entire room.
The panels should be rolled into loose rolls so that the front part is inside. Thanks to the non-woven base, there should be no problems with handling such wallpapers, as with ordinary ones, which are more whimsical.
Using the instructions, you need to dilute the wallpaper glue. In this case, special glue for non-woven wallpaper is used. Pour water into a bucket, and then pour in the glue in a thin stream, stirring constantly, so that hated lumps do not arise that can interfere with the quality of pasting even non-woven wallpaper.
The glue needs to sit for a bit for it to swell. You can insert a special plastic mesh into the bucket to remove excess glue.
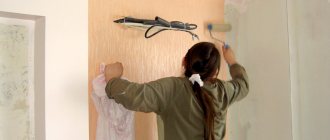
We dip the roller in a bucket, run it along the mesh, and then smear the wall under gluing one panel.
The technology for gluing non-woven wallpaper is that the panel needs to be glued on top.
We take the edge of the canvas and apply it to the wall. We gradually lower the roll down, smoothing the wallpaper from the middle to the edges using a special brush or roller.
You can also use a plastic spatula, but this must be done carefully so as not to damage the wallpaper.
Please ensure that the non-woven wallpaper is pressed tightly against the wall and that there are no bubbles or folds.
When two or more sheets are pasted, each subsequent seam of the wallpaper should be rolled with a roller. The remaining piece of wallpaper at the bottom must be carefully cut off. It's better to do this when everything is dry.
It is necessary to calculate so that the baseboard, which will then be installed, covers the wallpaper completely. At the top of the wallpaper you can use a border of the desired thickness.
How to stick models with a pattern?
Wallpapering corners is a difficult job in itself, especially for a beginner.
Plain colored wallpaper is a great way out. But you can bring liveliness to the interior only with the help of drawing. Also, in some cases, such models can cover up unevenness. Do not forget that the canvas is glued overlapping, otherwise the pattern will add an awkward look to the interior, and all the imperfections will be visible.
You can use the method of selecting a pattern, not forgetting that the canvases are glued overlapping, and they need to be cut off. The drawing should be of medium size and strictly plumb.
Large or too small drawings add a distorted effect.
Uneven walls and corners are found not only in old house buildings, but also in modern new buildings. It is because of this defect that problems arise with interior decoration. To avoid sad consequences, you should follow the rules:
- In order for the wallpaper to stick better on the outer corners, it is necessary to press it as tightly as possible to the wall. Glue the wallpaper from top to bottom, gradually lowering towards the floor, thereby avoiding the appearance of folds.
- If glue gets on the front part of the material, remove it immediately with a soft cloth. The front sides of some types of canvas become unusable from wallpaper glue.
- If an air bubble is detected, it must be punctured. Use a syringe to inject glue and smooth it out.
- The inner corners of the room are the most problematic; it is in these places that peeling, swelling, and tearing occur. For effective and reliable corner gluing, add PVA glue (10%) to the water when preparing the glue. Mix the glue until smooth so that there are no lumps.
- Make sure there are no drafts. They prevent complete and uniform drying, after which the material peels off. It is allowed to ventilate the room only after the wallpaper has completely dried. This happens within 2-3 days.
- To better cover areas with windows and wooden openings, the canvas must be taken with a reserve and allowed to dry completely. Only after this, carefully cut off the excess material with a stationery knife.
- The unevenness of the wall is not always noticeable. Only when pasting the internal and external corners will flaws and incorrect alignment be visible. To avoid these shortcomings, immediately before work, be sure to check the curvature of the walls using a building level and plumb line.
- If there is thermal heating, use a thin, narrow brush to lubricate the glue.
Wallpaper is one of the most affordable materials for finishing even not very high-quality and even walls. They can perfectly hide uneven spots and even distortions. But gluing them on a completely crooked surface is not easy, inconvenient, sometimes even impossible
Therefore, the first step is to maximize, and the corners should be given the greatest attention. If in other areas of the wall the wallpaper became elastic from impregnation with glue and could stretch, then on crooked corners, both internal and external, surprises in the form of distortions and large folds are not excluded
Even at perfectly straight corners, difficulties sometimes arise. Therefore, before starting work, you should be well prepared for gluing wallpaper in the corners.
How to make joints invisible
Care must be taken to ensure that the joints of the canvases are invisible during gluing. You need to connect the canvases so that there is no gap between them, but also so that they do not overlap one another even by a millimeter. A perfect match must be achieved.
Move the strip in the desired direction
Since we, alas, rarely see perfectly smooth walls, it turns out that the seam either creeps in a little or diverges. Your task is to move the canvas so that it becomes perfect and invisible. You can move the canvases with your hands - they can slightly stretch and contract. Due to this, you achieve the required match. If the resulting defect is too large and nothing can be achieved by shifting, the strip is peeled off to this place and, having corrected it as necessary, is glued again. Sometimes, if the seam is sticking out a little, rolling it with a special tapered roller can help.
With this technique, it turns out that first the edge is glued, which is joined, and then, from it, they begin to smooth out the rest of the surface of the canvas. If you have examined the seam and are satisfied with the result, take a clean rag and wipe it off any excess glue that may have come out during all these actions.
To learn how to glue meter-long vinyl wallpaper on a non-woven backing and how to make the joint invisible, watch the video.
Types of wallpaper - choosing the latest materials
Paper wallpaper is an eternal renovation classic. Their unfading popularity is due to two factors - low cost and wide range. However, it should be understood that rolls of paper, no matter how beautifully decorated they are, remain a very short-lived material, and there is no point in gluing them in the hope of a long service life.
In just a year or two they will lose their former attractiveness, and if there are small children or animals in the house, this process can speed up significantly. However, this minus can be used to your advantage in cases where you need to make light cosmetic repairs in a rented apartment, or when you like to experiment with the interior.
Paper-based vinyl wallpaper is a more durable finishing option. The front side, which bears the bulk of all operational loads, in this case is performed by a layer of polyvinyl chloride. And he has a lot of positive qualities:
- it can be washed repeatedly, even with the use of detergents;
- foamed vinyl can be painted up to 10 times;
- vinyl does not fade, does not allow moisture to pass through;
- the decorative effect in the case of silk-screen printing or thick wallpaper (varieties of vinyl) is comparable to the most expensive finishing materials.
Paper-based vinyl wallpaper lasts much longer. Among the disadvantages, you should remember about the airtightness of vinyl; however, if you wish, you can find more modern types of finishes on the market that do not have this problem. Vinyl rolls on a paper base are glued in the same way as regular paper wallpaper, so for most people it will not be difficult to glue the canvases without special preparation.
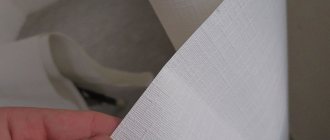
Vinyl wallpaper on a non-woven base is an elite type of finish, which is particularly durable due to the non-woven material used as a lining for the vinyl. Interlining is an advanced paper that consists of modified cellulose fibers. It is tear-resistant, does not absorb moisture, and does not shrink, which means that such wallpaper can be glued end to end. Actually, the technology for gluing such canvases is fundamentally different from gluing paper wallpaper and takes significantly less time.
The fact is that the glue is applied only to the wall. There is no need to apply it to the canvases and wait for them to absorb it and swell. To ensure perfect joints, very careful marking is required. Non-woven wallpaper is another type of finishing material made only from non-woven material. Wallpaper can have a textured pattern, but, as a rule, it is a smooth canvas with interesting patterns. They are glued in the same way as the previous version.
Features of gluing for each type of wallpaper
Technologies do not stand still and the market is ready to offer a wide range to suit every taste and budget. A variety of textures, gluing methods, width of the canvas and a variety of colors and patterns. But in order not to make a mistake with your choice, you should know the disadvantages and advantages of each type of wallpaper. The most popular at the moment are four types.
Paper wallpaper
They are environmentally friendly and low cost. They are the ancestors of all wallpapers. Modern species are also based on them.
You will also have to give up the idea of washing anything on them; after getting wet, the paper becomes deformed and tears.
Non-woven wallpaper
These are paper wallpapers with the use of special additives that turned them into a real find. They can be painted (repeatedly), they do not fade in the sun, they are very durable, waterproof and fire resistant. At the same time, covering a room with them will not be difficult; the glue is applied directly to the wall. The only disadvantage of this type is the high price.
Watch the video on how to glue non-woven wallpaper
Vinyl wallpapers
They are distinguished by reliability, wear resistance and durability. A special feature of the gluing is its two-layer nature. The base (the bottom layer, which is glued to the wall) can be paper or non-woven. The advantage of the first option is the ability to stretch. They are convenient for covering niches and complex openings. But at the same time, you need to apply glue to the surface of the canvas itself and the wall.
After applying the adhesive mass, extreme caution should be exercised, since the paper base can easily tear. The non-woven base is more durable, saves glue consumption (since the composition is applied only to the wall)
It can easily hide minor defects, but due to its rigidity it creates problems when straightening folds and removing air.
Watch a detailed video on how to glue vinyl wallpaper
Photo wallpaper
The variety of themes and designs of this type of wallpaper is fascinating. You can find real works of art that can transform the interior beyond recognition. Based on the base material, photo wallpapers are divided into subtypes: paper, vinyl and fabric. The main difficulty in covering walls with such wallpaper is matching the pattern. At the preparatory stage, you need to make precise element-by-element markings on the wall, then remove the white edges from the fragments and only then apply glue.
Detailed video of gluing photo wallpaper
Why are the coverings coming off the wall?
It happens that everything was done according to the instructions, but the wallpaper came away from the base. The main reasons for peeling off:
- Surface defects. The phenomenon is not uncommon, since the walls are deformed or initially uneven. Before finishing work begins, poorly adhering plaster should be removed and all visible cracks should be filled with putty.
- The installation of walls made of plasterboard sheets was carried out incorrectly. The joints between the sheets were poorly processed.
- The surfaces for gluing are unsatisfactorily prepared. Probably, they still have the same wallpaper or traces of painting or whitewashing (find out how to remove liquid wallpaper, photo wallpaper, and washable wallpaper). The situation will become more complicated if they are not primed in advance (why prime the walls for wallpaper and how to do it?). This is an invariable stage of gluing materials.
- The wallpaper was applied to a damp surface, wet primer or plaster.
- Wallpaper glue applied unevenly. This is a common mistake. Troubles are possible if the paste is applied with a brush rather than a roller. Gaps and areas without adhesive appear on the canvas (how and with what do you apply glue to wallpaper?).
To do this, it is recommended to do the following:
- Keep doors and windows closed for the first days.
- To avoid drafts, close the ventilation.
- Curtain the windows so that the sun's rays do not fall on the wallpaper.
Often the stripes come off and bubbles appear if the room is cool or the air humidity is high.
Tools and Process Steps
To work you will need the following tools:
- Brush. It is used to apply glue to narrow strips or along the edges.
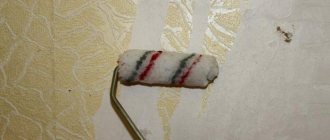
- Foam roller. Rollers with artificial or natural fur can replace it, but this is the most comfortable one. The quality of the pasting largely depends on which roller is used for the job. Before first use, it must be well saturated with water.
- Bath. Necessary for rolling out the roller; it's easier to use than a whole bucket of glue.
- A rag or sponge made of foam rubber.
Stages of gluing:
Carefully study the instructions, all symbols on the roll. Determine application technique. Prepare the composition according to the instructions on the package
It is important to follow the recommendations on water temperature and the duration of swelling of the mixture. A large sieve will help you get rid of lumps, through which you need to pass the entire composition (read more about how to cook and use and where to store the paste here). When applying to sheets, you need to prepare a place for their placement
This can be done on the floor or on a large table. When applying to the walls, you need to make sure that they are clean, free of dust and small debris. Wet the brush and roller with plain water. Spread a protective layer of paper on the floor or table and lay out the linens. It is important that the paper does not fade or print on the roll when wet. This is especially true for white and light wallpapers. Apply glue to the center of the sheet depending on the wallpaper material: a little on thin ones, more on thick ones, allowing for absorption. Spread with a roller along the entire length: from edge to edge of the opposite side. Then move to the near half, apply from edge to edge along the length. Separately coat the edges with a brush. Blot any excess that gets on the front side with a rag or sponge. Thin wallpaper can be pasted. Thick ones - leave to swell, folding the edges towards the center and setting aside for 5-10 minutes. Then stick it on. If it is necessary to apply it to the wall, it is better to do it in two layers. The first serves as a primer, the second is where the wallpaper is directly glued.
Vinyl
Gluing technology:
Prime the wall well. Next, proceed as indicated in the instructions from the roll: Either smear the vinyl sheet and leave it to soak, or lubricate the wall. The only possible method of joining is end-to-end. It is important to note that when saturated, this type of fabric stretches greatly.
Non-woven
Let's consider whether it is possible to apply glue to non-woven covering and what attention should be paid to. Pasting instructions:
No adhesive is applied to this type of wallpaper. It is important to pay attention to careful treatment of the surface for non-woven finishing, where the adhesive is applied in a thick layer, preferably twice. It is important not to miss a single centimeter when applying.
They are glued end to end, without overlap. It is convenient that non-woven wallpaper will not tear, as it is mounted on the wall dry. The sheet is convenient to carry and correct in case of an error.
Paper
Gluing stages:
Apply glue to the inner surface of the canvas, fold the edges towards the center, leave to swell. Straighten the canvas, coat it with glue again, paying attention to the edges and corners. If the sheet curls up, it means it is not ready yet; it needs time to soak. Gluing - overlap.
What wallpaper is suitable for uneven walls?
Of course, the walls in the room can be leveled, but not every person will undertake such work. If you have no desire to deal with this issue, then you should choose the right material for gluing. There are several types of wallpaper that are best used for uneven walls and crooked corners. Let's look at them in more detail:
The first type is widely used in the domestic market. Such wallpapers have a unique structure, due to which they do not stretch after gluing. As a result, the number of visible flaws is reduced. Most often, this material is used when the walls have a large number of defects.
Vinyl wallpaper is also quite popular. The advantage of this material is its versatility and wear resistance. The service life of vinyl strips can reach 10 years. This material is most often used when there is a need to visually hide small irregularities in the walls.
Vinyl wallpapers
Non-woven wallpaper also does not stretch after gluing, so it can be used to eliminate large and minor unevenness. This material is often used for painting.
Non-woven wallpaper
A rather interesting way to independently hide various wall defects involves the use of liquid wallpaper. This material is applied to the walls using a spatula. This method is ideal for uneven surfaces.
Types of wallpaper
The name "wallpaper" comes from the method of applying the finish. Initially, they were made from fabric that was used to cover walls and ceilings in castles, palaces or wealthy houses. With the advent of stationery presses in Europe and then in Russia, wallpaper made from paper became widespread. They are valued for their environmental friendliness, decorativeness and accessibility.
GOST 6810-2002 classifies materials into groups:
- paper - one- or two-layer (simplex or duplex), light, medium weight, heavy;
- vinyl - on a paper or non-woven basis;
- textile - made of cotton, flax, jute fiber or polyester based on paper or non-woven composite materials.
The front surface can be smooth or grooved. It is decorated with embossing, painting, printing, and silk-screen printing. Structure and volume are added by applying foamed polymer, metal powder, and brushing.
They produce wallpaper that can be painted, is moisture-resistant, sound-absorbing, and anti-vandal. Glass wallpaper is a woven fiberglass material with figured weaving that is durable and non-flammable.
For connoisseurs of natural finishes, wallpaper is made from cork, bamboo, jute, reeds, and seaweed. Exotic species - leaves glued to a non-woven base, tanned animal skin, thin sections of rocks bonded together.
The stores have a wide selection
The minimum roll dimensions are 0.53x10.05 m, although widths of 47 or 75 cm can be found. The maximum length of the strip is 42 m. Standards establish standard values for the resistance of finishing to fading, abrasion, and the release of harmful substances.
Wallpaper is glued using industrial compounds or homemade paste. Some types are self-adhesive, meaning the sticky substance is already applied to the surface. You just need to activate it by soaking it, place the cloth on the base and roll it with a roller.
The variety of materials is great. Where to start and how to properly glue wallpaper are questions that a person faces when renovating or decorating a new room.
Preparation and leveling makes subsequent finishing easier
Correctly gluing wallpaper in corners
When doing renovations in old apartments, I always putty the walls and install perforated corners. They simultaneously serve as beacons and protect the ledges from destruction. I choose cardboard ones if the inner corners have slight unevenness. In all other cases I use a PVC profile.
- I check the verticality of the walls with a laser level. You can use a plumb line. I choose a flatter base surface.
- I putty and embed the profile in the solution, leveling it.
- After drying, I smooth it with another layer of putty. For paper and non-woven wallpaper I use an additional finishing compound.
If customers don’t want to spend money on leveling and corners, then I simply fill up large depressions. I cover the corner with wallpaper, cut a strip 10–12 cm wide. I place it evenly on both walls, making cuts for a tight fit. After this, it is easier to glue wallpaper in the corners. If the top fabric has to be cut or the paper trellises burst, then thanks to the background made of the same material it will not be noticeable.
We glue wallpaper in the corners ourselves
Advice! It’s better to align the corners well once than to fool your head every time you wallpaper a room.
The last strip in front of the corner is cut off so that it extends onto the other wall by approximately 2–5 cm, depending on the curvature. The greater the differences, the wider the approach. It should completely cover the most convex place by at least 8 mm.
For a better fit, I make notches with a sharp knife or just cuts with scissors. It is desirable that they be inclined towards the edge. I cover the corners with wallpaper and smooth out the main part first, then the strip around the corner.
How to glue wallpaper in the corners of an apartment?
Before you start gluing the wall from the corner, measure the width of the trellis and draw a line vertically along the level. I also check the condition of the corner. The side surface of the strip should go along the deepest dent. I paste it strictly vertically, according to the markings. Near the corner the edge lies flat. The protrusions are hidden under the wallpaper that was pasted earlier.
It is better to cut wallpaper with large patterns so that the lines match. A slight shift will not be noticeable.
I cut thick vinyl wallpaper using a ruler at a distance of 2 mm from the edge of the top sheet. Using a sharp knife, I cut both pieces strictly vertically along the entire height. I remove the excess and the canvases lie end to end. For strength, I put a painting mesh.
We glue wallpaper in the corners with our own hands
Advice! Use clear glue.
We start gluing from the door
My friend was able to see everything and now wallpapering in the corners did not scare him. Before you start finishing the room, you should draw vertical lines and check the condition of the corners. If there is no professional level, you can use a weight on a thread.
Further, by analogy with external corners:
- We glue it with an overlap of up to 5 cm on the adjacent wall.
- Smooth the main fabric to the corner and glue it.
- We make cuts and tightly fill all the unevenness with wallpaper.
- We mark the vertical and, taking into account the pattern, glue the next strip end-to-end to the corner.
- Using a ruler, we cut both sheets at a distance of 1–2 cm.
- Remove excess pieces of wallpaper.
- By bending both edges we glue the painting mesh. Coats it with additional glue.
- We connect the strips end to end along the cutting line and press.
Before gluing wallpaper in the corners, make an approximate marking of the location of the stripes on all walls. If a piece of wallpaper ends close to a corner, immediately move the first strip. You can start with a strip cut along the length.
Let's start wallpapering
You need to cut the wallpaper with an allowance of 5 cm on each side if you consider the pattern to be large. For ordinary relief embossing, a total allowance of 5 cm is sufficient. It is convenient to start gluing wallpaper for painting on the left side of the window, moving clockwise if you are right-handed. But the quality of the entire work depends on how smoothly the first canvas is glued. A regular plumb line or laser level will come in handy here. With its help we will mark a vertical line on the wall. Gluing occurs strictly along this line.
Fold the paper sheet with glue applied in half, trying to prevent the glue from getting on the front surface. The impregnation time is usually indicated on the roll, and if this information is not available, then a soak time of 5–10 minutes is sufficient. You need to smooth the wallpaper with a brush or a plastic wallpaper spatula, pressing the canvas along its entire length, moving from the center to the edges, removing air bubbles and excess adhesive mass. These movements should be quite delicate so that the relief texture of the canvas is not disturbed. Smoothing non-woven wallpaper, which is stronger in structure than paper, can be more energetic. Fiberglass wallpaper can be safely glued even with excessive effort; these dense canvases are almost impossible to tear when gluing.
What changes if you choose wallpaper with a pattern
A drawing made in a chaotic manner does not require any special “tricks”. You need to work with it in the same way as with single-color wallpaper. It’s another matter when the pattern is made with a vertical/horizontal accent, which must be taken into account.
In order to complete the entire process correctly, each step must be checked with a level
Here it is important to carefully trim the edge adjacent to the other wall and ensure that the remaining part of the canvas always adheres to a clear vertical line
Working with uneven corners
The previous methods work well with standard right angles, but you may encounter less traditional geometries in your space. Then you can overcome the curved corner using the following instructions:
- The height of the wall is measured and 7 cm is added to the resulting value.
- The wallpaper roll is cut into several strips with the required thickness and in the appropriate quantity. If the canvases contain a pattern, take this into account and take fragments from their edges to minimize damage to the composition.
- We treat the walls and corners with glue, if required for the selected brand of wallpaper. Otherwise, apply the adhesive mixture only to the inside of the strips and glue them to the corner. At this stage, there will inevitably be some bumps, which you shouldn’t be afraid of, because... in the future they can be corrected by cutting off unnecessary fragments.
- To avoid “blockages”, you should carefully press the sheets along the entire perimeter of the corner, expelling air accumulations from under them. This will ensure better adhesion of facing products to the surface.
- The corner section with two layers of wallpaper overlapped is carefully trimmed with a knife. After that, the resulting cut is also treated with an adhesive mixture, on top of which a folded fragment of the strip is placed.
Working in corners
When joining wallpaper in the corners, follow the given algorithm of actions:
Preparing the corner. At this stage, the walls are puttied; the corners are equipped with special plastic corners at the bottom of the wall. The corners are attached using putty and your task is to do this conscientiously so that they are securely fastened to the wall surface.
Wallpapering corners. Cut a strip of the required length, then apply glue to the part of the wall where you are going to apply the wallpaper.
Important
Important! Apply glue along the width of the wall and leave an extra 3-5 centimeters on the sides; also be sure to apply glue to the plastic corner.
You can apply wallpaper to the wall. If you are gluing from right to left, then you need to attach the right side to the inside of the corner so that the strip adheres evenly to the wall along its entire length.
Leveling the canvas on the wall
Using a spatula, level the wallpaper and remove any swelling that has formed between the canvas and the wall. The joint between different strips of wallpaper should not be more than 5 mm. And the remains of the wallpaper need to be carefully cut off with a stationery knife.
The video clearly demonstrates how to join wallpaper in the inner corner:
Different color
Combining colors in wallpaper is quite often used when decorating a room. To make the walls look presentable and the colors of the wallpaper to harmoniously combine with each other, you can design the joints in the following ways:
- Classic joint.
- Initially, no glue is applied to the edges of the wallpaper, but the main part of the wallpaper is glued to the wall with an overlap.
- Then take a long ruler or plank, which is leaned against the wall and a line is drawn along the overlap.
- Then, using a stationery knife, the joint is cut off, and the remaining wallpaper is thrown away.
- After all this, you need to lubricate the joints with glue and secure them to the wall. With this algorithm of actions, the joint will turn out smooth.
- Horizontal stripes. In this case, a straight line is drawn on the wall using a level. After that, you cut out the strips you need and glue the top wallpaper first, and then the bottom ones.
- Framing. Here, when framing the joints, various devices are used: baguettes, moldings or borders. When an insert in the form of a stained-glass window made of wallpaper is meant on the wall, the canvas is also framed using these materials.
With an image
It is most difficult to glue wallpaper with patterns, since if it is joined incorrectly, distortions in the form of overlaps or distortion in relation to the floor are immediately evident. To avoid such troubles, use the following tips:
- Make a very slight overlap on the other canvas, it should be barely noticeable.
- If you find any curvature, move it to the top and hide it behind the panels.
- Glue the straight edge along a plumb line, and cut off the excess part using a stationery knife.
On the outside corner
This situation is a little similar to joining wallpaper in the inner corners, but a slightly different algorithm applies here:
Bring the strip around the corner by 5 centimeters, and glue the next strip slightly overlapping this allowance. Take a metal ruler and make a vertical cut in the middle of the overlay between two layers. Attention
Important! When working with a knife, make sure that the ruler does not move, otherwise the cut will turn out crooked. 0.5 centimeters wide
This is due to the fact that paper wallpaper shrinks in width after drying.
The advantage of this method is that after the glue dries, the seam does not separate, and the bare wall will not be visible between the two canvases. But still, when sticking paper wallpaper, follow the technological overlay 0.5 centimeters wide. This is due to the fact that paper wallpaper shrinks in width after drying.
The folded edge should be strictly vertical; if it deviates, draw a line and cut off the excess wallpaper. The next strip is overlapped by 0.5 centimeters.
The video clearly shows how to properly glue wallpaper on the outer corners:
Gluing external corners
If you are gluing heavy wallpaper (vinyl, non-woven and other similar ones), then you need to use a plumb line and make a centimeter overlap on the adjacent wall
Non-woven fabric can withstand prolonged slight physical impact. This fact allows you to place wallpaper of this class in places where there are large crowds of people - shops, offices, etc.
To ensure that pasting non-woven wallpaper does not take much time, you need to adhere to the recommendations below:
- Install the required number of plastic corners in the curves;
- Dry wallpaper is attached to a previously prepared wall;
- It is allowed to apply glue only to the wall.
Applying non-woven wallpaper on external and internal corners is a relatively simple task provided that certain rules are followed. Firstly, the glue is applied only to the wall, and, secondly, it all starts with the installation of corners made of plastic.
We evenly glue the wallpaper on the corners
I told Vadik earlier that to create an original interior, a combination of different patterns and tones is used. After a tour of the ancient building, he expressed the opinion that the designers came up with such a technique to hide defects.
Before starting renovations, consider options for decorating the interior with companion wallpaper. First, cover the walls with trellises with a pattern, extending onto the adjacent wall. Then you create the transition with plain stripes. The cutting lines will visually look like straight corners. Irregularities will not be noticeable.
For those with no experience, combining is more accessible than wallpapering with a pattern. At the same time, you adjust the shape of the room and enlarge it.
In order to wallpaper walls in an original way, highlight specific functional areas with them, and highlight the advantages of a particular room, designers offer numerous ways to use decorative materials of different colors. Wallpaper may differ in pattern and texture.
All this must be taken into account when different wallpapers are joined in a corner. The gluing of very dense fabrics is done with minimal overlap. In the case of using fiberglass wallpaper, uneven places will become very noticeable. One edge of the canvas, placed on top of the other, cannot be hidden.
Vinyl wallpaper is fixed only with a rubber roller. Using other tools, you can erase the design and ruin the overall appearance of the decor. This must be kept in mind, including when gluing such wallpaper in the inner corners, where it is not always convenient to use only a roller to achieve complete adhesion of the wallpaper to the wall surface.
When joining wallpapers of different textures, such as paper and vinyl, you need to stick them so that the thinner ones are under the denser and thicker ones. Then the overlap area will stand out less.
In this video you will find tips on wallpapering corners.
General principles and features of work
There are “canonical” recommendations on how to hang non-woven wallpaper on a wall, based on the ideal data of the decorative material itself and the perfect parameters of the room in which the work is being carried out. But for gluing non-woven wallpaper with your own hands, professional experience will also come in handy. There are no contradictions between them, only small amendments taking into account local characteristics.
For example: it is not a fact that the distance from floor to ceiling, along the entire perimeter of the room, will be a constant value. Therefore, first of all, you should measure the height of the room at all corner joints of the walls. The larger indicator is taken as the main one. And pasting the walls should begin closer to this place, from the ceiling. This point is especially important if you are going to hang non-woven wallpaper with a matching pattern. The video shows one of the gluing methods, from a whole roll. This method is quite relevant, but not always convenient.
It is easier to operate with a pre-prepared cut. The required number of whole canvases is cut to the size of maximum height. The selection of a cut with a rolling pattern is carried out by correctly combining two cuts. The cut sheets, laid with the working side up, are placed in a common stack on the floor surface. Depending on the coating, the floor is cleaned or covered with plastic film.
It is believed that to glue non-woven wallpaper, it is enough to apply glue only to the wall. But for those who are trying to do this work for the first time and with their own hands, it will not be superfluous to treat the working side of the canvas with glue. This will give the performer additional time (the glue tends to dry and be absorbed into the surface) and will make it easier to move individual sections of wallpaper along the wall plane in the process of aligning the joints.
The issue of preliminary or subsequent installation of fillets should be resolved directly on site. There are a number of reasons why ceiling fillets are more productive to install after wallpapering.
- For the currently popular suspended ceilings, manipulations with a stationery knife, metal ruler or facade spatula, carried out in close proximity, pose a serious danger. It's easier to trim off the excess with scissors. Possible irregularities in the cut will subsequently be covered by the volume of the fillet.
- Recommendations to trim the top and adjust the wallpaper to the fillets after drying can result in the decorative coating sliding off. As already noted, non-woven wallpaper is quite heavy.
- The baguette shapes of the fillets completely exclude the possibility of adjustment due to the shaped protrusions.
Related Posts
- How to glue wallpaper: common mistakes in gluing yourself
- How to glue vinyl wallpaper on non-woven backing?
- Wallpaper for the bedroom
- How to tear wallpaper off the walls if it won't come off
- How to glue wallpaper on painted walls: water-based, oil and acrylic coating
- How to calculate wallpaper: how many rolls and glue are needed to cover a wall. methods for calculating and determining the quantity of materials
- How to glue fiberglass correctly?
- Technology of painting wallpaper with water-based paint
- How can you glue old wallpaper that has come off the walls and how to do it correctly?
- Wallpaper combination: modern options and rules for use in the interior. 105 photos and videos gluing master class
- Vinyl wallpaper with non-woven glue
- Which wallpaper to prefer: vinyl or non-woven
- Liquid wallpaper. types, how to make, how to apply and more
- Liquid wallpaper
- How to glue meter-long non-woven wallpaper with your own hands
- Repairing ceilings in an apartment: finishing features
- Is it necessary to prime the walls after the starting putty before the finishing putty?
- How to properly glue fiberglass to drywall with your own hands
- Is it worth replacing wallpaper with paint in an apartment: what to paint with, is it possible to do the work yourself, and what paint to choose for the wall
- Which glue to choose for wallpaper joints?
- How and with what to glue plastic corners to slopes
- Do I need to apply a primer before wallpapering drywall?
- 3d wallpaper on the wall in an apartment: photos for the living room and all other rooms, how to hang it yourself
- Choosing paint for wallpaper and recommendations for painting
- Mounting a mirror on the wall in various ways
Read with this
- How to glue wallpaper: common mistakes in gluing yourself
- How to glue vinyl wallpaper on non-woven backing?
- Wallpaper for the bedroom
- How to tear wallpaper off the walls if it won't come off
- How to glue wallpaper on painted walls: water-based, oil and acrylic coating
- How to calculate wallpaper: how many rolls and glue are needed to cover a wall. methods for calculating and determining the quantity of materials
- How to glue fiberglass correctly?
- Technology of painting wallpaper with water-based paint
- How can you glue old wallpaper that has come off the walls and how to do it correctly?
- Wallpaper combination: modern options and rules for use in the interior. 105 photos and videos gluing master class
Alternative methods
It should be noted that it is possible to put wallpaper on crooked walls, but it is not always possible to hide large defects. This is especially true for recesses. Filling them with putty is quite difficult; it is not a crack or chip that has sharp edges. The putty solution adheres well to them. A deep recess is, in fact, a depression. By covering it with wallpaper, we get a void under the finishing material. Therefore, you will have to imagine.
Look at the photo above. Here is one of the options for how to hide a large unevenness in a wall covered with wallpaper. In this regard, the wallpaper itself is laid in a wave, thereby hiding the flaw. At the same time, the design approach solved not only the problem of the wall surface, but also made it possible to make the interior of the room original. The wave finish is actually beautiful and unusual, but it is also functional. Shelves were created on the wall, which, due to the dense structure of the material, can withstand certain loads. In any case, a couple of books will easily rest on them.
Or this option in the photo above. The place of the big drop is covered with a large mirror. Of course, you will have to take into account the wishes and capabilities of the owner. That is, does he need the same mirror in this place? Or whether it will fit into the interior being created. Although a mirror is just one option. For example, you can cover an uneven wall with a large piece of furniture - a wall or a slide. Hang a photo or painting. There are plenty of options.
Another opportunity to hide the unevenness of the wall. To do this, you can use wallpaper that is saturated with the same type of repeating pattern of an even geometric shape. Such a drawing purely visually blurs the boundaries; it seems to smooth out the surface with its repetition. That is why defects under the finish are not visible. It is impossible to say which of the proposed options is better. Everyone chooses for themselves. It is important to glue the wallpaper correctly, exactly according to the technology, so that it does not become a defect in the wall itself.
So, you can glue wallpaper on uneven walls. Which technology to choose is up to the owner of the house to decide.
How to glue wallpaper is a difficult question, especially if you need to do work on uneven walls and in crooked corners. It is very difficult to carry out the work correctly in such conditions, but there are certain tricks that allow you to cope with this task. The attractiveness of the interior as a whole depends on the design of the walls in the room, so you should not approach the work without preparation.