There is soil - there is a quality result
Often during renovation and finishing work, people have questions about the need to prime their ceilings. More precisely, you are interested in how to prime the ceiling, and what types of primer are applicable for this. In this article we will try to answer these questions in as much detail as possible.
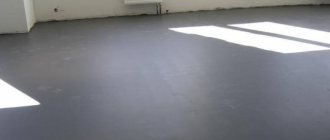
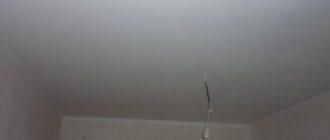
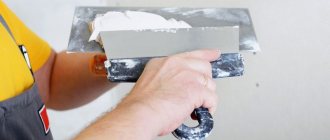
Priming the ceiling before painting
When carrying out repair work, it is important not only the quality of materials, but also the technology of their application. If you skip one of the stages, the result will be completely different. One of the important stages is priming the ceiling. The advantages of pre-priming include:
- antibacterial surface protection. The primer contains antimicrobial substances that prevent corrosion and mold;
- eliminating dust particles and filling porous surfaces;
- after treatment, the surface becomes rough, which improves adhesion to further coating - putty, paint, glue, etc.;
- some types of primers form a fire-resistant film and prevent fire;
- savings on finishing. When using a primer for the ceiling, a smooth surface is formed and when applying the next decorative and finishing material, its consumption will be less.
Is it necessary to apply
Professional builders definitely recommend priming the ceiling before further finishing. Due to the force of gravity, any finishing coating on the ceiling will be pulled down. Over time, decorative material applied to an untreated surface will begin to crumble and crumble, even if we are talking about tiles.
Equipment used
Purchasing a primer composition is indispensable for high-quality work. It is imperative to have other materials and tools available.
In order to prime the bases before laying the tile covering, or if you plan to subsequently apply a water-based emulsion, it is recommended to use brushes or paint rollers.
It is better not to skimp on devices, as well as on primer, since the quality of the work performed and its service life directly depend on this.
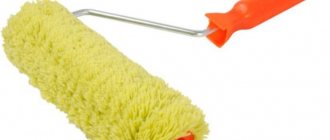
As a rule, such priming is carried out using a paint roller, since with its help the work can be done much faster and easier.
Note: if the choice falls on a brush, then it is better to purchase one with soft bristles, since hard bristles may leave unaesthetic stripes and other visual defects on surfaces.
But, if you plan to cover the ceilings or walls with wallpaper or other canvases in the future, using a brush with hard bristles will come in handy.
Using a brush will make it possible to make the bases rougher and, accordingly, increase their degree of adhesion to the materials used.
Features of priming the ceiling with different types of primers
Among the most popular means is acrylic primer. It has good penetrating power and versatility, it can be applied to brick, concrete base or plasterboard sheets.
Strengthening impregnation is used for weak surfaces, for example, after whitewashing or in small cracks. It gives them additional strength.
The adhesion promoter contains small particles. They add roughness to the ceiling and then any finishing material can be applied to it.
Impregnation for loose substrates contains latex polymers that penetrate deep inside and make the substrate stronger.
The following types of impregnation are less commonly used:
- alkyd impregnations for metal and wood bases;
- PVA-based primers for surfaces made of concrete, wood and plaster;
- epoxy primers for concrete and metal;
- primers with mineral components for brick, concrete and gas silicate surfaces;
- silicate soils for street work.
Types of solutions
Not so long ago, there was only one primer for the ceiling - soap maker. It was prepared by boiling a mixture of water and crushed laundry soap. Sometimes PVA glue was added to the composition. This product is still used to treat whitewashed surfaces. It effectively removes dust from the surface and creates an adhesive layer, but today manufacturers produce more effective and relatively inexpensive primers - both specialized and universal.
The latter include acrylic solutions, which are used in preparation for finishing any ceilings. The surfaces treated with them are in good contact with paint, putty, glue, etc.
A specialized primer is designed for impregnation with a specific composition before finishing. Solutions of this kind are also suitable for certain types of slabs. For example:
- Strengthen loose surfaces with emulsion compositions based on vinyl-acrylic copolymer. They impregnate plastered and concrete slabs to ensure reliable contact with subsequent finishing layers.
- Latex compounds are used to prime gypsum boards and wooden surfaces. Cement-sand mixtures are applied to them. This is how the ceiling is treated before tiling.
- An alkyd primer is used to create an adhesive layer on metal, fiberglass and tiles. It is the most durable of all mixtures.
- A deep penetration composition containing antiseptic substances can destroy the fungus and strengthen the surface layer of the ceiling slab.
- A primer with quartz sand will make the ceiling rougher, which will allow you to apply a layer of decorative plaster on it.
We recommend: Epoxy primer in a can: we describe all the nuances
The basis of the products are drying oils, resins, cement, gypsum and lime. So that the consumer can make the right choice, manufacturers indicate the scope of application of the composition.
Which one to choose for water-based paint?
Rooms with high humidity, such as the bathroom or kitchen, require a good, durable ceiling coating. Therefore, water-based paint is often used.
Before priming the ceiling before painting, it is important to thoroughly sand the base and use a soft-bristled brush to remove particles of dirt and dust.
Important! If the base is additionally degreased with solvent or white spirit, the adhesion of the finishing material will be better.
Next, pour the impregnation into a special tray and use a paint roller to paint in one layer. To avoid splashing the walls onto the roller, it is recommended to take a little material. After the ceiling has been primed, it is recommended to wait 4-6 hours until the layer has completely dried, and then reapply the liquid.
How to prime
If you have a question about how to properly prime a ceiling, we will answer it as follows. Priming the ceiling is no different from priming any other element of the building.
You will need:
- A roller with medium pile (it is not recommended to use felt or sponge);
- Tray for convenient wetting of the roller in the ground;
- Maklovitz brush;
- Hard spatula.
- We begin the treatment by cleaning the surface from large flaking particles - we go over it with a spatula;
- Pour the soil into the tray and thoroughly wet the roller;
- We systematically coat the entire ceiling;
- We go through hard-to-reach places (corners of the room, various surface irregularities) with a brush. You can also coat the main parts of the ceiling with it if you don’t have a roller at hand.
Applying primer with a brush
Attention! After applying the primer, wait about 10 minutes and check how well the absorption has occurred. If the surface has become almost dry, repeat the treatment.
Technology for applying primer to a concrete ceiling
Surface preparation
If there is any old coating left on the surface, it must be completely removed. To do this, first thoroughly moisten it so that the material soaks, and then remove it with a spatula. If foam ceiling tiles were glued, then they are torn off along with the glue. This step is recommended to be carried out even if you plan to install a stretch ceiling, in order to avoid the old coating from falling off on the inside.
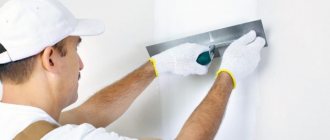
At the second stage, uneven surfaces, cracks and crevices are puttied. The dry surface is sanded with sandpaper until completely smooth.
Now you can move on to priming.
Features of calculating primer for the ceiling, consumption per 1m2
Before applying primer to the ceiling, you need to calculate the required amount of material. As a rule, manufacturing companies write consumption rates per 1 m2 on the packaging. However, you need to keep in mind that these are only approximate figures, and they do not take into account the absorbent properties of the coating base, the type of tool, or the possibility of re-application.
For example, for universal and acrylic primers, the approximate consumption per 1 m2 is 100-170 ml.
What tools to use
The modern market offers consumers a huge selection of all kinds of facing materials for treating all kinds of surfaces, including ceilings.
In order to carry out the work efficiently, it is necessary to select the right material and carry out the work according to all the rules.
As for primer mixtures, some of them must be diluted with thinners or water before being applied to the surface (this must be taken into account before purchasing). If you plan to prime a large area, it is recommended to purchase special primers with a reserve (this will save both time and money).
If you plan to prime the ceilings before applying emulsion or other types of dyes, you need to know the dilution proportions of the material, as well as how long it takes to dry.
The time for complete drying of the composition depends on what type of base it will be applied to, and the same applies to dilution proportions.
On average, the optimal proportions are 1:5 or 1:2.
Choice depending on base
- A water-based ceiling primer for painting is suitable for water-based coatings and paints. This product is recommended for use when you need to prepare a plasterboard, wood, concrete or cement base for wallpapering. This primer dries quite quickly. At this time, even minor temperature changes should be avoided.
- For substrates made of fiberglass, it is recommended to apply an alkyd-based primer. The finishing layer is very durable.
- Ceilings made of brick, concrete, expanded clay concrete and gas silicate blocks, as well as those finished with plaster, are best coated with a mineral-based primer.
Purpose of the primer
The primer improves the adhesion of paint to concrete.
The purpose of priming the surface is to improve the adhesion of plaster, putty, paint, and glue. The product covers uneven surfaces and cracks in the base and prevents moisture from penetrating into vulnerable areas. This is especially important for certain materials. For example, according to technology, adhesive mixtures must retain moisture for a certain period of time.
The primer performs the following functions:
- uniform distribution of paint;
- anti-corrosion coating;
- protection against fungus and mold;
- increasing the service life of the finish;
- prevents stains from appearing on the finish coat;
- giving strength.
Special compounds protect the ceiling from oil, rust, soot and grease. Additionally, uniform drying without loss of moisture is ensured.
Purpose
Why is a primer needed? This question is asked not only by beginners in the construction process, but also by very experienced craftsmen. The purpose of the liquid is as follows:
- Strengthening the concrete surface. Liquid consistency allows the product to be easily absorbed. The water contained in it gradually evaporates under the influence of positive temperatures, leaving solid particles in the concrete. The latter are responsible for increasing the strength of the ceiling surface.
- Increased adhesion. The primer creates a film on the ceiling that improves the adhesion of the slab and finishing material.
Some types of the product have bactericidal properties. After their application, the ceiling surface becomes resistant to mold and the development of fungal spores. This quality is invaluable for rooms where children, as well as people with diseases of the respiratory system, stay for a long time.
The question often arises whether it is necessary to prime the ceiling before painting. The main purpose of the product is to prevent moisture from being absorbed by the ceiling surface. Skipping a liquid treatment step when painting will result in more coats being required to evenly cover the entire surface. Even after applying putty, it is impossible to exclude the possibility that the paint will begin to crumble after some time.
What is soil and why is it needed?
What is a primer? This is a mixture (colloidal solution) consisting of a special substance capable of creating the thinnest membrane film on smooth surfaces for the convenience of further repair (construction) work. In our case, painting the ceiling.
Treatment with such a primer mixture allows the paint to lay down evenly and firmly, because... The film formed by the primer also has adhesive properties, i.e. it increases the adhesion of the paint to the horizontal surfaces of the ceiling slabs. Adhesion guarantees even application of the coloring solution and significant savings!
A huge advantage for ceiling primer is the presence of antiseptics in it, which do not allow mold to multiply, which can poison your joy of existence not only in appearance, but also significantly impair your health.
Surface preparation
Before you begin the process of priming the ceiling, it must be properly prepared. For these purposes, a number of works should be performed:
- at the initial stage, completely remove all layers of the previous coating;
- then thoroughly clean the base of the ceiling;
- after this, proceed to repair existing defects in the base, be they voluminous depressions, cracks or bulges;
- perform preliminary priming;
- after this, apply the initial layer of test plaster;
- then apply a layer of high-quality finishing putty to the ceiling surface;
- The next important stage before the final primer is thorough treatment of the ceiling using special sandpaper and troweling.
Keep in mind that before you begin the final priming of the ceiling and walls before painting, you must get rid of all remnants of construction debris. This is necessary to avoid excess dust, which can spoil the result obtained after your work.
Additional tools
It is important not only to purchase a high-quality primer for the ceiling and walls, but also to correctly select all the necessary tools and auxiliary materials.
For priming under special tiles or under coating with water-based paint, you need to use a convenient roller or brush. It is important that these products are of high quality, because this affects the durability of the coating and the reliability of the work performed. In most cases, it is preferable to use a roller for priming, since it allows you to do this job much better, easier and faster.
Brushes with overly stiff bristles should not be used for priming ceilings and walls, as they can leave unattractive streaks and marks on the surfaces.
But if you plan to wallpaper in the future, a hard brush is exactly what you need. It will create characteristic roughness on the surface, thanks to which the quality of adhesion of the putty to the adhesive composition and to the wallpaper itself will significantly improve.