Purpose
Why is a primer needed? This question is asked not only by beginners in the construction process, but also by very experienced craftsmen. The purpose of the liquid is as follows:
- Strengthening the concrete surface. Liquid consistency allows the product to be easily absorbed. The water contained in it gradually evaporates under the influence of positive temperatures, leaving solid particles in the concrete. The latter are responsible for increasing the strength of the ceiling surface.
- Increased adhesion. The primer creates a film on the ceiling that improves the adhesion of the slab and finishing material.
Some types of the product have bactericidal properties. After their application, the ceiling surface becomes resistant to mold and the development of fungal spores. This quality is invaluable for rooms where children, as well as people with diseases of the respiratory system, stay for a long time.
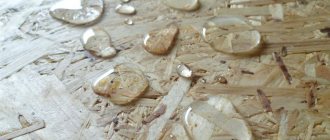
The question often arises whether it is necessary to prime the ceiling before painting. The main purpose of the product is to prevent moisture from being absorbed by the ceiling surface. Skipping a liquid treatment step when painting will result in more coats being required to evenly cover the entire surface. Even after applying putty, it is impossible to exclude the possibility that the paint will begin to crumble after some time.
The main hazard is dust and loose particles
It will probably be no secret to anyone that dust is generated during any repair work. Small particles settle not only on the floor and walls, but also on the ceiling.
Putty peeling off
No brush can completely remove all the smallest particles. Trust us, even a vacuum cleaner will not help 100%.
These particles, unrelated to the base, greatly reduce the adhesion of any surface. As a result, putty, wallpaper, paint and other coatings may peel off over time due to the fact that they initially had poor contact with the surface.
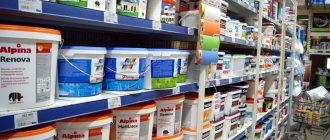
What are the types of primer mixtures?
Materials for processing ceiling tiles have different compositions depending on the type of base surface. It is also important to consider the type of room. For example, acrylic, alkyd primer, as well as a product with a mineral base, are the best choice for rooms in a house, apartment, or office.
Acrylic primer can have different compositions, which allows it to be divided into several types.
Impregnating
This product is needed when working with loose base. The loose structure of plaster mixtures and putty allows the product containing latex to penetrate to a depth of 10 cm. The result is a monolithic base that will last quite a long time.
Strengthening
Doesn't really penetrate into the base. Its purpose is to tie those parts of the base that hold weakly. This composition is used, for example, if the ceiling is covered with plaster with a fine fraction. This primer is also needed if you need to strengthen minor cracks. Both of these types of primers are indicated for working with surfaces that have previously been whitewashed.
Adhesive
Due to the presence of acrylic in the composition, it creates a film on the base. In the future, this allows you to significantly save on finishing materials for subsequent work. This type of primer can be easily combined with almost any paint. Even putty is much easier to apply.
How long does it take for any type of acrylic primer to dry? On average, from 6 to 12 hours. The exact time depends on what the foundation was.
How to make your own primer
If for some reason it was not possible to purchase a ready-made solution or the types of commercially available ceiling primers do not meet the requirements, then you can make the mixture yourself. It will also protect the base from water and increase the adhesion of materials, but the homemade mixture has a drawback: it does not penetrate into the coating as deeply as the production one.
A primer for strengthening walls is prepared from wood glue, laundry soap and copper sulfate, taken in a ratio of 5:2:1. Pour water into an enamel container and place on low heat. After boiling, add grated soap and cook until the contents turn into a homogeneous mass.
Add vitriol, stir well and immediately add glue. After half an hour, the required soil will be ready: you need to let it cool a little and then strain through a sieve. As soon as it cools down, you can use it for its intended purpose and prime the surface.
The technical characteristics of a homemade primer for walls and ceilings differ from factory ones, but if the proportions are observed, it is quite possible to create a high-quality product that will have all the necessary properties.
Choice depending on base
- A water-based ceiling primer for painting is suitable for water-based coatings and paints. This product is recommended for use when you need to prepare a plasterboard, wood, concrete or cement base for wallpapering. This primer dries quite quickly. At this time, even minor temperature changes should be avoided.
- For substrates made of fiberglass, it is recommended to apply an alkyd-based primer. The finishing layer is very durable.
- Ceilings made of brick, concrete, expanded clay concrete and gas silicate blocks, as well as those finished with plaster, are best coated with a mineral-based primer.
Tools for work
In principle, gluing ceiling tiles does not require any serious preparatory work. The only preparation will be the selection of tools that may be useful during work. In order not to be distracted during repairs, it is better to prepare everything you need in advance. To ensure that the tiles are glued as quickly and efficiently as possible, you will need the following tools:
- Ladder. Ideally, this should be a stepladder so that it can be freely placed anywhere in the room.
- Construction knife. Needed to trim excess tiles.
- Threads and a simple pencil. Needed for marking the ceiling.
- Small spatula. Used to apply adhesive to the tile surface.
- A piece of clean cloth or a soft sponge. Needed to remove any remaining glue.
Special cases
Many owners of old homes are wondering how to prime the ceiling (and whether it is worth doing it) if it is whitewashed or it is planned to apply putty to it.
Most often, the question of the need to prime a base that has previously been whitewashed arises when a homeowner decides to paint the ceiling. Before starting work, you should determine what served as the basis for the applied composition - chalk or lime:
- Whitewash with lime, if it is not cracked and does not fall off, can simply be wiped with a damp cloth. After the surface has completely dried, you can safely proceed to priming and painting (even with water-based paint).
- For chalk-coated surfaces, you need to carefully evaluate the condition of the surface and determine how many coats have been applied. If there are no cracks and a thick layer, the ceiling is coated with a special whitewash primer.
How to apply primer to a previously whitewashed ceiling? The technology includes preliminary cleaning of the surface from dust and other contaminants. After this, it is recommended to apply the first, test layer. Then you should wait from two hours to a day - this is how long the primer composition dries, depending on its base. Do not allow drafts - this increases the risk of the base coating peeling off.
After the first layer has completely dried and there are no signs of peeling or swelling on the surface, apply the second. How many layers should there be? Experts say no less than three. And before applying a new one, you should wait the recommended time until the previous one dries. If even minor violations of the strength of the base have been identified, it is recommended to return to the earlier stage and completely remove the old coating.
Correct ceiling primer
You can properly prime the ceiling and walls with your own hands. To do this, you just need to follow the instructions provided.
We recommend: Primer for liquid wallpaper
Instructions for applying primer:
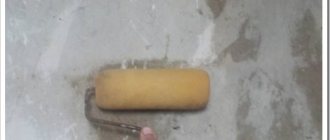
- Pour some of the primer into the prepared plastic tray;
- Dip the roller into the solution, lift it up, and then shake it lightly to remove any excess. Otherwise, this excess will drip onto the floor while working.
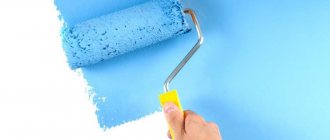
- Carefully apply the primer to the wall;
- You will likely need to apply at least two coats. To do this, you need to wait until the first layer is completely dry (several hours), and only then apply the next one.
In hard-to-reach places, it is better to prime the ceiling surface with a brush.
If you want to see how primer is applied in practice, you can watch the corresponding video.
Keep in mind that some manufacturers' primers must be diluted with water. Companies write such information on the label of raw materials.
Priming before puttying
How to properly prime a ceiling if putty will be applied to it? And is this necessary? The priming process in this case allows you to solve two problems:
- Disinfection. After the product is applied to the ceiling slab, its surface receives reliable antifungal protection.
- Increased adhesion. Putty is a fairly heavy material. Therefore, in the absence of a primer coating, it may begin to peel off over time. The technology involves layer-by-layer application. That is, after a layer of putty is applied and sanded, it is coated with a primer.
The product should not be applied while the base is drying. The type of primer used and the material of the ceiling tile will determine how long it will take.
If the ceilings are suspended
Let's consider whether and how to prime the ceiling on which the structure with PVC film will be installed. Stretch ceilings are the best solution for apartments in new buildings. Over time, the house shrinks, after which the surface of the slabs becomes covered with cracks. To minimize repair costs, homeowners resort to using a tensile structure.
PVC film reliably hides all imperfections. After its installation, you can forget about repairs for a long time. However, this does not mean that the surface under the tension structure should not be treated. The primer is the minimum you can limit yourself to.
As you know, a suspended ceiling often protects an apartment from moisture coming from the upper floor. It is easy to remove. But while the untreated surface of the slab dries, microbes multiply in it and fungi can develop.
The primer provides protective properties. That is why the ceiling under a tension structure must be treated.
How to glue tiles
There are several ways to glue tiles: parallel to the wall , diagonally or in a diamond shape . Each of these options has its own advantages and some features.
Glue ceiling tiles diagonally
If we are gluing ceiling tiles diagonally, correct markings are needed to achieve the goal. To do this, you need two threads that are pulled between two opposite corners of the room. The intersection of the threads, that is, the diagonals, will indicate the center of the room.
At this point, the markings for gluing tiles diagonally can be considered complete. This option for gluing ceiling tiles is best suited for large rooms.
How to glue ceiling tiles with a diamond pattern
To figure out how to glue ceiling tiles with a diamond shape, you need to know the most popular pattern for this. Squares are measured from the center of the ceiling, after which lines are drawn diagonally from each. The corner of the glued tile should be in the center of the ceiling, and its sides should coincide with the drawn line. When gluing tiles with a diamond pattern, the material consumption can be significant, which must be taken into account in advance.
Important point
When choosing a primer, you should consider not only the period of time it takes to dry. First of all, it is necessary to determine the volume of product that will be required to treat the surface.
To find out how much primer is required, determine how many square meters to be treated. The resulting figure is multiplied by the consumption rate according to the instructions. You should also consider the following nuances:
- type of primer;
- purpose of the remedy;
- base material.
Taking into account the above points, it is not difficult to determine how much product is needed to evenly and completely cover the ceiling.
It is important to remember that the calculations are affected by another important point - the thickness of the layer. This indicator depends on how porous the ceiling base material is. The higher the porosity, the more layers may be required. To avoid mistakes, it is better to involve specialists in the calculations.
What glue to use to glue ceiling tiles. Choosing glue.
One of the most important questions is is best for gluing ceiling tiles On sale you can find special water-based , solvent-based , adhesive compound and hot melt adhesive .
Water-based glue is considered the most environmentally friendly; it is used for working with foam plastic, drywall, wood and is not used at temperatures below 5 degrees. The composition of the solvent adhesive includes acetone, alcohol, toluene, and the adhesive compound contains epoxy and polyester resins, polyurethane, due to which the glue hardens quickly. Hot melt adhesive with thermoplastic polymers and appropriate additives is used at high temperatures.
Well, if it’s simpler and with an example, then the best glues are Dragon , Eltitans or Power . Adhesive compound: PEO-521K or PEO-113K . PVA glue will also work .
When collecting information about the best way to glue ceiling tiles, we should also not forget about “liquid nails,” universal glue and special glue for ceiling tiles. Often the tile manufacturer will indicate in the instructions which adhesive should be used. The glue itself usually indicates the open time, setting time and complete hardening time. Having this data, choosing the best glue will not be difficult. There are a lot of brands of “liquid nails” glue on the market, but “Moment” liquid nails are recommended.