Often, car owners save on materials for painting the body, thereby violating the technology of car painting.
Are there any consequences from such savings? Why do such methods of car repair flourish? Painting a car with your own hands without a primer is stupid, but “economical.” Let's take a thorough look at this matter.
Of course, few people want to overpay, even if the quality of car repair depends on it. When involved in an accident, most drivers stop appreciating their car, especially if this is not the first time a traffic accident has happened. They are not looking for the best craftsmen who repair cars with high quality, but amateurs whose services are as cheap as possible.
However, the savings grab you by the throat and force the average driver to delve into painting technology. After this action, the idea dawns on him that he can paint the car without primer and save 15-20% of money. Not all masters go for such a trick, because they know how it ends. Of course, it is possible to paint a car without a primer, but this option is chosen if the car is being prepared for sale.
If you paint a car without a primer, the paint will begin to flake off in flakes within six months, or even earlier. Such paintings are ordered by car resellers. And if you consider that 40% of cars on the secondary market are sold through the hands of resellers, then it immediately becomes clear why low-quality paint jobs flourish.
On a note
No one can determine whether there is primer or at least primer-putty under the paint. And even with “normal painting” the car will shine and shine like new. Alas, the buyer on the secondary market takes a pig in a poke.
You can paint your car without primer if you are sending it on its “last journey.” If you still want to drive it, then you should do everything as the car painting technology tells you. And the more expensive the car painting materials, the longer they will last on your car. Low-quality materials last for 3-4 years, while average-priced and expensive materials last for 7-10 years.
Every car owner should value and respect his vehicle, and also keep it in good condition so that the putty does not fall off on uneven city roads, injuring passers-by, and the paint does not come off. A car is not only a means of transportation, but also a part of the image. Take care of it no worse than your favorite clothes.
What functions does the primer perform?
The main purpose of a primer is to increase adhesion. This term refers to the adhesion of dissimilar materials - including the plaster covering the ceiling and the water-based paint with which it is finished. Good adhesion ensures a better, more durable finish - the paint applies evenly and does not bubble or crack once dry.
High adhesion due to the properties of the primer:
- fills air spaces (pores and cracks), levels the ceiling;
- “neutralizes” dust particles that interfere with the adhesion of materials;
- prevents moisture from entering the main surface (concrete, wood).
The primer also prevents the appearance of mold and protects the ceiling from small pests, which is important for wooden coverings.
And a small bonus - when covering the ceiling with water-based paint, part of the material is absorbed into the fresh primer, so the paint does not smell so much when drying. It is important in autumn-winter renovations in a residential building, when you cannot keep the windows open.
Is it necessary to apply a primer?
Priming the ceiling is not a mandatory procedure, but recommended. Regardless of the material the ceiling is made of, primer will never hurt.
Even if the manufacturer of the paint and varnish material has indicated in the instructions on the packaging how to use the product instead of a primer, an additional layer of primer is still useful.
When primer is not needed
The only case when it is impossible to prime the ceiling is when using wallpaper for painting. It is necessary to prime under the wallpaper itself, but not on top of it before painting. Here the soil is almost useless and leads to the soaking of the ceiling wallpaper, which causes it to peel off.
Cases when priming is allowed, but not required:
- temporary cosmetic repairs - it is permissible to leave the old layer of soil and apply a new one later, during a future major overhaul;
- finishing the ceiling in the technical and utility room.
In these situations, the quality and durability of the coating are not so important, so in order to save money, primer is sometimes abandoned.
Which primer is best to use?
The choice of primer depends on the surface material and the specific purpose of application. The table will help you make a choice.
| Type of primer | Surface | Goals and properties |
| Acrylic | Any | Universal |
| Water based | Any | Under water-based paint |
| Alkyd | Steel, fiberglass | The most durable |
| Mineral based | Concrete, expanded clay, brick | Contains cement and lime for excellent adhesion |
| Based on epoxy resin, drying oil | Wood, metal | Moisture resistant and protects against corrosion |
| Deep penetration | Any | Strengthens old surfaces |
| With quartz sand (concrete contact) | Any | "Rough" ceiling design |
Some tips for choosing a primer:
- To avoid mistakes, it is better to buy primer whose packaging indicates the desired type of surface (“primer for concrete”, etc.).
- Additional protection against fungi and pests is provided by antiseptics and biocides in the soil. Most important in private houses and apartments located on the ground floor.
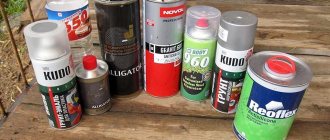
- All popular brands (Ceresit, Knauf, Axton, Starateli, Lakra, etc.) produce primer mixtures of approximately the same quality. If the composition of primers from different brands is the same, choose the cheaper one.
Selection of soil depending on the base
Water-based paint can be applied to any type of surface. In order for the coating to last as long as possible and look the way the manufacturer intended, it is necessary to prepare the surface for painting using a primer.
Bases can be divided depending on their condition and the actual surface material.
For loose, weak foundations, strengthening soils are used. For hard (strong) surfaces, you can use universal primers, which create surface films and impart adhesive properties to the base.
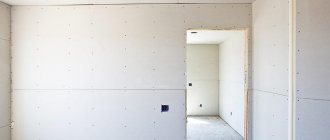
Mineral surfaces such as brick, concrete, plaster, drywall, putty are primed with water-dispersed (acrylic, latex) compounds. Metal bases are alkyd. Wooden surfaces - alkyd, acrylic, shellac.
To coat with water-based paint, you must have a perfectly flat surface. Fill cracked and weak bases with putty. And then, in this case, you can use surface primers, which will ensure adhesion, save paint, and in the case of wooden surfaces or in wet rooms, they will also perform antiseptic treatment of walls and ceilings.
Preparing the ceiling for priming
Before applying the primer layer, you need to prepare the surface:
- Remove old trim. Remaining materials must be removed from a previously painted ceiling. It is most convenient to remove wallpaper with a spatula, and paint with a wire brush.
- Clean the surface. In addition to the remnants of the previous finish, you need to remove all falling off pieces of plaster, old putty and debris. You will need a chisel and a hammer, and also a broom.
- Repair large dents. If during the previous stages significant irregularities appeared, they must be covered up. Usually they use the same mixture that was purchased for priming.
- Wait for the putty to dry completely. In the meantime, wet clean the room so that dust knocked from the ceiling does not fly into the air.
After these preparatory work, they proceed to priming.
What tools will you need?
List of tools used in priming work:
- spray;
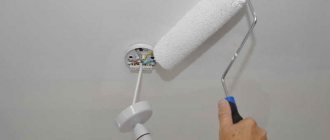
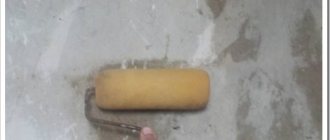
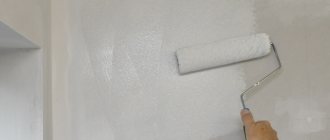
- a paint roller with a long handle (instead of a spray gun);
- a special painting bath with a ribbed surface - for the sake of convenience, pour the primer into it from a container (baths are sold at any hardware store);
- a vacuum cleaner and a broom to remove dust from the ceiling before work;
- gloves and a respirator (if you are fully confident that there is no allergy to the components of the soil, you can get by with a regular medical mask).
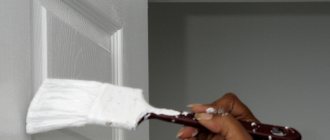
It is not recommended to apply the primer with a brush - traces of fibers are visible even through the layer of finishing material. But a paintbrush can be used in hard-to-reach places where the width of the roller does not fit.
Main tasks
It is not difficult to determine whether it is necessary to prime the walls before laying tiles, because these mixtures significantly improve the quality of adhesion of various materials to the surface. Even tiles in this case are no exception. Thanks to the primer, the base itself becomes stronger, which will allow the wall to withstand the load much more easily.
Even if some parts of the base do not adhere to each other very well, then this circumstance can be changed with the help of a primer. Do not forget about the protective capabilities of soil mixtures. As a result of their use, the walls will be reliably protected from the occurrence of fungi, mold and other pathogenic bacteria. You can achieve the best result only if you choose the right primer for a specific finishing material.
It is easy to understand whether the walls need to be primed before plastering or applying other finishing materials. Soil mixtures have a lot of positive properties, which is why experts do not advise saving on this action.
READ Do I need to putty drywall before gluing?
If you find an error, please select a piece of text and press CtrlEnter.
How to prime a ceiling
To properly prime the ceiling, you need to proceed like this:
- Cover the floor with newspapers and polyethylene. It will start dripping from the ceiling.
- Vacuum the surface and thoroughly broom. Keeping dust free will ensure the best quality primer.
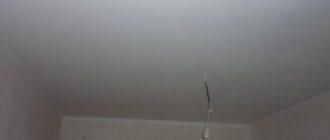
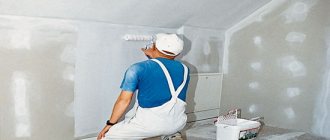
- Apply the first layer of primer with a spray bottle or roller. The layer should be uniform, dense, without visible traces of coating.
- Wait until completely dry.
- Remove everything unnecessary from the room, leaving only what the floor is covered with. It's better to clean up now so that less dust gets onto the second coat of primer.
- After drying, apply the next layer of primer in the same way as the first.
As soon as the second layer is completely dry, begin painting the ceiling.
How many times should the ceiling be primed?
2 coats of primer are best. No more is needed, because the third layer will not provide additional strength, but will increase the consumption of material.
In the utility room, where the attractiveness of the ceiling is not important, in order to save money, it makes sense to use 1 layer. In other cases - strictly 2 layers.
How long does it take for the primer to dry before painting the ceiling?
The drying time of the soil depends on the type and composition.
| Primer | How long does it take to dry? |
| Alkyd | 10-12 hours |
| Under water emulsion | 8-10 hours |
| Contains resin and drying oil | up to 24 hours |
| Deep penetration (and others) | 6-8 hours |
| Quick drying | 2-3 hours |
Accurate information about how long the purchased soil takes to dry is usually on the packaging. But you should always leave some extra time in case:
- high air humidity;
- large layer thickness (due to masking ceiling irregularities).
A quick-drying primer is only suitable for temporary repairs and technical premises. The quality of adhesion of such compounds is significantly worse than that of “full-grade” soils.
It is better to purchase a heat gun (fan heater) at a hardware store. The device noticeably speeds up drying and will be useful in future repair work.
When can I paint the ceiling after priming?
Regardless of the drying time of the selected type of primer, it is recommended to start painting no earlier than after 24 hours. They wait so long to ensure that there are definitely no wet areas left. The paint adheres to them less well than to dry ones, and the final coating looks uneven.
If you paint over a primer that has not dried completely, the coating will begin to peel off within 1-2 days.
Subtleties of application
It is best to apply the primer in two layers: the first is placed between the wall under the plaster and putty, and the second after putty. Then the applied materials will not be able to peel off or crumble. The primer forms a protective layer, allowing the two layers inside to firmly connect (adhere).
Everyone has the right to choose the soil that they consider most suitable for the walls in their home. The variety of assortment allows you to replace them one with another, it is only necessary to take into account the degree of humidity and air temperature in the room. A universal material that can treat any surface is an acrylic mixture. Before applying to the wall, the composition is diluted with water.
How to prepare walls for painting // Nathan Group
The mixture of medium penetration is applied to surfaces under wallpaper or before painting walls. Wallpaper should not be heavy.
For others, deep penetration mixtures are used. In this case, the wallpaper will last for a long period of time.
The process does not require any special skills or abilities.
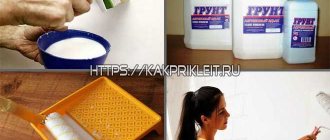
The mixed primer is poured into the container. If the mixture is dry, then it is diluted with water. If the solution is concentrated, then it is prepared taking into account the proportions indicated on the package.
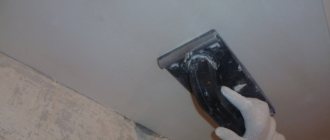
Next, the walls are coated with a brush evenly and thoroughly, especially in places where there were cracks or damage. When the walls are old, then in order to strengthen them efficiently and reliably it is necessary to apply the mixture in a thicker layer. If the base is porous, then the soil is applied until the hollows are completely filled. The solution is applied with a roller from bottom to top. Distribute the solution over the entire area of the base.
Drywall can also be processed in a similar manner. The entire surface is evenly treated with the prepared (diluted with water) mixture. Use a brush to clean the joints and areas for screws. The subsequent drying time of the solution depends on its type.
After the primer has dried, a thin layer of finishing putty is applied to any surface. This is how the walls are leveled. Reinforced tape is glued to the drywall at the joints. After drying, it is necessary to apply the final primer again.
Can I use liquid paint instead of primer?
Instead of a primer mixture, water-based paint is often used. It is diluted to a slightly more liquid state (the volume of water is about 10% of the volume of paint) and used as a regular primer.
But replacing the primer with liquid paint is not always acceptable:
- a new (in new buildings) or durable surface with a recent high-quality finish, which does not absorb moisture much, allows the use of paint instead of primer;
- the ceiling, which was previously finished more than 1-2 times, needs to be fully primed;
- if the plaster under the old coating cracks and crumbles, primer is also used.
You also need to look at the paint packaging. It should say “it is permissible to dilute the product with water.” Then the paint is suitable for priming and can be used as an alternative to primer.