5833 0 0
MesterulManole June 14, 2017Specialization: many years of experience in finishing works of residential and office premises, dachas, country cottages, etc. Hobby: cycling in all its forms
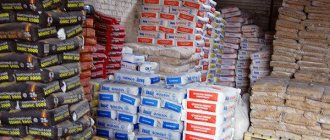
Assortment of aerosol primers and paints for garage painting work
Products made of polymer materials are not easy to paint, since most paints and varnishes on such surfaces are poorly retained. An effective solution to the problem is a plastic primer. I will tell you what primers are used to prepare plastic for painting. After reading the recommendations in this review, you can paint plastic without fear of the coating peeling off or blistering.
The difference between plastic and other materials
The main differences between plastic compared to other materials, such as metal or concrete, include the following indicators:
- Weak adhesion (adhesion) to paints and varnishes.
- Great plasticity of the material.
- Light weight.
- Anti-corrosion.
- High resistance to precipitation.
- Excellent thermal insulation properties.
- High noise reduction rate.
- Resistance to aggressive environments.
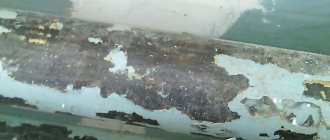
Plastic products undergo an aging process over time, and therefore applying a paint coating has a positive effect on increasing its service life.
Painting is the most interesting stage in bumper repair
At this stage, the gloss is reduced with gray Scotch Brite or R-800 sandpaper. The part is blown with air and thoroughly degreased. If necessary, accessories are pasted over. The paint is diluted and, if necessary, the spray gun is adjusted.
When painting locally, acrylic is applied to a primed surface, leaving a “transition” area on the part. With each layer, the transition area (paint breakage) must be covered with new paint. After 2-3 layers, this area is smoothed with a special transition solvent applied from another spray bottle.
When painting a metallic bumper, it is important to smoothly apply the paint on the last layer, and disperse the varnish either in the same way as acrylic, or cover the part completely with varnish. When painting a bumper with a metallic paint yourself, you need to let each layer of paint dry for about 15 minutes , and then wipe off the paint dust with an antistatic cloth. This is especially important to do before applying varnish.
It should be understood that most paints, no matter how selected by computer selectors, will distinguish a plastic part from a metal part by shade. However, not everyone can notice such a difference.
Choosing a primer for processing plastic
When choosing a primer for coating plastic products, you should pay attention to the compatibility of the paint compositions and the primer. They must be identical in composition and scope of application.
The property of plastic to change under the influence of deformations should also be taken into account. For example, when a plastic window sill breaks, creases and cracks appear on its painted surface.
Attention!
It is important to know that the primer and paint coating must be equally susceptible to possible deformations.
Types of primers
Primers for plastic are classified according to composition, method of application and degree of readiness.
Based on their composition, primer mixtures are divided into the following types:
- Acrylic mixtures. Polyacrylic primers are non-toxic, odorless liquids with high adhesive properties and are easy and quick to apply. Acrylic primer creates a durable and strong coating on plastic products.
- Alkyd compositions. The main components of these mixtures are alkyd resins, fillers and pigments. Due to its versatility, the primer is used not only for plastic materials, but also for metals. The primer has a specific odor and after application forms a stable and durable coating. When working with alkyd primers, you should pay attention to the safety of work.
- Epoxy primers. These are two-component formulations composed of low-viscosity resins, fillers and coloring pigments. Before use, the primer is mixed with epoxy hardener.
Depending on the method of application, priming mixtures for processing plastic products are divided into a filler type, used to increase adhesion and fill the microrelief, as well as finishing primers, which are applied before painting.
Protective primer for plastic
Protective primers are complex mixtures consisting of 90% dusty powders of zinc, magnesium, lead, aluminum and binding components - epoxy resin (10%). The primer is applied to the plastic elements and, like a shell, protects the structure from an aggressive environment and possible scratches. This product is often applied to plastic parts of cars before painting. If the integrity of the protective primer layer is damaged, zinc oxides create a reliable barrier in the form of a thin film and prevent oxidation of the metal base of the metal base of the plastic.
Protective primers for plastic products are represented by EP-57 suspensions and other similar mixtures.
Adhesive primer for plastic
To improve the adhesion of plastic products with painting compositions, use a one-component quick-drying primer. Construction markets offer a wide range of such soils with different technical characteristics. But despite the different brands of brands, adhesive primers have much in common: they all belong to professional products intended for subsequent painting of polypropylene, as well as plastic products, with acrylic and base enamels.
Application of an adhesive primer requires careful preparation of the surface: it is cleaned of contaminants and degreased, matted with an abrasive cloth, degreased again, and only after complete drying can the priming process begin. The primer is applied in one or two layers at intervals of 5 to 10 minutes.
Alkyd primer for plastic
A special alkyd primer is used for application to various plastic products. An example would be:
- Plastic window sills.
- Window frames.
- Elements of the drainage system.
- Children's outdoor playgrounds.
- Rest benches and lanterns.
Alkyd primer is a mixture of special purpose modified alkyd resins, pigments, fillers, inhibitors, special additives and solvent. Such a complex composition belongs to the class of extra-adhesive special primers that can prevent the appearance of coating cracks and possible shedding of the applied paint coating.
Alkyd primer not only increases the adhesion of the plastic surface and paintwork, but also hides small defects in the form of small scratches, and also protects parts from the negative effects of paint.
Acrylic primer for plastic
Acrylic primer differs from other primers in its unique ability to increase the adhesion of any type of plastic product. Its distinctive properties:
- Formation of a special protective film on the surface, which creates a reliable barrier to chemical and mechanical damage.
- The product is ideal for coating products that are used outdoors and are constantly exposed to direct exposure to the atmosphere.
- The soil is not afraid of temperature changes and even in conditions of negative temperatures in winter, such a negative effect as cracking and peeling of the painted surface does not appear.
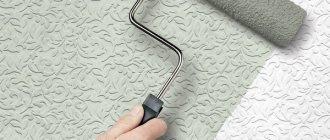
A good example of an acrylic primer is enamel primer in aerosol packaging from the Kudo brand, which is sold completely ready for use and has a wide color palette.
Acrylic primer can quickly cover a large area, and aerosol packaging contributes to economical and low material consumption per 1 m2.
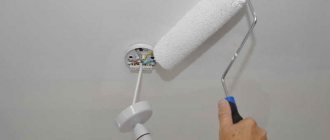
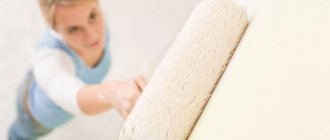
How to apply primer to plastic
Before applying primer to a plastic element, it is necessary to perform a series of preparatory work to clean and degrease the surface. It is recommended to pre-treat the glossy base with sanding paper to a light matte finish.
Step-by-step instructions for performing the work:
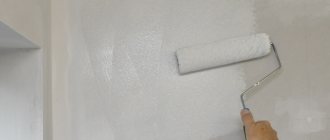
- Step one. Using a quality natural fiber brush or sprayer, apply the primer in an even, thin layer. For complete coverage, it is enough to apply one coating layer.
- Step two. The approximate drying time for the first layer is 1 hour. After making sure that the coating is completely dry, you can begin to apply 2 layers.
- Step three. The surface painted twice must be leveled and matted.
- Step four. The product must be thoroughly dried. It is unacceptable to paint the surface using a wet primer.
- Step five. When the product is completely dry, wipe it with a cloth soaked in solvent.
Upon completion of all steps, you can proceed directly to painting the product.
A prerequisite for high-quality priming is to carry out work in the temperature range from +5 to +25 degrees, and the relative humidity should not exceed 80%.
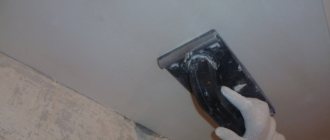
Putty - bringing it to perfection
To level plastic parts, use only plastic putty. For severe unevenness and for strengthening, you can resort to putty with fiberglass. For minor cracks, use a medium-grain putty. The best effect is achieved if the putty and hardener are properly diluted.
The proportion is written on the can. Approximately 1:18 . During puttying, you can use both rubber spatulas and metal ones. It is necessary to putty the part until the desired result is achieved.
The putty can be treated with paint blocks and sandpaper with grit from P-100 to P-400 . The smoother the part, the better the irregularities are felt. After the bumper is removed, you can begin priming.
How to clean primer from plastic
During repair work, all possible measures are taken to protect plastic items from paint and varnish compositions: plastic window sills. countertops. doors and windows are covered with a thin PVC film, sheets of old newspapers or cardboard. But what if the primer ends up on the plastic, because cleaning it is a big problem?
The following methods are possible:
- Using home remedies, such as vinegar essence. The effectiveness of this product is very high and makes it possible to quickly clean plastic from primer stains. But we must remember that vinegar essence emits harmful fumes and therefore you should use protective gloves and a respirator. The room must be well ventilated. Apply the product to a sponge or rag and thoroughly clean the soiled plastic.
- You can try to clean dried stains with the same type of primer, moisten the stains generously and quickly wipe dry.
- The next option is to cover the primer stains with a wet rag and leave for two to three hours. The soil will swell and can be easily cleaned.
- The plastic is cleaned with an abrasive fine-grained sponge with preliminary wetting with water.
- Using a cleaner for polyurethane foam or industrial alcohol, gasoline, or solvent.
- Primer stains on window sills and windows can be easily removed with the Mister Muscle liquid product.
- Primer marks can be removed with plenty of baking soda.
In some cases, it is advisable to use a steam cleaner.
In conclusion of a brief overview trip into the World of primers for plastic, I would like to note the importance of the priming process. With the help of a properly selected and applied primer, you can create a high-quality paint coating for plastic products.
Soldering a burst bumper
To remove or not to remove the bumper? It depends on the damage and ease of use. Better to take it off.
Before soldering, it is better to wash the part in order to immediately see all the defects and draw up an effective work plan. If the bumper is deformed in such a way that the place of the crack “pulls” and is inconvenient to solder, then you should warm up this place with a technical hair dryer, align it as best as possible along the seam and cool it with cold water. The plastic will take the desired shape after cooling.
Soldering plastic with your own hands is easy, the main thing is to choose a powerful soldering iron (preferably 100-150 watt ). After preliminary soldering the seam in two or three places, it is necessary to solder the reinforcing mesh. with a cross section of 1-2 millimeters is perfect . If the thickness of the plastic allows, then it is better to apply a mesh on both sides. Without a reinforcing mesh, the plastic may burst during bumper installation. The bumper is subject to strong vibrations while the car is driving, so it should be reinforced with high quality.
When the mesh is heated with a soldering iron, it is easily recessed into the plastic. For ease of work, you can still press on the mesh with a flat screwdriver.
After soldering, it is necessary to remove all burrs in the seam area. To do this, you can use construction blades or a sharp knife. Protruding wires can also be cut off if they are not blocked by putty. You can also clean the seam using a sander, but you should be careful not to clean off the entire mesh. Now the seam is ready to be smoothed with putty.