Today, many people want to see the decoration of their home unusual, different from the usual furnishings of average apartments. Everyone wants to see expensive curtains, handmade carpets, and luxurious antique furniture around them. But of course, not everyone can afford such furnishings - pieces of furniture that show signs of aging are very expensive and are often sold only at foreign auctions. But if you still really want to make your apartment special, the solution may be artificially aged furniture, fashionable in recent years, and do it yourself.
Where to use aged furniture
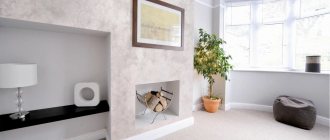
- Aged furniture can become an element of interior decor in a modern style - then aged furniture plays in contrast with ultra-modern and technologically advanced interior elements, and only 1 piece of furniture should be shabby.
- As furniture for interiors in country or retro style. In this case, the effect of wear may be present on all furniture indoors.
Aged items can successfully complement any interior, especially in country style
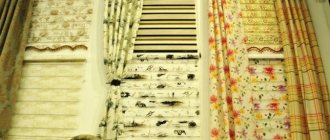
- The aging effect can be useful when decorating not only furniture, but also other interior elements: for example, photo or painting frames, or window frames, stair railings.
- Having mastered the techniques of aging furniture, you can use this technique to age not only wood products: papier-mâché boxes, ceramic dishes, and metal interior items. Sometimes the walls in the house are aged to obtain an interesting texture.
We need to prepare for old age
Start the furniture aging procedure with an audit. Wooden parts may have cracks and mechanical damage that are incompatible with operation, fasteners may have traces of rust.
Before you start aging furniture on your own, it is necessary to thoroughly prepare all wooden surfaces that will be processed.
You need to get rid of old cracked paint or varnish, as well as dismantle fittings and other interfering elements.
- Disassemble and thoroughly inspect the furniture.
- Use sandpaper or a hand sander to remove any traces of the old coating.
- Wash all wood and plywood parts with clean water.
- Dry for 1-2 days.
- If necessary, retouch minor scratches with furniture wax matched to the color of the furniture.
- Replace old handles, locks and door hinges if necessary.
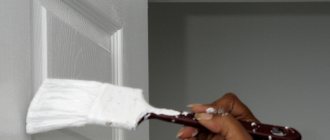
To make your furniture look shabby and worn, you can use the painting technique.
IMPORTANT! New elements of fittings also need to be aged - after all, they can give away your trick with furniture.
After assembly, you can begin decorative aging.
The combination of a rich base and a light second layer will create the effect of faded paint.
Additional techniques and techniques
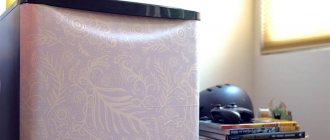
Preparing the surface for decoupage, choosing an image that suits the style and sticking a napkin on it is only half the battle. The product can be modified in several other ways.
Picturesque ornaments, pastoral scenes, and, of course, natural motifs: flowers, birds, landscapes are relevant here. If you have never tried painting, then, of course, it is first recommended to learn the basic techniques and hone them on smaller and simpler objects.
2. Aging effect
Provence style decor is characterized by artificial aging of furniture and interior items. You can make a thing several decades older using various materials and methods.
(By the way, we have a separate large article on our website dedicated to a variety of aging techniques: “Artificial aging of objects. Techniques and methods.” We recommend that you read it!)
We will mention only the most popular methods of aging.
Old things invariably get dirty over time: something is spilled or dripped on them. Splashes are drops of paint specifically applied to an item to give it an antique appearance.
Another simple way to age. It consists of the following: a little paint is picked up on a synthetic brush, the excess is removed with a napkin, then with light movements, barely touching the surface, the object to be decorated is dirty with an almost dry brush.
Craquelure is a network of cracks in a paint layer or varnish layer that appears on products due to age and exposure to the environment. To achieve the crackle effect, it is not at all necessary to wait fifty years; many materials are now being produced that help speed up or simulate such cracks.
To complement Provence-style decoupage with beautiful cracks, we recommend that you familiarize yourself with the master class: “Crackelure techniques. One-step, two-step and others.”
3. Relief patterns and patination
You can complement decoupage in the Provence style with voluminous materials, for example, apply a pattern through a stencil, or make a drawing with an outline. However, for greater realism in the aging effect, one must understand that over time, dust accumulates in the gaps and bends of the relief, and a patina forms or simply darkens the material.
A quick way to age furniture
There are several fastest ways to “aging” furniture. The first one has already been described - this is the dry brush method.
It is important to follow the correct drying technology.
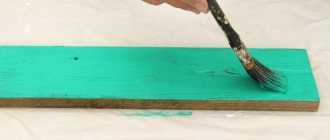
- The second is rinsing. It will be done quickly and easily. Used primarily for wooden furniture. You will need several tools: water, a brush, a rag and paint of a suitable shade. The wooden surface is painted and, without waiting for complete drying, the whole thing is carefully wiped with a rag. Creates a light rinsing and rubbing effect.
- The third is firing. You will need a gas burner for quick effect. In addition, a metal brush is used. The surface is first treated with a metal brush, then fired. The process should be done quickly to leave light marks rather than heavy burning. The tree should not burn, but just scorch a little.
Use special products for aging furniture.
Very important! The procedure with fire is carried out only with special protective gloves and a mask. Otherwise, you may injure yourself.
Brushing
Brushing is a labor-intensive and complex method of “aging” furniture. Used in combination with staining, painting and varnishing.
For work, prepare a grinder, chisels, sandpaper, and a set of hard metal brushes.
- Use a wire brush to comb out the soft wood fibers, moisten them with water to avoid dust and dry.
- Remove debris and crumbs.
- Use a chisel or drill to leave traces of wormholes in some places.
- Polish with a sisal roller.
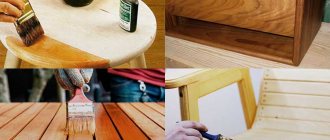
- Apply wax or oil.
A special composition, which includes varnish and powdered pigment, will create gray or golden shades, giving the product an “aged” darkened appearance. A thick layer of stain and immediate removal of excess with a sponge will help to achieve a contrasting pattern. A sander and fine-grained emery will add abrasions.
More: Lifehacks for decorating a studio apartment
The method is suitable for wood where growth rings are strongly pronounced: pine and oak, larch, ash and walnut.
Furniture made from teak, maple, beech, birch, alder and fruit trees is not suitable.
Aging "Crackle"
This type of aging uses a craquelure varnish, which causes the paint to crack. The underlying color shows through the cracks, creating an interesting and slightly variegated effect. Since this varnish only works with fresh paint, the object will also have to be painted. We will soon tell you how to do everything right in a separate article. Do not miss! The technique works on any surface, but looks best on wood.
Drawing in Provence style
Painting furniture is a rather difficult task that requires patience, so many craftsmen prefer to decorate surfaces using the decoupage method. In this case, only small parts have to be completed manually. In addition, the task can be significantly easier if you use special stencils.
Our master class is devoted to a method that is popular among novice artists who want to paint with paints, but do not have sufficient skills to do so. For work, it is better to use acrylic paints, which are excellent for wood and create a waterproof surface. These paints are sold in sets and individual tubes, so you can buy only the colors you need in packages of the appropriate size.
Painting is best done with brushes made of synthetic materials or with mixed bristles. Currently, there are special acrylic brushes on the market. Beginners are not recommended to use natural brushes, as they can stick together and become unusable.
Decorating with acrylic paints can be done on the fronts and side walls of cabinets, chests of drawers, sideboards, benches, tables and cabinets. It is recommended to start with small items, such as stools or drawers. The procedure includes the following steps:
- Priming the wooden surface and then painting it in two layers. The bottom layer of paint should be several tones darker than the top.
- Surface painting according to a specially prepared paper sketch or using a stencil. In the second case, the decor may look less vibrant, but the use of stencils allows you to avoid mistakes when applying the design. The finished image can be made a little blurry by blowing it with a hair dryer.
- Coat the product with oil varnish, and after 3.5 hours - with water-soluble varnish. You can make the decor even more colorful if you apply golden paint to the finished drawing with a thin brush (but in this case it is important not to overdo it).
After the finishing coat has dried, the piece of furniture can be equipped with forged handles and other elements of stylized fittings. Now the furniture is ready for use, and the master class is finished.
The effect of wear and fading paint on furniture
Gives a cabinet or table the appearance of a battered but still strong veteran.
Antique furniture can be quite easily created on your own at home.
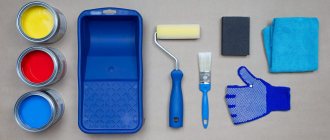
You will need:
- Dark acrylic paint or stain for the first layer;
- The same paint in a light shade;
- Furniture wax or paraffin candle.
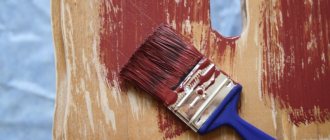
As a base, we choose any shade of the palette you like, the main thing is that it is saturated.
Sand the surface thoroughly with sandpaper. Use special sticky wipes to remove any fine dust that has formed. Apply the dark paint evenly with a wide roller. Wait for it to dry. Using sandpaper up to 200 grit, lightly sand areas where abrasions are possible - edges and corners of the tabletop, doors and drawer fronts, wooden handles. Apply wax to them and rub well. Paint the furniture with a light paint.
Sand the areas where the paint was wiped off again with finer sandpaper.
FOR YOUR INFORMATION! To secure, you can coat these areas with clear furniture varnish.
How to distinguish an original from a fake
Unscrupulous sellers are trying to sell a modern copy under the guise of an antique item. You can avoid this by remembering the signs of antique furniture:
- Unevenness. The drying of wood makes the dimensions of furniture made from it slightly different from the same measurements on the opposite side;
- No matter how hard the restorers try, cracks, chips and abrasions will be visible upon close inspection. An ordinary magnifying glass will help you find them;
- Uneven surface color. This is due to sunlight;
- Screws with a flat head have long ceased to be used; this sign can be considered reliable;
- For antique furniture, sellers must provide supporting certificates.
Every person wants to place elements of past eras with their own history in their home. They are chosen in specialized stores or at auctions. A restoration specialist will help you verify the originality of your purchase. Not every interior requires the presence of original sets; sometimes you can get by with just high-quality copies.
Before getting rid of old furniture and taking it to the country, you should ask about the history of each element. They may be valuable. If the owners want to update the interior, then decorating old furniture will be much more interesting than purchasing new ones. You can find ideas for changing the appearance on the Internet and decide for yourself which ones are suitable for working with antique furniture. When planning interior design, paper construction is used. This measure will help you choose options for arranging furniture, putting together a picture of the future room and assessing the overall appearance.
A method that involves the use of paint
Let's say you can use stain. In this case, you should wet the sponge in water and use it to wash off this very stain in certain places. By the way, you should remember that you should not wash off the stain on the edges, cracks, protrusions and bends of the product. If after this you cannot achieve the desired result, you can simply sand the surface and then use stain. Only in the latter case should the stain be on a different base, for example, on Naphtha or White Spirit.
Using paint when aging furniture
Experts also recommend that after the above procedure, be sure to wait until the stain is completely dry and all the moisture has evaporated.
After all the procedures described above, you need to take a brush and use it to fill the cracks and crevices. Alkaline soil is quite suitable for this. In this case, there are also some tips, for example, it is best to use primer of different colors, in which case the resulting color will be even more saturated and very deep.
Next comes the turn of a sponge made of steel and antique wax. In this case, the master’s movements should be directed along the fibers. If you want to make the surface matte, you can simply wipe it with a soft cloth.
If you want to make the surface matte, you can simply wipe it with a soft cloth.
Based on all this, it becomes clear that in order to age furniture with your own hands, you need to adhere to precise technology.
Aging furniture for shabby chic style
Stock up:
- light wax sticks;
- white acrylic paint;
- synthetic flute brush;
- sandpaper or abrasive stone.
Step-by-step instruction:
1). Wash and wipe the item using alcohol. Prime with PVA glue.
2). Rub the end part in some places with wax sticks.
3). Using a flat brush or roller, paint the table white, gradually in 3 layers.
4). Decorate the dried surface with paintings.
5). Partially remove the paint layer, creating scuff marks.
How to get furniture with an aging effect
To represent the holes that termites typically make, use a marker to draw sketches at the end or edge of the plank. Then, using a drill and a 3mm drill bit, make the holes, slightly varying the drilling angle for a more natural look. Lightly sand the holes you made so that there is no burr left on their edges.
Use the edge or base of a heavy household item, such as a flower pot or cooking pan, to create indentations or friction marks on a wooden surface. Use different means at hand so that the damage does not look homogeneous and monotonous. Accidental scratches can be produced by sliding keys or tools such as pliers or a screwdriver across the wood.
A wet mug mark can be recreated by spraying black paint on the neck of a can and making an imprint on wood. True, it would be better to practice this operation on cutting wood before using it on furniture. Another method for imitating signs of age on furniture is to use a toothbrush dipped in ink and then make smudges to create the appearance of an old burn from an unextinguished cigarette left on the countertop.
Final work
Having treated the furniture using the method you like, all that remains is to protect the surfaces from possible damage. This will significantly extend the service life of artificially aged furniture, and not provoke accelerated natural aging.
For protection, 2 materials are used:
- Wax. A special wax designed for wood. Dark or clear wax is usually offered. Apply with a foam sponge or lint-free rag;
- Varnish. There are quite a lot of varnishes. But the best for such tasks is considered to be matte on an acrylic basis.
An important point when aging is the replacement of fittings and the use of decorative elements. The choice is huge now, so this definitely shouldn’t be a problem.
Have you ever encountered anything similar? Were you able to achieve the desired effect and what advice can you give to our readers from personal experience?
Subscribe, leave comments, ask relevant questions and tell your friends about our project!
Work progress in decoupage
To decoupage furniture in the Provence style, it is important to understand and be imbued with the spirit and characteristics of Provence, since the method of decoupage itself will not differ in any way from decoupage in other styles, and the process of work will be the same:
- Preparing the surface for work. Sanding, priming.
- Coloring.
- Selecting and gluing an image.
- Fixing the image with varnish.
- The use of additional decorative methods: spraying, two-step craquelure, patination of relief elements, etc.
- Final multi-layer varnishing.
Decoupage in Provence style: general features
- vegetable and floral motifs, some of the most popular are the themes of wine, olives and, especially, lavender;
- whitewashed interior items;
- artificial aging;
- abrasions and scraped paint on the surface of furniture;
- calm palette (delicate shades of blue, olive, white, wheat, beige, as well as shades of lilac, violet, pink);
- author's painting.
Separately, it is worth mentioning the decoration of interior items and accessories. Provence is characterized by things woven from wicker, forged figurines, beautiful openwork pillowcases, woven lace, and the texture of natural wood.