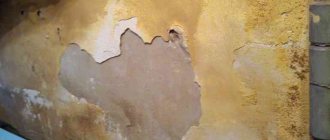
The rough finishing of the walls sooner or later begins to collapse and become deformed. As soon as this process has been noticed, it is imperative to take the necessary measures and measures. Please note that a complete replacement of the plaster layer is not always required. This process is very expensive and labor-intensive, so it is possible to partially repair it, thereby refreshing its appearance. It is very important to consider the type of composition and the nature of the damage. Let's look at how to quickly refresh the appearance of plaster, what is required for this, the sequence of processes, and their features.
Updating old walls
The quality and reliability of the created work depends entirely on the material chosen for the work. It is imperative to choose the type of mortar used during rough finishing earlier. That is, if cement plaster was used, then it should be used in order to “revive” the appearance of the wall. Repairing an old surface may be required in different cases. Most often this occurs due to the formation of cracks. They can be created for several reasons. The first is a poorly cleaned surface during initial work. Dust and dirt could remain under the plaster. The second is the wrong type of solution. For example, gypsum-based plaster is not suitable for external work, since high levels of humidity spoil the integrity of this material.
How to update old decorative plaster with paint
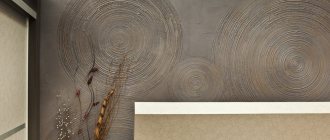
Today, decorative plaster is very popular in interior design. However, over time, spots, gray plaque or scratches appear on it, which is a signal for the need for cosmetic repairs or a color change. In this article we will look at one of the ways to update plaster, which is painting the plaster.
When choosing paint, you should take into account the texture features where it is located. For exterior work, silicone, silicate or latex paints should be used, and for interior work, acrylic, water-based, alkyd and oil paints should be used. You also need to take into account the characteristics of the room: high humidity, temperature changes and immunity to ultraviolet rays.
If the texture of the applied plaster is very embossed, it is recommended to apply the paint with a spray gun. Otherwise, either a roller or a brush will do.
Paint application process
1. At the preparatory stage, you should clean the surface with a stiff brush, repair chips and peeling of the plaster, degrease and dust the surface with special solutions.
2. Applying a primer to improve adhesion.
3. Applying paint. Plaster with a smooth surface should be coated with one coat of paint. Paint is applied to the relief surface in two or three layers.
When painting in one color, the prepared composition is applied in an even layer to the wall surface. The grooves and reliefs are carefully painted over with a brush, roller or spray gun. After complete drying, a fixing varnish is applied.
If you want to get the maximum transformation here, we recommend using a two-color color on the relief texture. To do this, you should select the main color of the texture and an additional color for the protrusions. After the first coat of paint has dried, apply a second coat using a sponge.
At the same time, it is recommended to apply paint to the upper protrusions only with a roller, no spray gun!
After the second layer has dried, we fix the color with varnish. The inner part of the relief with this color becomes very expressive and attractive.
In some cases, it is more advisable not to paint the plastered surface, but to apply decorative plaster with an already selected shade. To do this, pigment dye is added directly to the plaster mixture.
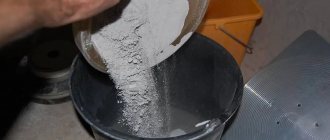
Tinting must be done on the entire composition at once - otherwise it will be difficult to select the same shade for re-preparing the composition. For cement plaster, you can use any concrete dye, and for a polymer mixture it is recommended to use an acrylic-based color.
When purchasing a dye for plaster, you should carefully check the packaging labeling, which indicates the type of work and what type of plaster it is applied to.
Regardless of the choice of paint and dye, we advise you to carefully study the instructions for use in order to avoid all kinds of mistakes and get the most uniform, even shade of the wall.
Restoration of the coating
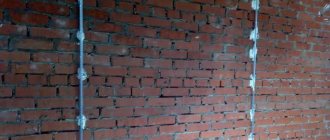
Sealing cracks inside the wall must be done with the same solution that was used before. First you need to clean the cracks from the previous finishing material for finishing and rough finishing and place a new, prepared composition. Please note that modern construction experts recommend using reinforced tape. It allows you to create a high level of adhesion and affects the quality of the created coating. If you decide to restore the plaster and want to “revive” it, then you should check all the walls for the quality of the layers. To do this, you need to walk over the coating with a wooden stick, that is, tap it. If you hear a dull sound, then replacement is required. It is recommended to clean the old layer in different ways, it all depends on the basis of the composition. A very simple way is to use copper sulfate. But this option is not always suitable.
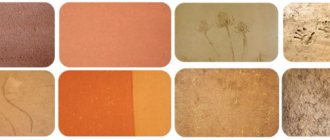
What to do if the color of the decorative plaster is not what it should be?
Today there are many types of decorative plaster, which differ in quality, method of application, texture and color. The main thing is to be able to apply it correctly.
During repairs, the finishing material may not turn out to be the color it should be. What to do in such cases? Everything can be fixed; in this article we will talk about how to choose the right shade and apply a decorative coating to the walls. And also how to lighten or darken the color of walls and ceilings.
Why you should not repaint decorative plaster
Let's look at the reasons why this happens. Here are the main ones:
- Incorrectly selected brush or roller for painting.
- Change the type of paint.
- Violation of texture and structure.
If the owner does the repairs himself, most likely he chose the wrong brush for painting. If the brush is too narrow, the paint will not apply evenly. Rollers with short bristles can make a pattern too thick and rough, ruin an existing one, or simply hide it. The grooves in the plaster remain the same color, and the design loses its beauty. When choosing a radically different paint, you need to pay attention to the combination of these two colors, since sudden changes in color will definitely play a cruel joke and the walls will turn out gray-brown-crimson, unpleasant and unkempt in appearance.
Painting walls: choosing tools
All necessary equipment should be prepared first. If everything is at hand, the painting process will be much faster. To paint plaster you may need:
- Roller. It has different widths, pile lengths and materials. The size of the handle can be adjusted.
- Brushes. An important element that allows you to paint both the entire surface and individual elements and hard-to-reach places.
- Spray gun. Allows you to save costs and paint the plaster in one color as quickly as possible.
Different painting methods require different tools. It is also important to consider the type of surface and its structure. In addition, be sure to have tools for grouting and leveling the surface on hand. If, while carrying out the work , defects are noticeable, they can be quickly eliminated.
Additional compositions for processing decorative plaster
You can make the appearance of plaster more impressive and create an additional protective layer using wax, varnish and various glazes.
Wax creates a protective, waterproof coating that gives the surface a shine and bright color. Suitable for any type of plaster, looks especially impressive on Venetian. Both transparent and colored formulations are available for sale. Before application, dust must be thoroughly removed from the base. Plaster coating is done in one go without stopping. The setting time of the wax is about 4 hours; during this period, the resulting flaws can still be corrected.
Varnish is a single-layer finishing coat. Creates a durable water-repellent film on the surface that strengthens the plaster, protects it from damage and, most importantly, makes the appearance of the finish more attractive. Acrylic varnishes are used for indoor work, and organic solvents for outdoor work.
Before work, mix the composition thoroughly, add glitter or coloring pigment if necessary. The coating is done in one layer using a foam roller. Approximate consumption – 50-80 g/m².
Glaze is a glazing translucent composition for the final coating of paint, allowing for smooth color transitions. It is used for application on flat and textured surfaces both indoors and outdoors. Work can be carried out at temperatures below +10°C. The coating is applied with a sponge or a special mitten using strokes.
Advantages of decorative plaster
The use of facing composition is common due to its:
- Versatility, allowing you to process walls from any popular materials;
- Durability;
- Ease of application;
- Strength and durability;
- Resistant to moisture, sunlight and damage;
- High level of sound and heat insulation.
High-quality facing material contains natural ingredients that do not emit toxins, and therefore its use is safe and recommended in any room, including children's rooms.
Before applying plaster, you need to make sure that the wall surface is degreased and cleaned, and also treated with a primer. In this case, good adhesion of materials and durability of the coating can be guaranteed.
New publications are published daily on our Yandex.Zen channel
Source
How to paint decorative plaster with your own hands
Painting decorative plaster on walls with your own hands should be carried out strictly according to the algorithm. Only in this case is it possible to obtain an ideal result.
Surface preparation
Preparatory procedures are very important before painting, since paints and varnishes must be applied to plaster that is perfectly free of dust and debris. Since the plastered surface is most often embossed, it will be rational to clean it using a special vacuum cleaner. It will effectively remove dirt from the depressions. The second important preparatory procedure is priming.
Using a primer allows you to:
- reduce paint consumption;
- strengthen the surface of the plaster;
- provide improved adhesion of materials when painting.
When the primer layer has dried, you can begin the main process - painting.
Painting features
The application process itself will depend on the technology chosen. Regardless of the method of painting plaster, it is important that all parts are carefully painted, both raised and recessed.
For basic painting, it is better to use a roller; you may also need additional sponges and brushes. To paint a large surface area, it is better to purchase a paint sprayer.
When painting plaster, you need to make sure that the lint from the roller or brush does not remain on the surface. This may degrade the appearance. If the work is carried out outdoors, then you need to choose the right time and weather conditions so that particles of dust, debris, and pollen do not stick to the facade before the paint dries.