Miscellaneous
The decorative covering of a door deteriorates over time and loses its attractiveness. If the old paint is cracked and peeling in places, it is recommended to remove the old coating before applying a new coat. But it also happens that the surface has only lost its shine, has become dull, or spots have appeared on it, but the layer itself lies smoothly and has retained its integrity. In such cases, there is no point in carrying out work to remove the old coating. It will not be possible to qualitatively remove the old layer of paint that has retained its strength. It is difficult to remove. As a result, you can only damage the doors or get a surface whose quality is much lower than the original version.
Repairing small dents and large holes
If the doors are very old or have been subjected to impacts that have left holes and dents on the surface, then they need to be restored. The damage is filled with special wax or putty, which subsequently hardens. To work you need:
- hard furniture wax, matched to match the color;
- soft wax;
- retouching felt-tip pen;
- soldering iron or special gas wax melter;
- lint-free microfiber cloth;
- fixing varnish.
The order of restoration work:
- Trim the edges of the damage along the contour, trimming them.
- Fill the dent with hard wax, melt it with a soldering iron and pour it into the recess. Wait until it hardens, remove excess with a knife to level the wax with the surface.
- Retouch the color with soft wax and a thin felt-tip pen.
- Secure the result with varnish.
It is not necessary to retouch the defect to match the color of the surface if the restored area is planned to be sealed or painted in the future.
If the hole is of impressive size, then wood putty is used instead of hard wax.
For through holes in a hollow door leaf, the restoration process is as follows:
- Trim the edges of the pothole, giving the edge a smooth shape.
- Fill the hole with soft paper around the edges - a kind of foam limiter, which is filled in at the next stage.
- Blow polyurethane foam into the hole.
- After waiting for hardening, cut off the excess.
- Putty the surface of the foam and the door, leveling it with a spatula.
- Clean the surface with sandpaper.
- Primed, painted.
Solid painting
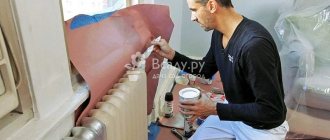
In most cases, repairing a wood product means painting it. This is absolutely justified, because... Applying a new layer of paint and varnish material to a carefully prepared surface allows not only to give the product a new look, but also reliably protects the solid material itself from premature aging and the harmful effects of the environment. Before you start choosing a color for painting solid wood, you need to decide on the planned appearance of the solid wood.
It is very important to decide whether you want the solid wood to retain its natural pattern after painting, or whether you would prefer to completely hide it under a layer of opaque paint. The choice of paint color depends only on your taste preferences and color schemes in the architecture of your home or the interior of your apartment
To paint solid pine or solid oak, or paint solid wood from other “noble” woods, it is recommended to give preference to the first (transparent) painting method. In this case, you will need transparent and tinted varnishes, various oil impregnations or stains. The use of the listed materials will give the surface of the array new shades, while preserving the original wood pattern, which looks very advantageous and harmoniously combines with almost any interior.
In the second case, i.e. In order to completely hide the natural grain of wood, opaque enamels and various coloring compositions based on Alkyds, polyurethane, acrylic, and polyvinyl chloride should be used. This approach also has the right to life, because allows the product to more accurately and harmoniously integrate into the architectural or interior ensemble of your home.
Do-it-yourself painting of an array consists of the following operations:
- Surface preparation;
- Primer;
- Applying an underlying or initial layer;
- Applying the finishing layer.
Surface preparation involves mechanically sanding the surface using sandpaper. If the product was previously painted, this will significantly complicate the preparation process, because... Removing old paint can take a long time. To remove a layer of old paint, in addition to coarse sandpaper, you can use a metal brush with short and not very stiff bristles. After removing the old paint, the surface must be treated with fine sandpaper or other grinding materials. The final goal of the operation is a smooth and even surface. Upon completion of mechanical treatment of the surface, wood dust must be completely removed from it. It is strictly not recommended to use wet rags for this purpose - under its influence, dust may stick to the surface or clog into the pores of the material, which will deteriorate the quality of the surface.
Before painting, the surface must be primed. The choice of primer depends on what kind of paint will be used to paint the solid wood. The primer can be applied with a brush or roller. The applied primer will hide minor surface defects and become a reliable base for paint. Thanks to the primer, the adhesiveness of the surface increases significantly. Moreover, while maintaining the natural pattern, the primer can provide additional, “rich” shades to the appearance of the array.
After the primer has dried, you can apply the initial coat. The tradition of applying paint in two layers is explained by the fact that the first, thin layer of paint serves not only as an additional primer and provides adhesiveness to the main layer, but also allows you to see the paint, in all its glory, directly on the surface. The initial layer is applied with anything: a roller, a brush or a spray.
The main layer is applied after the initial layer has completely dried and is the final stage of our work. To apply it you will need a wide brush or roller. For painting ends and other narrow areas, it is better to use a narrow brush. Movements when applying paint should be made in one direction. You can use a spray bottle to paint solid wood, but this method of applying paint to wood usually has a bad effect on the design.
Dyeing technology
If you are painting a new canvas, you should protect it from swelling. First lay it on a flat surface and sand it with sandpaper or a sander. Then the panel is primed, the recesses and smooth areas are processed. After the surface has dried, secondary treatment is carried out.
Rice. 8. Directions for painting the canvas
An old house door needs to be painted with high quality so that there are no stains or smudges on its surface. It is unlikely that you need to buy a spray bottle to paint one or two canvases, so you can use a paneled brush or roller.
After you have chosen what you can use to paint a wooden door, you should familiarize yourself with some of the nuances of the work:
- fluff the brush, removing poorly fixed hairs;
- You need to paint a panel door correctly in 3 stages, using a roller, from the upper left corner you need to move to the right, covering the entire canvas. After drying, the door must be processed in the longitudinal direction. Then you need to paint the canvas from the upper right corner ;
- When processing paneled fabric, you need to use a brush and treat the surface carefully, avoiding excess coating.
Rice. 9. Sequence of web processing
Painting with alkyd enamel
To coat doors with alkyd enamel, the following steps should be followed:
- remove the panel from the hinges so that paint drips do not appear on the surface. Then use a spatula and sandpaper to remove abrasions and the old layer, thoroughly rinse the surface and inspect for defects. Chips and cracks are puttied, the surface is dried and sanded. At the last stage, priming is carried out;
- the finished canvas lies on a horizontal surface of the floor, table or workbench, covered with polyethylene. The existing glass is sealed with tape. For a paneled door, first paint the panels with a brush, and then the protrusions. Subsequently, the entire panel is painted with a roller. With a two-layer application of alkyd enamel, the result will be a consumption of 40-80 g/m2;
- Additionally, you can tint the wenge fabric by impregnating it with a special compound. This paint is based on natural oils. After a layer of paint has been applied, you need to run it over it with a rubber spatula or sponge about 10 times;
- you can take liquid soap with paint. First, the panel is covered with paint and liquid soap. You need to apply another layer of coating to the soap.
Stain treatment
When choosing a stain, no primer is used. The product penetrates into the deep layers of pine or oak wood, coloring its fibers and increasing its protective properties. There are several ways to apply the composition: rubbing, spraying, simple application and staining with a brush. Usually a simple application is used.
Rice. 11. Processing the canvas with stain
Since the stain will adhere better to a damp canvas, it needs to be slightly moistened. First, coloring is carried out along the fibers, and then across them. We perform the next layer in the direction of the fibers. We process the panel with jambs from below so as not to disturb the design of the structure.
After the water-based stain has been applied, the surface should be sanded using sandpaper (due to raised fibers), remove dust and apply the next layer of coating. If an alcohol stain is used, the fibers will not lift and no sanding is required. But aqueous formulations do not have an unpleasant odor or toxicity.
Oil or wax impregnations
There are nuances to processing canvas with oil impregnation. First, the Pinotex composition is mixed well. If applied incorrectly, darkened areas and streaks may appear. For work, use a brush, sprayer, roller or foam sponge. Depending on the porosity of the material, the number of layers will be calculated.
Rice. 12. Application of wax impregnation
First, take a little composition, distributing it evenly across the width of the panel. Then the impregnation is rolled out with a roller or rubbed with a brush without sagging. Drying time is 8-12 hours. No later than a day later, another layer is applied.
Wood imitation
To ensure that you paint interior wood doors with your own hands correctly, follow the instructions:
- apply light paint (beige, white, gray or yellow) to the building material;
- treat the dried surface with liquid soap;
- cover with dark paint, remove liquid soap.
The wood structure can be created on veneered material by treating the fibers with a special brush (an antique effect is obtained). Then you need to apply one or more paint coatings to the surface and sand it.
How to paint laminated doors
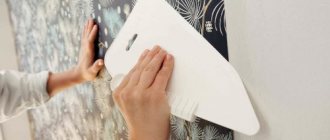
Compared to doors made of natural wood, laminated products look aesthetically pleasing, are easy to use and are affordable. To process laminated doors you will need a roller or brush, wood putty with a spatula, sandpaper, rags, solvent and special enamel.
The surface is completely sanded, cleaned of dust with a rag and puttyed with a thin layer. After the putty has dried, it is treated with sandpaper, applied a second time and sanded again after drying. Before painting, the composition is diluted with a solvent. The paint is applied carefully, paying attention to hard-to-reach areas. After 3 layers, the result is secured with varnish.
Rice. 13. Varnishing wood surface
If there are no defects, the laminated coating can be renewed. A tinted varnish or stain is suitable, which is applied after sanding and tinting.
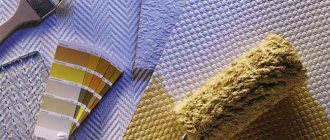
Which paint to choose
First, decide what paints are used to apply to the door:
- Alkyd enamels. This is the most affordable option. Film strength is average. The main disadvantage is the long drying time and the characteristic pungent odor. Among materials of this type there are a large number of glossy coatings.
- Acrylic enamels. This type of paint is a water dispersion of acrylates. The main advantage over other compositions is the absence of odor and quick drying. In addition, the color palette, represented by hundreds of colors, allows you to create unique shades yourself. To protect the surface, it is additionally coated with parquet transparent varnish.
Nitro enamels. They dry quickly, but at the same time a volatile, caustic solvent evaporates, which can cause poor health and even poisoning
If you take precautions and use personal protective equipment when working, then this option deserves attention. After complete evaporation of the solvent, the coating becomes safe
It is considered a high-quality and fast method of painting.
What if the door is made of laminated chipboard (or MDF)?
For doors made of chipboard, MDF and other materials, the technology will be the same. The difference is that you don’t need to use a hairdryer or solvent - you have to use a sander. The only caveat is that you should not carefully sand off the entire coating completely. It is enough to make it rough. Since the laminate is plastic, it is necessary to select a paint (and primer) that is suitable for painting this type of plastic. If the door was covered with thin melamine paper, it will still have to be removed completely.
How to properly paint doors to look like natural wood (video)
If you want to decorate the interior of your home with stylish interior doors made of natural wood, but you think that buying such a door is not a cheap pleasure, you can get by with simply painting the door to look like wood.
Today, the technique of painting door panels to look like natural wood of any type is considered one of the most common and popular. This technology allows you to create an attractive effect at home on an old door leaf, which will practically not differ in appearance from real wood.
This technology is quite simple, despite the end result. It involves the use of a special varnish base for application to doors. Using a special method of applying varnish, you can achieve maximum resemblance to natural wood of various species.
This technology also allows you to achieve a luxurious “antiquity” effect and get a beautiful door leaf with an antique effect at home, using a minimum of materials and tools. To create a similar style for your entrance or interior door, you need to prepare the door leaf before starting work.
The old interior door should be removed from its hinges and all elements of door hardware should be dismantled. The surface of the door leaf must be cleaned of dirt, dust and a layer of old paint, if any. First you need to remove the cracked layer of paint, and then clean the surface with sandpaper and sand it thoroughly.
In addition, this technology of turning an old interior door into a work of art can also hide some defects in the door frame. If the old door has small cracks and other unpleasant defects, they can be thoroughly sanded using regular putty. Believe me, traces of putty application will not be visible under a layer of varnish and special paint of a rich wood shade.
The technology of painting a door to look like natural wood begins with preparing the door leaf, removing it, cleaning it and sealing cracks. Next, using stain, the door leaf is covered with several layers. This will allow you to achieve different woody effects. Before painting the door leaf itself, you can practice on a small piece of wood.
How to remove old stubborn paint from a wooden surface?
To properly paint old wooden doors, first remove the worn-out coating. Clean carefully so as not to disturb the surface of the door leaf. Particular care will be required if you need to repaint a veneered wooden door. The veneer is very thin and is susceptible to mechanical stress. There are four common methods for removing old paint from wooden surfaces.
Mechanical
The most labor-intensive and aggressive mechanical method is used when other methods of removing paint from a wooden surface have not brought a positive result. Veneered doors are not subjected to such cleaning. Mechanically, durable nitro paints and alkyd enamels are usually removed. Peeled areas are cleaned with a scraper or spatula. The stubborn paint is removed with a grinder, grinder or drill with grinding attachments. It is difficult to rub with sandpaper. It is usually used if there is no power tool.
Sandblasting Applications
The mechanical cleaning method includes the use of sandblasting. Air supplied under high pressure from the compressor mixes with dry sand particles and breaks the old paint with a strong jet pressure. Sandblasting can easily remove varnish or enamel from a wooden door in a few minutes, but it is important not to overdo it. The impact of grains of sand crushes the wood along with the paint. If you stay in one place for a long time, the surface will be damaged. To remove a thin layer of paint, use a fine abrasive: river sand or soda.
Heat treatment
The panel and panel doors are subjected to heat treatment. For a safe method of removing paint, use a heat gun or a hair dryer powered by electricity. When heated, the old coating acquires a soft structure that can be easily scraped off with a scraper. Professionals use gas torches, but work with such tools carefully. An open source of fire along with paint can burn the wood.
Chemical method
To remove paint from doors chemically, use solutions that soften most types of enamels and varnishes. The work is performed in a well-ventilated area using personal protective equipment. The method is suitable for veneered door panels, but first you need to check the instructions to see if the solution is safe for veneer.
To remove old paint from a wooden door, just lubricate it with a chemical. After 5–10 minutes, the coating will rise in bubbles that can be easily removed with a scraper.
What is the best varnish to coat a door leaf?
Before you start painting an old door in a light or other shade, it is important to take into account that the painted layer of the door will definitely need to be opened with varnish so that the paint lasts longer and does not peel off. Typically, the choice of varnish will depend on the type of paint for the door
Most often they opt for acrylic varnish, which is suitable for painting any surface.
This type of varnish is quite durable, has a safe composition, gives the door leaf a characteristic shine and reliably protects the top layer from damage, abrasion and cracking.
As a rule, varnish is applied to the door after the last paint layer has been applied and completely dried. After the last layer has dried, it is necessary to apply a layer of acrylic varnish, which will help the paint adhere securely to the surface.
What color should I paint the door?
If you have no particular preference for color, and the interior is decorated in a classic or modern style, then you can simply paint the doors white. This option is suitable for bright rooms and as a contrasting option in a dark interior. White color is good for its neutrality and versatility. We talked about this in another article. In addition, if desired, the white color can be given a colder, icy shade, or, on the contrary, made warmer, more organic, close to ivory.
Other options for universal colors are gray, various shades of brown. Black (or other strong colors, such as red) is also possible, but it must be well balanced with the colors of the interior, wall decoration, upholstery, so that the door is not a flashy spot, but complements the aesthetics of the room and adds a finishing touch to it.
Selection of materials
How to choose the right coating for wood? When choosing what to cover a wooden door with, you need to consider: is it an entrance or interior door?
This is important because all paint and varnish materials are labeled accordingly. They are divided into:
- paints and varnishes for exterior work;
- paint and varnish materials for interior work.
If the canvas that you are going to coat with paint and varnish is located in a room with high humidity, you should opt for moisture-resistant materials. They are marked accordingly. Before considering how to coat a door, it is necessary to understand the types of coatings and in what cases it is appropriate to use one or another paint and varnish material.
The coating can be transparent or opaque. It is better to use an opaque coating if you are going to update an old copy. Such products, as a rule, have various defects that need to be hidden. These are scratches, traces of locks and fittings, chips and remnants of old paint.
An opaque coating will help hide many defects and give the door an attractive appearance. Such a coating will not only renew its appearance, but also provide it with long-term protection from adverse influences. The opaque paint coating is applied in several layers, which contributes to its durability. The application of varnish is carried out in several stages:
- surface putty;
- surface primer;
- finishing with enamels.
Transparent paint and varnish coatings are used if the surface of the wood has a good appearance without major defects or damage. Then the transparent coating will only emphasize all the natural beauty of the tree. To achieve a transparent effect, varnishes are used. To varnish a door, you need to carry out the following sequence of work:
- surface putty;
- surface primer;
- applying the finishing layer.
Step-by-step process on how to paint a wooden door with your own hands
First, you have to remove the door leaf from its hinges, after which it needs to be laid on two stable stools or a work table. If you decide to use an alkyd composition, it is recommended to work outdoors. Or at least on the balcony.
If you do not want to remove the panel, you need to block it with wedges so that you can reach all the elements of the door with a paneled brush. In addition, the lock will help prevent the door from accidentally closing, damaging the dye layer.
Preparing the door for painting:
- Remove all old layers of paint, as well as previous primers and fillers from the wood. You can use either a regular sanding machine or a block with medium-grain sandpaper attached. There are also special wood removers on sale that allow you to remove old paint.
- Then comes the primary sanding - small dents, remnants of old paint, scratches, and chips will be eliminated. You can also do this with sandpaper.
- Then there is puttying of large defects. To do this, purchase a special wood putty. This is done if you plan to cover the door with varnish, stain or oil. You must not forget about the gaps between the decorative parts of the door leaf and the door leaf itself, as well as between the lintel and the jamb.
- After the putty has completely dried, a second layer of sanding is applied. You can use abrasive sandpaper with a medium grain size.
If there are deep dents in the wood and the paint is not transparent, then they can be repaired with auto putty. Only this putty should not contain glass fibers. Such a stage as preparation is mandatory; without it, repainting a door in an apartment or house cannot be of high quality.
Preparing the canvas for painting
First, the door is removed from its hinges and placed on a flat surface. Before using alkyd paint, it is better to place the canvas outside or in a well-ventilated area. The door is then locked so that all elements are accessible. The fittings are also removed or wrapped in foil, and the locks are sealed with tape.
Cleaning the door
First, cleaning and removal of old enamel or paint are carried out . For such purposes, it is better to use a grinding machine, and if you don’t have one, you can peel off the layer with medium-grain sandpaper. Any bubbles that appear are eliminated with a hairdryer, which heats up the paint layer to remove it with a spatula. A cost-effective and simple way to clean surfaces is with stripping compounds.
Rice. 5. Cleaning and grinding the surface
Layers of old paint can be removed with an abrasive attachment on a drill. Pieces of dust and paint are swept away from the panel, the surface is sanded so that there are no scratches, unevenness or roughness. The surface is inspected from both sides, the density of the joints is analyzed, and the frame can be strengthened with fasteners and metal corners.
Puttying and sanding
Existing cracks and recesses are sealed with new putty . For alkyd paint, a composition of any color is suitable, and before applying oil impregnation, varnish or wax, the tone of the putty must match the panel. Dried areas of the door are sanded with fine-grained sandpaper. At this stage, any defects are eliminated.
Rice. 6. Door putty
Antiseptic coating
When applying paint, the surface is pre-treated with a fire retardant and antiseptic impregnation (for example, biotex) when the door is installed in a steam room. It is advisable to choose products from the same company, which will improve interaction and quality of coverage.
Rice. 7. Antiseptic for wood
After this, the door needs to be primed, and then a layer of putty must be applied. All areas of the door need to be treated, as well as cracks in decorative parts, between the jamb and the lintel. After the putty has dried, the surface is puttied again.
Choosing a varnish to coat a wooden door, the specifics of applying glue to the surface
If the method of painting a wooden door does not suit you, or you want to cover not an old door, but a new one, but without finishing, then varnish is best suited to maintain the natural texture and shade of wood. But you need to choose the right varnish, because each surface has its own composition.
Varnish and any other product applied simultaneously to the canvas must have the same properties.
The assortment of varnish can confuse an uninformed person. Some formulations have a very strong odor, others are barely noticeable. There are several types of varnish:
- Alkyd - the base is a solvent that has a pungent odor. The varnish is water resistant. When applied correctly, they give the wood a light yellow tint. Dries within one day. A hardener can be added to improve properties.
- Nitrovarnish - similar in composition to the first option. Dries quickly. For even application it is better to use a paint sprayer.
- Polyurethane varnish is the most resistant to external influences and lasts longer than other varnishes on the surface. But it must be remembered that this varnish can make the wood dark if you do not apply a primer first.
- Acrylic varnish is the most environmentally friendly of all listed, because it is water based. It does not have a pungent odor, which also inspires respect. But acrylic varnish, like acrylic enamel, is less resistant to abrasion. You shouldn’t count on maintaining the gloss of a wooden door for a long time.
The choice is yours.
Recommendations for choosing door colors
The color of the panel is selected based on your wishes. The main recommendations include:
- drying the surface before applying alkyd enamel;
- combination of shade of canvas with furniture;
- choosing a solid wood door coated with oil impregnation for a wooden home;
- combination of an aged door with antique items;
- choosing a dark-tinted door for lacquered furniture;
- use of water-based paints.
During the process of painting a door, you need to follow proper techniques and safety measures.
Painting a door - all the nuances
The procedure for painting a door is as follows: first, paint the panels with a brush, then the protruding parts, and at the very end, go over the canvas with a roller. When working, make sure that the room is well ventilated - this will save you from the smell if you use alkyd or nitro paint.
The room in which the work will be carried out must be clean and not dusty. The settling of dust and debris on the painted surface will spoil the appearance of doors made of wood, fiberboard, MDF or other materials.
When deciding to repaint a laminated interior door, you need to keep in mind that the adhesion of its surface to the paint is practically absent. Therefore, before you start painting, you need to go over the entire surface of the canvas with fine sandpaper with your own hands, and then wipe it with a cloth soaked in white spirit. Such actions will help remove the protective coating, increase adhesion and allow you to successfully restore the laminated door. After the paint has dried, the canvas can be varnished.
Painting a veneered interior door with your own hands is more difficult than any other. This is due to the fact that the thickness of the veneer is very small. Therefore, in case of minor deformations or scratches, you can simply coat the surface with varnish. If you need to completely change their color, it is recommended to use water-based paints. Before painting, the surface is treated with a special primer that hides scratches. It is not recommended to use nitro paints; they can contribute to the formation of dull spots.
An interior door veneered with artificial material can also be painted. But to do this you need to choose a paint that will not roll off a smooth surface. It is not recommended to prime such doors, since the natural effect is lost.
A newly painted and varnished door made of wood, fiberboard, MDF or other material can be placed in the opening by returning the fittings and glass. She will delight you with her appearance for many years.
The decorative covering of a door deteriorates over time and loses its attractiveness. If the old paint is cracked and peeling in places, it is recommended to remove the old coating before applying a new coat. But it also happens that the surface has only lost its shine, has become dull, or spots have appeared on it, but the layer itself lies smoothly and has retained its integrity. In such cases, there is no point in carrying out work to remove the old coating. It will not be possible to qualitatively remove the old layer of paint that has retained its strength. It is difficult to remove. As a result, you can only damage the doors or get a surface whose quality is much lower than the original version.
Door painting technologies
The quality of the door coating depends on the tool, application method and professional skills of the craftsman.
Tools
Door painting is done using the following tools:
- Brushes. It is not recommended to paint the entire canvas with just one brush. If you lack experience, the surface will end up with streaks. It will not be possible to apply a thin, even layer of paint with a brush. But without this tool it will not be possible to paint hard-to-reach places, corners, layout patterns or panel margins. Therefore, when painting canvases with a complex configuration, first work with a brush, painting over problem areas.
- Roller. Repainting panel interior doors is done with just a roller. The roller bobbin must be fur, polyamide or polyacrylic. These materials are resistant to most aggressive solvents.
Important! For painting work on door restoration, foam rollers are not used.
Working with a brush
- Compressor (spray gun). A spray bottle will allow you to get an even, thin layer. The result is a perfectly smooth coating. The process of applying paint is much faster than manually.
Related tools you can’t do without:
- gloves;
- paint tray;
- rags;
- masking tape;
- sandpaper;
- putty knife;
- and what you have at your disposal: stools on which you will place the canvas, or sawhorses.
In addition to paint and varnish, prepare putty, primer and solvent.
Which paint to choose
In order to choose good quality paint, you need to spend a lot of time, as it is not so simple. And many people make mistakes when choosing paint, and therefore are dissatisfied with it in the future.
At first glance, it seems difficult to choose a paint? I went to the store and bought everything, but in reality you need to choose the painting materials well, since sometimes the paint may not be suitable for painting the specific wood from which the door is made.
Door paint called alkyd enamel has become widespread. It is chosen because it has several advantages over other paints. The cost is low and affordable for almost everyone, a wide variety of colors. In addition, it has high strength and lasts for a long time without peeling.
The disadvantage of alkyd enamel is the fact that it has a pungent odor that lasts for about 2 days. Because of this, it is better to do painting work outside.
If painting needs to be done inside a building, then it needs to have good ventilation. You can see options for doors painted with this enamel in the photo.
If persistent odor is a big problem for you, we suggest you use acrylic paint. This paint also has a huge variety of colors, but does not have such a strong smell. However, the resulting layer is not very durable, so you must varnish your doors. The price of such painting is quite high, and as a result you will only get a matte surface.
Varnish selection
There are several types of paints and varnishes that are used when varnishing doors.
- Alkyd. They include solvents that give the wood a yellowish tone and are resistant to moisture. To improve drying ability, increase moisture resistance and strength, so-called hardeners are often added to the composition. The drying time for a surface coated with such paints and varnishes is approximately a day.
- Acrylic. Manufactured on a water basis. Odorless and non-toxic. To increase strength, hardeners can be added to the varnish composition, since without it the composition does not have good strength characteristics.
- Nitrovarnishes. The main advantage is very fast drying. The basis of this varnish is solvents. The disadvantage is increased toxicity, which often makes its use unjustified. The best method of application is a spray gun.
- Polyurethane coatings are durable. Polyurethane gives a dark tint, so the surface of the door needs to be primed.
There are other varieties that can be used when varnishing a door. However, the ones listed above are considered the most common.
Note! There is a pattern: the more toxic the varnish, the higher its consumer properties. Alkyd varnishes are more resistant to moisture, so it is recommended to use them in rooms with high humidity (for example, a bathroom)
Alkyd varnishes are more resistant to moisture, so it is recommended to use them in rooms with high humidity (for example, a bathroom)
Types of paints for doors
Don't be intimidated by the huge variety of coloring enamels. The packaging always contains detailed instructions for using a particular coating.
And the first thing you need to pay attention to is what material the paint is intended for. Improper use leads to rapid wear of the door coating - loss of shine, peeling and cracking
There are four types of coatings for wooden products:
- Alkyd enamels and varnishes are pleasing with their prices and wide color palette. The polymerization process takes place quickly - after 1.5 - 2 hours, the painted surface sets and is resistant to the influence of dust, humidity and deformation. Complete drying occurs within 24 hours. To treat a wooden surface, you can use a brush or roller. The disadvantages include:
- fragility, after 1–2 years the surface loses its luster, burns out, and cracks when temperature changes;
- the presence of toxic substances that are not recommended for use indoors. The door emits a specific odor for a long time;
- exposure to temperature changes. Alkyd resins, on the basis of which enamel is produced, tolerate high humidity well, but changes in temperature conditions lead to cracking of the smooth surface. The optimal range is -30°… +5°С.
- Acrylic enamels and varnishes. Manufactured on a water basis. The disadvantages of alkyd paint and nitro enamels are mitigated due to the composition selected from water-soluble colors. The only disadvantage of acrylic material is its high price. The undoubted advantages are:
- absence of harmful substances and volatile solvents in the composition;
- wide range of colors;
- the formation of an elastic elastic film upon drying, on which cracks do not form;
- color stability to ultraviolet radiation.
- Nitro paints and varnishes. They are used outside residential premises, most often in industrial facilities. This is due to the fact that the solvent on which the paint is made is toxic and flammable. When carrying out work, it is necessary to ensure good ventilation of the room. Nevertheless, this type of coating is in demand because it is the most durable and resistant to adverse factors. Drying occurs within 30–60 minutes (depending on the thickness of the layer). The polymer film covering the wood lasts up to 5 years without compromising its appearance.
- Oil paints. Absorbs into wood by 0.3–0.5 mm (depending on the type of wood). Thanks to this, the outer surface layer becomes water-repellent and durable. However, today this material is not so popular, and there are good reasons for this:
- long drying time - complete hardening occurs no earlier than after 24 hours (depending on environmental humidity);
- low compatibility with other types of paints. If it is necessary to re-coat the doors, the previous layer must be completely removed (including sandpaper treatment);
- high price;
- sensitivity to mechanical damage.
All types of paints described are used for metal doors, but there are also those specially designed for steel surfaces. These include:
- Hammer paint. The coating combines good decorative properties with increased durability. After drying, a pattern appears on the doors, simulating the impact of a forge press. Operational advantage - the paint can be applied to a rusty surface, having previously degreased and removed small debris and dust. There are other advantages:
- high durability of the coating, which can withstand even impacts from metal objects;
- long service life, it exceeds 10–12 years;
- protection of metal from corrosion, temperature and humidity changes.
- Powder paint. Industrial version of door painting. It is impossible to apply the coating at home, since this requires special equipment - a muffle furnace in which the powder is melted and baked. The result is an extremely durable coating that lasts for several decades.
- Forge paint. An expensive coating that can turn an ordinary door into a work of art. Various colors and shades allow you to imitate gold leaf or silver that has become tarnished over time. In such cases, specialist artists are most often invited, who are guaranteed to give the coating the necessary visual effect. Performance properties are as high as those of hammer paint. Long service life and resistance to adverse factors compensate for financial costs.
Features of painting over an old layer
At first glance, painting a door over an old layer seems like a trivial matter: just go ahead and paint it.
But in fact, to get a surface that is no worse in quality than factory paint, learn a few rules:
The surface of the door, regardless of its condition, must be carefully prepared. Against the background of the old paint, cracks and potholes are invisible, but after applying a new layer they will appear and ruin all your efforts. The right choice of material for painting. It’s not just a matter of proper selection of color, surface texture or the strength of the film formed
It is important to consider the compatibility of materials. Many paints are not compatible with each other, and if chosen incorrectly, the old coating may curl or bulge when it comes into contact with the new material. Decide on the right paint application technique
For doors with a complex structure, it is possible to obtain a smooth and neat surface with proper selection and combination of painting techniques and painting tools.
The last rule, common to all cases of working with paint, is to strictly follow the instructions for applying the selected paint material.
Material Compatibility
It is not so easy to understand the modern variety of materials. Chemical compositions for the uninitiated person are a secret behind seven locks, and when buying a material to apply to old paint, many rely on luck, hoping that the old layer will not react in any way to contact with the new chemical. There are some recommendations according to which you should select the material depending on what the door is painted with.
Therefore, before you go for paint, you need to clarify what the canvas is painted with.
- Epoxy and polyurethane compounds contain aggressive solvents. Cyclohexanone or xylene are capable of destroying materials that are reversible polymers obtained by natural curing (nitrocellulose, vinyl, copolymer-vinyl chloride compounds). Simply put, epoxy or polyurethane paint will destroy the coating made with nitro paints.
- Epoxy and polyurethane materials are applied only over the same compositions or primers, maintaining drying intervals for each layer.
- Silicate compounds are generally not applied over any other types of paints.
- Alkyd paints are not aggressive and can be safely applied over any material.
- Copolymer-vinyl chloride compounds and compounds based on chlorine rubber are applied only over acrylic, epoxy, and silicate materials.
Do-it-yourself painting of wooden doors
To make painting easier, the door leaf must be removed from its hinges and placed horizontally on two stools, either on a work table or on special trestles. This will ensure that the paint is applied evenly to the door surface.
If it is not possible to remove the door leaf from the hinges, then it must be blocked with wedges in such a position as to provide access to all parts to be painted. In addition, blocking the door is necessary so that it does not accidentally close and damage the freshly applied layer of paint.
If the doors have glass and you do not want to remove them, then simply cover the glass with paper or film and secure it with masking tape. After painting, the masking tape must be removed immediately, without waiting for the paint to dry. Fixed parts of door hardware also need to be tightly wrapped with paper or foil and secured with tape. It is also necessary to seal and secure the door lock mechanisms with tape.
Do-it-yourself painting of wooden doors is carried out in at least two stages. The first layer of paint acts as a primer. We paint small details and corners using a panel brush. Large and free areas of the door leaf are painted using a roller. You can also paint wooden doors using a spray gun. After drying, sand the primer layer with fine sandpaper and remove dust. This is necessary so that the second layer of paint adheres evenly and tightly to the first.
The paint that will be used as a primer is selected several shades lighter than the final decorative coating so that it does not affect the final color of the door leaf.
The second coat of paint is the finishing coat and is applied as a decorative coating. After complete drying (usually about three days), the door can also be varnished.
Depending on the design of the entrance or interior wooden door, different painting schemes are used. So, the panel door leaf is first painted across, for example, from left to right. Next, once the first layer has dried, the door leaf is painted in the longitudinal direction. Then, after the second layer has dried, painting is completed in the direction opposite to the first stage (from right to left).
Panel doors are first painted from the recesses with a brush, and then painted with a roller according to the painting scheme for a panel door, which is presented above.
Painting entrance or interior wooden doors can and should be done with your own hands. Then the cost of the work will be determined only by the prices of paints and varnishes. And this, you see, will be a good saving than if you ordered painting of wooden doors.
A wooden door relatively quickly loses its aesthetic appeal. But if this happens, this, of course, is not a reason to get a new door. Painting helps out, which is not so complex that an amateur cannot cope with it, but also not so primitive that one refuses to familiarize yourself with painting tips.
Painting schemes
First, a little theory. The interior door can be panel or panel. Depending on this, the execution scheme and the order of staining will depend.
If it is a panel-type canvas, then painting is carried out in 3 stages:
- Coloring begins from the upper corner in the transverse direction. The movement of the brush goes from left to right.
- the second layer of paint is applied in the longitudinal direction.
- the third layer is similar to the first.
Please note that three layers cannot be applied at once; after each coating, time must pass for the composition to dry.
For work, it is better to use a roller, as the brush may leave streaks.
If it is a paneled door, then first all the recesses are painted with a brush, and then the rest of the panel, but with a roller.
Stages of work
All work can be written in the form of the following algorithm:
- It is better to remove the door and twist the fittings. If there is no such possibility (or desire), then handles, hinges, locks and glass are sealed with film and masking tape. It will be difficult to remove the paint. The tape must be removed before the paint dries.
- Washing and drying the door surface.
- Removing peeling areas, filling defects, sanding. Each layer is sanded after complete drying.
- Selecting the type of paint material.
- Applying a primer (paint diluted with the same type of solvent). This will improve adhesion and reduce the likelihood of bleed through putty areas.
- Applying the required number of layers of paint or varnish.
Preparatory work
Painting furniture made of pine, which is a soft tree species, when done correctly, increases resistance to compressive loads and has high adhesion (cohesion of layers). The process must take place in a room with normal, regular temperature and humidity levels. Use personal protective equipment such as gloves, goggles, respirator
In order for the result to have a smooth surface without bubbles and streaks, it is important to complete the preparatory steps, namely:
- remove the fittings, cover glass and other inserts and areas that cannot be painted with masking tape;
- sanding the top layer is necessary for a uniform color, a surface without cracks and peeling, and hiding wood defects;
- cleaning of debris and dust, drying (if necessary), degreasing work areas;
- selection of tools, such as rollers and brushes with bristles of the required stiffness, a paint tray, and, if possible, a spray gun;
- selection of enamel (paint) by color, type of texture, performance characteristics;
- caulk cracks and joints of planes, apply a primer to provide a smooth surface for paintwork.
Removing paintwork
To give old furniture a new look, it is important to thoroughly clean the wooden surface of the previous layer. The fastest and easiest method for removing finish is to sand with a sander, or in areas with difficult geometry, use coarse sandpaper.
The modern market of finishing materials offers special flushing agents that are applied in a thick layer, left for a certain time, and removed with a spatula.
You can use a hair dryer to make the paint crack, peel off, and easily give in to the spatula. Control the pressing force of the working tool. Any method requires a certain skill in order to preserve the surface of the wood and prevent the appearance of chips and microcracks. The lower the grade of lumber, the thinner the layer being removed, the more labor-intensive the preparation process.
Painting of products
Painting solid wood furniture looks beautiful, can emphasize the structure of the wood, and have a dense, glossy, matte color finish. A varnish coating can be applied as a final layer. There are decorative and protective compositions for external and internal conditions, objects with high humidity
When working with a brush or roller, it is important to follow one direction of movement, apply the paint coating parallel to the fibers
Painting is carried out in one or two stages, requiring complete drying between each layer. If you work in a draft-free room, the drying process will go faster. For wooden surfaces, water-based, alkyd, and acrylic paints are often used. Depending on the composition, different indicators are provided for resistance to abrasion, fading, moisture, and mechanical damage.
How to paint a lacquered door to transform it
It often happens that you are quite tired of varnished doors, but there is no money to purchase new ones.
You can find a way out of this situation, transform the door so that it pleases not only you, but your entire family. But in order to do this correctly, you need to know the technology of preparatory work and the process itself, how to paint a varnished door. In this article we will tell you how to reproduce all these works. We prepare tools and materials before painting
•Liquid for degreasing.
•Spatula, screwdriver, brush, roller or spray gun.
Preparing the door surface for painting
In order for the paint to adhere well to the surface of the varnished door, it must be pre-treated before painting. Therefore, before painting a varnished door, it should be prepared for this process. You should not skip the preparatory work, since 80% of the successful finishing of the door as a whole will depend on them.
Surface preparation process
•We prepare the place where painting will be carried out. This process can take place on site, then paper or oilcloth is placed under the doors. If you decide to remove the door from its hinges, then prepare a special table on which the doors will be painted.
•All locks, handles and decorative elements are removed, and the surface of the door is degreased with an alcohol or vinegar solution.
•Using a hair dryer, remove the varnish coating from the heated surface of the door with a spatula. This process is carried out until the paint layer is completely removed.
•All surface irregularities and old coating are sanded with sandpaper to a smooth, rough state.
•If there is such a need, then the surface of the door is coated with an antiseptic.
•If there are defects, cracks and chips on the surface of the door, they should be removed using wood putty. The best option for this would be a fine-grained composition that dries quickly.
•After drying, the areas treated with putty must be sanded.
•Then the door leaf is primed in two approaches. After the first layer has dried, the second is applied.
Painting a lacquered door
Now we come to the climax of our article, where we will learn how to paint a lacquered door. Work should begin by painting all the recesses and door edging. You need to pay special attention to the joints. Next, the entire surface of the door is painted. You shouldn’t put a lot of paint on the roller to avoid smudges, and if they do happen, you should remove them as quickly as possible before the paint dries. If after the first layer, the door leaf is not uniform and there are bald spots, then you need to apply a second layer of paint.
Painting an old door that has already been painted
It also happens that you have to restore a fairly old door leaf that has already been painted. Here you will have to work a little more. Now we will tell you how to paint a varnished door if it has already been painted previously.
•Locks and handles are removed from the door.
•The door surface is thoroughly washed and dried naturally.
•The door leaf is processed with sandpaper.
•The areas that are not to be painted are sealed with masking tape.
•The surface of the door is treated with a thin layer of primer. You should not apply a lot of impregnation, since it will not be absorbed into an already painted surface, but will stand out as separate puddles on the surface of the door or smudges if the doors are painted in a suspended state.
•After this we proceed to applying the main paint. This should be done after the primer has completely dried. The coating layer should be as thin as possible; it is better to have two or three thin ones than one thick one. Just keep in mind that before applying a fresh coat of paint, the previous one must dry.
Now you know how to paint a lacquered door to breathe a second youth into it. If you follow technology, you can quickly turn an old, boring door into a fresh and attractive one. Now you don’t need to waste money on purchasing a new door; try restoring the old one.
How to paint wooden doors
The choice of paints and varnishes for painting wood is very wide and sometimes it is impossible to do without the help of a specialist. Conventionally, paint is divided into two categories:
- transparent coatings, which include varnishes, special impregnations and protective glazes. When applied to the surface of doors, they do not hide the structure of the wood, which is often used by designers when decorating. Clear coatings are often applied to new interior or exterior doors as a protective layer.
- opaque paints, which include compositions based on organic solvents with the addition of pigments that give the paint color. In particular, these are oil paints, alkyd or acrylic enamels and nitro paints.
Alkyd enamel is the most popular due to its varied colors, affordable price and good durability. Its significant drawback is the persistent pungent odor, which takes a very long time to dissipate.
Acrylic enamel has virtually no odor, dries quickly, has a large selection of colors, but the surface painted with this paint will be matte. The price of acrylic enamels is quite high, which somewhat limits its use. In addition, acrylic enamel must be additionally coated with acrylic varnish, which also increases its cost.
Nitro paint is the strongest and most durable, but its fumes are very toxic, so it is recommended to paint in a well-ventilated area or outdoors.
The main aspect when choosing paint for interior doors should be environmental friendliness. For entrance doors, the protective function of paint plays an important role. Sometimes wooden doors can simply be varnished and they will look much better than if they were painted. And the price of a varnished door will be significantly lower.
How to renew varnished wooden doors
How to varnish a wooden door to return it to its original appearance
When the interior needs to be updated, but there is no money to buy new doors, there is a desire to do something with your own hands. Many resort to various methods of decoration - pasting the canvas with self-adhesives, painting it with various paints and varnishes, covering it with vinyl panels. But I liked the way of varnishing a wooden door. It is about this method that I will write in more detail today, and also tell you how the whole coating process happened with my own hands and how to remove the varnish if necessary.
How to varnish a wooden door?
Advantages and features of using varnish
We coat the door with varnish
In addition to the fact that varnish allows you to give the door a spectacular look, it also has a huge number of protective functions that are so necessary for the door leaf. Thanks to various types of varnish, you can completely change the appearance of the solid wood and give ordinary pine the appearance of a valuable type of wood. Varnishing also allows you to emphasize the shade that the door leaf has and give some of its details a deep and rich color.
Important! Many people confuse the concepts of impregnations for wooden surfaces and protective coatings. If the former serve to protect the material from mold and rot, then the latter protect the wood from the external negative effects of water, sun and sudden temperature changes.
For myself, I found out the following advantages that allow you to varnish the door yourself:
- Varnish is an affordable material - everyone can choose the appropriate mixture based on the pricing policy. But here we should not forget that only a high-quality mixture can improve the protective and external properties of the door and at the same time extend its service life. Therefore, such protection will not cost a penny.
- Simple application - even a beginner who has no previous experience in carrying out such events can coat surfaces with varnish
- Versatility - the material is used for various surfaces, in addition, it can be used as a fixing for decoupage and painting
- The protective functions that varnish has increase the resistance of a wooden door to various negative influences. This can include mechanical damage, scratches, moisture and ultraviolet light.
- Oil varnish - as is already clear, the main component is oils, which, when absorbed into the surface, can change its color. They can be used as a solvent, they take a long time to dry and most often have an unpleasant odor
- Water-based - popular nowadays because they are colorless, have no strong odors and can be either completely matte or glossy. Has a short drying time, but the door leaf requires preliminary application of stain
As it turns out, there are plenty of varieties of varnish, but they are all divided by composition. There are such as:
Sequence of work
Door finishing with varnish
As with all bases, proper surface preparation comes first. If the canvas has already been varnished, it should be removed. Such manipulations can be done in several ways:
Important! If there are chips, use a special mastic that can be matched to the color of the canvas. If you decide to use stain before coating, apply it immediately after sanding and cleaning the surface.
From a friend of mine, I learned some features that will make covering the canvas much easier and more correct. Doors require dismantling and installation in a horizontal position - only this action will protect the door as much as possible from smudges and other flaws. Using a brush allows you to apply the varnish evenly. In total, you should apply from three to five layers - if you applied the base layer with horizontal brush movements, then apply the second one in a vertical direction. You should also alternate subsequent layers if you need to coat the canvas with varnish.
DIY antique effect
We coat the door with varnish ourselves
If we figured out how to renew an old canvas, then on the contrary, I had no idea how to age wood. Very often, antique doors are used to emphasize design solutions in rooms and there is no desire to purchase expensive options. This is precisely why there are ways to create an antique wooden door.
I liked the brushing option, but I will talk about each one separately. So, to achieve an antique look, the following methods are used:
We cover the door with varnish with our own hands
When I first heard about varnish and similar actions for updating doors or, conversely, aging doorways, all the actions seemed difficult to carry out and very complex in terms of execution technology. But the first time I tried to apply varnish and decorate interior door panels with my own hands, I realized that my home would not need to replace interior doors for a long time.
We also recommend reading:
Interior doors for painting: what and how to paint the canvas Do-it-yourself door trim: the most popular materials Types of interior doors Doorway and methods for DIY design
How to varnish doors
- - wooden door
- – varnish for wooden surfaces
- – small roller or brush
- – rags
- – sander
- – fine-grained and coarse-grained sandpaper
- – construction hair dryer
- - putty knife
- – wood putty
You purchased a new door made of untreated solid wood, then you skip the work of removing the old covering. Place the door in a horizontal position. Place it on stools, and lay newspapers on the floor so that the varnish does not drip onto your coating.
When restoring an old door . remove it from its hinges and place it on the stools. Now you need to clean the door of the old coating. If your door was covered with paint, then you will need a heat gun and a spatula. Remove the coating in a well-ventilated area; the smell of heated paint will be very strong. Point the hair dryer at the surface to be treated. The hot air will cause the paint to bubble. Remove paint with a spatula. Then sand the entire door. If the door was varnished
. then remove the old coating with a grinder or sandpaper.
If there are cracks or chips on the wooden surface, apply putty. Select the putty so that it matches the color of the door . After the treated area has completely dried, go over it with sandpaper.
Pour the varnish from a large jar into a plastic container with a ribbed edge so that it is convenient to squeeze excess varnish from the roller. Dip the foam roller into the varnish and run it along the edge of the container. of the door evenly . Avoid drips. The varnish must dry completely. The door will become rough. Don't be alarmed, this is how it should be.
Take some fine-grit sandpaper and sand the surface. The hardware store sells a special holder for sandpaper so as not to hurt your hands. If you do not have such a device, then take a wooden block and wrap it with sandpaper. This way it will be easier and more convenient for you to sand. Use a damp cloth to wipe off any wood dust from the door . Apply another layer of varnish. Sand it. For a smooth finish, apply 3-4 layers of varnish.
How to update a door: original ideas
Renew a door with your own hands photo
Many owners think about how to update an old door, because replacing doors, whether interior or entrance, is not an easy task. When replacing the box, it is impossible not to damage the finish of the opening and maintain the integrity of the slopes.
And the price of a new door, even a simple one, is not affordable for everyone. In this case, there is only one way out - updating the unpresentable old door: decor, original restoration.
And believe me, with the right approach, your “new old” door can become, as in the photo, the main decoration of the facade or serve as an accent element for the interior. Today we will look in detail at how to update an old door with our own hands.
Restoration of wooden canvas
How to update interior doors, because in most cases they are made of wood or its derivatives, and there are, as they say, a thousand and one ways to decorate wood. In principle, this is not a difficult job, and the video: “Decoration of old doors” will help you cope with it.
In our article you will also find a lot of useful information on this topic:
- What's the point of decorating a surface that has dents and scratches? In addition, the door leaf can be painted so many times that a thick layer of paint not only spoils the appearance, but also prevents it from closing properly.
- Most doors in houses built 50-60 years ago are made of solid wood. But why throw such a door into a landfill when it can be restored! So, decorating old doors begins with bringing them into proper shape. The restoration method should be chosen in accordance with their original condition.
How to update interior doors with your own hands
- It is quite possible to make a practically new door with your own hands. To do this, you will need to purchase furniture wax, solvent, clear varnish and a retouching pencil from the store. We think a soldering iron and sandpaper can be found in every home. You may also need a sanding machine and a blowtorch - it all depends on the area of \u200b\u200bthe paintwork that will have to be removed.
Note! If there is a thick layer of oil paint on the canvas, the solvent will not help, and you won’t be able to remove it with sandpaper either. This is when you will need a blowtorch: with its help, the surface of the paint is heated until it swells, and then it is simply scraped off with a spatula.
- The main thing is to heat the paint evenly, without holding the flame for a long time in one area. The doors, of course, must first be removed from their hinges, and placed on convenient supports, the glass elements, if any, must be removed. You also need to remove the locks and all fittings.
Remove the fabric from the loops
Decorating an old door with your own hands can be quite labor-intensive if you don't have a sander. After all, if the paint needs to be removed over the entire area of the canvas, then the surface will have to be sanded completely: first with a large abrasive, then with a fine one.
But doing this manually, using sandpaper, is not so easy. But let's start with a simpler repair option.
Repairing damage
Now let's look at how to update a damaged door with your own hands, because this happens quite often. Perhaps your door is not that old, but simply has some damage to the varnish coating and the door leaf itself.
This happens most often. In this case, there is no need to completely remove the varnish - the surface is prepared for decoration by sanding the damaged areas.
- First, with the help of a solvent applied to a napkin, stubborn dirt and dust are removed from the varnished surface. Then use coarse sandpaper to remove the layer of varnish on the damaged areas. After this treatment, the top layer of the coating will be erased and become whitish.
Refresh door photo retouching pencil
- Don't let this scare you, to fix this you will need a retouching pencil. Such pencils are sold in a set, like ordinary felt-tip pens, only they contain stain as paint. The colors of such pencils usually correspond to wood tones.
- The shade suitable for the restoration of a particular surface is simply selected according to a line drawn on a white sheet of paper. All scratches are retouched, after which they begin to repair large potholes. Here a pencil is no longer an assistant, but you need furniture wax. They melt it with a regular soldering iron, although you can also purchase a special heater, which you see in the photo below.
- The deeper the pothole, the more wax you will need. In the depths of the recess, its color can be any, but the surface of the wax “stopper” should be a tone lighter than the door itself. After filling, the pothole is also retouched with neat strokes, and the place of the former damage is well camouflaged. It is better to do this in daylight so that you can correctly assess the match between the shades of the pencil, wax and the base color of the door.
Wax chalk for furniture
- When not just a scratch is being eliminated, but a larger area of damage is being restored, it is possible, and even necessary, to use two pencils, with a dark and a light shade - this makes it easier to imitate a wood pattern. After repairing the damage, the door remains to be varnished. The easiest way to do this quickly and evenly is to use an aerosol can.
This restoration method is excellent for both wooden doors and veneered chipboard panels, which are most often found in apartment buildings. Watching a master class from a professional will help you better understand how to decorate old doors with your own hands.
Processing of solid wood panels
Now let's look at how to update a wooden door. When we are dealing with a wooden blind door, it can be restored more radically, without selecting pencils by color, but by completely changing the decorative coating.
It can be painted in a non-standard way, covered with veneer, pasted with 3D wallpaper or made with interesting appliqués. There are quite a lot of options, but to implement them one thing is important - before implementing such decoration, the surface must be properly prepared.
Sanding the canvas with a sander
- We have already talked about how to remove old paint manually. But those who have a grinder at their disposal will not need any blowtorch. By changing the attachments on the working surface of the machine, you can remove the paint and thoroughly sand the door leaf. Sanding will not only give a smooth surface, but will also open up the pores of the wood.
This is important if you want to tint its surface so that the natural texture of the wood is visible. After sanding, it is necessary to fill small potholes, knots and cracks in the canvas, after which the entire surface is coated with a primer for the appropriate purpose.
Only after this can we consider that the door leaf is prepared for further finishing.
Decoration options
A door made of natural wood can be decorated in a variety of ways. You can, of course, simply paint it with stain and cover it with fresh varnish.
To finish wooden panels, you can also use methods used in interior design. It all depends on what kind of wood will be under the removed paint.
- If it is beech, walnut, alder, or, for example, ash, their texture should not be hidden under a layer of paint. These are valuable rocks, and they naturally have a beautiful pattern, which only needs to be emphasized by covering it with azure or patina. It will look very interesting if the door has a paneled design.
Panel door covered with veneer
- After sanding, it is easier to cover a panel door made of birch or pine with veneer made from valuable species (see Veneered doors: what is it and how is it done), and then tint it. It is quite possible to get the result you see in the picture above if the surface of the door is well prepared.
- The beauty of the veneered surface will leave few people indifferent, but today no one will be surprised by the wood pattern. In addition, this is the most expensive way to restore doors. Many homeowners prefer to make an ordinary door original, using non-standard techniques for this purpose.
Original door design: piano keys
- This does not require any special knowledge, but rather wild imagination. So, having decided to restore one or more doors, it would be a good idea to organize a competition between adults and even small inhabitants of the house for the best offer. Or maybe it makes sense to borrow a ready-made idea, such as in the example we have proposed. The piano keys on the interior door look interesting, don’t they?
Such design can be done by applying an artistic drawing, and it’s good if one of the household members has such talents. Otherwise, it is much easier to look for photo wallpaper with a similar or other interesting design - rather than hire an artist to decorate the door.
Decoupage technique
To decorate a door leaf, any door, not just a wooden one, you can use another, very popular method. This is a technique called by the beautiful French word “decoupage” (see How to decoupage doors with your own hands). What it is? Essentially, this is an applique cut from fabric, wallpaper and other rolled materials, and pasted onto a hard surface.
- Stores also sell ready-made cards for decoupage. Using this method, the door can be decorated in the same style as the walls, curtains or cabinet furniture. Moreover, you can decorate not only the door itself, but also the wall around the perimeter of the opening.
- Another type of decoupage is stenciling. To create it, just buy a stencil made of polymer film from a store that sells handicrafts, and stamp the design onto a canvas that has already been painted with background paint. Several patterns around its perimeter, at eye level or around glass inserts, will transform the door like nothing else.
Decoupage door in chalkboard style
- If desired, you can even imitate an inlaid surface with the help of applications and drawings. The style and quality of finishing will depend on the materials used for the decoration - and, of course, on the time and money that you intend to spend on it. By the way, you can also use ordinary interior stickers to decorate the door (see Do-it-yourself decorative door decoration: choosing options).
- If the door is in good condition, that is, its surface does not require repair, the door leaf does not even need to be removed from the hinges. In this case, it needs to be cleaned of dust deposits, the greasy film removed from the surface, covered with a primer and painted with paint, the shade of which should become the background for the application.
- The door can also be decorated in a patchwork style, using bright squares of fabric or wallpaper, pasted in a similar way to a multi-colored patchwork quilt. A similar version of decoupage can be applied to the insert. Let's say the door was previously glazed: the glass broke or its appearance simply does not match your interior.
Unusual door inserts
- In this case, instead of glazing, you can make an excellent insert from a piece of plywood, decorated in one of the listed ways. And by the way, the decoupage technique is great for decorating the glass itself - only its surface should not be corrugated.
The process of decorating depends on what materials you use for this. If these are decals or interior stickers, you need to refer to the manufacturer's instructions.
The paper and fabric are glued to PVA, the edges are sealed with putty, treated with zero-grade sandpaper and varnished.
Conclusion
The door can be perfectly decorated by applying a geometric frame to it. These can be moldings painted around the perimeter, a glued polyurethane frieze, or mounted and contrastingly painted shaped slats.
By the way, they can be stuffed over the entire area of the canvas. This design is perfect for smooth panel doors and looks very interesting.
As for the paint, if you choose some unusual shade or use a textured option, the door will turn out chic without any additional decor. There are many options for how to update a door, now the choice is yours.
- How to update varnished wooden interior doors 3 secret ways to refine a door yourself Thinking through the design There are many ways to update a door. choice of which...
- Wooden doors - accordion When arranging their home, almost every owner pays great importance to the installation of doors, one of the most important...
- How to install a door with your own hands? Video instructions for installing a door I would like to offer you several training videos on how to install doors yourself. Thanks to the video...
- Insulation of an iron door Recently, an increasing number of people are trying to install an iron door in their apartment. Undoubtedly...