Renovating an old apartment can cause some difficulties. The walls of almost all old houses are whitewashed with lime. This is explained by the fact that at the end of the 20th century this finishing method was the most popular due to its low cost and ease of execution.
However, today you can also find walls with lime, so before gluing, you need to know some of the nuances and rules of the feature in order to avoid difficulties and not waste a lot of time.
Whitewashing the walls: is it possible to glue wallpaper on top?
In theory, wallpaper can be glued to whitewash, but it won’t last long. If you want to take a risk, you should determine the type of whitewash:
- The chalk surface leaves marks on the palm. It’s better not to waste time; the material will quickly peel off the wall.
- Lime coating does not differ in appearance from chalk. You can run your hand along the wall; if dust remains on your palm, you need to clean the surface. If your hand remains clean, you should stick a small sample. After a day, pull the corner, if it doesn’t come off, we move on to all the walls.
Working with wood coverings
Is it possible to apply liquid wallpaper to plywood? The answer will definitely be “no” if it is not processed in any way. Plywood is a wooden material for which excess contact with moisture is extremely undesirable, and liquid wallpaper contains a lot of water. Otherwise, the finishing material will simply delaminate and peel off, and the wood will begin to swell. Therefore, applying it to an unprepared surface can result in peeling and a change in the structure of the plywood itself.
Laminated sheets are coated with primer paint with abrasive chips before applying liquid wallpaper. This will help to achieve, if not ideal adhesion to the surface, then very high quality. Alkyd enamel is applied to non-laminated boards, followed by a primer layer.
Interesting! According to some experts, plywood in direct contact with liquid wallpaper will greatly decrease in area. On the wallpaper side, the sheet bends inward.
The easiest way to verify all of the above is to conduct an experiment on a thin sheet of plywood and see what happens to it and what the finish itself looks like.
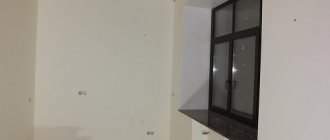
Preparing whitewashed walls for wallpapering
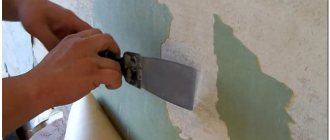
First of all, clean the walls from whitewash. The procedure is dirty, so you should take out the furniture or cover it with plastic, and cover the floor with newspapers or film. Then proceed with the repair:
- Use a sponge dipped in warm water to walk over the surface.
- Take a break to allow the water to absorb. Remove the whitewash with a spatula.
- Cover the walls with acrylic primer.
- Remove debris, wipe window sills, and wash floors with water and vinegar.
- Ventilate the room.
Whitewash is often confused with chalk putty. If it is properly applied to the walls, it does not have to be removed
Surface preparation
As for preparing the surface for the main work: if the whitewash is old or of poor quality, then first you need to remove it. At first glance, this may seem like hard work, but in reality everything is much simpler.
1. If the whitewash layer is not thick, then a piece of tulle or mesh bag will come to the rescue. The material needs to be soaked in water and, without squeezing, begin to rub the wall with it. This must be done until the whitewash completely disappears from the surface, each time rinsing the fabric in clean water.
2. If the whitewash layer is thick enough, you can use a spatula or scraper. If there are cracks, if the coating is old, the lime will be removed even in dry form, all you have to do is just wash away the minor remains with water. If the dry whitewash does not come off, then soak part of the wall with warm water and leave for about 15–30 minutes. During this time, periodically moisten the surface with warm water. You will be surprised how easily a layer of whitewash can come off with a spatula.
Remember that after removing lime from the wall, you must wait until the surface is completely dry and only then proceed to other work. Even if you are going to glue wallpaper on a wall that has been cleaned of whitewash, you still need to use a primer, but glue diluted with water can be neglected.
How to wash off the remaining lime?
Lime whitewash is washed off with clean water, but the process is long. You can speed up the procedure using special means from a hardware store or proven folk methods:
- mix 4 tablespoons of baking soda and 3 tablespoons of grated laundry soap in 10 liters of warm water;
- mix 10 liters of water, 400 grams of baking soda and 400 grams of salt;
- dissolve 1 tablespoon of ammonia in 10 liters of water;
- Dilute 1 tablespoon of acetic acid and dishwashing detergent in 5 liters of warm water.
Moisten the surface with the solution and after 10 minutes it will be ready for cleaning.
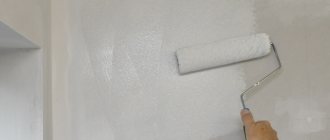
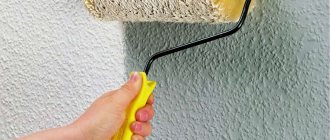
How to prime the walls?
No professional skills are required for priming. Dilute the acrylic primer according to the description on the package and apply it to a flat surface with a paint roller in several layers. It takes up to two days for one layer to dry; the next layer is applied only after the previous one has completely dried.
There are different brands on the shelves. It is better to give preference to soil with an antiseptic. This will prevent mold from forming. After priming, proceed to wallpapering.
If the composition does not contain an antiseptic (fungicide), you can additionally purchase it in water-soluble form and add it to the primer.
Some tips from the professionals
Many years of experience in construction and finishing work have allowed the craftsmen to adapt to almost any working conditions and understand the intricacies of old houses and apartments. For example, the following points need to be taken into account:
- In old adobe houses, the whitewash must be removed to the very foundation. The fact is that earlier, instead of ordinary clay, they often used a highly limed material, which can literally “corrode” even the most expensive and dense wallpaper.
In adobe houses, it is better to get rid of whitewash before wallpapering - It is not recommended to glue wallpaper to a whitewashed ceiling, since the likelihood of it falling off remains critically high. In this case, you can re-whiten the ceiling, cover it with plasterboard, plastic, polystyrene boards or something else.
- Experts themselves recommend taking care of the safety of whitewash only if it is applied in a thin layer to a brick base. The fact is that such a natural finish can neutralize the smell of paint, mortars and mixtures.
In conclusion, we can say the following: even if you love traditions and environmentally friendly materials, you should not use lime as a finish. The fact is that it is capable of attracting moisture, which is why the wallpaper rots in just a few years.
- Author: Julia
Rate this article:
- 5
- 4
- 3
- 2
- 1
(22 votes, average: 4 out of 5)
Share with your friends!
Wallpapering walls after whitewashing: technique
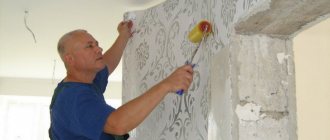
For gluing you will need a roller and a bowl of glue, a stationery knife, a tape measure, a pencil, a dry rag or sponge. If you decide to glue over whitewash, you need to be prepared for the corners to peel off from the wall. How to reduce the risk:
- Calculate the required number of rolls. You can use the calculator on the websites or do it yourself, taking into account the height of the room, the perimeter of the room and the width of the roll. Take with a small reserve.
- Cut the canvas, it is better to add another 10 cm to the height.
- Remove unusable whitewash.
- Clean the corners.
- Apply deep penetration acrylic primer.
- Dilute the glue and cut the blades.
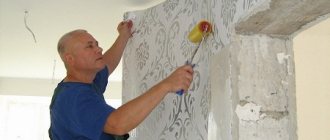
- Spread paper wallpaper with glue and fold it inward for five to eight minutes.
- Apply PVA glue to the corners and the upper section of the wall.
- Start from the window in the direction of the light. Press the wallpaper against the wall with a dry cloth and smooth it out in a herringbone pattern: from top to bottom, from the center to the edge. Remove excess with a knife along the floor line. Glue the material with an overlap of up to 4 mm, otherwise after drying the edges will begin to come off.
If there is a pattern on the wallpaper, you should join and cut all the canvases in advance.
Why prime the walls?
It is necessary to prime walls for a number of reasons:
- strengthening the surface of the walls, preventing the formation of cracks, holes, voids;
- uniform moistening of the entire wall surface (this is part of the technological process of working with some finishing materials);
- masking those stains that cannot be removed (for example, greasy, indelible stains);
- preventing the appearance of fungal microorganisms and mold;
- saving paint and other materials used for wall decoration;
- increased adhesion.
Let's look at each of the listed reasons in more detail.
Strengthening function
The primer impregnates the surface being treated, which makes the material more durable and uniform. The fewer internal defects a wall contains, the easier it is to decorate it and the better the quality of the finishing coating (of course, subject to the technology of its application). In addition, the primer reliably binds the material from which the wall is made and the finishing material (tiles, wallpaper, paint, etc.).
This function is most important for porous, loose materials with many small cavities - brick, plaster.
Hydration
When applying hygroscopic finishes, it is very important to pre-wet the surface as deeply and evenly as possible. For this purpose, the walls are primed before plastering.
If this is not done, in different places of the ceiling or walls the finishing layer will dry at different speeds: in one place the moisture will evaporate instantly and you will have to wet the walls again, while in another it will take a very long time to dry. As a result, the surface becomes mottled in color. This occurs due to the heterogeneity of the material from which the walls and ceilings are composed: deep in the ceilings there may be pores and chips, near pipes and heating devices the finishing layer dries faster, the configuration of the room also affects in a certain way (especially in the corners of rooms and near the outer surfaces of the building ).
Concealing spots
During the renovation process, removing old whitewash or several layers of wallpaper from the walls, you can find many unpleasant surprises in the form of indelible traces of grease, ink, soot, tobacco, coffee or tea. They can bleed through new wallpaper or plaster, ruining the appearance of the entire room. To combat them, walls are primed with special compounds designed to mask stains.
Protection against mold and mildew
Mold and mildew that live on the walls or ceiling of a room pose a health hazard to the people who live there. Neither apartments in panel high-rise buildings, nor private wooden houses and cottages are safe from these uninvited guests - mold and mildew appear wherever there is a lot of moisture, temperatures that are not too high and there are no constant drafts; bathrooms are the favorite.
The best way to protect against them is prevention. To do this, the surfaces of walls and ceilings are primed with a special composition with antiseptic properties before wallpapering, plastering or tiling.
Adhesion
Adhesion (adhesion of surfaces of various materials) plays an important role in repair work. If there is a lack of adhesion, the tiles fall off the walls along with the glue, the wallpaper rolls off, and the plaster crumbles right on your head. The smoother the surface (for example, painted or leveled concrete walls), the more of these problems it causes.
Therefore, it is imperative to prime such walls. The soil gives them a slight roughness, and the top layers (paint, glue, plaster, etc.) adhere to them more firmly and are distributed more evenly.
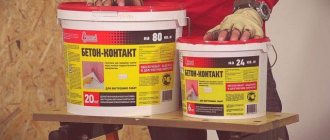
An example of such an adhesive composition, which is used to prime too smooth walls and ceilings, is concrete contact. It contains small particles of quartz in an adhesive base. When processed with it, the surface remains fairly smooth, but acquires the desired degree of roughness and graininess.
Reduced material consumption
All of the above properties of the soil facilitate and speed up the application of finishing coatings to the primed base. Consequently, finishing materials are used more economically, lay more evenly and are of better quality.
For example, before painting the walls need to be primed. For primed walls, one coat of paint is usually enough, while for “bare”, untreated walls, two or three or more may be required, especially in places where there are visible unevenness or dark spots. And this entails additional waste of paint and time, since each layer must still have time to dry.
This makes primer mixtures very popular in construction and repair work.
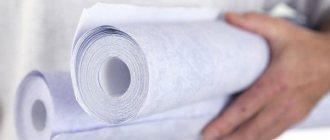
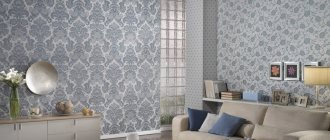
Which wallpaper is better to choose?
For whitewashed walls, only light paper wallpaper is suitable.
In theory, non-woven wallpaper will last if, in addition to the canvas, special glue is also applied to the walls.
If you want to use liquid wallpaper, you must completely clean the surface. You won't have to enjoy the beauty for long - the material will quickly fall behind the walls, stains will appear or the color will completely change. When applying the wallpaper mixture by spraying, in principle they will not adhere to the surface. If applied with a spatula or trowel, the whitewash will move and ruin the texture of the walls.
Gluing wallpaper over whitewash can be very risky. By saving time on cleaning the walls, you can spend more effort on fixing them later. And if the wallpaper does not last on a chalk surface, then with a lime coating there will be an unpredictable result. If there are no options left, you should carefully approach the process and carefully glue the canvases. In this case, there is a chance that the new repair will delight you for a long time.
Is it necessary to remove whitewash?
Before gluing wallpaper to whitewash, you need to assess the condition of the walls or ceiling and carry out preparatory work. Surfaces with old whitewash are inspected with special care.
Is it possible to glue wallpaper over whitewash or do you have to remove it? This question cannot be answered unequivocally, since everything depends on the quality of the foundation. If the whitewash does not crumble, there are no visible cracks or gouges, then you can glue the sheets directly onto the whitewash. Otherwise, you need to remove the whitewash completely, otherwise the sheets won’t last long on it.
To eliminate the risk of premature peeling of sheets from the wall, stick a test piece of canvas and wait a while: if everything is fine, proceed to gluing.