Decorative brick made from plasterboard - making the wall stylish with your own hands
Things are easiest for those whose homes are entirely built of brick.
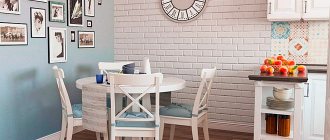
It is enough just not to finish one of the walls. But not everyone is so lucky; many live in ordinary concrete boxes, while striving to create some kind of authentic country-style style inside. To be honest, I’m a builder, not a designer, and I don’t understand styles. To me, brickwork is just a wall made of bricks. But even I admit that it often looks very harmonious even in an ordinary average apartment.
The only problem is that not everyone can afford to spend money on facing bricks to achieve such an effect. Fortunately, you can get by with “little expense” by creating only an imitation of masonry on one of the walls of your home. For example, making decorative bricks from plasterboard with your own hands is not a difficult task, and the result is quite decent.
Therefore, I decided to devote today’s article to this issue. But first, let's figure out why you should use drywall and not any other material.
Preparing the wall
As usual, one of the most important roles in the installation of finishing materials is played by wall preparation. It happens in several stages.
- We carefully remove all old covering: wallpaper or other finishing. The surface should become absolutely clean.
- Sand the wall so that it becomes smooth.
- We make markings to place the “bricks”. This is necessary to ensure that the masonry turns out really beautiful, smooth and natural-looking. In this case, two nuances need to be taken into account. Firstly, brick blocks in real masonry are not located one above the other, but with a shift. That is, each brick must lie on two blocks of the previous row. This is called ligation. This, of course, does not apply to the first row, but it certainly does to the rest. Secondly, do not forget that in real masonry there is also cement mortar. Therefore, when marking, we take into account the seams, both side and inter-row. Usually their thickness is about 10 millimeters, but you can make it 15. When applying markings, do not forget to use a building level, this is the only way you can get perfectly even rows.
- The last stage of preparation is priming the wall. This will allow the drywall to stick to it well and for a long time. The primer must be applied using a roller in an even, thin layer. Make sure that there are no smudges or drops. After application, you need to wait until the composition is completely dry. The time required for this is usually indicated on the packaging of the product.
What and how to create bricks from
When choosing a material, be guided by where you plan to place the artificial stone. Suitable building materials for interior walls include plaster, plasterboard, and putty. Exterior decoration - walls, house foundations, fences - require cement products that are more resistant to temperature changes.
The suitable texture for manufacturing is molding gypsum - GF 10. Quite expensive, but easy to use, hardening time is about 10-20 minutes. The bricks are beautiful and durable.
It is possible to replace it with “G 5” alabaster; at home, a gypsum thin putty solution is also used. If you add GKL glue to the mixture, you will get a durable brick of excellent quality.
Portland cement “M 500”, filled with river sand, is used for the production of concrete tiles.
Imitation of tile covering
After leveling the walls with gypsum putty, within 2 hours, on the existing non-smooth base, you can imitate any type of masonry or stone finishing.
To do this, you will need any chalk other than white - it will be used to mark the base, along which the seams are cut with a chisel or a shoe knife. So, to give the impression that the wall is brick, the lines should be straight.
To create an imitation of finishing with wild stone, lines are drawn randomly or according to a pre-thought-out plan. Here everything depends on the overall interior of the room and the imagination of the person who brings the idea to life.
When the putty has dried, the seams should be treated with coarse sandpaper, dusted off and primed. You can paint such a surface only after it has dried from the primer.
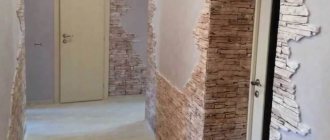
To decorate false fireplaces, you can use a variety of materials - from stone or brick wallpaper to clinker tiles and decorative stone. Often the surface is plastered with decorative plaster (for example, imitating brick). Often the structures are decorated with stucco, the countertops are made of marble or precious wood.
Surface preparation and marking
Preliminary work is carried out according to the following scheme:
- The optimal size of the bricks is determined. The actual parameters of the products are taken as a basis: length – 250 mm, width (height) – 55–65 mm. The thickness depends on the thickness of the drywall, which is 9.5 or 12.5 mm.
- To facilitate subsequent procedures, the sheet is treated with a primer. The mixture is applied to both sides of the product. This will avoid difficulties, because working with small fragments is much more difficult.
- After drying the slab, markings are applied; for this, the material is laid on a flat surface. Clearly visible lines are drawn with a simple pencil.
- If the room does not allow placing a solid panel in a convenient position, then cutting into the required parts is carried out immediately.
To make parts, you can use plasterboard sheets of different types and thicknesses, and “bricks” of different thicknesses will look even better. An
excellent solution is to use leftovers. To mark them, the optimal cutting pattern is selected. In order to obtain an attractive and harmonious decorative appearance, the same height of the masonry should be maintained; deviations are possible only in width.
On a note! You can use another method: gypsum plasterboard tiles are adjusted to the required dimensions and covered with wallpaper with an imitation material.
Production technology
First, let's figure out how to make decorative bricks from plasterboard. For this:
- We place the slab on a flat surface so that there is room for its displacement;
- We make deep cuts with a knife (2/3 of the thickness of the plasterboard sheet);
- break off the element in one movement, cut through the wrong side;
- If you plan to make bricks for “old” masonry, it is recommended not to process uneven edges. If you need to get straight sides, you will have to work with a plane;
- parts are cut from long strips of plasterboard to look like bricks.
When working with a knife, it is necessary to use a ruler for convenience, but this condition is not considered mandatory if unevenness is planned as an additional effect.
The required number of elements is prepared immediately, while creating a small supply of them. The need can be easily determined by taking into account the surface area and size of the seam areas. Using this technique, you will prepare fragments of the same size.
The desired effect is obtained in various ways, but the simplest of them is the following option:
- a putty composition is prepared, the volume of which is selected taking into account its “lifetime”;
- the mixture is quickly applied to the surface of the “brick” parts;
- Having completed a certain working volume and without waiting for the putty to harden, we form the necessary texture. For this purpose, we use available things - a sponge, a brush with metal bristles, polyethylene material;
- Having decided to create an imitation of smooth masonry from new brick, distribute the applied mortar evenly;
- dried parts are sanded, which is very important when decorating “old” masonry;
- To make the masonry interesting and give it volume, it is painted in several layers. Depressions and protruding places are treated with dark paints, then shading is performed.
You can imitate a brick wall without putty material. To do this, the surface of the plasterboard sheet is wetted with water to separate the cardboard. Then the required texture is applied with a metal brush and painting is performed.
There are a lot of ways to decorate brickwork, but the easiest way to do this kind of work is to decorate it in a “antique” way.
For this job you will need a steel bristle brush, a knife and sandpaper.
The masonry, which has a fine-grained facial structure, looks original. To achieve this effect, the surface is coated with glue and sprinkled with fine sand. As soon as the glue has dried, a varnish treatment is performed to fix the achieved result.
It is allowed to work with the putty mixture even after completion of the installation work, but in this case a lot of effort will be required.
Types of imitation bricks
Manufacturers of false masonry take into account not only the great demand for products that create the appearance of a brick wall, but also the impossibility of cladding partitions with real ceramic blocks. Therefore, several variations are made that can completely replace the natural appearance of brick walls.
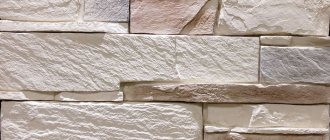
You can imitate any type of brick and even natural stone
This finish is produced in various shapes and structures. Solid or plastic tiles have dimensions identical to those of ceramic stone or a combination thereof. Large panels are made from polyvinyl chloride, fine wood fraction, and glass fiber cement. One element is capable of covering a relatively large area of the partition, creating an overall brick imitation appearance.
VIDEO: Plastering brick walls
Flexible material
Flexible tiles are considered an excellent solution for cladding walls that are regularly exposed to aggressive environments. The product serves not only as a decorative element, but also to protect walls from mechanical and chemical influences.
Soft tiles, already painted to match the masonry - you just need to stick them on the wall
Installation of flexible stone is carried out both on flat surfaces and on embossed, internal or external corners. It is used for cladding corridors, kitchen rooms, loggias. Also suitable for exterior decoration of facade walls, decorative structures in the form of columns or fireplaces.
In manufacturers' catalogs there are many flexible materials with different textures, colors, and shapes. Thanks to this, you can create a unique style that is in harmony with the overall design of the home interior.
Hard material
Brick facing panels are made from a variety of raw materials. The workpiece is often gypsum, cement mortar, clay mixtures with the addition of coloring components, plasticizer or fiber fiber. Some materials involve making imitation bricks for interior decoration with your own hands.
Brick look tiles
The process of creating rigid tiles, based on almost all components, is identical. Differences can only occur when laying the product, since each type of finish is attached using a specific adhesive mixture.
Gypsum products
The gypsum coating option is considered the most budget-friendly. This is justified by the low cost of raw materials and the low degree of resistance to a humid environment.
However, there are additional components that improve the moisture resistance of the outer and back layers of the slabs. In this case, the product can be used both for interior decoration of any premises and for cladding facade walls.
The product is lightweight, which makes it easy to attach it to the wall surface using gypsum glue.
Before making an imitation, you should first prepare the necessary materials:
- Gypsum;
- Mixtures to improve the moisture resistance of the product;
- Forms;
- Grout for finishing seams.
Next, you need to dilute the gypsum mortar, fill the molds with it, wait until it hardens completely and begin laying the brick wall.
Installation and finishing
When the brick is ready, you can proceed directly to the laying. Carefully clean the wall and coat it with primer, then make markings and begin laying the fragments, placing them on the adhesive mixture. When laying, you can use standard plastic crosses, and after drying, fill the seams with a grout mixture.
At this point, the bulk of the work can be considered completed. If desired, you can apply an additional layer of paint or varnish to the brick surface, making it more uniform, beautiful and attractive. With enough diligence, you can recreate natural brickwork using available materials. Happy renovation!
What you need
Externally, the surface of the gypsum plasterboard bears little resemblance to brick and requires additional processing. Therefore, to create a relief and a beautiful texture, you need to stock up on one more material - a plaster mixture or putty. In principle, it does not matter which mixture is used, the main thing is that it “sticks” well to the surface of the gypsum board. In addition to putty or plaster, you will need a small set of tools:
- Small spatula.
- Sandpaper for finishing the edges of parts.
- A hacksaw or other device for cutting gypsum boards.
- Roulette.
- Masking tape.
- Marker or pencil.
You also need to prepare the paint that will be used to paint the surface being created. In some cases, ordinary white paint is enough, but if you want to achieve high-quality texture detail, you will have to prepare several paints of different colors, similar to real bricks. However, in the case of decorative parts made of gypsum board, it is quite difficult to achieve high realism and it is better to choose a simpler option with one color.
Required materials and tools
The advantage of homemade decorative brick is that it can be made using scrap materials. The key element is drywall sheets. Standard materials used for the construction of niches and multi-level ceilings are suitable. If you plan to decorate a bathroom or kitchen with artificial bricks, it is recommended to use moisture-resistant sheets.
You should buy textured putty. This will help recreate the natural texture of real brick, with pores, small cracks and abrasions. If there is ordinary putty left in the house, then it is also suitable for making artificial brick, and you can use other methods for decoration.
Other materials that will be required for the work:
- varnish - it is recommended to use transparent or matte, which will help consolidate the result and preserve the appearance of artificial brick;
- building mixtures - we are talking about compositions intended for laying sheets of drywall;
- sand - useful when decorating the surface of artificial brick;
- paint - water-based paint is suitable, and stock up on several colors in advance to give the brick a natural shade;
- primer - a deep penetration mixture is needed, as it will help strengthen surface adhesion;
- PVA glue - used for additional decoration.
As for the set of tools, it is standard: a construction knife for cutting, a profile with metric divisions or a hydraulic level, a spatula for applying putty, a brush and roller for painting, a container for mixing solutions.
If you have a drill with a mixer attachment, it will make the job much easier. To style the surface you will need a roughing plane.
Sanding and priming
When the tile has dried thoroughly, it needs to be shaped. The edge of the product is polished using a sanding float with coarse abrasive. The grater should be held at an angle, this makes it easier to chamfer 5-10 mm. It is necessary to ensure that it is the same on all sides. The top side of the tile remains unpolished.
The primer is mixed from a mixture of water and wax for walls in a ratio of 30:100. Use a wide brush to coat the front side and edges.
Cutting gypsum boards and decorating artificial bricks
Cutting drywall into fragments is carried out according to the following algorithm:
- The slab is laid on a flat surface with the possibility of displacement.
- Using a construction knife, deep cuts are made (more than 2/3 of the sheet thickness).
- The piece breaks off in one motion, cutting through the underside of the drywall.
- If the bricks have an aged appearance, then the uneven edges are not processed. A plane is used to create straight sides.
- Long fragments are cut into separate parts.
When cutting plasterboard with a knife, using a ruler as a stop is desirable, but not necessary; small curvatures to imitate old masonry are acceptable. The
required number of blanks is immediately prepared with a small margin. To do this, calculations are made that take into account the area of the wall and the size of the seam between the elements. This technique will allow you to avoid significant differences between fragments.
The desired decorative effect can be achieved in different ways; the simplest imitation of brick is created as follows:
- The putty mixture is prepared. The amount depends on the lifetime of the solution.
- The composition is applied with quick movements to the surface of the parts.
- After a certain volume has been completed, but before the mixture sets, the desired texture is formed. To do this, you can use available tools: plastic film, a hard-bristled brush or a sponge.
- If you plan to create an imitation of new masonry, then the solution is distributed in an even layer.
- After the parts have dried, sanding is carried out. This process is especially relevant when aging.
- To give the masonry an interesting three-dimensional effect, you can paint it in several layers. Depressions and protrusions are treated with a dark-colored composition, after which shading is performed.
You don’t have to use putty, but simply remove the cardboard from the front surface of the gypsum board; to do this, you need to wet it. Then apply the texture using a wire brush and then paint. The entire process is shown in the three-part video presented in the article.
There are many options for decorating masonry, but the easiest way is to make aged brick: all the work can be done with a wire brush, a knife and sandpaper
Details with a fine-grained facial structure look original in the interior. To do this, glue is applied to the surface and sand is poured. After drying, a layer of varnish is applied to fix the result.
Attention! Work with putty can be done after installation, but this will require a lot of effort.
Characteristics of drywall
Essentially, the material consists of two sheets of cardboard, between which there is a gypsum layer. This, in fact, explains the name “plasterboard”. Gypsum itself is an excellent material, therefore the same qualities are characteristic of the material in the creation of which it is directly involved:
- light weight. The lightness of the material means ease of transportation (as well as savings on it), ease of operation, and the absence of loads on the floor slabs in your home;
- flexibility. From sheets of plasterboard you can create a wide variety of structures, not just straight walls. Semicircular arches, various niches, ceiling cascades and other shapes - all this can be brought to life;
- low thermal conductivity. It is clear that external walls are not made from this material. But, firstly, it is possible to carry out interior finishing with its help, thereby increasing the thermal insulation characteristics of the structure. And secondly, there are times when you need to protect a warm room from a cold one, and here a plasterboard partition will come in handy;
- fire resistance. Despite the fact that there is cardboard on the outer sides of the sheets, the material perfectly resists the effects of flame. Of course, its lining will burn if it comes into direct contact with fire. But the internal gypsum filling will perfectly withstand even long-term interaction without collapsing;
- ease of installation of structures and finishing;
- absolute evenness of the surface, which allows you to begin finishing immediately after installation, without wasting time on puttying, leveling and other tedious procedures;
- environmental friendliness. Since the material essentially consists of gypsum and paper, it is not capable of causing any harm to the environment and people. It can be used without risk to health in the bedroom, in the nursery - in general, absolutely everywhere.
To complete the picture, we list the disadvantages:
- low strength. Drywall can be damaged by the slightest load. This can happen during its transportation, during installation, and in general during use. Naturally, it cannot be used to hang something heavy on the wall. And in general, during operation you have to behave carefully - for example, do not lean on those sections of the walls that are finished with this material;
- water resistance. Ordinary drywall does not have this quality at all. There are, of course, special waterproof varieties. They can be distinguished from ordinary ones by their green color. But still, I personally don’t usually recommend using it in rooms that typically have high humidity levels, i.e. the bathroom, etc.;
- soundproofing. It’s also very low, it’s not for nothing that there is a common expression about “walls like cardboard.” When constructing an interior partition, this problem can be solved by installing drywall in two layers and filling the space between the sheets with soundproofing material. By the way, you can hide various wires and cables in the same place. But as a decorative finish, plasterboard will not improve the sound insulation of a room;
- susceptibility to fungal infections. But this problem falls into the same category as lack of water resistance - just don't use drywall in areas of high humidity.
Now that you can fully appreciate this material, let's talk about how it can be used for decorative finishing of premises.
Advantages and disadvantages of products
The advantages and disadvantages are summarized in the table:
- A variety of types of decorative gypsum stone for interior work.
- The cost of the stone is equal to the price of ordinary tiles of the average manufacturing category, while the performance of the material is much higher.
- Lightness, which allows you to make the cladding look like stucco.
- The environmental friendliness of the material makes the surface “breathable”, it is decorated with ordinary paint for interior work, and is suitable for partitions, facades, surfaces insulated with mineral wool or foam plastic.
- High technological characteristics, the tiles last a long time and look great. It is durable, resistant to temperature changes and high humidity.
- The main disadvantage is lightness. A wide range of decorative possibilities allows you to make stone from gypsum yourself, so for those who want to buy a factory product, it will be difficult to distinguish it from one made independently (how to make decorative stone yourself?). The difference between factory-made and garage gypsum tiles can be significant.
- Low sound insulation.
Making a mold for casting brick tiles from plaster
An imitation also be cast: you can make gypsum tiles in the form of bricks yourself. To do this, an impression is taken from interesting specimens of bricks (a mold is made to form an artificial finishing stone), and then a gypsum solution is poured into it. The resulting tiles are used for wall decoration. This technology is good because it allows you to prepare several molds in which you can make bricks of different colors for different rooms.
We find bricks of interesting shape and several almost ordinary ones, but with various minor defects. We will use them to cast the mold. It is desirable that there be at least a dozen of them, or better yet, more. “Artificial brickwork” will be more varied.
On the side that we will “multiply”, apply grease or heated wax mixed with kerosene. This is necessary so that the silicone does not stick to the surface. When everything is dry, apply a layer of silicone sealant to the treated side. The layer thickness is 1-1.5 cm. Leave until the silicone is completely polymerized (the time depends on the type, it is written on the package).
DIY plasterboard bricks
When the silicone has hardened, take the foam and coat the mold without removing it from the brick. After the foam has hardened, remove the brick and level the bottom of the mold so that it stands level. Can be used by filling with gypsum mortar. It sets quickly; if you have a dozen molds, in 2-3 days you can make tiles for a couple of squares simulating a brick wall. By the way, gypsum mortar can be painted in bulk. Then new cracks and chips are not a problem - just like a brick .
do-it-yourself decorative bricks from plasterboard, part 1
Selection of adhesive composition
On my own behalf, I will add that you can quite successfully glue decorative bricks from plasterboard with your own hands on:
- any solution designed to work with ceramic tiles;
- silicone sealant or other elastic fastening compound;
- standard cement mortar.
Be sure to read the instructions on the product packaging before use. This way you will not only avoid unpleasant situations, but will also be able to achieve the strongest possible adhesion of materials.
When using compounds, avoid exposing them to direct sunlight - this will reduce the adhesive ability of the product. If this cannot be avoided, after finishing the work, wrap the stone in film to reduce the rate of moisture evaporation.
READ Do-it-yourself foundation drainage for a private house
Is it possible to glue a stone blank onto a plasterboard surface?
Decorative stone made from the same material can be glued onto drywall.
In order for artificial stone to serve as an interior decoration for a very long time, the working surface on which it will be glued must meet the following requirements:
- perfect evenness, without grooves or roughness;
- be dry, clean;
- the surface must undergo a degreasing process.
Drywall meets all these requirements and is suitable for cladding.
Decorative stone made from plasterboard is used for covering surfaces made of brick, concrete, wood and other materials in a variety of rooms: in the bedroom, in the living room, in the corridor, in the hallway and in the kitchen, on the balcony. The main thing is to choose the appropriate adhesive composition, prepare the wall and partitions for stone.
How to choose a place for a fireplace?
Initially, you need to select a suitable room and place where the decorative plasterboard fireplace will be installed. As a rule, such an interior element is located in the living room. Here everything depends on the dimensions of the room - in a large one it is more advisable to place the portal in the middle of the longitudinal wall, in a small one - one of the corners will be a good place. The design can also be supplemented with a false chimney, which will give it expressiveness and believability.
Photo 5. Corner placement of a plasterboard fireplace
Regardless of the chosen location, the installation of the fireplace must be carried out in strict accordance with the technical requirements of the room. Not only the decorative effect and harmony of the interior composition, but also the functionality of the room itself depends on this. The following video shows the process of installing a wall-mounted false fireplace in a high-tech style:
Gypsum coating can be maintained using dry and wet cleaning. It is permissible to use a vacuum cleaner with a special attachment, soft-bristled brushes, and damp rags. Abrasive materials and aggressive detergents can cause irreparable damage to the surface. The varnish coating significantly reduces the risk of damage to the top layer. To ensure the finish is resistant to moisture, it is treated with a special impregnation. After applying this product, the cladding can be washed.
Important step: applying plaster.
So, you have completed the preliminary preparation of the wall (cemented, plastered defects), primed it and waited for the base to dry. Now proceed to adjusting the working mixture. The simplest and most common option involves adding dye to the plaster solution. There is another way, but it will be discussed at the end. Now let's focus on the first one. Dilute the dry mixture according to the instructions, then add the coloring pigment and mix everything well.
Without experience in this kind of work, you should not mix a whole basin of mixture. The thickness is like viscous sour cream, so that the composition gradually slides off the spatula, but does not drip or fall off in pieces. The composition is good, if there are no lumps. For the first time, it is enough to cover 1 square meter of wall. If you hesitate, the solution will dry out and you will have to throw it away.
The mixture is scooped up with a spatula and thrown onto the surface, then leveled upward. If you want a brick wall made with your own hands from plaster to look as unnatural as possible, do not try to smooth the surface too much. Brick is rarely perfectly smooth; more often it is rough and has irregularities.
- Inexpensive way. Such coverage will not require financial investments.
- Eco-friendly. The plaster does not contain harmful impurities.
- Simple. No special skills or tools are needed here. Just a little care and patience.
Marking
Before starting the main work, it is necessary to prepare the surface - remove the old finish. If it is not level, level it with plaster and cover it with a primer. Another option is to use drywall, this is a dry leveling method. However, if the area of the room is small, this method is unlikely to be suitable, because the sheets will “eat up” the space.
Please note: if the apartment is in a new building, you can start decorating the room no earlier than 1 year after the completion of the house. Otherwise, the walls may shrink and cracks may form.
Once the surface is prepared for work, you can begin marking. And there are two options here.
First: some construction stores sell a ready-made mesh form; this method is simpler, but also more expensive. Second: independent marking. How to make an imitation brick wall with your own hands?
- The standard brick size is 250 mm x 65 mm, the size of the joints is about 15 mm, although this is not important, and they, of course, can be changed.
- Cut a brick out of cardboard with seams on the sides.
- Mark the center of the brick, also taking into account the seams. You should get a blank like in the photo below.
Marking starts from the left corner. Provide in advance for indentations from the ceiling and floor - at least 5 cm. First, you can mark out the area according to the lattice principle, marking a grid, and then draw half of the brick through the row. Trace the resulting stones and you will have standard brickwork.