Ways to imitate brickwork
There are several interpretations of this design solution. The range of finishing materials is quite wide, and the choice mainly depends on financial and physical capabilities.
The least labor-intensive method is gluing panels specifically designed for interior decoration. They are rectangular in shape and made of plastic. The outer side of such a panel is decorated like brick. The finishing work itself does not take much time and effort, and the result is quite acceptable.
But such a wall does not look entirely natural. If you want to achieve greater realism, it is recommended to use ready-made tiles or special wallpaper that imitates brickwork.
If you have limited finances, you can use one of the following methods to recreate the appearance of the wall:
- plaster or putty (during repairs, excess finishing materials usually remain, which can be used);
- cardboard.
How to make imitation brick with your own hands
There are several ways to finish the brickwork. We will analyze each of them in a separate article with a detailed master class:
Wallpapering
The simplest option for decorating walls would be wallpapering . Smooth, inexpensive wallpaper with matching bricks was a popular option for hallways and kitchens. Modern production offers many types of brick-look roll wallpaper made of strong and durable materials, for example, vinyl, non-woven fabric, fiberglass. Their drawing surprises with its realism; it is quite difficult to find identical bricks the first time. The price for one roll can be up to 5 thousand rubles.
Photo wallpapers differ from roll wallpapers in that their pattern is not repeated . Besides the brick wall, they usually have something else painted on them: old crumbling plaster, paint, graffiti. Photo wallpaper with imitation brick can be ordered from any design studio. They will print them according to your design and desired size. The price starts from 400 RUR/m2.
A few words about egg trays
The trays that are used to transport ordinary chicken eggs are mostly made from paper waste and waste paper sent for recycling. They are quite dense, have a certain shape, and inside the eggs themselves are more or less tightly packed into special cells.
Since such a tray contains only paper, it is absolutely safe, and besides, it can be used by needlewomen and craftsmen to create various objects from papier-mâché. Papier-mâché is a special plastic mass that can be easily given the desired shape, created from paper and glue. You can make anything from it: masks, crafts, figurines, various accessories, and so on. Depending on the type of papier-mâché, you can create objects of varying texture and strength.
An egg tray is a product made of cardboard and paper, ideal for creating papier-mâché
On a note! Most often, papier-mâché is used to make various crafts for school. However, the list of options for using this mass is quite extensive. Papier-mâché is suitable for a variety of projects, from creating jewelry storage boxes to all kinds of stucco molding that decorates the walls of the house.
An egg tray is one of the most affordable materials that is great for creating papier-mâché. But everyone throws them away, except for handicraftswomen. Although in fact it is best to recycle such trays if you do not want to use them in any other way.
On a note! Until the early 70s of the last century, eggs from USSR poultry farms were transported using sawdust and straw. Later, the equipment necessary for the production of egg trays was purchased abroad.
Egg trays are used to make original little things that fit perfectly into the interior.
If you like to make things with your own hands, then the egg tray is a real find for you. This is a great option to make something useful in everyday life or just a beautiful thing. In this article we offer you to get acquainted with a master class on creating brickwork from such trays.
Do you throw away egg trays? We found an interesting use for them in budget renovations.
A subscriber to our VKontakte group, N.A. Kolmogorova, shared the history of the renovation and photos before and after.
Brickwork in the interior will probably never lose its relevance. If you think through the design correctly, it will become an original addition to the room and its bright accent. But to make such home decor, you need to buy either the brick itself, or panels that imitate such masonry. Sometimes it is impossible to purchase materials for one reason or another. But there is a solution: you can make beautiful brickwork from egg trays! How to make it? For you - a step-by-step guide to creating such decor.
Main details
The most important thing in all the work is to make the “right” bricks. They must be the right size. There are many varieties of this material, but most often in masonry you can see the following dimensions: 250 by 120 by 95 millimeters and 228 by 138 by 65. There is also a dimension that is less common: 250 by 120 by 88 millimeters.
In addition to choosing the dimensions, you still have to decide which side the brick will lie in the masonry - this is also done in different ways and you need to choose the option that suits you. Having decided on this, a template is drawn on the cardboard according to which the parts will be cut. When the marking is applied, everything is cut along it and put aside for now. Some of the parts will have to be cut in half to imitate halves of stones.
Imitation using plaster
The work will require the following materials and tools:
- plaster;
- tile adhesive;
- tape (painting);
- primer;
- dye;
- container for mixing the solution;
- medium-sized spatula;
- drill with a special attachment for stirring;
- pencil;
- roller;
- brush;
- measuring tool;
- scissors;
- latex gloves;
- template (stencil).
The latter can be purchased at any hardware store. The stencil is a hollow mesh shape consisting of many rectangular bricks. It is applied to the wall and plaster is applied, and after drying it is removed. An analogue can be adhesive tape or reinforced tape. They are glued according to the markings of the seams between the “bricks”.
First of all, prepare the surface - remove the old cladding and level the wall . If there is paint, then leave it, but first make notches. Then a layer of acrylic-based primer is applied. Apply the finished stencil and fix it or glue it with tape. When using the latter, mark the wall. It happens like this:
- Place pencil dots on the wall along both edges with a vertical indent of 7.5 cm. Marks located opposite each other are connected by a straight line horizontally.
- Glue strips of paper tape along the marks obtained. Recommended thickness is 1.5 cm.
- Paper tape is glued vertically every 25 cm.
- To achieve a checkerboard pattern, in the second row the first line is glued at a distance of 12 cm from the edge.
To imitate a brick wall using plaster with your own hands, after such manipulations, mix the solution according to the instructions on the package and apply it to the wall using a spatula. The recommended layer thickness is 4–5 mm. Level the surface and carefully remove the tape markings. Since the paper may become wet, the procedure must be carried out as quickly as possible.
The result is bricks. If necessary, smooth out sharp edges with sandpaper.
The dried plaster is covered with paint (latex, acrylic, water-based) of the required color. The seams between the bricks are painted with a contrasting color – usually white. It is convenient to use a thin brush.
If it is not possible to spend time on painting, the color is mixed into the plaster. In this case, it is recommended to immediately mix a large volume of mortar so that it is enough for the entire wall and it turns out to be one tone.
Progress
Surface preparation
The surface on which the brickwork will be imitated (it can be a wall or panel) must first be prepared.
Clean the wall of old wallpaper, if necessary, prime it with a special construction primer or a 1 to 2 solution of PVA glue and water. If the wall was covered with paint, then wipe the surface from dust and degrease.
Imitation of decorative brickwork
There are quite a few varieties of bricks. It all depends on which one suits your interior best. And, if you have the opportunity to experiment with the color of the brick, then you need to decide on the size of the bricks right away. The main dimensions of the brick can be seen in the figure
In addition, the type of masonry depends on which side of the brick will be visible. Each side has its own name and will look completely different in the interior.
1 - bed 2 - spoon 3 - poke
There are different options for decorative brickwork: for example, the outer side can be completely laid out with a bed or a spoon, or it can combine different sides of the brick.
In our example, we will imitate red brick masonry; we will lay it with a spoon with dimensions of 228x65.
On a sheet of thick cardboard (packaging box) we draw out the “bricks” of the required size.
Then we cut the sheets along the marked lines using scissors or a stationery knife and a ruler.
The “masonry” in the interior can be either solid or reveal some kind of image to us. For clarity, in this example we took a photo from a calendar. In the interior this can be a drawing, photo wallpaper, stucco, etc.
Mark the boundaries of the drawing. If the boundaries according to the plan will have to go under the decorative brickwork, we place the drawing on the wall. We glue, we draw, we sculpt.
We cut some of the resulting “bricks” in half. This is necessary so that the masonry is staggered and looks realistic.
We begin to glue the “bricks” to the surface. This can be done with glue for heavy wallpaper, such as vinyl. You can use PVA glue or any other convenient for you to work with. After some experiments, I settled on this method: PVA construction glue + hot glue gun. If we consider them separately, PVA glue dries for a long time and does not immediately fix the bricks, and a hot glue gun, if used without PVA, uses up the rods very quickly. Therefore, we do this: apply PVA glue to the entire rectangle, with the exception of the corners themselves. We apply glue from a hot-melt gun to the corners. Hot-melt adhesive immediately fixes the “brick” in the right place, and PVA securely fastens it within 24 hours.
It is most convenient to start laying from a corner. We fix the first “brick” in the lower left corner.
We will fasten the next one at a certain distance, leaving space for an imitation seam of 07-10mm.
We will retreat the same distance from above, starting to lay out the second row. It will start with half a “brick” to create a checkerboard pattern.
When all the rectangles are glued, we leave them to dry for the time specified in the glue instructions. If it is PVA construction adhesive, then the drying time will take about a day.
When the glue has dried and the “bricks” are securely fixed along their entire length to the wall or panel, we begin decorating with napkins. This is to add texture to our brickwork and to hide the corrugation of the packaging board.
The napkins need to be thick and of high quality so that when soaked in glue they do not tear or roll up.
Using a brush or sponge, thickly apply PVA glue on top of the rectangles.
We crumple the napkin in our hands to form folds.
And we apply it to the wall, in the place where the glue was applied. Apply glue on top of the napkin with a brush once again.
Select the gaps between the rectangles with a brush or finger.
This way we cover the entire wall. We make sure that there are folds and well-defined gaps - seams between the masonry.
Let it dry for another day.
When the glue dries and hardens, we begin painting.
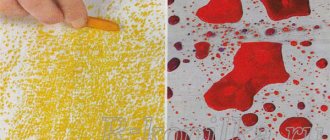
The color is selected in accordance with the design. In this example we imitate red brick. By mixing white, orange, red and black paint we achieve a similarity to the original color of the brick.
And we cover the “bricks”. You can do this with a brush, or with a sponge, imitating the slightly porous structure of brick.
Then we go through the “seams” in the brickwork with a thin brush. You can also choose the color of the solution to suit your taste. But most often it has a slightly grayish tint.
Remember that after drying the paint becomes lighter than it appears in its liquid state. If after drying the color does not suit you, then the wall can be repainted until it acquires the desired shade.
When everything is ready, the folds on the bricks can be highlighted with darker or lighter paint, thereby giving the masonry a little antiquity and texture.
Apply paint of a suitable shade to the “bricks” with a dry brush.
It is best to varnish the paint on top to protect the surface from moisture and dust.
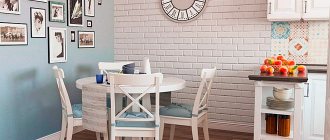
Such walls in the interior look very believable and beautiful. The work is not difficult, you don’t need to be a professional builder or finisher to complete it, the materials are available, and everything can be done to your liking, choosing colors and shapes to match the interior.
"Brick" wall made of cardboard
In search of an original wall design for certain conditions and desires, another way was found to decorate a wall “like a brick” without using these same bricks.
There was already a note on the site about this: Finishing a wall with brickwork. And everything would be fine, and the result would be wonderful, but... drilling into a concrete wall for a bunch of “auxiliary” slats is simply unrealistic. This master class talks about designing “like a brick” using a sheet of hardboard (as a base) and thick cardboard (for bricks). Even though this is an example of creating a background for photo shoots, no one is stopping you from using it for interior decoration, especially when this is done as a temporary solution. For example, in rented housing, or if there is a lack of funds, or as a “test of the pen”, or... in general, there are many options.
In a nutshell: rectangles of cardboard are glued onto the base, their sides (cuts) are covered with putty, and the surface is decorated with it, primed, painted and varnished.
But enough reasoning, let’s take a look at Natalia’s detailed master class and apply it for our own needs.
We will need:
- a sheet of hardboard, - sandpaper with coarse abrasiveness, - cardboard boxes, or rather thick cardboard itself, - a construction or stationery knife, - a ruler, - a pencil, - Titanium glue, - putty, - a spatula, - a primer for walls, - a paint brush wide, - thin glue brush with stiff bristles, - white acrylic paint, - paint of the desired color, - acrylic varnish.
Let's get started:
1. We measure and line the rectangles of the required size (standard brick - 24 x 6 cm). It’s easier to cut cardboard not with scissors, but with a knife under the ruler, placing something hard and unnecessary, because it will be ruined by cuts from the knife.
2. We lay out our rectangles on hardboard, imitating brickwork. Like that:
3. Now all this needs to be properly glued and Titan glue copes with this quite well.
Next, we take putty, dry (dilute to a thick sour cream) or ready-made for wood, it doesn’t matter. And we apply it to the edges of the bricks, covering them. And this is one of the jobs in which negligence, on the contrary, is only welcomed. Next, the same putty must be applied to the bricks themselves, carelessly, leaving uneven spots and depressions.
4. Let it dry (I dried it on the radiator for about an hour). It’s dried, now we need to fix it all with a primer for the walls, cover it and dry again for about another hour.
5. Take white acrylic paint and the desired color, mine is “coffee”. I cast a little white paint and a very small drop of color. And if the paint is thick, then it is better to dilute it a little with water. And we cover everything in one tone.
6. The paint dries quickly, almost instantly, so I immediately begin further painting. We dilute the paint again, only the color is a little larger, so that there is a difference of a tone or two, and apply it along the edges with a thin brush and a little on the bricks themselves. So several times, we mix, add darker areas and lighter ones, highlight the shadows and leave the highlights. Until the result seems most suitable.
7. Next, we need to paint the distances between the bricks, for this we dilute the paint as before, the tone should be a little darker than the previous ones, for which we need to add a drop of black color. In order for the paint to apply evenly, you need to add a little water. And again, add light and dark tones, mix, highlight edges and irregularities to add volume.
8. The final stage will be coating with acrylic varnish. In my opinion, it is worth using matte and semi-matte varnish (for a brick wall, gloss is not a very suitable option).
Option for interior decor:
Should I try gluing it directly onto the wallpaper (especially if it is not smooth)? Line the position of the bricks on them, observing their standard size and the size of the seams between them (the author of the master class did not do a very good job with this). Use a roller for painting, since the area is completely different. It’s unlikely that so many “steps” of coloring are needed - the light in the apartment itself will create all the necessary shadows on the texture.
Painting and varnish
The process is more creative than complicated—be sure to use multiple shades of paint. For red bricks, brown, red and black are suitable. For white - just white paint, slightly diluted with black to a grayish tint. The solution turns gray or dark gray. The result will depend on your efforts and the talent of the artist. After the paint has dried, you can coat the surface with varnish.
Imitation of a brick wall with your own hands.
Every day, a brick wall is used more and more often: previously, such surfaces were carefully decorated, but today, on the contrary, they are even artificially created. Moreover, not only professionals, but also ordinary people can reproduce such an imitation. All you need is a little patience, a great desire and this article, from which you will learn all the secrets of creating an imitation brick wall with your own hands.
Option 3 – traced brickwork.
To simulate it you will need:
- kitchen sponge;
- Ruler and pencil;
- paint of the desired color (in our case it will be obtained by mixing the available 2 red and 3 dark paints).
That's the whole list.
- Cut the sponge to the required brick size.
- On the wall where the imitation will be created, draw the lines along which you will work.
- Dip the sponge into the paint (or mixture) and press it firmly against the wall. Do this several times until you get the print you want. Next, make a gap (indent) and repeat this step again until the entire wall is covered with these “bricks.” And don’t be afraid if something isn’t perfect – it’s even more natural.
We imitate cardboard bricks at home
Corrugated cardboard is best suited due to its density and structure.
Necessary materials
- Sheets of corrugated cardboard or thick cardboard boxes;
- thick paper napkins (preferably high-quality ones that will not be almost completely dissolved by glue);
- a lot of glue, such as PVA;
- wide brush;
- hot glue and a gun for it;
- stationery knife;
- pencil and ruler;
- dye;
- varnish (optional).
Process sequence
- As in the previous version, the wall must be prepared: cleaned and degreased, primed.
- Cut out rectangles of the required size from cardboard. If naturalness is very important to someone, the standard length and height of a single brick is 250x120 mm. Using a ruler, mark horizontal lines on the wall to make it easier to mount the bricks evenly on the wall.
- We coat each cardboard “brick” with PVA glue. IMPORTANT: do not touch the corner parts. Apply glue from a gun to the corners. This integrated approach will allow you to fix cardboard bricks to the wall almost instantly using hot glue, and gradually drying PVA will enhance the effect over the entire surface of the element.
- The most creative stage is decoration. To create the effect of roughness and decoupage on the wall, apply glue to each brick tile with a brush, glue paper napkins to them, and coat the top with glue again. Before gluing the napkin, crumple it in your hands - this will help achieve a more realistic appearance of the brick structure.
- A round stick or just a finger will help to create the appearance of seams - we use them to press down the seam line so that it “sinks” into the wall. The sharp edges of the rectangular cardboard tiles will smooth out the napkins.
- At the last stage, we move on to painting the brickwork with paint. To enhance the decorative and protective effect, you can apply varnish to the wall.
Option 4 – brickwork made of putty.
To recreate it you will need:
- directly putty (any except finishing);
- level;
- pencil;
- putty knife;
- window seal with a thickness equal to the desired joint of the false brick wall.
A furniture stapler may also come in handy (if the glue you choose cannot securely hold the seal), but it is not necessary.
So, the standard brick dimensions are 250x65x120 mm. In accordance with them, basic surface markings should be carried out.
- Step back 65 mm from the floor, use a level and a pencil to mark a straight line and glue the window seal onto it.
- Step back 65 mm from it again and do the same thing again. And so on until the entire surface of the future “brick” wall is filled with these horizontal stripes.
- Make vertical markings. To do this, step back from the lowest point (from which one, it doesn’t matter, unless there is a corner in your false wall, otherwise you need to start from there) 250 mm and draw a vertical line, then another 250 mm... and so on throughout the first row. The second row and each subsequent even row should be done in the same way, only in order to get a checkerboard order, the first “brick” must be halved. Afterwards, glue all the drawn lines with a sealant.
- Dilute the putty, fill the resulting “honeycomb” to the entire thickness of the seal (there is no need to cover it) and leave until completely dry (about 24 hours).
- Peel off the seal (this is not difficult to do, since it does not “resist”), paint the imitation brick wall with your own hands in a more natural color, and after it dries, cover the seams with tile grout or cement.
How to make brickwork from egg trays
So, how to make imitation brickwork from egg trays? Everything is very simple, and after getting acquainted with the master class, you will be convinced of this.
Step 1. First you need to prepare papier-mâché. To do this, take egg trays and chop them into small pieces with scissors. The less, the better - this way the paper will get wet faster.
Let's start preparing papier-mâché
Step 2. Next, fill the paper in the container with hot water. If you fill it with cold water, the paper will also get wet, but the process will take longer. It is best to leave the paper in water for several hours.
Fill the paper with water
Step 3. While the paper is soaking, draw a sample of brickwork on a piece of polyethylene using a marker and ruler. Choose the optimal brick size for you - for example 7*20 cm.
Brickwork sample
Step 4. When the paper is wet, add plaster to it. Calculating the amount is simple: for three egg trays for ten eggs, use two to three tablespoons of gypsum (heaped).
Soaked papier-mâché paper
Adding gypsum
Step 5. Mix the mixture well so that the gypsum spreads throughout the paper. Watch the consistency - if there is too much water, add a little more gypsum.
Mix the mixture well
Step 6. For the convenience of further work, secure the polyethylene on the table with tape. Then it will not move on the table, and it will be easier to form bricks.
Polyethylene is perfectly fixed with tape
Step 7. Spread the resulting mass on the surface of the polyethylene in.
Future, not yet formed bricks
Step 8. Now use a spatula to form neat bricks.
Forming bricks with a spatula
Step 9. Remove excess water that will flow out of the mass onto the polyethylene with a regular paper napkin.
Removing excess water
Step 10. Once the bricks are formed, leave them to dry.
Before further work, the bricks must be thoroughly dried.
Step 11. The dried bricks need to be covered with finishing putty. Dilute it according to the instructions.
We dilute the putty according to the instructions
Step 12: Using a regular brush, coat the outside of the bricks with putty. Leave them alone until dry.
Bricks coated with putty
Step 13. Cover the finished bricks with acrylic paint. You can just use white, or you can imitate any color of brick. When the paint layer has dried, the bricks can be fixed on the wall in the chosen location.
Finished bricks can be coated with paint
On a note! Papier-mâché can be used to imitate not only brickwork, but also rockwork. You can find out how to do this by watching the video below.