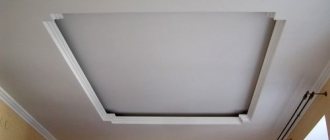
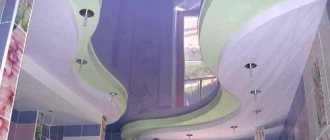
Using this innovative technology, we produce ready-made elements for interior decoration from standard sheets of plasterboard. You can choose various cornices, multi-level transitions, lighting boxes and much more from the catalog or we can produce them according to your drawing. The product is ready-made, easy to install and ready for painting. Depending on the complexity of the elements performed, you are guaranteed to receive savings of 10-50% according to materials and 50-70% saving installation and finishing time!!!
Advantages
Going without a profile
To form a corner, you do not need to use an expensive metal profile. Since the product is formed by milling and gluing, the product is quite rigid and self-supporting. The sheet is simply bent and glued with glue specially designed for this purpose, which will maintain the strength of the structure and will not allow it to crack over time.
Frame simplification
To install many protruding elements or niches, it was previously necessary to use complex manipulations with the frame. This is no longer required for milled products. For many elements, a conventional straight frame under a straight plasterboard ceiling is sufficient. Or you can attach it to finished surfaces.
Reduced material costs
In most cases, the painter’s work is reduced to simply sealing the joints of finished elements and painting. Since the internal and external corners are ready-made, there is no need to install painting corners and reinforcement.
Reducing painting time
Since the elements do not require preliminary leveling, there is no need to apply several layers of putty. The number of wet processes is reduced. And most importantly, the weight of the structure is reduced and, consequently, the cost and labor costs for its production are reduced.
Drywall milling
The concept of "milling"
officially came into use in the 17th century, when milling cutters were created. This term refers to the mechanical processing of a workpiece with a milling cutter. One of the parents of the milling machine was Leonardo da Vinci, and the developer of the milling machines that are now commonly seen in factories was Eli Whitney, and this happened in 1818.
Almost any workpiece can be milled. Milling plasterboard for construction needs is especially important. In order to bring all your design ideas to life, we will consider how to make plasterboard structures with your own hands using milling.
In the modern world, the easiest way to level walls is with plasterboard. Its sheets are smooth, and the walls are leveled quickly and accurately. It is necessary to accurately align the guides for the sheets. However, there are ways to use drywall without framing. In this case, its sheets are glued to the desired surface. Drywall is divided into three types - regular, moisture-resistant and fire-resistant. Moisture-resistant plasterboard is mainly used for finishing bathrooms. Drywall is also used in the manufacture of multi-level ceilings. When a room is completely finished with plasterboard, a frame is first formed on the walls, then on the ceiling. The next step is to attach the plasterboard sheets to the frame in the same sequence - first the walls, and then the ceiling.
When working regularly with drywall, it is most convenient to use milling machines.
It is especially convenient to use a machine with a mobile cutter. Milling machines have high precision when cutting and processing drywall. They also have a fairly high processing speed.
Machine selection
When choosing a machine, you should pay attention to manual machines. They are called milling cutters. When using routers, it is necessary to clearly mark the sheet of drywall. They come with disc and shaped cutters. For rough machining of drywall, such as cutting or grooves, disc routers are best. And shaped ones are for smaller and more detailed processing, and for cutting holes of any shape in a sheet of drywall.
When processing plasterboard sheets, you should pay attention to the gaps. To make a quality groove, a gap of 2 mm is required to the bottom side of the sheet. In other words, when processing a sheet 12 mm thick, the groove depth should be 10 mm.
Plasterboard blanks are either glued or screwed to the frame. When gluing, special mastics are used. A special reinforced mesh is glued to all joints in both options. This mesh is filled with putty and leveled. All grooves are also puttied, but without the mesh. The exception is V-shaped grooves; they do not need to be puttied. When filling such design grooves, you can achieve the same characteristics as a whole sheet of drywall.
If necessary, rounding radii and blunting of sharp edges are processed with a U-shaped cutter. And to create sharp corners, it is advisable to use a V-shaped cutter.
Milled drywall
When making a design structure, it is sometimes necessary to bend drywall. To bend it, first make an incision along one side. The cut sheet fits into the required template. A reinforcing mesh is fixed on it and puttyed. After complete drying, the finished bent sheet of drywall is removed.
It should be emphasized that when working with a sheet of drywall, fine dust is generated. In milling cutter models designed for working with drywall. protection against this dust has already been added. And the tool lasts longer than milling cutters without protection.
Drywall milling process
When processing a plasterboard structure, you should not forget to treat the grooves with a special primer. The use of a strengthening primer is mandatory for plasterboard structures that will be used in residential premises. The primer removes dust from the grooves and prevents further spread of gypsum dust particles.
If you don't have a router, you can use a circular saw. However, it loses to milling cutters when working with drywall. The saw does not have dust protection, and there is no provision for adjusting the depth of cut. In other words, the grooves or artistic cuts will not be smooth throughout their entire depth.
GYPSUM CARDBOARD CATALOG Yours sincerely,
Team of the Faculty of Construction Materials
#RDS-Academy
Working with a V-shaped cutter
The best quality milling can be achieved on a specialized milling machine. But this solution is quite expensive and is appropriate only for industrial scale work.
The most convenient and high-quality option for sawing drywall is to use a specialized milling machine.
To mill drywall and create profile parts from it on the scale of a repair team or independently, you will need:
- Drywall (better if it is waterproof).
- Cutting table.
- Fraser.
- Milling cutters.
- Industrial vacuum cleaner with cyclone filter.
- Rule.
- Clamps.
- Protective equipment (gloves, respirator).
- Masking tape.
- Primer and brush for it.
- Adhesive: polyurethane foam; PVA; "Uniflot"; hot glue, etc.
Work on milling and forming parts can be divided into preparatory and main ones.
Preparatory work
- For the convenience of further marking, cut a measure from plywood with a width equal to the distance from the center of the cutter to the stop edge of the router.
- Using clamps, secure a rule or level to the assembly table for use as a stop when milling.
- Adjust the router so that the cutter cuts through the entire thickness of the drywall sheet, but does not touch the bottom layer of cardboard. A residual layer of gypsum no more than a quarter of a millimeter thick is allowed.
- If you need to make a large number of parts of the same type, then it also makes sense to cut out measurements from plywood for each of the seams.
Main works
- Calculate the required number of seams, the distance between them and their location on the sheet.
- Saw off a piece of the required size from the gypsum board.
- Using an edge cutter, chamfer the edges at the plane joints in advance.
- Mark the routing lines.
- Mark the edge stop lines of the router.
- Place a sheet of drywall against the rule.
- Attach a cut measurement to the rule.
- Press the edge of the router against the measurement with the left side.
Note! In conditions of free movement, the router moves to the left, so the stop should be located on this side.
Milling drywall allows you to perform more accurate and faster work.
- Make the first cut along the entire height.
- Make a second cut along the same groove in the opposite direction - this is done to ensure a clean cut.
- Cut all the grooves on the side of the sheet to be processed.
- If the geometry of the part being manufactured requires milling drywall on both sides, then carefully turn the sheet over and repeat the work.
- Dust with primer using a semi-dry brush.
- Apply adhesive to the joints on one side.
- Place the part so that the joints are vertical.
- Apply adhesive to the joints of the second side.
- Give the part the desired shape, check the geometry of the corners.
- Secure the structure in this position with masking tape until completely dry.
Milling gypsum plasterboard is a very convenient and profitable solution when creating plasterboard structures. This technology, although it requires more expensive equipment, allows you to perform work more accurately and faster than conventional methods of working with plasterboard.
Workflow Features
Let's figure out what advantages milling drywall has over the classic version of the work, and also consider all the features of working with cutters.
Pros and cons of this option
Drywall milling has the following advantages:
- Saving time . The use of the technology we are considering reduces the time spent on the construction of boxes and corners by 2-3 times. Everything is done much faster and easier, in addition, the likelihood of damage to the material if all recommendations are followed is practically absent;
Making corner joints with a router is very easy
- Possibility of constructing boxes of any size and configuration . There are no restrictions on the complexity of the design, the main thing is to correctly understand the markings and make grooves in the required places;
It is better to train on designs of simple forms, and when you already have experience, you can move on to more complex options.
An experienced craftsman can make structures of very complex configurations without cutting the sheet into pieces
- The number of open ends is reduced . This makes the structure neater and greatly simplifies the work of puttying and finishing. In addition, you do not need to reinforce all bends with corners, which reduces the cost of the project and reduces the time spent on putty with metal elements;
- Possibility of creating structures without a frame . If there is no load on the box or corner protrusion, then you don’t have to reinforce such elements with a profile. They themselves will have good rigidity and will last for many years without deformation.
You can make blanks in advance if you need a lot of identical elements, this is very convenient
The only downside is that you will have to spend money on a cutter and router. But if you are doing renovations in your home, then it is easier to rent a power tool. The price of the service is low, so you will save significant money.
The working process
Let's figure out what you need for work:
- A 90 degree drywall cutter is a special device that is used to make perfectly straight corner joints. The cost of equipment varies from 1000 to 4000 rubles. For household needs, the cheapest option is also suitable - even it will be enough for ten years of occasional use;
Drywall is a soft material, so the cutters practically do not wear out during use.
- Manual frezer . As I wrote above, if you are not involved in professional installation, then it is easier to rent a power tool. The work usually only takes a few days, so rental costs will be minimal. The main thing is to make sure that the shank of your cutter fits the equipment.
A manual milling cutter is a simple and convenient device for making grooves in plasterboard and gypsum boards
Instructions for doing the work yourself look like this:
The cutter rotates clockwise, so during operation the router always pulls to the left. It is on the left side that the rule needs to be made.
Step-by-step instructions for milling plasterboard sheets
Having connected and assembled the milling machine, you can start working. There are several ways to mill drywall, but the following sequence of actions is considered the most effective:
- Carrying out markings makes it possible to see in reality exactly what a three-dimensional plasterboard system will look like. It is carried out using a pencil and a ruler, sequentially transferring the necessary lines to the surface of the sheet.
- Each relief area has its own size and texture. Therefore, before processing, you need to create the required number of workpieces, which will subsequently be processed on milling machines . The necessary pieces are cut out of a whole sheet using a knife, which will be subsequently milled.
- The workpiece is placed on the table and rests against the clamp. Personal protective equipment is put on, and the milling machine is connected to the network. When turned off, it is applied to the surface of the gypsum board in such a way that the semicircular side is in contact with the fixing post.
- The machine is turned on and driven away from itself towards the edge of the sheet. As a result of the passage of the device, an even seam is obtained, which, when bent, will form a beautiful angle.
This is what a seam on drywall looks like after milling - Sometimes there is a need to make a seam on the back side of the sheet with grooves cut on top. In this case, the canvas should be turned over, but this must be done extremely carefully, since it will become 3-4 times more fragile.
- The cut blank is removed from the table and folded according to the seams obtained. To fix them, ordinary mounting foam is used, which is applied to the joint and pressed until it stops. After 3-4 minutes of pressure, the angle will be fixed, and the remaining polyurethane foam will be cut off with a utility knife.
Applying polyurethane foam to the seam of a plasterboard sheet
When the sheet is bent, it needs to be fixed with paper tape so that the corner sticks together tightly.
Milling drywall provides many advantages, among which efficiency and practicality play a decisive role. The sheet can be given the required shape without using a frame and with minimal material costs. You can assemble a textured object in literally 15-20 minutes, and the quality of its corners and transitions will be optimal.
What are cutters?
To begin with, the type of device is selected depending on the tasks assigned, and only after that a cutter for the gypsum board is selected. It all depends on what form of drywall
need to get it. Rounded blanks are created with U-shaped parts, and sharp-angled ones with V-shaped ones. You need to understand that the intermediate results obtained in some cases will need to be puttied in order to obtain a sufficient level of strength of the product. If there is a rigid frame, the master will need to putty only those grooves that were created using the U-shaped element. This is a mandatory condition; in the case of acute-angled grooves, their putty is more an optional procedure than a mandatory one.
Tools needed to work with drywall and profiles
In order for the drywall cutter to work properly and create a curved structure exactly as in the drawing, you must do the following:
- The material is cut and marked in accordance with what the future structure will be. The accuracy of the lines must be maintained, otherwise further milling will not work out as intended.
- Next, the required cutter for drywall is selected, installed in the router, and the sheets are cut. Fastening the guide rail is necessary so that you end up with an even groove.
- Polyurethane foam, PVA glue or gypsum composition is applied to the resulting groove.
Now the workpiece can be bent, but only with a little effort, and you need to act along the groove line. The resulting form
fixed with tape and left until the adhesive applied to the bend has completely dried. The question may arise whether it is necessary to prime the grooves cut into the core of the gypsum sheet. Experts recommend doing this, since in this case all dust will be removed from the groove, and subsequently gypsum dust will not get into the air.
source: //mrgipsokarton.ru/instrumenty/freza
The practicality of drywall is due to its structure, which consists of two paper layers and a gypsum base. Thanks to this, the gypsum board sheet can be cut at different angles and given a variety of shapes.
The only drawback is considered to be increased fragility, which interferes with the creation of relief objects. As a rule, frame structures are used to form textured surfaces. However, their construction is not always justified and requires not only the availability of free space, but is also associated with material costs. Milling plasterboard, which is a cheaper and more practical alternative to lathing, will help save space and money.
Types of milling machines
This tool can be divided into 2 types:
Disk
This type of tool is intended for cutting gypsum boards along straight lines. Thanks to the disc, there are no chips or nicks on the cut, and the work happens quickly. But the Strong cutter is not suitable for products with complex structural shapes.
Shaped
This is the main tool for milling gypsum boards. Using a shaped tool, you can cut out complex geometric grooves or holes, which can be oval or round.
- V groove cutter for plasterboard expert, straight – for drilling holes at an angle of 90 degrees and forming grooves. With its help, you can drill holes of various complex shapes;
- T-shaped cutter - used in the same way as the first option, only the diameter of the holes can be the maximum possible;
- Edge cutter - to create a chamfer along the edge of a plasterboard board, the profile of this cutter can be different;
- U-shaped cutter, fillet. Used to create grooves with a semicircular bottom and holes of unusual configuration in drywall;
- The Festool 90 degree V-shaped plasterboard cutter cuts corner grooves between the sides of the cut, this is the configuration often used when installing plasterboard structures.
Return to contents
