It doesn't matter what material your arch was built from. It will become a full-fledged decoration of the interior only after you complete its decorative finishing. If you ordered a general project, then the experts will definitely tell you how best to decorate the arch in the apartment so that it fits perfectly into the design concept of the room.
However, if you like any decor, you can always choose it yourself, and after that you will only need to finish the cladding of this architectural element. There is no need to worry about the complexity of the process - you can handle it yourself. The main thing here is to have the desire and the necessary tools/materials. Let's talk more about finishing the arch right now.
Finishing an arch in an apartment - how can this be done?
The good thing about arches is that you can decorate not only the door with this design. This architectural element will effectively decorate a niche in your wall in a particular room; this method is also chosen when you want the window decoration to look original and exclusive.
It is precisely because of the variety of options that the requirements for arch finishing vary. If the arch is interior, it will definitely experience serious loads. The decor in this case should be distinguished not only by its external aesthetics, but also by a certain strength - this rule should not be ignored.
Review of finishing materials
The cladding of an arch in an apartment can be made with various materials - there are plenty of options.
The modern market of finishing materials offers a sufficient number of solutions so that a through opening can be finished.
If there is an arch, how to finish it? Let's look at the most popular materials:
- Decorative rock;
- Wallpaper (a classic solution that has been proven for more than one decade);
- Mirrors - used for decoration not so long ago;
- Mosaic;
- Textile;
- Cork;
- Decorative plaster;
- Ceramic or tiles;
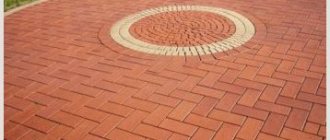
- Facing brick.
Arched corners
Vulnerable spots of the arched structure are necessarily marked with corners - that’s just the way it is. Protection is not required only for their hard cladding.
If the arch is finished with some kind of hard material, you don’t have to use arched corners - this is not necessary.
But, if you have a completely different design, it is the corners that are needed in order to protect the entire architectural structure from mechanical damage. This way you will maintain the aesthetic appearance of your arched opening for many years.
When finishing, pay special attention to arched corners, they are vulnerable
Today on sale you can choose arched plastic corners of various widths - they produce products for structures of any volume. But experts note that the following solution is a convenient size: 1 by 2 cm. The wide side of the corner is glued inside the arch - liquid nails are used specifically for this procedure. The narrow side of the corner is fixed to the facade of the arched structure.
To achieve maximum effect and finish the arch with high quality, the corner must be pressed against the base for a long time. It is best to wait about 12 hours. Therefore, use masking tape to secure the already securely glued plastic element to the arched structure.
Finishing
You can complete the finishing of the arched structure:
Finishing material can be found at any hardware store. Modern industry boasts a variety of arched elements, for the production of which wood and MDF were used, as well as baguettes made of polyurethane, and components made of natural and artificial stones.
How to choose the right wallpaper: useful tips
You can decorate the arch with different materials, but when choosing suitable wallpaper it is better to choose durable, washable ones. The following types are suitable for these purposes:
During the operation of the room, the opening always experiences heavy loads, regardless of the purpose of the rooms, so the surface must be periodically wiped with a soap solution. The right decision would be to abandon paper forms. This is dictated not only by their low wear resistance - the paper may wrinkle after pasting. Usually the surface levels out over time, but sometimes it becomes severely deformed at bends.
When pasting, it is quite difficult to match the patterns, so it is better to choose wallpaper in solid colors or with rare small illustrations.
Companion wallpapers are very popular today for decorative decoration of premises - they go well with each other, but have different designs. Thus, you can paste wallpaper with any pattern on the facade of the arch, and cover the inside with plain, but compatible colors.
There are often other solutions - when, regardless of the texture and color of the facade, the vault is finished with wallpaper in a contrasting color or kept in the same color scheme. For example, the vault can be covered with wallpaper in a neutral shade or a contrasting palette can be used, but the color of the vault should be combined with the baseboards, sockets and switches.
Surface sanding and priming
Painting drywall in a room
Without additional processing, all areas of wall putty will stand out, regardless of the type of paint and the number of layers. Before painting the drywall, apply a coat of finishing putty. All irregularities and protrusions must be sanded with sandpaper. Then a layer of primer. If depressions of more than 0.5 mm remain, the treatment must be repeated.
Advice! To work with drywall, choose gypsum-based mixtures. They are homogeneous with the composition of the sheets. This ensures good adhesion and uniform shrinkage.
To ensure an even gloss of the paint, use putty to cover the entire surface of the walls or ceiling. The number of layers depends on the surface roughness. A thick layer of plaster can shrink and crack. Apply several thin coats if necessary and prime each coat. Each layer of material must dry completely.
The surface of gypsum board and gypsum putty absorbs moisture differently. All untreated areas of the wall will stand out with spots of paint with a different sheen and shade. This is not visible under the wallpaper. For painting, careful preparation is necessary for the entire wall surface.
Decorating an arch with wallpaper is not difficult
Wallpaper nowadays is often used for application to arched structures.
When there is an arch, what is the easiest way to decorate it? Of course, you can choose wallpaper for this task. Such cladding is not only very economical, but also simple - the design can be easily done with your own hands, the help of specialist finishers is not required.
Perform gluing
So, you have decided that wallpaper for the arch is exactly what you need. In what order should the work be done?
- First, you need to level the surface to be finished - for this, most often, putty is used;
- When the base is puttied, you can start preparing the glue. Stir the composition with a construction mixer, you can also use a drill - if you have the appropriate attachment;
- The strip of wallpaper is pasted vertically - next to the opening, the edge is folded over the arch. The bend amount is about 30 mm, no more. Next to the first strip, glue the second strip in exactly the same way - near the first;
- An allowance must also be made when gluing all subsequent strips - this is necessary;
- Next, using scissors, the corners are cut out in these allowances - this is done specifically so that there are no folds. They are glued to the arched structure and carefully smoothed out.
As part of the last stage, the vault is pasted. How to do this part of the finishing?
It's simple:
- First of all, cut a strip of wallpaper as wide as the width of the arch. The length is made a little longer - so that you can combine the pattern on the canvas;
- This strip is glued at the top of the arch, then goes down.
It is customary to smooth the wallpaper on the arch from top to bottom, then do it towards the edge. It’s better to act this way – so that there are no unpleasant surprises in the future.
Wallpaper on an arch can look more than decent
Another popular question is what are the advantages of such cladding? Indeed, we figured out how to decorate an arch with wallpaper, but is it worth doing this in your apartment?
The undoubted advantage of using wallpaper when decorating an arch is that you have a lot of patterns and colors of the material to choose from. That is, you can choose the ideal option that will easily fit into almost any room.
The cost of such cladding is also pleasantly pleasing - especially those people who really like to count money will be delighted.
There are also disadvantages, they are:
Decorating an arch with wallpaper is not durable. The material can quickly turn yellow; after a while you will feel that the cladding has lost its novelty and has lost its freshness. But that’s not all: unfortunately, wallpaper easily deteriorates due to moisture. An arch trimmed with stone does not know such shortcomings - so this is a reason to think about choosing some other facing material.
Be sure to watch the educational video: decorating arches with wallpaper. Perhaps this particular video will help you decide whether it is worth using wallpaper to decorate arched structures, or whether it is better to invest more money and get a truly beautiful structure for many years.
How to paint drywall: a guide to action
- Inspection and elimination of installation defects.
- Applying primer.
- Strengthening butt and corner parts.
- Starting putty.
- Grout and another primer.
- Final puttying.
- Grouting with sandpaper.
- Final priming.
The plasterboard base will have to be well prepared for painting with oil paints. If for water-soluble paints it is enough to simply putty the surface with a gypsum compound and apply a primer, then before applying oil-based paints you also need to treat the drywall with PVA glue.
- Cement. They are resistant to moisture, but shrink strongly and take a long time to dry. This is not a good choice for drywall.
- Plaster. Most often used for plasterboard surfaces. They have good adhesion and quick setting. The disadvantage of gypsum putties is their low moisture resistance.
- Polymer. Acrylic-based putties are practically devoid of disadvantages, except for one thing - high cost.
- primer;
- putty (starting and finishing);
- metal corners;
- serpyanka;
- sandpaper (with medium and coarse grain);
- roller or brush;
- spatulas;
- screwdriver;
- construction mixer.
Many people believe that oil paints are not the best choice for drywall. However, it is not. Drywall is a very durable material that can withstand even fire-resistant paints on metal, and oil-based paints and varnishes will not harm it, even less so.
The curvature of the arch is less than that of the classic one. The ends immediately go into the walls. The height of the ceilings is not important.
It’s good to decorate wide spans this way. If the sheet is scratched, cover this area with reinforced film. First, use a cutter to widen the scratch and apply joint putty.
Immediately glue the paper onto the wet solution, pressing it into the sheet of drywall with a spatula. You don't have to worry about cracks. Similar to the initial step, any new coverage should begin with contouring with a brush. In the case of matte paints, it is easier to correct defects.
If you notice any unevenness or stains, you should make sure it is completely dry and try to carefully sand them off. In the case of glossy paint, you will have to level the area of the incident and paint another layer. If you start correcting defects while drying, you can only achieve streaks and halos. The first stages are carried out using a small brush. She should walk along the contour of the site. It also covers all protrusions, edges and obstacles. It is better to take a flat brush no more than eight centimeters.
How to make an arch from plasterboard?
Nowadays, drywall is an indispensable material during renovation. This material is not only very “pliable”, but anyone can handle it, even a non-professional builder.
Types of arch shapes.
Drywall arches are a favorite design element in every third apartment in Russia. By following some recommendations, you can easily build an arch and decorate it with your own hands.
To make plasterboard arches you will need the following material:
- one sheet of arched plasterboard 6-7 mm thick;
- two ordinary sheets of plasterboard 12 mm thick;
- one rack profile and four guides;
- reinforced arched corners - 2 pcs.
We take 2 sheets of drywall and cut them exactly to the width of the doorway. On each of these sheets we draw a semicircle that forms the outline of the arch of your arch. Next, using a jigsaw or hacksaw, carefully cut out the resulting arches along the drawn contour.
Structure of a plasterboard sheet.
We attach metal guides to the wall and ceiling (do not forget to retreat 1.5 cm from the edge). We hammer self-tapping screws with plastic dowels into the pre-drilled holes. Using metal screws and a screwdriver, we attach the gypsum board sheets to the guides. The screws should be tightened in increments of no more than 10-15 cm. Having measured the arc of the future arch, we cut the guide profile to the appropriate size, make cuts on it and bend it along the contour of the arc. We fix the profile inside the drywall. To make the structure more durable, you can add jumpers from a rack profile. The jumpers for the arches are attached using the same screws to the metal guides. Next, measure the length of the arc that forms the arch. According to this length, we cut out a strip of arched plasterboard (and the width of this strip is equal to the depth of the opening in the door). We bend the arched drywall, moistening it with water if necessary, and attach it to the metal frame using self-tapping screws. Our arch is already ready for finishing.
Related article: Do-it-yourself technology for laying electric heated floors under tiles (video)
What to use for unusual decor
Decorative plaster is probably the second most popular and accessible material for decorating arched openings. With its help, with a little imagination, you can create a unique arch design. The advantages of this finishing material:
- ease of use, the putty is simply applied to the wall, does not require special construction skills;
- the ability to create relief patterns or textures;
- low cost.
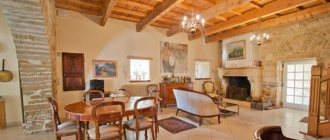
Stone finishing in the interior
Plaster also has disadvantages:
- it is difficult to repair a separate area without changing the entire design of the arch;
- due to its embossed texture, decorative putty is difficult to care for;
- like wallpaper, decorative putty is afraid of excess moisture.
If for some reason the previous building materials are not suitable for finishing the arch, try using natural stone. This finishing material has many advantages:
- combines with other building materials, emphasizing the design of the room;
- is not afraid of a humid environment and is quite resistant to damage, does not require maintenance;
- durable, capable of maintaining its original appearance for a long time;
- a wide variety of textures and color variations.
This building material also has disadvantages:
- complexity of installation; decorating a decorative arch with stone will not be possible without knowledge in the field of construction;
- the high price does not always allow the use of this material for finishing.
Functional partition in the living room.
Additionally, decorate the plasterboard arch with the help of figured stucco molding, spotlights or cornices.
Decorating an arch with a brick:
Finishing arches with cork
Cork is also a good solution for finishing this structure.
Decorating arched openings with cork is a very popular trend today. Everything is simple here: the material is chosen because it is very warm, natural and safe from an environmental point of view.
Finishing arches with cork can only be done when a rolled type of material is used for this work. In addition, you can easily cope with the application of self-adhesive cork wallpaper.
How can you decorate an arch with cork in an apartment? Here everything is approximately the same as with a simple wallpaper sticker - no particular difficulties can be identified. Perhaps, in order to increase the strength of the coating, after lining the arch, it is customary to cover the cork with a layer of varnish.
A small recommendation for working with cork rolls: if you are going to decorate a kitchen arched opening, choose a material that has a wax coating. Due to this, moisture will be repelled and the original appearance of the arch will remain for many years.
Watch the video: arch – finishing with cork. The material will help you avoid mistakes, especially recommended for beginners.
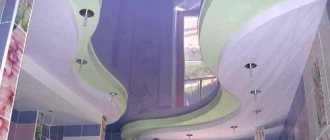
Arches in the interior of premises
Most rooms do not initially require arches, but they can be used to decorate any room in the house: living room, bedroom, corridor, bathroom or kitchen.
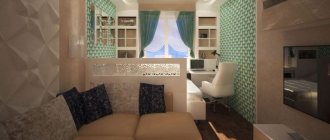
Arch-shaped partitions are appropriate in living rooms. This is especially true in small apartments, where the living room simultaneously becomes a study. In such cases, plasterboard arches are used to zone the room. Usually, it is easy to fit an arched vault into the design of a living room, since, in addition to its functional purpose, it also has a decorative role.
We use decorative plaster
Today, finishing arches with decorative plaster is not so rare - people often choose just such a cladding for their structures. And there are reasons for this, which we will talk about right now:
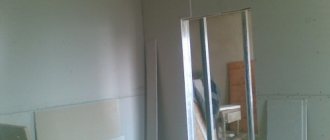
This is what a blank arched opening made of wood looks like
- Applying decorative plaster to an arched opening is very simple; no difficulties arise here. The finished finish will be durable - you can’t argue with that;
- Among the disadvantages, it can be noted that work aimed at restoring the finish is not so easy to carry out. In addition, keeping the relief clean is not as easy as just washing it. Keep this in mind if you decide that finishing the arch with decorative plaster is exactly the solution from which your interior will benefit.
To cover the surface of the opening with decorative plaster, you will need relief stamps or rollers.
Please note: using slow-drying mixtures for finishing arches (we are talking about ready-made compounds) is the right option to make the whole process easier. While the plaster is damp, it is easy to create relief on it - any craftsman will confirm this.
Execution order
- The mixture must be distributed over the surface. To avoid mistakes, carefully read the instructions: the recommended layer thickness is given there. As a rule, this figure does not exceed 15 mm;
- Then, using relief stamps or rollers, the relief is created. Rollers are generally a very convenient option for such work - they will help save not only time, but also the material itself. The same cannot be said about stamps;
- When the above procedures have been completed and the relief has already dried, the arched opening is primed (more precisely, the finish that was applied to it).
Then you have to wait - usually at least twenty hours. And you can color it. There is a special scheme here:
- To effectively highlight the relief, first apply dark paint with the roller that has a longer pile;
- The organization of the second layer looks like this: light paint is applied with a roller (the tool has a shorter pile than in the first case).
Sometimes they even choose a rubber tool. That's all - only one thing remains: you need to paint all the tops of the relief so that the work looks finished.
Another common finishing method is plaster.
If you like this type of finishing, then let's look at the algorithm of actions with this finishing material:
- We prepare the plaster according to the recipe on the package or buy it ready-made.
- The first step is to plaster the plasterboard from which the arched opening is made. This is done in order to achieve a perfectly flat surface.
- Remember that plaster is not paint after all. Don't overdo the alignment. You just need to eliminate significant irregularities, and everything will work out.
- After you have plastered the entire surface, be sure to coat it with a primer. This technique ensures reliable adhesion of decorative plaster and surface.
- Now leave the arch for 4-24 hours for complete polymerization. And then we apply decorative plaster, form the surface relief using a spatula, sponge, grater and other available materials.
- And the final stage of work is painting the surface with paint. When choosing a paint, give preference to the one that is used specifically for painting plaster.
Related article: Magnetic motor motorcycle: truth or deception
You can also get by with applying a finishing layer or decorative metallic.
Stone for finishing openings
In certain cases, it would be appropriate to line the arch with stone.
An arch trimmed with stone is a beautiful solution that will decorate any room in your apartment. The spectacular design of these architectural structures with tiles or stone can be symmetrical: this is a worthy choice for country or eco style.
You can also make an asymmetrical cladding - if you decorate the arch with stone in this way, you will get a magnificent flourish in the Art Nouveau or deconstructivist style.
Place the stone in an arc
If you want the arch to be finished with stone, there is a great way - laying the material in an arc:
- Laying is carried out only on the surface, the preparation of which has been carried out carefully;
- First, it is customary to try on the tiles, and mark the cut line from the inside;
- Along the line that is drawn, you need to draw it several times with a construction knife. Then the unnecessary part is easily broken off with pliers, and the edges are smoothed with a file;
- 24 hours after completing the work, you can begin sealing the seams.
Laying tiles
- Before this work, the surface of the arch must be plastered and then primed. In addition, it is necessary to make notches;
- The solution is prepared from glue, sand, lime, cement (or the tiles can be secured with liquid nails - if the instructions for the material do not prohibit this).
If you glue the material overlapping, you won’t have to seal the outer corners later. They glue them end to end in the first row, in the second it is customary to shift them inwards.
- That is, in each of the odd rows the edge of the tile should be aligned directly with the border of the opening. But they are attached with an overlap in each of the even rows.
Working with facing plastic
How to finish the arch? Drywall will definitely help you with such work.
Suppose you decide to finish the arch with plastic. This choice can be called successful - such work is considered not very labor-intensive.
If the arch is finished with plastic, you don’t have to putty and prime the base - usually they start making the frame right away.
However, it is recommended to frequently check the level of inclination when performing work, as well as the parallelism of the entire finish. This is the only way to protect yourself from mistakes.
- A frame is built under various plastic panels - any slats, even wooden ones, are suitable for construction
- They are secured with polyurethane foam on both sides of the arch. In addition, it is necessary to install temporary spacers to hold the structure until the foam has completely hardened.
- Next, the plastic parts are cut to the required sizes, and they are mounted on slats - horizontally or vertically. Large staples and a stapler will help you here.
Decorative rock
Finally, if the previous two options do not suit you, you can use decorative stone.
This material allows you to highlight the arch favorably
Advantages
- Effectiveness. Of course, the appearance of this material deserves the highest rating. It adds elegance to the room.
- Life time. Decorative stone can “last” for several decades without losing its original luster.
- Easy to care for. It is extremely easy to clean, as it is not afraid of moisture and most detergents.
Flaws
- Expensive. The price of decorative stone is extremely high. For this reason, the demand for it is quite modest.
- Difficult to install. Only a professional (or at least a person with a certain set of skills) can finish the surface with such material.
Installation
Of course, finishing with decorative stone is the most effective, and at the same time time-consuming method. Particular difficulty arises in the decoration of the arch vault.
It is worth noting that this material does not require careful alignment of the walls, which simplifies the task a little. So, the work needs to be carried out in the following sequence:
- First, the installation solution is prepared. It can vary depending on the type of stone, but almost always it consists of cement, sand, lime and glue. To make the task easier, you can use “liquid nails”.
Tip: it is best to find out the exact consistency of the solution when purchasing a finishing stone.
- The first stone must be laid at the bottom - at the junction of the opening and the wall. It must be adjusted using a level and pressed as tightly as possible. In order not to be distracted in the future by sealing the corner, it is better to mount the stones “overlapping”.
The stone gives the room a touch of nobility
- Those stones that will be installed along the arc should be cut strictly along its radius. To do this, you can use wire cutters or a grinder. The resulting cut is sanded with a file.
- The seams need to be sealed with a special solution (usually it is sold along with the stone itself).
Results
A neat arched doorway, the finishing of which has been successfully completed
Finishing arches is a very important step in renovation work in an apartment or a private house. This architectural element fits perfectly into any interior and perfectly decorates the room. To carry out finishing work, you can use a variety of wallpaper, lining, decorative plaster, boards (parquet or laminated), natural or artificial stone. The use of any material involves its own characteristics, which we discussed in this article. In addition, pay attention to the instructions for the materials - this way you will not make mistakes.
The easiest way to cladding a trapezoidal arch is to carry out cladding – moreover, this is the design that is called the most economical. Only the vaulted semicircle will have to be finished. For this work, it is best to choose bendable and elastic materials - they will look great on the arched surface.
In addition, we recommend that you watch a general video: how to finish an arch. The material will be useful for both experienced builders and novice craftsmen.
Preparing drywall for painting
Painting drywall on the balcony
At the first stage, walls and ceilings covered with plasterboard are prepared in the same way for any finish. First, joints, corners, and fastener installation locations are sealed.
Deep gaps between sheets can be filled with sealant. The corners of the sheet swell and delaminate. It is better to cut them at an angle, making the joints conical. After this, the cracks are filled with starting putty. A painting mesh is placed on top and everything is smoothed down.
The heads of the self-tapping screws that secure the sheet are puttied. After this, the protrusions and irregularities are smoothed out. The entire surface is primed. This preparation is sufficient for wallpapering. Is it possible to paint drywall without additional finishing? If you do not need to have smooth beautiful walls, then cover the gypsum board with paint.
Concave corners are sealed with mesh, as are joints. I recommend installing a special perforated PVC profile on protruding parts of structures.
Interior arches in a house are a sure sign of excellent taste!
View all arches
The tradition of using arches in the house came to us from the Ancient East. Today this is one of the most popular decorative elements: arched structures help create an atmosphere of luxury and comfort in the interior, while also having considerable practical significance. And if in city apartments it is not always possible to make all your design dreams come true, then private cottages and country houses are the place where you can give free rein to your imagination. Large premises, high ceilings and the ability to carry out any construction and finishing work are ideal conditions for installing exquisite and original arched structures.
Vaulted systems can vary in shape, material of manufacture and features of their use. Thus, modern designers propose decorating the interior using arched structures in three ways:
- Install interior arches into the house in place of the doorways.
- Use wall-adjacent (solid) structures that form a decorative niche in the wall.
- Zone a spacious room: separate the room from the balcony, the study from the living room, the kitchen from the dining room.
How to choose the right arch design option
Those options for decorating arches that look ideal when exiting, for example, onto a loggia, are irrelevant for the kitchen, and vice versa. Therefore, when deciding on the finishing method and appearance of the arch, take into account its placement and other nuances. These include the design, size and purpose of the room in which you are decorating the entrance, and the function of the arch itself.
Finishing a plasterboard partition with wallpaper
To make the right choice, keep in mind that plasterboard arched vaults, depending on the functional load, are divided into active and passive. Each of these types is designed differently:
- Passive arches are simple architectural structures of a simple form that carry only a decorative load. Such arches are placed in places where there is a smooth transition from one room to another. They are made in oval, semicircular or rectangular shapes and are finished with any building materials.
- Active arches are massive structures of complex shape, often distinguished by an unusual pompous design and variable configuration. Such designs are complemented by shelves, niches and other functional devices. They are given different, even bizarre shapes. An example is arches in oriental style.
How to paint an MDF arch?
We will make an interior arch from MDF in the apartment. What is the best way to paint it, and how to prepare the surface before painting? It is much easier to make an arch from any other material that bends more easily and is much cheaper, for example plywood or drywall. MDF is a porous material and to fill all these pore pits you need a primer, most likely you will have to prime it two or even three times, only in this case the paint will lie smoothly and beautifully. You can paint MDF with alkyd enamel, if you have experience in painting from spray cans and do not have a spray gun, then buy automotive enamel, it fits perfectly on MDF, the spray can will create the necessary pressure.
Wallpapering the arch
Next, the owner needs to trim the arch. One of the final finishing options is wallpaper. It is advisable to match the color of the material to the color of the wallpaper on the wall. The framing technology is quite simple. Before decorating an arch in an apartment with your own hands, you need to prepare strips for finishing. Then you should prepare wallpaper glue. The consistency should be thicker than when wallpapering walls. This is necessary to increase the drying time of the glue. so that you can move the wallpaper strips if they have a pattern. It is advisable to start gluing the strips on the wall near the arched opening. Then you need to lay a strip that will cover part of the arch opening. The protruding remains of the material should be cut off with a stationery knife, but taking into account that there is an allowance of about 25 mm. After this, you need to make cuts at intervals of 20–25 mm, bend the strips of wallpaper and glue them to the arched plane.
Similarly, you need to paste the second side of the arch. To complete the gluing of the arch, you should cut a strip equal to the width of the arched opening. However, the length of the workpiece must be longer so that the pattern can be adjusted. The cut strip of wallpaper needs to be glued to the inside of the arch. To avoid the appearance of bubbles under the wallpaper, you need to carefully smooth out the glued strips.
How to paint an MDF arch
Some items are produced only if the product is ordered in bulk in quantities of 30 or more pieces. You can view a list of such articles in the summary table of types of arch finishes. The name comes from the Latin Simplex - simple. The width of the casing is 70 mm.
Search data for your request:
Wait for the search to complete in all databases. Upon completion, a link will appear to access the found materials.
Go to search results >>>
WATCH THE VIDEO ON THE TOPIC: How to paint a door correctly?
Features of drywall
Before treating drywall before painting, you need to become familiar with the features and types of material, which can be:
- Ordinary wall or “standard sheet”.
- Ceiling . Most often used when leveling simple ceilings and multi-level construction.
- Moisture-resistant - cannot be replaced when finishing bathrooms.
- Fire resistant . It is distinguished by its resistance to an open source of fire, while maintaining its position on the frame.
- Arched . Allows installation of fairly complex curved surfaces.
- Acoustic . Very rarely used. A special feature of the material is the presence of perforations with many holes, the diameter of which is approximately one centimeter, and a special soundproof fabric located on the back side of the sheet. It is used in the design of recording studios and home theaters.
Acoustic plasterboard ceiling
- Relatively low price.
- Ecologically pure.
- Does not burn.
- High sound insulation properties.
- It takes away excess moisture from the air and easily releases it when the air dries out.
- Easy to process and easy to install.
- Minimum waste after finishing the room.
The disadvantages of drywall include:
- Relatively low strength and water resistance.
- Difficulty in attaching anything.
Tip: Do not drive nails into a plasterboard wall. Only dowels and screws can hold a small shelf or picture. You cannot hang anything heavy on them, this will simply lead to the destruction of the wall.
After familiarizing yourself with the characteristics of the material and installing it in the room, you should determine how the surface will be finished.