Previously, waterproof boots were used only for hiking and fishing. Now the range is much more diverse. In addition to hiking ones, there are also glamorous models for graceful legs in rainy weather. After all, they guarantee that your and your children’s feet will remain dry, and no one will catch a cold. Unfortunately, stepping on a nail, etc. can damage your shoes. What to do in this case? Let's look at how to make repairs yourself at home, to the delight of your loved ones.
Pros and cons of EVA
Nowadays, polymer models of different shades are deservedly popular.
EVA – ethylene vinyl acetate, whipped until foam forms.
Advantages:
- Greater ease - manufacturers of children's shoes took advantage of this circumstance.
- The polymer is elastic, pleasant to the touch, and has a memory effect, which makes them indispensable when creating orthopedic models.
- Water resistance is like rubber ones, and the weight is disproportionately less.
- The polymer is wear-resistant; damage, if it occurs, will only be due to punctures or cuts. That's when EVA glue comes in handy, but others won't work.
- Hygiene – does not contribute to the appearance and spread of fungi and bacteria.
- Hypoallergenic, which is why it is used to create knitwear and footwear for medical workers.
- Resistant to oils and solvents.
Flaws:
- Sensitivity to sharp objects. It is possible to cut through or pierce a thing with an ordinary push pin.
- The anti-slip properties are quite weak. This problem is solved by the release of ribbed soles used to prevent falls and injuries.
But damage to EVA can be dealt with by glue with similar components.
Preparing boots for repair
All it takes to damage rubber shoes is a nail, a small piece of glass, or even a sharp-angled stone. One wrong step, and the boot may get cracked.
Repair shops do not accept rubber shoes. This means that damaged boots can either be thrown away or repaired yourself.
How to seal rubber boots is a common question, the answer to which lies in knowledge of some of the features of such repairs.
First you need to determine the location of the puncture or crack. To do this, you can take a container of water and a damaged boot. Roll up the freebie, starting from the top edge, like a tube of toothpaste. You should get a tight bundle. Next, lower the sole into the water. Air will escape from the punctured area, forming bubbles.
The next stage of preparation is the mandatory cleaning of boots from dirt and dust, degreasing and drying. It is recommended to dry shoes away from heat sources. Drying rubber boots on batteries can lead to deformation, which will ruin their appearance and complicate the restoration process. All manipulations should be carried out carefully so as not to increase the size of the damage.
Then you should accurately determine the material from which the boots are made. Modern rubber shoes for women are made not only from rubber, but also from polyurethane and ethylene vinyl acetate (EVA). Each of these materials requires a different glue.
If it is difficult to determine the material of the boots on your own, you can take them with you to the store, where a specialist can quickly determine what the shoes are made of.
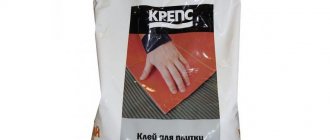
Glue
Glue characteristics:
- It has a microporous structure, does not release heat even at a significant minus.
- Hypoallergenic, does not absorb moisture, and is easy to wash.
- But the biggest advantage is its low weight, much less than PVC.
Unfortunately, excessive lightness and porous structure do not contribute to strength, and the products are easily damaged mechanically.
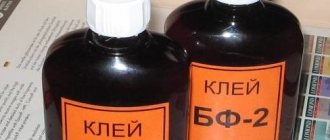
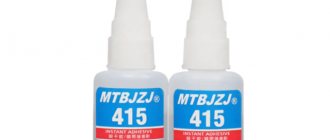
There is glue for EVA (ethylene vinyl acetate). First, a yellowish tint appears when gluing, then disappears. Properties:
- Does not allow moisture to pass through, is water resistant.
- Does not spread to the sides when gluing.
- The place of repair is almost impossible to see due to the transparency of the composition.
- The product lasts for a long time, thanks to which the damaged area is not afraid of leakage.
- You will use the glue slowly, as you should spread it thinly.
- The relatively low cost is a definite advantage.
- Long term of use - 24 months.
Important circumstance:
- EVA glue is not used for repairing PVC products.
- It also won’t work to glue the PVC patch onto the EVA, which is connected into a “joint”.
- It is advisable to press down on the damaged area so that the inner part rises up. We apply a thin layer of the composition right here.
Safety precautions
When working with a line of epoxy adhesives, you should not only carefully follow the included instructions, but also observe safety precautions. Considering the harmfulness of the substance, it is imperative to adhere to these rules. They are:
- Do not allow the resin to come into contact with unprotected skin of the hand. In addition to serious allergic reactions, getting glue on the skin, given the speed of polymerization, causes pain. If resin gets on your skin, wash the substance off immediately with soapy water.
- To protect against dust and harmful toxic fumes, use a respirator mask equipped with a carbon filter.
- All work with glue is carried out in a well-ventilated area.
- Use rubber gloves when mixing resin and hardener.
- Do not mix resinous substances in a container that will subsequently be used for eating or storing food.
- If the paste or glue is difficult to squeeze out of the tube, the tube can be slightly warmed under hot running water. Do not use a water bath, microwave or oven for this purpose, otherwise the resin will boil and become unusable.
Step-by-step sealing of boots
Instructions:
- Squeeze the cut area so that the porous surface of the ethylene vinyl acetate comes out. This must be done, because otherwise nothing will stick together.
- Apply glue for the first time and wait about 5 minutes.
- Repeat. After 5 minutes, connect the joint, pressing it firmly.
- Apply a thin layer of glue, as excessive amounts will reduce the quality of bonding!
- The hardening process lasts 24 hours.
- The quality of the composition is high - it is impossible to tear a successfully glued product at the place of the cut.
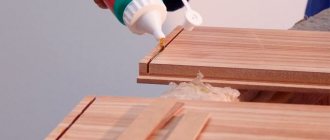
Options for gluing soles
There are two ways to reliably connect surfaces, used at home. How to glue the sole, which method is better to choose depends on the skills and desires of the master.
Cold way
The method does not require special equipment and is easy to implement. After applying the adhesive, the surfaces to be joined are pressed against each other with maximum force. It is imperative to ensure that there are no voids left in the sealed product between the base of the upper and the sole. After connecting the parts, the boot is placed under pressure for at least 10 hours.
Hot way
The method is most often used when repairing shoes with hard soles; it provides ideal grip over the entire surface. After application, the glue is left to dry completely (usually this takes 30 minutes). Then the soles of the shoes are heated with a hairdryer or over a gas burner and intensively pressed against the top of the shoes for 15 - 20 seconds. Shoes glued in this way can be used after 48 hours.
From the video you will learn how to use hot melt adhesive:
How to glue PVC boots (step by step)
Materials:
- A couple of patches made of waterproof material that will cover the damaged area.
- Glue, maybe a moment.
- Hair dryer.
- Fine-grit sandpaper.
- Acetone for degreasing.
- Gloves.
- Napkins for wiping off excess glue.
We repair PVC shoes and produce:
- Use sandpaper to clean the surface with the defect and the patch. The area will become a little rough.
- Degrease it with acetone. Apply glue to the desired area and patch and wait a quarter of an hour. Then we apply the next layer of glue and wait for half an hour.
- We heat the glue with a hairdryer and apply the patch, applying glue to it both outside and inside.
- Press the parts tightly against one another and hold for about 5 minutes. After proper repair, the boots will be no worse than new ones and will serve you for a long time!
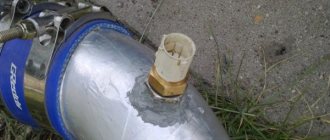
Anglers method
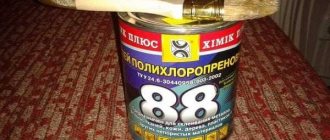
Fishing and hunting stores sell special rubber adhesives. They contain instructions that describe in detail the technology for using the product. For rubber boots, it is generally recommended to sand the damaged surface and glue a patch.
How to seal rubber boots if they are made of EVA? This material has a porous structure into which glue is absorbed. To repair such boots, patches are not needed. It is enough to apply the required amount of glue to the crack lines and press firmly. The hardening time of the product is indicated by the manufacturer on the packaging. After gluing, the boots will look like new, and the defective area will remain invisible.
Is it possible to repair the soles of rubber boots?
Stages of work:
- First, we will process the damaged area on a sharpening machine to achieve smoothness.
- It is preferable to use sealants.
- Applying a patch in this case will not lead to the desired result. When walking, the patch wears out, and repairs will need to be made endlessly.
So, we are convinced that nothing is impossible. Basically, you should strictly adhere to simple rules:
- cleaning with acetone;
- double application of glue;
- introducing glue inside.
Proper repair will make your comfortable shoes serve you for many more years! Happy fishing, comfortable hike and dry feet everyone!
Knitted sundress for girls
Crochet sneaker booties
Cyclists method
This method has been tested by many cycling enthusiasts who often encounter the problem of a broken tube. To repair wheels, a bicycle repair kit is mainly used, consisting of patches on protective films, special glue for rubber and sandpaper.
According to this technology, it is necessary to rub the area where the patch will be placed with sandpaper, degrease with acetone and apply glue evenly. After a few minutes, apply the patch and press firmly.
The bicycle repair method is reliable and guarantees high tightness. You can use sealed boots almost immediately.
The disadvantage of this method is the unaesthetic appearance of the repaired product. A bicycle patch remains at the place where it was glued, which is impossible not to notice. Therefore, it is better to glue boots for the garden or fishing in this way.
Motorist method
What to do if smart women's rubber boots need repair? Like EVA boots, they are best sealed without a patch.
You can fill the hole in colored and transparent rubber boots with elastic adhesive sealant.
The “Crazy Hands” adhesive-sealant from the “Done Deal” brand has proven itself well. You can buy one in stores for car enthusiasts. In order for everything to work out as it should, do not neglect the preparatory stages. After washing, dry the shoes thoroughly and degrease the hole with acetone. The quality of gluing depends on this.
Again, rubber boots also need different glue - keep in mind that all of the listed materials are not suitable for leather.
Patch the holes
If all the EVA mats in the car look pretty good, but the one located under the driver’s seat has worn out under the gas pedal, do not rush to buy a new set. Even if a hole forms, the problem can be solved.
Perhaps there is an old mudguard lying around in the garage. In this case, follow this plan:
- Cut out a rectangle of the desired shape.
- Degrease both surfaces.
- Glue using EVA glue or silicone sealant.
- The hole on the back side will also have to be sealed with a piece of mudguard.
Perhaps people with aesthetic inclinations will find such repairs unsightly. But for those who don’t like throwing money away, this is it.
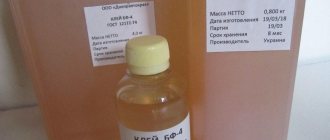
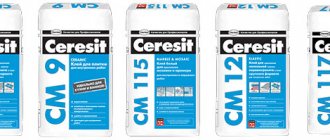
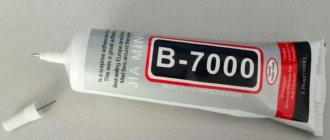
Characteristics of the adhesive composition
Sneakers, boots or winter fishing boots made of EVA material will be properly sealed only with the same material, i.e. EVA glue.
Properties:
- waterproof;
- does not spread;
- is able to tightly connect gaps formed at the bend, as well as side and corner ones;
- the repaired area remains almost invisible;
- the product stays on the shoes for a long time, thanks to which the damaged area is protected from repeated damage;
- the composition is consumed sparingly, since the manufacturer recommends applying it in a thin layer (otherwise the polymerization process is difficult);
- inexpensive, a 15 ml tube costs about 100-120 rubles;
- Shelf life is 24 months (2 years).