Properties and application of the Betonokontakt primer
Finishing work does not belong to the category of easy ones, but every year the development of advanced technologies makes them more accessible to any experience in these works, the time for completion is reduced and, accordingly, the result improves. But everything new raises many questions, misunderstandings and, as a result, errors in practice. Today, using the example of a primer, we will try to understand how concrete contact primer differs from similar materials and what its advantages are.
Contact concrete - application of the mixture
A special primer is used for repair and finishing activities:
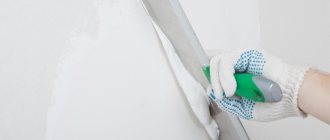
- processing of concrete bases intended for plastering;
- covering the facades of buildings subject to decorative finishing;
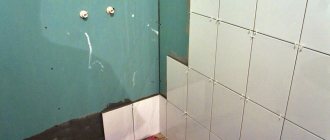
- impregnation of the bases to which the finishing tiles will be attached;
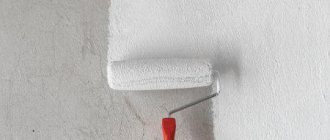
- priming walls on which wallpaper will be glued or paint will be applied.
You can begin work immediately after opening the lid of the sealed container, the label of which indicates what concrete contact is and how to use it.
Who produces Betonokontakt?
It so happened that this finishing composition has several names. The most common among consumers is “Betonokontakt”, and it is also called: Beton-kontakt, Betokontakt. If we turn to the original source, the manufacturer of the mixture, FEIDAL, then their version of the name looks like Betokontakt, which in translation sounds like “Betokontakt”.
The popular version was most likely due to the direct use of primer. Since it is applied to concrete, that’s where it comes from – “Betonokontakt”.
Interesting fact, FEIDAL is the one who developed the composition to increase adhesion on low-absorbent substrates.
Today, most manufacturers of finishing mixtures have similar products in their range, sometimes with similar names. No matter who produces this product, it is important that it is of high quality and performs all its functions.
Why are walls treated with concrete contact?
Concrete contact for interior work Prospectors 20kg
An adhesive mixture based on plasticizing additives improves the bond of finishing building materials with the base. The absence of roughness and pores on the surface layer reduces the effectiveness of fixing decorative coatings. Many home craftsmen have repeatedly convinced themselves, using concrete contact, that this is a reliable means for processing rough foundations.
Purpose of the innovative composition:
- gluing building materials to glossy and smooth substrates;
- increasing the adhesion of the plaster mixture to external and internal walls;
- preservation of plastered surfaces for a long time.
No preparation required for use. The composition saturates the concrete mass through the pores, increasing the roughness of the base. Thanks to the relief texture, contact between plaster, paint and varnish coatings, ceramics and wallpaper is improved.
Primer composition
Manufacturers add various substances to the solution, this does not spoil the composition, but from FEIDAL it contains:
- Copolymers or acrylic dispersion. This is the base of the entire primer, which ensures adhesion and forms a sticky layer after drying. The productivity of the primer itself depends on this component.
- Natural fillers. Most often it is quartz sand; it provides a rough surface, and it is this fact that increases the tenacity of the next layer.
- Various additives that can give the primer special functions, such as moisture resistance, resistance to various types of bacteria, etc.
Sometimes manufacturers add dye. This method makes it easier to control the application and not leave gaps. The method is effective, so if your Betokontakte does not contain dye, you can add it yourself.
The advantages of primer include:
- No harmful impurities;
- Neutral acidity;
- Resists alkali;
- Does not oxidize metal;
- Suitable for gypsum and cement plasters.
Axton mixture
The technical characteristics of axton primer allow it to be used for treating even unprepared surfaces. They do not need to be sanded or subjected to thorough cleaning, although, of course, you should not forget about this. The axton primer contains the following components:
- acrylic;
- marble chips;
- polymers (copolymers);
- quartz sand.
The consumption of such material is quite economical and amounts to 0.3 kg per 1 m2. You can work with a surface treated with this mixture within a few hours.
Axton mixture
Where and how to use primer
The main advantage of using Betokontakt is for a base that resists water. When you put plaster on this surface without treatment and without preparation, it will fall off for the simple reason that it will not “catch on”. Then “Betokontakt” comes to the rescue, which really fulfills its functions 100%.
The mixture is not budget-friendly, so it doesn’t make sense to use it everywhere. Before purchasing, you must read the instructions or consult the seller.
This primer, as already mentioned, forms a rough layer on the treated surface with the help of abrasive particles, due to this the plaster is perfectly attached to it. These abrasive particles form a good support for finishing, but Betokontakt is not applicable to all surfaces.
Since it is intended for use with surfaces that do not perceive liquid, we list them:
- Completely smooth concrete with no pores. Often, these are panels in residential buildings or building columns in monolithic buildings. It is important to understand that if the concrete is characterized as loose or porous, then a different mixture will be needed;
- Ceramic tile. When laying new tiles, there is no need to remove the old ones, but it is recommended to do so. If it was not possible to dismantle the old layer, a couple of layers of Betokontakt provide the opportunity to lay new tiles;
- Wood. In this case, there is simply no other method, but it must be taken into account that the wooden surface must certainly be completely dried;
- Metal. Similarly with wood - this is a base that does not absorb liquid at all, so a layer of primer is simply necessary here.
These are the recommended surfaces for using our primer. Experts advise choosing a primer with a coarser grain for plaster, and a fine grain if using putty.
For metal and wooden surfaces, applying Betokontakt to individual elements is advisable, because there are other technologies for plastering wood or metal.
How to apply concrete contact correctly / Found Bettokont
Do you want to save this video?
- Complain
Report a video?
Sign in to report inappropriate content.
Liked?
Did not like?
Video text
Betokontakt LP55 Will also base other materials of this brand - https://bit.ly/osnovit How to properly apply concrete contact / Will base Betokont! For plastering smooth substrates (concrete, monolithic blocks, etc.) there is a quartz primer that provides such surfaces with additional adhesion, transforming smooth into rough. But there is one important nuance here - not every plaster or mixture is suitable for such a primer. And in video No. 310 “How to properly apply concrete contact / Founded by Bettokont”! Concrete contact is a primer with polymer binders and quartz filler, which gives the walls the necessary adhesion before plastering. Adhesion is the pull-off pressure that a material exerts on a surface. For concrete contact (and bettokont Osnovit in particular) this pressure is 0.4-0.7 MPa. The problem is that most mixtures based on cement binders have higher adhesion than concrete contact, and these plasters can simply tear the concrete contact film to shreds. And this primer must be applied after studying all the issues regarding the adhesion of the plasters themselves. If you use concrete contact under gypsum plasters on concrete, then this quartz primer will provide: • Additional adhesion of a smooth surface • Protect gypsum binders from aggressive alkalis from concrete • Level the overall moisture absorption of the surface That’s all, I hope you understand how to properly apply concrete contact (namely Install Bettokont LP-55) on the walls with your own hands before plastering with gypsum mixtures.
New video in our VK group on how to properly apply concrete contact (quartz primer to improve adhesion) - https://vk.com/guysstone Our Instagram with exclusive photos from the world of repair and finishing - https://www.instagram.com /guys_stone_/ Excel file with channel navigation and links to all videos about apartment renovation in Moscow and Volgograd, and priming walls with concrete contact from Osnovit - https://yadi.sk/i/NExnOhQD3HWJMD Video No. 310 “How to properly apply concrete contact / Osnovit Bettokont” – https://www.youtube.com/c/Guysstone You can also visit the YouTube channel Osnovit with their mixtures and Bettokont LP-55 – https://www.youtube.com/channel/UC8mg.
How to apply concrete contact / Found Bettokont! For plaster smooth bases (concrete, monolithic blocks, etc.) has its own quartz primer, which provides these surfaces with additional adhesion, transforming smooth into rough. But there is one important nuance here – not every plaster or mixture is suitable for such a primer. And in the video No. 310 “How to apply concrete contact / Found Bettokont”! Concrete contact is a primer with polymer binders and quartz filler, which gives the walls the necessary adhesion before plastering. Adhesion is the pressure that the material exerts on the surface. In concrete contact (and Bettokonta Foundations in particular), this pressure is 0.4-0.7 MPa. The problem is that most cement-based cementitious mixes have better adhesion than concrete contact, and these plasters can simply break the concrete contact film in tatters. And it is necessary to apply this primer after examining all the issues on the adhesion of the plasters themselves. If to use concrete contact under gypsum plasters on concrete, then this quartz primer will provide: • Additional adhesion smooth surface • Protects gypsum binders from aggressive alkali from concrete • Aligns total moisture absorption On this all, I hope you understand how to apply concrete contact (namely, Found Found Bettokont LP-55) on the walls with your own hands before plastering plaster mixes. #Concrete contact #Wall primer #Plaster
Sources: https://stroy-podskazka.ru/gruntovka/kak-nanosit-betonokontakt-na-steny/ https://otdelkasten.com/otdelka-sten/kak-nanosit-betonokontakt-na-steny https://balkonsami .ru/otdelka/primenenie-betonokontakta.html https://www.youtube.com/watch?v=9CZYof6mUHk https://dekoriko.ru/gruntovka/knauf/
"Betokontakt" and oil paint
Some professionals use primer on painted substrates. But still, most people advise removing the paint. This can be explained simply - with a primer, and without it, a layer of plaster from the pressure of weight may well separate from the paint.
But if the paint is not removed, then the following actions are recommended:
- Thoroughly degrease the surface to be treated;
- Get rid of the smooth surface effect, for example, using sandpaper or a wire brush;
- Make notches with an axe;
- Remove dust thoroughly (in any way);
- Apply the first coat of primer;
- Allow the surface to dry;
- Apply a second coat of primer;
- Allow to dry again;
- Then carry out the planned finishing work.
This is another clear example of how Betokontakt works, but here you can be content with notches: if the area is sufficient, then the plaster and tiles will stick, apply the desired mixture to chips on the surface, and after drying, continue finishing.
Those who have used this primer agree that it holds up better. Without a doubt this is true. But provided that all instructions are followed. Particular attention should be paid to the surface drying process. Follow the recommendations strictly, observe the specified time, drying up to four hours, and a cheaper analog – up to a day.
What not to do?
When doing construction work yourself, it is not recommended to make the following mistakes:
- Dilute the mixture with more water than recommended on the packaging, because... the material will not provide the required bonding strength to the surface and may crack.
- The primer composition is not applied to a frozen base.
- Do not spread the mixture on an uncleaned surface; cleaning, degreasing, and dust removal are required.
- The surface must be dry; do not spray the mixture onto a wet surface.
- During operation, it is necessary to stir the composition regularly, because granules or grains of sand may sink to the bottom of the container.
- Do not continue surface treatment until the primer dries; the mixture must be wet.
- It is not recommended to carry out work at temperatures below +5°C.
- It is unacceptable for dust to get on the coating; the adhesive ability of the primer may be reduced.
- Mixtures that have expired or are frozen should not be used.
- There is no need to add water to the prepared composition.
Where is Betokontakt contraindicated?
Like any finishing material, this primer has areas where its use is not permissible. We also advise you not to listen to popular opinions that it is useful to apply the composition to loose or friable surfaces. For these purposes, completely different solutions are intended, which are characterized by deeper penetration. Our mixture sticks to the base without penetrating inside. Further, it is not at all worth covering whitewash, the usual CBPB, any types of concrete blocks, etc. with our primer.
“Betokontakt” is popular when it is used as a primer for working with ceramic tiles. But, if the surface is capable of absorbing water, then this method of using it is not effective. This is easy to find out by comparing adhesion indicators. For tile adhesive it is 0.9 MPa, and for Betokontakt it is 0.5 MPa. If you nevertheless decide to use the primer in question for these purposes, then as a result you will spoil the effect and waste your money.
When laying tiles, it is more advisable to buy high-quality glue; naturally, this will affect the budget, but the combination of an inexpensive special glue and the necessary primer will be even more expensive, and the result will be unpredictable. In some cases, when the surface is in doubt, we advise you to take a primer with full penetration, or an adhesive with characteristics such as “for complex substrates”; this one will definitely stick firmly, because it will penetrate into the very depths of the surface.
Where exactly “Betokontakt” will cause harm is when working with self-leveling floors. These cement bases will have reduced adhesion, while those made of gypsum will have to be “pulled.” This will happen because they simply will not spread over the sticky base, and as a result, cracks, swelling and other very negative aspects will appear over the area.
Consumption of different types of material
Concrete contact consumption varies. This can be explained by the different fractions of the solid filler, the consistency of the soil and the absorbency of the base. Based on this, several average values are distinguished (in g/sq.m):
- 150 on a smooth base with high density (glass, metal, cement-based monolith);
- 200 for oil paint and enamel, varnished surfaces;
- 250 for tiles, porcelain stoneware;
- 300-350 for concrete slabs, brickwork, plaster;
- 500 or more for porous block structures.
Note! Compared to conventional primers, Betonokontakt costs more. Therefore, to reduce consumption in the case of highly absorbent substrates, you can pre-treat the substrate with an acrylic-based impregnating composition.
Primer Features
There are many videos on the Internet that show how plaster or tiles did not hold up on Betokontakte. Most likely, during the work period, the recommendations on which bases the primer is best suited to were not followed.
Plus, you shouldn’t do the following:
- Add a larger volume of water to the dry plaster or putty composition than the manufacturer recommends. By simplifying the work, you risk ending up with falling off plaster;
- Under no circumstances apply the composition to a frozen surface;
- Before application, carefully prepare the substrates according to the manufacturer's requirements. There should be no dust left, any loose pieces of old materials, etc.;
- Dry the surface thoroughly before application, do not place the primer on a wet base;
- During the application process, it is necessary to periodically stir the solution, this is due to the fact that sand or its granules have the ability to sink down;
- Wait for the primer to dry completely, only then proceed with further work, follow the instructions;
- The primer is also used for exterior work, but only in case of positive temperatures. The manufacturer does not recommend working with it at temperatures below +5C;
- Carefully remove dust from the surface being treated. The dust settles well on the sticky base, but then falls off along with the layer of plaster. If the base is dusty, another coat of primer will be required;
- Monitor the expiration dates of the primer solution or those that have been frozen. There are frost-resistant compounds - this is a different case. Before applying them, defrost them and work with them only at positive temperatures. This property of the primer means that such compositions can withstand several full cycles, and not that they should work at sub-zero temperatures;
- Do not exceed the specified amount of liquid in the solution, even if the finished primer seems too thick to you. This is only possible if the manufacturer’s recommendations are included in the instructions for use, but no such notes have been found.
The basic rule for consumers is to try to avoid counterfeits. For the primer to work, it must be of high quality, and this is only possible from trusted manufacturers. Of course, this can and should be checked. For example, before applying the main volume, apply it to a small area, strictly following the instructions. Afterwards, apply putty or plaster, let it dry and risk tearing it off. If Betokontakt is real and you did everything correctly, you won’t succeed. It is believed that this primer can be used even when applying plaster to glass surfaces.
Types and characteristics
The main criterion for classification is a set of concrete contact additives, which is reflected in the application and purpose of the finished product. The fraction and nature of the solid filler also matters.
The following soils are distinguished:
- For interior work. This includes a mineral component with a fraction of up to 3 mm. The action of the additives is aimed at resistance to biological activity and environmental friendliness of the composition. After treating the walls with such concrete contact, it is permissible to apply a leveler, gluing tiles and wallpaper, and decorative painting.
- For external use. Here additives are introduced into the composition to increase the resistance of the coating to frost, changes in humidity and temperature. If it is necessary to protect the surface from natural phenomena (wind, precipitation, UV rays), then this material is excellent. A two-layer coating can independently withstand the listed factors for a year.
- Universal concrete contact has a wider application. Here the filler fraction is often 3-6 mm, additives have different properties. This material can be used for work inside and outside the building, for any type of finish.
Technical description
The Betonokontakt primer, the technical characteristics of which are determined mainly by functional additives, is an environmentally friendly building material. This is explained by the absence of toxic substances in the composition. During work, it is not necessary to protect the respiratory organs and mucous membranes. Before drying, the soil can be easily washed off with running water without household chemicals.
The widespread use of concrete contact is explained by its versatility and properties:
- breathability;
- inertness to mold, fungi, bacteria, chemical reagents (acids, alkalis;
- solids strength;
- quick drying (for a single-layer coating from 3 hours);
- resistance to moisture;
- duration of action (up to 80 years);
- ease of work.
Note! In order for the film to work within the stated period, operating conditions must be met. This is a positive air temperature (5-35 degrees Celsius), relative humidity 60-80% and the absence of draft, wind, and precipitation. Forced drying of the coating is unacceptable.
What tools to use with Betokontakt
After you understand everything about the purpose and properties of the primer, let’s figure out how and with what tools it is applied. At first glance, there is nothing complicated, but to understand, you need to try.
The solution itself is always thick, the consistency is from the state of kefir and is thicker. It contains grains of sand and granules, and it is advisable to distribute them evenly over the base so that they do not accumulate all in one place. It turns out that the process is not entirely easy.
We suggest using simple tips:
- It is recommended to work in special clothing, covering all areas of the body. The primer is extremely difficult to wash off, and if it gets on your hair, you will have to remove it along with it. To avoid this, it is first recommended to cover the exposed areas with a rich cream or oil, and when working with the ceiling, be sure to protect your face, for example, wear safety glasses, but do not exclude the application of cream or oil.
- “Betokontakt” is not very easy to apply, and when working with it over a large area, it is best to use a roller. The size of the tool must match the bucket so that it fits there; this is the most practical option. The pile of the roller should be at least 12 mm; of course, something will be absorbed, but this is better than foam rubber. The latter almost instantly becomes wooden. Of course, the pile will also become clogged with sand, but it can be removed periodically against the rim of the bucket or cleaned off with a spatula.
- If the treatment area is not large, or you need to apply the solution in the corners, then it will be more convenient to work with a brush. The size of the pile here depends on your preferences, but keep in mind that the long one is heavier, especially when it becomes clogged with sand. Also remove accumulated sand on the edge of the bucket; you can wash it or replace it if necessary.
- A good method is to attach a brush or roller to a meter stick. Then you won’t need a stepladder and there is less risk of the solution getting on open areas of the body.
For internal work, the use of “Betokontakt” is rather recommended, but for external work, this is a prerequisite. Without this primer, it is impossible to achieve the necessary adhesion for contacting building materials. Under difficult climatic conditions, the cladding can peel off, which contributes to the poor appearance of the building, as well as the separation of materials from the base, and this threatens possible human injuries if the finishing was done with stone or tiles.
Who makes the Betonokontakt primer?
Today, every supplier of building materials for finishing has such a primer in its assortment. If you're leaning towards a specific manufacturer, it's worth trying this product too. In addition, there are some small regional companies that present their range in certain territories, but are distinguished by the manufacture of quality products.
Below we present a list of the most popular companies that have proven themselves among Betokontakt consumers:
- FEIDAL (Feidal). The company is a primer developer, their production of Betokontakt is always at its best, and the price corresponds to it, and is not too overpriced;
- Knauf (Knauf). The composition of this manufacturer is not moisture resistant. It is important to follow all recommendations when preparing the solution;
- Eskaro (Eskaro). The composition contains ammonia, so it is recommended to use it on large areas with good ventilation conditions, but at the same time it shows itself very well when applied;
- The solution from the manufacturer Shtock (Stock) from Germany is distinguished from others by the presence of marble chips as a filler, as well as a high level of water resistance;
- Ceresit. Unfortunately, the products of this manufacturer are distinguished by a lot of counterfeits; they contain a pink pigment, which makes it easier to control application;
- Plitonite. Its advantage is the slow settling of particles; it also shows good performance during operation;
- Pufas. It has a slightly smaller number of positive reviews than the previous one, but no particular complaints were expressed;
- Osnovit or Bettokont, this primer requires constant and thorough mixing, dries in a couple of hours, is recommended for use with gypsum plasters, and overall gives a decent result;
- Olympus. Perhaps the most budget option of those listed, despite the price, it works no worse than the others;
- Prospectors. This primer is characterized by a coarse filler, drying time up to four hours;
- Bolars. The thickest of all options, it is also difficult to apply and dries within a day.
These are manufacturers offering goods in various price categories. Accordingly, those that are higher in cost are placed better. Budget ones will have to be stirred often, and application is also more difficult. When working with such compositions, it is recommended not to leave bald spots, and if this happens, you need to apply another layer and wait completely for the allotted time for drying. This approach is more expedient than having to redo the entire work afterwards.
Leaving reviews, consumers are interested in whether there is an analog product for the Betokontakt primer. In our opinion, there is one example - Ceresit ct-16. This solution shows approximately the same effectiveness, but will be more expensive than the Betokontakt primer.
Instructions for use
Before you begin, you should prepare the foundation. The processing process includes the following steps:
- Wash the surface from dust or dirt;
- Remove aggressive formations: grease, bitumen, glue and others;
- Beat off poorly fitting plaster, remove peeling paint, remove loose wallpaper.
Concrete contact primer requires application to a dust-free surface; this is the main condition for obtaining a solid, prepared base for finishing. Structures washed with water must dry thoroughly before application.
If the walls were previously covered with chalk, they are washed with soapy water and dried. Lime whitewash is removed if it crumbles and peels off.
The composition of the concrete contact primer is selected depending on the quality and condition of the surfaces being treated.
Usually, the concrete-contact primer is ready for use; you just need to mix the composition before work. Sometimes it is diluted with water as directed by the manufacturer. It is important to ensure that the mixture does not contain lumps.
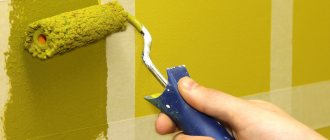
Concrete contact is applied using painting tools - brushes, rollers, or you can use a spray gun. Uneven walls made of concrete or brick are covered with a wide brush. This ensures penetration of the concrete contact into cracks and seams.
For smooth surfaces it is better to use a roller. You should try to apply stripes without leaving spaces between them. If the first layer has gaps, you need to apply the next one to paint it well. The next layer is applied after the previous one has dried.
The primed coating dries after 3-12 hours. This time is indicated on the package, but you need to take into account the room temperature and humidity. To make sure that the soil is dry, you can lightly scratch it with a knife or spatula. Do not continue work if the layer strength has not been achieved.
Conclusion
To buy exactly the right primer and not make a mistake with your choice, we recommend that you carefully read the instructions. Some acrylic primers, for example, are suitable for cement and plaster, while others are suitable for one or the other. There are some that are used only for indoor renovation, and some are not suitable for interior decoration.
The instructions specifically state that the presence of old paint on the surface is acceptable for certain compositions, and some are used only under tiles.
In any case, in order to get what was expected as a result, you do not need to invent something, you should only follow the manufacturer’s recommendations.
