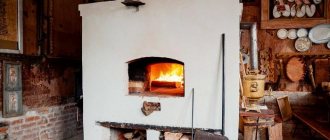
Why plaster the stove?
The materials of the Russian stove include:
- clay;
- fireproof (fireclay) brick;
- iron (doors, grates, grates).
Each has its own heating temperature, expansion, and thermal conductivity.
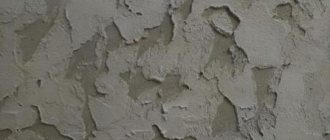
Yes, it is indeed possible to leave the stove unfinished, but after a short time it will lose its neat appearance along the colored seams. If the masonry was done in haste, cracks will begin to appear.
Plastering is performed to strengthen the structure, protect it from drying out, and give it a beautiful appearance.
In addition, the procedure is relevant in the following cases:
- The oven is not laid out neatly. The mixture will help level the corners and sides.
- The old coating began to crack and fall off.
- To increase the strength of the walls, their thickness will increase.
- Heat capacity improvements. The bathhouse or house will remain warm longer.
- The seams were filled with a natural-based mixture, which is why insects settled there.
- The interior design of the room has been changed, so the furniture needs to be decorated in the appropriate style.
- Increases the level of fire safety. It prevents carbon monoxide and smoke from entering the house through cracks in the brickwork.
Using heat-resistant plaster is an excellent way to restore antique stoves, fireplace boxes, followed by laying ceramic tiles, marble and other decor on top.
Classification of plaster for stoves and fireplaces and requirements for it
During combustion, a significant temperature difference is formed outside and inside the product. It disappears only after it has completely cooled down.
To avoid cracks in the brickwork, purchased or homemade plaster must meet a number of conditions:
- Be resistant to high temperatures, be heat resistant.
- Have an elastic structure. This will simplify the application process. The mixture will not begin to crumble from drying out.
- All components in the composition must be environmentally friendly and, when heated, safe for health.
- Be fire-resistant, not exposed to flames, maintain working properties.
- Adhere well to the surface.
Regardless of whether it is purchased thermal plaster or made at home, it must meet the requirements.
Ready-made factory mixtures are sold in dry form, so you need to dilute them with water in the correct ratio.
Based on the composition of the mixture, they are classified into two types.
Simple
Simple plaster is called plaster, which contains only two components: clay and sand.
Before making the solution, sand is passed through a sieve, clay through a metal mesh with small cells. This way the raw materials are clean, powdery, without any debris.
Stove makers recommend choosing fatty clay, since this way the adhesion to the surface will be much better. With increased fat content, simply increase the proportion of sand in the mixture.
Before mixing the solution, the coarse clay must be filled with water and allowed to soak as much as possible for 2–3 hours. This will make the mixture plastic, and over time the coating will not begin to burst.
Complex
A complex composition involves the combination of three or more components at the same time. There are several mixture options:
- lime, clay, sand;
- asbestos, clay, sand;
- clay, cement, asbestos, sand;
- fiberglass, sand, gypsum, lime, clay.
The basis throughout is heat-resistant clay.
It is important to maintain the correct proportions of the mixture and mix to the desired consistency, otherwise the solution will become too hard and may crack.
The composition of the purchased putty includes fireproof kaolin clay. After being fired (at a temperature of 1500 degrees), it is crushed to powder.
Clay elutriation
Souring clay is soaking it, soaking it in water.
When elutriated, the clay not only becomes purified, but also becomes fattier and more flexible. Therefore, clay that contains a lot of sand and has low plasticity is most often washed out. Clay needs to be washed out in a tall vessel, for example, a bucket.
Pour one part clay with three parts water and leave overnight. In the morning, thoroughly stir the clay with a stirrer until a homogeneous solution is obtained. Then let the solution sit for a long time
As soon as the water clears from the top, carefully drain it using a rubber hose. But it's not so easy to drain the water without muddying it
Therefore, even in ancient times, a simple and ingenious device was invented, which is still used by Japanese potters (Fig. 1.4). Several holes are drilled vertically in a wooden tub at a short distance from each other. Before filling the tub with liquid clay mortar, each hole is plugged with a wooden stopper. Heavier grains of sand and various kinds of pebbles settle to the bottom first. Then, after settling, clay particles fall down. Gradually, the water from above brightens and finally becomes transparent (1.4a). As soon as the level of clear water appears just below the top hole, the plug is pulled out and the cleared, settled water is poured out of the barrel (1.46). After some time, remove the plug located below. This way all the settled water is gradually drained out. To speed up the process of clay settling, bitter Epsom salt is first added to the solution (about one pinch per bucket). Instead of a wooden tub, you can use a suitable metal container. At different levels, short tubes are soldered into it and plugged with plugs.
After removing the settled water, carefully scoop out the liquid clay, leaving the bottom layer untouched, which contains pebbles and sand that have settled to the bottom. Pour the clay solution into a wide wooden box or basin and place it in the sun so that excess moisture evaporates from the clay faster (1.5)
As soon as the dried clay loses its fluidity, stir it with a shovel from time to time. After the clay acquires the consistency of thick dough and stops sticking to your hands, it is covered with plastic film or oilcloth and stored until the start of modeling work.
Preparing the room for plastering a brick oven
In fact, even a home craftsman who has no experience in similar work can properly plaster a brick oven. It is important to pay close attention to the process and use high-quality materials, then the stove will retain its presentable appearance for a long time.
Before plastering the stove, you need to prepare the room. To do this, you need to make room for work - all unnecessary items need to be removed from the room. Furniture should also be removed from the room if possible. If this cannot be done, then you need to cover it with a thick cloth. To protect windows, walls and floors from debris, dust and damage, these surfaces should be covered with polyethylene.
Warp finishing
Sometimes old age, damage or unscrupulous work of builders can cause distortions in the walls of the stove. You can fix this this way:
- focusing on the building level, set up beacons for alignment;
- heat the stove so that it is warm;
- moisten the slanting wall with a roller or brush;
- the surface is primed and left to dry;
- the first layer of plaster is applied using the “spray” method so that the mixture covers all the seams;
- after the first layer has dried, apply the second - it should protrude about 1 cm above the beacons. Start work from the bottom, leveling the rule every half meter of the layer;
- the wet solution is polished with grout;
- To level the corners, use a special corner spatula.
Application of mesh
The use of this mesh in cladding allows not only to level and hide surface defects, but also makes the plaster coating more uniform and durable. To plaster the stove, you need:
- install the mesh near the work surface at a distance of no more than 2.5 cm;
- “spray” apply the plaster and wait for it to harden;
- cover everything with the next leveling layer;
- rub out;
- decorate.
Light plaster
The need for such work usually arises if the stove has no obvious defects or distortions, but needs cosmetic repairs. Plaster it like this:
- guide elements are fixed on a previously prepared surface so that the coating is uniform;
- apply the solution from bottom to top with a wide spatula, which is immediately leveled using the rule;
- the corners of the structure are plastered with an angle spatula;
- the result is neatly erased.
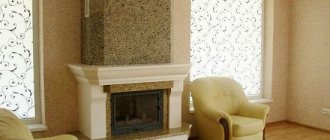
Decorative cladding for fireplaces
The service life of a plastered surface largely depends on the adhesion of materials, and for this it is necessary to correctly apply the plaster and distribute it evenly on the surface of the stove.
You can solve the question of how to plaster a stove without cracking using special tools, which include the following:
- Putty knife. Several types of spatulas are used; with the help of some tools the solution is collected from a container, while with others it is applied to the surface.
- Plastering hammer. This tool is used to drive plaster nails.
- Trowel. Using this tool, the solution is evenly distributed on the stove wall.
- A hammer-cam is necessary for working with a chisel or a trojan.
- Scissors are ordinary and for cutting metal. If you use fiberglass mesh in the process, you will need ordinary scissors; you need to cut the chain-link mesh with metal scissors.
- A grater is necessary for leveling and smoothing a plastered stove wall.
- Using a smoother, the surface is brought to perfect smoothness.
- A chisel is used to make notches on the surface of the stove, this promotes better adhesion of the plaster and the working surface.
- Brushes. It is necessary to purchase several types of this tool, since some are used to apply primer, while others can be used to apply textured plaster.
- Using a building level, check the vertical and horizontal level of the working surface.
- Using a plumb line, the evenness of the walls and the applied plaster solution is controlled.
- As a rule, the mixture is distributed between beacons, which are installed on the walls for even plastering of the surface.
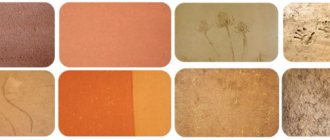
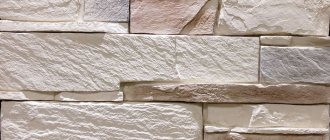
Marble tiles are resistant to sudden temperature changes, so they last a long time
The decoration of any country house is a fireplace. The following natural materials are used for its decorative cladding:
- marble and granite in the form of stones or tiles;
- onyx or coil;
- sandstone and white limestone.
Even taking into account the fact that granite has good resistance to sudden temperature changes, it is not recommended for use for cladding internal surfaces.
Cladding order
The fireplace is finished using reinforcing mesh; when working with tiles, the installation technology is slightly modified. It is carried out in the following order:
- A mesh is attached to the surface, after which it is carefully leveled. For these purposes, special adhesive compositions are used.
- The mesh is fixed with nails driven directly into the seams.
- Decorative tiles are mounted on a leveled and well-dried surface.
- The material selected for cladding is laid from bottom to top, and the adhesive is applied using a notched trowel.
During installation, the tiles are manually pressed against the surface of the fireplace, and then leveled by lightly tapping with a rubber hammer. Plastic crosses are installed between adjacent tiles to ensure uniform seams. At the end of the work they are removed.
First of all, let's find out why we need to plaster stoves and fireplaces. There are at least two reasons for this:
- The plaster layer is necessary as insurance during the operation of the structure, since it creates strength and tightness. Over time, fumes and soot can penetrate the room, leaving their marks on the walls, ceiling, as well as furniture and other objects. All this invisibly harms health. When using high-quality plaster, the stove does not crack and does not allow smoke and other combustion products to pass through.
- Finishing material decorates the interior and allows you to refine the appearance of the room.
Kiln plaster is an ancient but reliable means of covering thermal structures.
- Primer. In the absence of a special substance, you can use ordinary water.
- First layer: the consistency should be liquid and creamy.
- Second layer: applied after the first has dried, no more than 10 mm thick.
- When the plaster has set, leveling is done.
- Then it is moistened with water and rubbed in a circular motion using a wooden or foam grater.
It is recommended to start plastering the stove from its top.
If after these steps the surface develops cracks, they need to be widened, the grooves filled with mortar and rubbed again.
If you did not have time to rub the plaster and it has dried out, moisten it with water using a brush.
The corners of the stoves are plastered in the same way as window or door openings:
- You need to take a metal or wooden lath and insert it level with the letter “G”.
- After 10 minutes from the moment of applying the solution, the lath is carefully removed and, if necessary, rubbed with a float.
We have decided on the primer and materials that will become part of the mixture; we will discuss the tools that may be useful to us:
- Two containers: one for mixing, the other for water (bucket, trough...).
- Trowel or spatula.
- Corners.
- A hammer drill or drill with a suitable attachment.
- Sand sieve.
- Grater or sandpaper.
- A level with which you can find and eliminate irregularities.
- Burlap or mesh and nails (optional).
We suggest you read: Installing a stove in a bathhouse with your own hands
To maximize the adhesion of the plaster and prevent peeling, we recommend several options for covering the walls:
- Some people decide to attach fiberglass mesh to the walls.
- Others drive nails into the seams and stretch a metal reinforcing mesh with a cell size of 10x10 mm. This method only works if the wire is attached at the construction stage.
- You can also cover the stove with burlap. To do this, it is better to pre-moisten the walls and the burlap itself with liquid clay. The flaps are straightened and stretched around the perimeter. It is important to avoid air gaps. The disadvantage of this method is that the oven cannot be very hot.
The work process is carried out in several stages:
- Before you start plastering, you need to prepare the structure by thoroughly cleaning it of debris and old coating.
- The seams of the structure are cleaned to a depth of 5 - 10 millimeters. This will allow the solution to better adhere to the surface.
- Now we drive the nails in 15 cm increments. ¼ of the nail should protrude. We apply the mesh. If nails are not used, use a trowel to apply a five-millimeter layer of plaster and fix the mesh. You can use the nails to guide you in relation to unevenness.
- After this, we prime the oven with a special liquid.
- We pause and let the primer dry.
- Now you need to heat the oven, since it is better to apply the mixture to a heated surface.
- We plaster, adhering to the tips outlined above.
- We paint the stove with chalk diluted in lime milk.
At one time, prepare as much mixture as you can use before it starts to dry out. The stove cannot be plastered earlier than a month after laying bricks.
About materials and tools
You need to learn how to plaster a brick stove and prepare all the necessary tools and materials in advance. You will need a set of tools, including:
- trowel or trowel;
- grater;
- hammer;
- chisel or spatula;
- wire cutters and pliers (they can be replaced with pliers);
- sprayer - it is needed to wet the surface with water (if you don’t have it, a paint brush will do);
- metal scissors and fabric scissors;
- coarse sieve - for sifting sand and / or clay;
- container for solution and separate for water;
- scoop for the plaster mixture (or its components);
- broom or vacuum cleaner.
The list of materials for plastering the stove includes the mortar itself for plastering the stove, a reinforcing mesh with 10 x 10 mm cells (you can get by with burlap), lime (or water-based paint), as well as a cement mortar (it will be needed to secure the wire, including case if we are talking about an old stove).
Reinforcing mesh with cells 10 x 10 mm
Plaster solutions
Today you have the opportunity to choose between buying a ready-made dry mixture for plastering the stove or preparing the solution yourself according to proven “folk” recipes. To achieve a high-quality result, it is necessary to carefully observe the ratio of dry components and water, which must be either tap water or technical water (neither lake nor river water can be used for the solution).
Depending on the purpose of the room and its humidity, the mode of its use, the planned method of exterior finishing, as well as the climate in the region, the owner must decide how to plaster his stove.
How to prepare the “correct” solution? The classic recipe includes clay and sand. If you plan to paint the stove white, then lime can be added - it must be slaked. To increase the strength of the solution, you can add crushed asbestos or fiberglass.
The composition of the mortar for plastering the stove may vary. The table shows the main popular options:
| Clay | Gypsum | Sand | Cement | Lime | Asbestos | Fiberglass | |
| ratio of parts in solution | |||||||
| 1 | 1 | — | 2 | — | — | 0,1 | — |
| 2 | 1 | — | 2 | — | 1 | 0,1 | — |
| 3 | — | 1 | 1 | — | 2 | 0,2 | — |
| 4 | 1 | — | 2 | 1 | — | 0,1 | — |
| 5 | — | 1 | 1 | — | 2 | — | 0,2 |
The sand content in the solution may vary depending on the fat content of the clay that will be used. If the fat content is high, then instead of two parts of sand, it is permissible to add three or even four.
To determine the correct ratio, you need to prepare a portion of the sample solution and apply it to the surface - a small area. If, after the solution has dried, the plastered area becomes covered with cracks, this means there is not enough sand and more needs to be added. If the solution crumbles, this indicates that there is not enough clay in its composition.
Bad solution
How to prepare a solution from fireclay clay
Depending on the application, clay mixtures have different proportions. Let us consider in detail how to properly mix a chamotte-based mortar for laying bricks and for plastering work.
Mix for laying bricks
In most cases, fireclay mixtures are used for the construction and repair of stoves, fireplaces and other objects operating at high temperatures. For the construction of stoves and fireplaces, heat-resistant silicate or fireclay bricks are usually used.
To ensure strength, reliability and maximum service life, it is necessary that the mortar and brick have the same coefficients of thermal expansion.
Masonry mortar based on fireclay clay
- In a prepared container, quartz sand and crushed fireclay clay are mixed. The proportion is as follows: 2 parts quartz sand to 1 part clay.
- Water is added to the resulting dry mixture. The composition is thoroughly mixed, after which it settles for 2-3 days until the liquid is completely absorbed.
- For final mixing, you can use a concrete mixer or a construction mixer. The solution is kneaded until the consistency of a thick viscous mixture.
If the mixture turns out to be too liquid, you can add quartz sand to the composition. Thick mixtures are diluted with water to the required consistency.
There are also more complex compositions. High-strength heat-resistant solution that can withstand temperatures up to 1840C.
The solution is prepared by mixing 1 part blue clay, 1 part fireclay clay and 4 parts white kaolin sand. After thorough mixing, water is added to the dry mixture. The solution is mixed in a concrete mixer until a homogeneous viscous mass is obtained.
You can improve the performance characteristics of the solution by adding the following ingredients to it:
- PVA glue;
- liquid glass;
- table salt.
The addition of these components significantly increases the plasticity of the solution.
Plaster mortar
Plaster mortars based on fireclay clay are characterized by high strength, heat resistance and long service life.
The method of plastering with fireclay is no different from plastering with lime or sand-cement mortar. The only difference is in the composition of the solution.
Plaster mixture based on fireclay clay
To prepare the solution you will need:
- Portland cement – 1 part;
- fireclay clay - 2 parts;
- quarry sand - 7 parts.
Before mixing, the sand must be thoroughly sifted. The solution is prepared in the following sequence:
- Clay and sand are poured into the container in appropriate proportions and mixed thoroughly.
- The dry mixture is diluted with water and remains in this state for 2-3 days.
- Portland cement is added to the mixture thus obtained. The solution is mixed in a concrete mixer or using a construction mixer until a uniform consistency is achieved.
Important! The finished plaster mixture must be worked out 2-3 hours before hardening begins.
A plaster mixture based on fireclay clay should be applied to a surface treated with a heat-resistant primer. This will ensure maximum adhesion to the base.
Composition for the manufacture of decorative elements and souvenirs
To make decorative interior items, the mixture is prepared in a certain sequence:
- In a suitable container, mix 6 parts of ordinary clay and 4 parts of fireclay powder.
- The resulting dry mixture dissolves in water and settles for 2-3 days.
- The prepared composition is intensively mixed until a homogeneous mixture with the consistency of liquid sour cream is obtained.
- The pre-prepared mold is filled with the resulting mixture and is not removed from the mold until it hardens completely.
The casting can dry more quickly if 1 part of PVA glue is poured into the finished composition. When the product is completely dry, it is subjected to high-temperature firing. In this case, the temperature in the oven should be approximately 1300C.
Rules for preparing the solution
In order to achieve good results, close attention must be paid to the process of preparing the solution itself. In this case, it is necessary to follow a number of simple rules not only when mixing the plaster mixture, but also when preparing the components.
Clay:
- clear away debris;
- Place in water to soak for several days;
- filter the resulting slurry through a coarse sieve.
Soaking clay
Lime (work on preparing this material is carried out only outdoors):
- pour pieces of lime into a bucket (it should only be metal) - no more than half the volume of the bucket;
- fill with water (no more than 0.6 bucket volume);
- Allow the solution to cool overnight;
- drain the solution;
- pass the lime slurry through a coarse sieve.
Sand also needs to be sifted, asbestos or fiberglass must be thoroughly crushed.
Sifting sand
To prepare a high-quality solution, you need to reproduce the following sequence of actions:
- Sifted sand is mixed into the prepared clay.
- The remaining components of the solution (for example, fiberglass) are added.
- The solution is thoroughly mixed. This can be done using a drill, a construction mixer, or a hammer drill with a special attachment.
A high-quality solution should not contain solid particles or lumps; it looks homogeneous and plastic.
Ready-made solution for plastering the stove
There are a number of nuances associated with storage and use periods, depending on what solution it was decided to use:
If gypsum was used as a base, such a solution hardens very quickly. It must be prepared in small portions, which should be immediately applied to the stove;
The prepared solution with a cement base should be used within an hour after it has been diluted with water;
The clay-based mixture can be prepared in advance. It can be stored for a long time if the container is sealed.
What do you need to consider when starting plastering and finishing?
When plastering a stove, you need to take into account some points that may affect the quality of the work performed.
You cannot apply plaster to a newly erected stove structure. A “fresh” stove should not only be well dried, but also go through the stages of shrinkage. To do this, it is used for two to three months, and only after this period can finishing work begin.
To paint a plastered surface, only water-based paints can be used. Other coloring compounds containing drying oil or organic solvents will release harmful substances and unpleasant odors into living spaces when the stove is fired.
For all plastering and decorative work on the stove, it is recommended to use natural-based materials, without any synthetic additives that are harmful to human health.
It should be noted that all the methods discussed in the article are not as easy to implement as they seem at first glance. Therefore, if you have a complete lack of experience in this work, you should not take risks and translate quite, sometimes, expensive materials. It is better to entrust these important activities to real professionals who know first-hand the secrets of masonry and subsequent finishing of the stove.
Some subtleties of plastering a stove with a mixture of sand and clay
The stove is one of the building elements that regularly heats up and cools down, so the chosen plaster composition must be resistant to this phenomenon.
Mixtures for preparing plaster mortar are divided into two types:
- Simple compositions that include only two components, sand and clay.
- Complex formulations contain more than two ingredients.
Plastering a stove with clay and sand requires preliminary preparation and cleaning of the materials from various impurities. In particular, sand must be sifted through a fine sieve, clay should be rubbed through a fine mesh to remove roots and small stones.
It is recommended to make the plaster mixture using fatty types of clay, this promotes better adhesion of the solution to the surface. If the clay is too oily, the amount of sand used can be increased.
In some cases, asbestos, finely chopped straw or fiberglass are added to the mixture for plastering the stove. These reinforcing components make it possible to obtain more durable materials.
When preparing plaster mixtures, special attention must be paid to the environmental side. During the heating process, the materials used should not emit substances that pose a danger to human health and life.
Separately, it should be said about salt; it is also sometimes added to the solution for plastering the stove. It should be noted that the opinion that salt makes it stronger can be considered erroneous. In fact, salt increases the hygroscopicity of clay, making it more flexible and resistant to cracking. Also, a plastering solution, to which a certain amount of salt is added, prevents the proliferation of various insects in masonry joints. For owners of private houses, this fact is of great importance.
Another component that can be added to the plaster mixture is gypsum powder. This material is used as a fixative. However, plaster must be used very carefully, as it hardens very quickly. The initial setting of the solution with the addition of gypsum powder occurs immediately after application, and after 10-15 minutes the surface hardens completely.
Before plastering the stove in the house, you need to familiarize yourself with the methods used.
Method No. 1 is most often used to level walls that have large distortions. In other words, when a layer thickness of 5-8 cm is required, the process proceeds as follows:
- They set up beacons that allow you to maximally level the surface with large differences. During the installation process, a building level is used, with its help you can achieve perfect evenness.
- Next, the stove is heated so that its walls are warm.
- Using a roller or wide brush, moisten the furnace wall with water to hammer fine dust and dry mortar into the masonry joints.
- The entire surface is covered with a primer and left until completely dry. Priming promotes good adhesion of the working solution to the surface.
- The first layer of plaster is applied using the sketch method; its thickness should not exceed 4-5 mm. In this case, the solution should not be very thick. Throwing the mortar must be accentuated in order to ensure that it gets into the seam between the bricks. After sketching the entire surface, leave the solution for plastering the stove until it dries.
- After this, they begin to apply the next layer; it should protrude 1 cm above the beacons. Work begins in the lower part of the oven, throwing the solution between the beacons to a height of 40-50 cm. By pressing the rule against the beacons, the applied mixture is leveled. After this, move on to the next section and repeat the entire process. Without waiting for the plaster to dry completely, grind the work surface using grout.
We suggest you read: How to properly heat a stove with wood
To prevent cracks from forming on the surface of the plaster layer during the drying process, stove makers with many years of experience advise covering the stove walls with damp burlap after applying the mixture for plastering the stove. If the fabric dries quickly, you can moisten it.
The burlap is removed from the dried surface, and the surface is rubbed and smoothed using a trowel with a rubber surface.
- For the third layer, it is necessary to prepare a more liquid solution for plastering the stove; its thickness should be 1.5-2 mm, since it is used to smooth the plastered surface. The third layer is applied only before painting or whitewashing.
- Making corners, even those reinforced with a metal corner, is considered a rather complicated process even for experienced craftsmen. To simplify the work, use an angled spatula. With this tool, the solution is easily applied and leveled well. If it is impossible to purchase such a spatula, use a wooden strip. It is fixed on one side of the corner and the solution is applied. After drying, the lath is removed and moved to the other side, and the solution is applied to the other side of the stove corner.
- In some cases, the edge of the corner is rounded. This makes it safer for small children and avoids chipping.
Method No. 2 of solving the question of how to plaster a stove with your own hands involves putting it in order using a metal mesh netting. This material is intended to reinforce the surface and give the required thickness to the plaster layer.
The surface is leveled as follows: pieces of wire no more than 25 mm thick are placed under the fixed metal mesh in the right places, hooking it onto the mesh or pre-installed metal slats.
The plaster is applied in several layers, similar to the first method, but the mesh must be completely covered with a plaster layer.
When applying the first layer, you should make sure that the solution passes through the oven plaster mesh and adheres to the wall. After spraying, the surface is left to dry. When the plaster dries, the mesh becomes motionless, so subsequent leveling layers are applied more easily and easily.
The main requirement for the solution is the ability to withstand sudden temperature changes.
There are several options for plaster mixtures that you can prepare yourself:
- Simple solution. It consists of only 3 components: sand, clay, water.
- Complex solution. The composition includes additional components: lime, cement, gypsum, etc. As a rule, such solutions are purchased in stores, since it is difficult to prepare them yourself at home.
Factory plaster for the stove
To prepare a simple mortar, we need clay, river sand, water and crushed fiberglass, which adds strength to the plaster.
We take 1 part of medium-fat clay, 2 parts of high-quality sifted river sand and 1/10 part of crushed fiber.
The quality of the solution is greatly influenced by clay, which can be thin or oily. The degree of fat content of the clay can be varied in the mixture by adding or reducing sand. For oily clay, you can increase the amount of sand to 4 parts per part clay.
And although facing work is not a tricky business, you still need to take into account the basic rules that will help you successfully complete the task.
- The oven must be thoroughly dried before starting work.
- If facing work needs to be carried out on an old stove, then the first step will be to clean the surface of the old plaster. Do not ignore this step and under no circumstances apply fresh mortar over the old cladding.
Cleaning old plaster - If the plaster is being prepared for painting, choose only water-based paint. If the paint contains drying oil or other components, then when the oven heats up, this smell will spread very strongly throughout the room. Even with prolonged use, it will not fade.
- Use only natural materials that will not harm the health of the residents of the house.
Ready mixes
Plaster can withstand high temperatures for a long time, does not crack or crumble.
The building materials market is filled with various types of fire-resistant products that allow you to plaster stoves yourself. The most popular, well-deservedly recognized, are the heat-resistant compositions “Fireproof”, “Terracotta”, “Pechnik”.
“Fireproof” mixture, available in three modifications:
- smooth plaster;
- simulated mixture;
- composition for tiled surfaces.
When using a modeled variety, it is possible to obtain a textured surface onto which any pattern can be easily applied. The smooth composition is ideal for painting most stoves.
“Terracotta” is another dry mixture, which includes clay and fine fireclay sand with fireproof additives. The solution is intended for treating surfaces made of ceramic and fireclay bricks and can withstand heating temperatures up to 200 ºC.
The composition called “Kilnmaker” includes lime and sand, as well as gypsum, cement, asbestos and clay.
Composition of fireclay refractory
In stores, fireclay is sold as a dry mixture in bags. It is produced from raw materials with a high content of highly dispersed hydroaluminosilicates. In addition to these components, refractory clay contains:
- Na sodium;
- Ca calcium oxides;
- K potassium;
- Fe iron;
- Mg magnesium;
- aluminum oxides and other components depending on the type of raw material.
When purchasing, you need to pay attention not only to the composition, but also to the expiration date. Kaolin, which is part of the building material, loses its properties over time.
Expired goods cannot be used.
The composition and instructions for use are printed on the packaging
When choosing a material for a specific job, you need to pay attention to its technical characteristics:
- grain sizes;
- firing temperature: at lower rates, fireclay absorbs up to 25% of moisture, at higher rates – up to 10%;
- humidity indicators, high-quality refractory should not contain more than 5%;
- temperature limit of the building material, the maximum limit is 1850 degrees C.
Fireplace made of fireclay bricks and fireproof clay mortar
The basis is clay with highly dispersed aluminum hydrosilicates. This material can be given any shape, for example, to make briquettes. The firing time and temperature can be different. After this, crushing is carried out and a granular structure is given. The main components of fireclay clay are:
- calcium oxide;
- quartz;
- compounds of potassium and magnesium.
It also includes sodium and iron in the form of oxides.
Sometimes you can hear that the plaster has begun to crumble and is covered with cracks. Most often, this phenomenon occurs if the material was kept in the wrong place or its expiration date has expired. Another possible scenario is improper preparation of the composition. The first material you come across is not suitable for this.
It is important to store the dry fireclay clay mixture in a dry place
To make a solution of fireclay clay for laying out a stove with your own hands, you need to follow certain instructions and use the main components in certain proportions.
Fireclay powder has the properties that it acquired depending on the production method. The fraction of the material also matters. Fireclay clay has its own special marking. If the letter “U” is indicated on the packaging, this indicates the use of defective kaolin in production. It is cheaper, but you should not use it in important work. Options for diluting fireclay clay:
- 2 parts of fireclay sand with a fraction of no more than 0.5 mm to 1 part of kaolin;
- 4 parts fireclay sand to 1 part kaolin and the same amount of blue clay.
For the durability of the treated surface, the solution with clay must be mixed correctly
To dilute the composition for laying the furnace, you need to take a container of suitable volume so that the solution does not splash out. It is also permissible to use any solution option from the above. It must be stirred so that there are no solid inclusions left in it. The mixture should be thick. Leave it for 3 days, add water so that the resulting solution looks like sour cream. If it becomes too liquid, add powder. If, on the contrary, the mass is thick, there are no lumps in it, it can be considered ideal.
It is important to keep the solution and not rush to add water to it. Patience is key here, otherwise the clay will crack.
There are special compositions for quick mixing. They are convenient because you don’t have to wait for several days. True, they cost more. PVA glue is added to this mixture. Fiberglass is used for reinforcement.
Related Posts
- Mortar for laying a stove: varieties, composition, mixing methods
- How to plaster a stove to prevent it from cracking: types of putty for stoves and execution technology
- Types and sizes of Russian stoves: types, sizes, 5 construction recommendations
- Clay mortar for stoves: preparing a mixture for masonry and plaster
- Homemade Russian stove on the street under a canopy
- Secrets of stove makers: brick stove for a bath
- Bricklaying in winter
- 9 types of heat-resistant tiles for fireplaces and stoves: choosing the best
- Fast and correct furnace repair
- How to operate a plastering machine correctly
- Instructions for using fireclay clay
- How to dilute alabaster
- How to cover an iron stove in a bathhouse with bricks with your own hands?
- Volumetric weights of materials
- Adding liquid glass to concrete. 2021 instructions
- Step-by-step technology for pouring self-leveling floors
- Wood-burning stoves and their variety of designs
- Brick laying mortar
- How to make a long-burning stove yourself
- Types of stoves for the home: classification and review of equipment from the best manufacturers
- How to fold a Swedish oven with a stove
- Adhesive foam for aerated concrete blocks
- The best way to glue plaster figures, means and rules for do-it-yourself restoration
- Not afraid of temperature or moisture, holds tightly
- Types of Kuznetsov furnaces and their order
Read with this
- Mortar for laying a stove: varieties, composition, mixing methods
- How to plaster a stove to prevent it from cracking: types of putty for stoves and execution technology
- Types and sizes of Russian stoves: types, sizes, 5 construction recommendations
- Clay mortar for stoves: preparing a mixture for masonry and plaster
- Homemade Russian stove on the street under a canopy
- Secrets of stove makers: brick stove for a bath
- Bricklaying in winter
- 9 types of heat-resistant tiles for fireplaces and stoves: choosing the best
- Fast and correct furnace repair
- How to operate a plastering machine correctly
Plastering a brick oven with your own hands: step-by-step instructions
Before you begin finishing work on lining the stove with plaster, you need to prepare the following materials and tools:
Plastering tools
- Medium spatula - for scooping up the solution.
- Wide spatula - for spreading the plaster over the surface.
- A hammer will be needed to reinforce the wall.
- A grater helps distribute the solution and smooth the surface.
- Chisel.
- Smoothing - allows you to bring the surface to a perfectly smooth coating.
- Brush – will help give the surface a textured pattern.
- Corner aligner.
- Metal brush for cleaning the surface.
- Construction rule.
- Construction level and plumb line.
Step 1. Preparatory work
It is recommended to carry out the work of plastering the stove no less than 2-3 weeks after the complete completion of the stove laying. It should dry well and the masonry mortar should completely harden. If you rush and start facing work ahead of time, then after 2-3 lightings of the stove cracks may appear on the decorative layer.
To apply the solution evenly, it is necessary to carefully prepare the oven wall.
- Prepare the workplace for construction work. It is advisable to cover all furniture and the floor with film, since in the process of cleaning the surface of the walls a lot of dust is generated.
Removing the old coating
- If you decide to renew the cladding on an old stove or fireplace, you must first clean the surface of the old layer. For this step, use a chisel and hammer. If you are covering the stove with plaster for the first time, you need to brush the surface well, as mortar may remain on the walls.
- After you have completely removed the top old layer of plaster, clean the surface well from dust and dirt using a wire brush and a rag.
Advice. To clean the walls, use only a dry cloth, as a wet one may leave dirty stains that will appear through the layer of plaster.
- Now we begin to deepen the seams. Using a brush and trowel, clean the dry mortar from the seams.
Deepening the seams
- If, after cleaning the surface from the old layer of cladding, you see that the wall is not level, then you will have to apply plaster in several layers. To do this, you need to stretch a metal mesh with 15*20 mm cells onto the wall. Attach the mesh to the wall using wide-brim nails, which must be inserted between the seams. The reinforcing mesh will allow the plaster to adhere well, and a thick layer of cladding will only increase heat output.
- If the corners are not straight, you can attach the steel corners with glue.
- Prime the seams with a brush.
Step 2. Preparing the mixture
You can choose any mixture for plastering the stove: ready-made store-bought or do it yourself.
To prepare the solution with your own hands, combine the required amount of dry ingredients in a bucket and only then add water. Using a construction mixer, you need to knead the solution well.
How to prepare lime mortar?
- If you use a clay-lime mortar, the lime must first be slaked.
To do this, pour lump lime into a metal bucket and fill it with water. Do all work outside. After a day, drain the cooled solution, and pass the slurry, which has settled as sediment at the bottom, through a wide sieve to remove all undissolved lumps.
Preparation of the solution
- Soak the clay in water for 4-5 days. After it turns into a paste, you need to pass it through a wide sieve to filter out all the lumps and excess debris.
- Add 0.2 parts of asbestos or fiberglass.
- Thoroughly knead the mixture with a construction mixer or a drill with an attachment. The consistency of the solution should be plastic, without lumps and resemble sour cream.
Step 3. Plaster application process
There are two ways to plaster the surface of the stove. It all depends on the condition of the walls.
First way
- If the walls are not level and a reinforcing mesh is installed on them, it is necessary to attach guide beacons that will serve as a guide for the correct application of the solution. We set the beacons to the building level and check their verticality with a plumb line.
Plastering on beacons
- Heat the stove well and wait until the fuel burns out completely.
- Apply water to the hot surface of the walls with a large brush. You can use a roller for this. This will remove any remaining dust.
- Apply the primer and wait until it sets well. If you skip this step, there will be poor adhesion between the wall and the plaster, which can lead to peeling in the future.
- Apply the first layer of plaster 5 mm thick. We apply it in sketches, as if spraying it all over the wall. The task of this stage of work is the deep penetration of the mortar into the seams between the bricks, which were previously buried.
- Let the solution dry thoroughly.
Application technique
- Now carefully apply the second layer of solution. At the same time, we make sure that it extends 9-10 mm beyond the beacons. Movements should be made from bottom to top. Immediately level the mortar using construction rules.
- Slowly move along the entire wall, applying plaster from the bottom of the wall to the top and leveling it with the rule.
- When it comes to the corners, use a corner spatula.
You can stick a metal profile on the corners
It's better to round the corners a little. Firstly, this will ensure the safety of the residents of the house, especially children. And secondly, there is less chance of the corner chipping during operation.
- Now you need to sand the surface of the wall while it is still wet and yielding.
Advice. To prevent cracks from appearing on the walls during operation of the stove, throw damp burlap over them. Once the fabric is dry, wet it again and throw it over the wall again until completely dry.
- The third layer will be decorative. For this you need to prepare a more liquid solution. If you still have a lot of ready-made solution left, add a little water to it. It will help to perfectly level the entire surface of the wall and sand it.
- The plaster is applied in a thin layer of 1 mm. If you do not plan to whitewash the stove or coat the paint, then you don’t have to apply this last layer.
Second way
This option should be used if the surface of the walls is very uneven and you had to attach a metal mesh to the stove.
Reinforcement
- In exactly the same way as in the first method, the first layer of plaster is applied using the “spray” method from top to bottom.
- In places where there are large depressions in the stove, you need to apply plaster until it goes beyond the mesh. The metal frame will add rigidity to the structure and will not allow the plaster to move out.
- After applying this first layer, you will notice that the mesh can no longer move. Now apply a second layer of plaster on top of it.
- Using a rule and a trowel, level the wall.
- We rub the seams.
Grinding
- Surface grinding.
Step 4. Decorative work
Of course, plaster itself can act as a facing material, but to make it more decorative, the stove can be decorated.
To do this, you can use elements of ceramic tiles, laying them out as an ornament, or you can whitewash a plastered wall.
Decorating a plastered stove
An excellent way to beautifully decorate a wall is to apply a design to a plastered surface. It all depends on creativity and skill.
For this part of the work you will need a brush and plastic film.
Apply a thin layer of liquid plaster.
Drawing using polyethylene
Using polyethylene rolled into a ball or a paper ball, we make a drawing in any shape, slightly pressing the shape into the layer. We are waiting for it to dry completely.
To make it easier for you to master facing the furnace using plaster, we suggest watching a training video before starting work.
How to plaster a stove - step by step diagram
Step 1: Heat the stove
Before preparing the solution for plastering the stove, heat it thoroughly so that it crackles where it should and warms up the walls. This rule cannot be broken even in the summer, despite the heat.
Step 2: Prepare the surface
Carefully go over the surface of the oven with a broom and brush to remove accumulated dust and remaining installation solution. To improve adhesion, it is better to clean and slightly deepen the cracks in the brickwork, but not more than half a centimeter.
Step 4: Reinforcement
If you decide to use burlap for reinforcement, this step is for you! The fabric, pre-cut into the required pieces, should be soaked in a liquid clay-sand solution and glued to the stove from top to bottom, just like wallpaper is glued. You can combine the pieces end-to-end, but it is better to overlap by at least 5 cm.
Step 5: Apply plaster
Remember that the thickness of each layer of plaster should be no more than 5 mm, and the total thickness of the facing layer should not be more than 1 cm. The solution must be applied from top to bottom, in an even layer, so that the facing dries evenly. As soon as the plaster has set well, it should be rubbed with a wooden float using circular movements. If the composition has hardened too much, moisten it with water. At the end of applying the plaster, people used to smooth it out with a rag soaked in a liquid solution of the same composition.
After completing the process, do not rush to heat the stove; let the layer of plaster dry completely. If cracks form during drying, they should be slightly widened with an ordinary knife, moistened with water and rubbed with the same solution. If over time you notice new cracks on the surface of the stove, analyze your actions - the stove may peel off and crack due to shrinkage, excessive layer thickness, or improper ligation of rows of bricks. In addition, cracks can also appear due to overheating.
How to cover up cracks?
You can cover the stove with a purchased mixture or a solution you prepare yourself. Further about the features of the options.
Sand-clay mixture
Putty made of clay and sand is the most accessible and inexpensive option. Scheme for preparing the mixture:
- you need to take clay and fill it with water in a ratio of 1:3; after this you need to leave the mixture for at least a day;
- The clay should be thoroughly mixed, adding liquid from time to time; after kneading, strain with a fine-mesh sieve and tincture again (several hours);
- after the next infusion, you need to drain the water and make sure that the mass has a creamy consistency;
- you need to mix clay and sand - first in equal proportions.
Readiness is determined using an object used to mix the solution. If too much clay sticks to it, add a little sand. As a result, the ratio of components can be from 1:1 to 1:2.5. The composition can be considered ready when a small amount of the viscous component remains on the stick.
This recipe is approximate as clays can vary greatly. It is best to rely not on a stick with stuck clay, but on the result of experiments. Experienced craftsmen make grout with different compositions. After this, several different types of cakes are dried in a place free from sun and wind. Those pieces that are not cracked are dropped from a meter height. “Surviving” flatbreads demonstrate the optimal ratio of components.
Fireclay putty
Bag of fireclay clay
A slightly more expensive, but also more effective option. Fireclay clay is very heat-resistant and durable. Most often, fireclay is used for stove repairs. The material is sold by construction stores. Before sealing the structure, purchased clay is infused in water for a couple of days.
Oven adhesive
If you need the best option, use a special mixture for ovens. The solution consists of fire-resistant cement and fireclay powder. There are two main types of glue you can buy in supermarkets - viscous and hard. If you are looking for something to cover up small cracks on the stove, purchase the first type. Solid mixtures are used for plastering.
The main advantage of factory materials is the optimal ratio of components and very thorough mixing. It is impossible to achieve such quality at home. In addition, there is no need to waste time preparing grout. Another advantage of ready-made compositions is quick setting.
An alternative option is oven grout.
Factory solutions are good for everyone, except for the price. There is another opportunity to save money - use putty prepared according to the following recipe:
- the clay is broken into small lumps and infused in water for about 12 hours;
- sand is added to the mixture of water and clay, after which the components are thoroughly mixed;
- during the mixing process, crushed straw is added to the composition from time to time, which reinforces the solution;
- After the mixture becomes homogeneous, salt is added to it (about a pack).
The ratio of sand and clay is 1:4. You need about 10-15 kg of straw per bucket of clay. It is easy to see that this is a modified version of the sand-clay mixture described above.
How to make fireclay?
You can often hear that fireclay is cracked, plaster is crumbling, and so on. The reason may be material that was stored in unsuitable conditions, the expiration date has expired, or (the most common option) an incorrectly mixed composition. So how to properly make a mortar for laying brick and plaster?
Fireclay mortar for bricklaying
In this case, the first material you come across will not work. The fact is that the quality of fireclay powder depends on its fraction and production method. Like cement, fireclay clay has its own brands. If you see the letter “U” on the bag, this means that defective kaolin brick was used in production. It is cheaper, but it is not worth using it for important work.
Most often, the following types of solution are used:
- A solution of 1 part kaolin and 2 parts fireclay sand (fraction up to 0.5 mm).
- A solution of 1 part kaolin and blue clay, 4 parts fireclay sand.
Higher strength of the solution can be achieved by adding Portland cement to the composition. It should be understood that this will reduce the fireproof qualities of fireclay.
To dilute clay for laying a stove, you need:
- Select a container of the required size (the solution should be mixed without splashing out).
- Pour out the required composition (choose from those described above) and fill with water.
- Mix the solution so that there are no lumps in it. It should be thick.
- Leave it for three days.
- Add water; the consistency should resemble sour cream. If the solution turns out to be too liquid, add powder.
If the mass is thick, without lumps, it can be used. Don't rush to add water a second time; if you don't let the solution sit long enough, the clay will crack.
There are compositions for instant mixing that do not need to be kept for three days, but they are much more expensive. In addition, PVA glue is added to the solution and reinforced with fiberglass.
A special refractory brick is placed on such a solution; it is not used for laying ordinary red bricks due to the difference in the coefficients of thermal expansion.
Chamotte mortar for putty
In this case, the mixture is prepared with the following composition:
- Portland cement – 1 part;
- fireclay clay - 2 parts;
- quarry sand - 7 parts.
You need to mix the solution in the same way as for masonry.
To strengthen chamotte plaster, a special metal mesh is used.
Plaster on metal mesh
Supplements
To enhance any properties of the solution, the following components are added to the composition:
- PVA glue;
- table salt;
- liquid glass.
Table salt is added in an amount of about 100 grams per bucket of solution, and glass - up to 3% of the total mass of the mixture. Additives are an excellent way to improve the characteristics of fireclay.
Fireclay clay is a safe material, but you should not allow it to come into contact with your face or eyes. Also, if you are mixing the solution indoors, ensure proper ventilation.
Expert advice on repairs
The stages of finishing the stove wall are identical for any selected mass. The differences are insignificant, but they are taken into account during the plastering process.
So the composition with the introduction of gypsum will dry 2 times faster than with cement. The use of fireclay clay in bulk is well suited for laying on bricks of the same composition, since the thermal conductivity is the same.
The plastered structure must dry without using auxiliary means.
More than one master will not answer how best to finish a stove building. Each stove maker has his own secrets and components of solutions for plastering brick surfaces. You can knead a clay and sand mixture and buy a ready-made mass. It is important to correctly connect and apply the material to the walls of the heated structure.
Conclusion
Do-it-yourself plastering of the oven walls is completed. It is important to follow all the necessary tips so that the stove lasts a long time and we can enjoy warm, cozy evenings in which it warms us with its warmth.
I would especially like to draw your attention to the fact that you cannot apply plaster if we have just completed the brickwork of the stove. The oven must dry and undergo a shrinkage process. And this requires enough time, 2-3 months of regular use.
Sources
- https://strbani.ru/kak-oshtukaturit-pech/
- https://kirpichguru.ru/pechi-i-kaminy/shtukaturka-pechi-iz-kirpicha.html
- https://stroyremont.info/otdelka/chistovaya-otdelka/kak-oshtukaturit-pech.html
- https://otoplenie-expert.com/kirpichnye-pechi/kak-oshtukaturit-pech-chtoby-ne-treskalas.html
- https://StrojDvor.ru/otoplenie/kakim-rastvorom-shtukaturit-pech-chtoby-ne-treskalas/
- https://kamin-expert.ru/otopitelnaya/shtukaturka-pechi-iz-kirpicha.html
- https://samstroy.com/%D0%BF%D0%BE%D1%87%D0%B5%D0%BC%D1%83-%D0%BF%D0%BE%D1%8F%D0%B2% D0%BB%D1%8F%D1%8E%D1%82%D1%81%D1%8F-%D1%82%D1%80%D0%B5%D1%89%D0%B8%D0%BD%D1 %8B-%D0%B2-%D0%BF%D0%B5%D1%87%D0%B0%D1%85-%D0%B8-%D0%BA%D0%B0/
- https://pechnoy.guru/pechi/izgotovlenie-pechi/materialy/shtukaturka/kak-oshtukaturit-pech.html
- https://strir.ru/vnutren-otdelka/shtukaturka/pechi
[collapse]