It seems that the renovation has come to an end and we can’t wait to move into our new home. But before this, it is important to thoroughly clean up the house, because even if the construction team does the cleaning, dust and dirt will still remain, since usually specialists in this profile do not know the intricacies of such work.
A particular difficulty in cleaning is the thorough dusting of the walls after repairs, which is not done by any construction team. But there is often a lot of construction dust left on them, which is harmful to the body.
Of course, with an ideal renovation, there should be no dust on the walls, because their design is carried out after the dusty work has been completed. But, as practice shows, after construction, not only dust remains, but sometimes also stains from paints and varnishes and building mixtures.
What is dust
Fans of cleanliness often wonder where dust comes from in the apartment.
Despite frequent cleanings, it still appears with enviable consistency, covering the floor, furniture and other surfaces with a thin layer. The appearance of dust does not depend on whether the windows are open or not, and it does not matter whether the room is being cleaned or no one lives in it. According to statistics, on an area of 40 square meters. meters, up to 35 kg of dust can accumulate in one year, while in the city each resident inhales about a third of a glass of pollution per day. Dust can be seen everywhere - in the house, in the forest, on the streets.
How to deal with dust in an apartment
How to clean dust from clothes
How to clean your laptop from dust
How to remove dust from walls and ceilings
Dust is microparticles ranging in size from 0.002 mm to 0.1 mm; they appear when any materials are destroyed; people and animals are also sources of pollution. The dust contains microparticles of soil, sea salt crystals, and microparticles from space. Around the world, volcanoes and forest fires bring up to 15 million tons of dust per year. The Sahara Desert, factories, construction sites are involved in the accumulation of pollution, and car tires are generally considered the best producers of dust.
How to deal with dust in an apartment
In the fight against house dust, there are several rules, following which you can do the cleaning as efficiently as possible:
- When using a vacuum cleaner when cleaning, you should not skimp on bags; they should be changed as often as possible. The best option would be to purchase a unit with an aquafilter;
- wet cleaning is required at least twice a week. It is best if you use special cleaning products. Pay special attention to hard-to-reach places - under sofas, behind furniture, etc.;
- If possible, prefer leather furniture, as it is easiest to remove dust from it;
- When cleaning, pay maximum attention to the kitchen; dust collects in incredible quantities in this room;
- bed linen should be changed at least twice a week;
- dry blankets and pillows in the sun as often as possible, any microorganisms react negatively to sunlight;
- carpets, rugs and other floor coverings are the best dust collector, as are any unnecessary things. If you have such items, it is best to get rid of them;
- Prefer living plants to artificial ones; they not only decorate the room, but also purify the air, while artificial ones only collect dirt;
- It is better to ventilate rooms at night, when there is no wind, or after rain;
- keep an eye on your pets, wash and comb them as often as possible;
- smoking in the house provokes the deposition of toxic dust;
- Instead of blinds, it is better to hang regular curtains; they are easier to wash.
When your home is undergoing renovations, cleaning up dust and dirt will be more productive if you destroy the dirt at the same time as the work, rather than after it. Cleaning should be done after each stage, this way you will prevent dirt from accumulating and spreading.
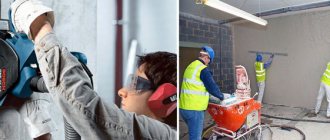
Tools and material for grinding
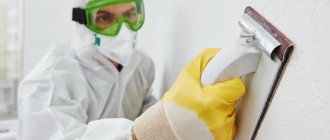
To carry out the final facing work, you need to know how to sand the walls after puttying so that the repair is completed as efficiently as possible. For large-scale repairs, it is best to purchase a grinding machine; this device is specifically designed for sanding after puttying walls. If the volume is small and the repair is carried out independently, there is no point in buying a special tool for grinding; cleaning the walls is done manually and this will require special sandpaper for puttying walls. Another advantage of manual stripping is the ability to process with the same level of quality in all areas, including corners and around door and window openings.
If the work is carried out independently, then to the question of how to sand the walls after puttying in order to speed up the process, but without compromising the quality, the answer is obvious - you will need the simplest and most affordable sanding block. Sanding walls after puttying with this device is very convenient: sandpaper is fixed to the surface of the block. The material for processing after putty is sold either in the form of an emery mesh or in a sheet version. To understand how to sand walls after puttying, just watch a simple video tutorial. On the Internet you can also learn more about how to sand putty on walls, how to choose the right sandpaper and features that you will encounter during work.
What type of putty sandpaper is best is up to the master to decide:
- Due to its structure, the sanding mesh processes the surface more cleanly, does not become clogged with dust as quickly, and small fragments do not linger on the surface of the material and fall out on their own.
- Sandpaper is cheaper in price, but it quickly becomes clogged with dust, which has to be knocked out, it has to be changed more often, and minor defects in the form of scratches are possible.
Novice craftsmen, not really knowing which sandpaper to use to sand the entire surface, use too coarse-grained paper, which will ultimately affect the quality of the grouting operations. Paper with large grain fragments (P60 and P80) is more suitable at the stage of rough grinding (starting grouting), but for finishing work, such material is unsuitable: stripes and scratches will remain.
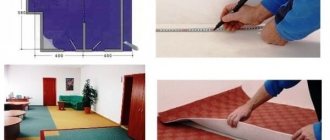
Which wallpapers are washable?
First of all, in order to avoid unpleasant situations and not spoil the coating, let's figure out what wallpaper can be washed. I think everyone understands that paper wallpaper cannot be washed.
Vinyl and non-woven wallpaper are called washable. However, not everyone knows that these fabrics may have different resistance to moisture and cleaning agents. Therefore, manufacturers inform customers about this characteristic of the material using special designations that are applied to the wallpaper packaging :
| Designation | Features of the canvas |
| One wave | Such wallpaper is moisture resistant, but not washable. Therefore, they can only be wiped with a damp cloth, doing this very carefully. In this case, no cleaning agents should be used. |
| Two waves | Fabrics of this type are washable, i.e. they can be washed with soapy water. However, this must be done very carefully. |
| Three waves | Fabrics with this designation are called super washable. They are resistant to water and can be washed using any household detergent. |
| wave with crest | Such fabrics are resistant not only to moisture, but also to friction. Thanks to this, they can be washed using a brush. It is also allowed to clean them with a washing vacuum cleaner. |
Designation of wallpaper resistance to moisture and cleaning
It must be said that not only vinyl and non-woven wallpaper can be washed. Paintable glass wallpapers withstand moisture well. However, it should be borne in mind that a lot depends on the paint with which they are painted. If the paint is not moisture-resistant, then, of course, you cannot wash such wallpaper.
Fiberglass wallpaper is not afraid of moisture
Liquid wallpaper is often used in kitchens. They themselves are not resistant to moisture. This coating can simply be washed off the wall with a wet rag or sponge. However, if liquid wallpaper is varnished, it becomes resistant to moisture.
Another type of wallpaper that often attracts people is paper canvases, as they often have an attractive appearance and are much cheaper than their vinyl counterparts. I already said above that this finishing material does not withstand washing . However, many people are interested in how to cover the wallpaper so that they can be washed?
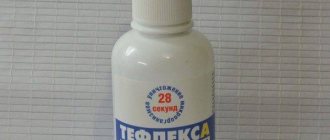
It is indeed possible to make such canvases moisture resistant. For these purposes, there are special wallpaper varnishes of the type VAK-A-104 .
People often wonder whether non-woven wallpaper can be washed if its moisture resistance level is unknown. I’ll say right away that all types of this finishing material can withstand wet cleaning. As for more thorough washing, resistance to it can be checked by washing a small inconspicuous area, which, for example, is hidden behind furniture.
Why do you need dust removal from walls?
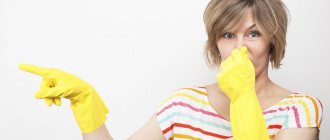
The need to get rid of dust is due to the fact that dust can be dangerous, especially construction dust. Parasites and pathogens can multiply in it. However, dust can also pose other dangers. It is important not to forget that construction dust can not only be soft, but also contain small and hard particles. They can have an extremely negative effect on things they come into contact with, for example, scratching glass or plastic surfaces.
Therefore, in most construction and renovation work, it is recommended to protect the respiratory tract using respirators.
Dust removal must be carried out not only upon completion of work, but also before applying decor, be it wallpaper, tiles, paint or flooring.
Only a specialized team with the appropriate skills and equipment can quickly and fully cope with such a task. However, some of the useful work can be done with your own hands.
How to remove dust from walls and ceilings
There are several ways to remove dust from ceilings and walls of any texture:
- static cleaning is not very thorough, but quite fast, it helps to clean surfaces that cannot be wet. To clean in this way, you will need a special mop - a device consisting of artificial lint that can become electrified. Before starting cleaning, rub the mop on a clean surface until static electricity appears, and then run it over the dirty surface. Dust tends to be attracted to magnetized things;
- Vacuum removal of dust from the ceiling and walls is carried out using a vacuum cleaner and special attachments;
- wet cleaning of walls and ceilings is not suitable for all surfaces, but is considered the best of all that is offered. To perform this type of cleaning, perform a test on a small surface; if it has not changed due to getting wet, you can simply wash off the dust.
Construction waste removal
General cleaning of an apartment after renovation begins with the removal of construction and other debris. First of all, get rid of large waste - in particular, scraps of old wallpaper, pipes, broken bricks and concrete, remnants of plastic or wooden baseboards, as well as linoleum, tiles, construction foam and other unnecessary materials. Small debris should be swept into one corner and then thrown away. To save space and quickly remove all unnecessary items, it is better to place filled bags at the exit from the apartment or outside it.
It is recommended to immediately remove construction waste by ordering transport and services from a specialized company. Do not throw it into containers intended for household waste. This threatens financial fines from housing company employees.
Tip: for small and loose waste, paper or plastic bags are more suitable. It is better to pack large waste in durable polypropylene bags. Do not fill them too tightly, otherwise the weight will become too heavy to lift.
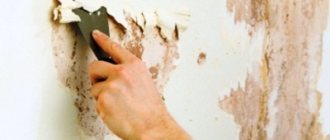
How to remove plaster and traces of whitewash
After repairs, not only construction dust, but also other contaminants remain on the floor and walls. First, let's figure out how to remove traces of plaster:
- If the stain appears on the tile, you should wait for it to dry completely. Then carefully scrape off the finishing mixture.
- Acetic acid will help tidy up linoleum. To clean, you need to apply a little water to the stained area of the floor with 9% table vinegar diluted in it. After five to ten minutes, try to wipe off the dirt with the hard side of the sponge. If it doesn’t work the first time, you can repeat these steps.
- Any solvent, for example, purified gasoline, dissolves plaster well. To achieve a positive result, you need to carefully apply the active liquid to the stain, being careful not to let it get on the floor covering. After ten to fifteen minutes, the plaster should come off easily with a soft brush.
Important! When working with aggressive substances such as gasoline or kerosene, you will need to protect your skin and also arrange intensive ventilation in the room.
Removing whitewash from the floor after repair involves performing the following steps:
- fill a ten-liter bucket with warm water;
- add fifty milliliters of sunflower oil;
- wash the floor with the mixture;
- Wash the surface again with water and vinegar.
Expert opinion
Irina Kovtun
Head of a cleaning company
At the end of cleaning, you will need to thoroughly wash the floor covering with plain water.
Rinse with water
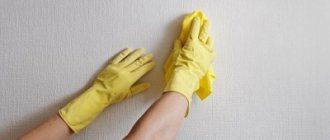
If the pattern of the wall covering does not wear off and remains the same, the wallpaper can be washed. This is the fastest way to clean wallpaper stains, but it has one drawback - it cannot be used on paper wallpaper.
Wallpaper can be washed with water as follows: first select a small wall area that is hidden from view (for example, behind a sofa) and wet it with soapy water and a sponge.
However, before washing, wash the surface of vinyl wallpaper with a dry cloth and wipe with a sponge and soap. After washing, wipe the surface with a damp absorbent cloth to remove excess water.
Cleaning surfaces from dust
It’s great if you took care of the safety of the surfaces before repairing. Construction film from dust will protect and secure furniture and all areas of the apartment. If you haven’t thought about this in advance, then you should start cleaning the house in detail. Inspect each room, assess the scope of work and the degree of contamination. Start with the most difficult places.
Repaired surfaces must be cleaned of stains and traces of glue, plaster, foam, whitewash and paint. It is better to remove dried protruding residues of sealant, putty and other materials with a stationery knife.
After removing visible dirt, walk the vacuum cleaner throughout the room. Start by cleaning the ceilings, then vacuum the walls, and finally the floor.
Wash wooden and plastic surfaces with a damp cloth. If stains are difficult to remove, use commercial removers, sprays or impregnations.
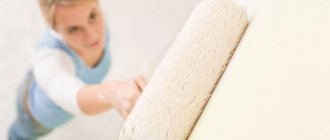
You also need to know how to clean dust from wallpaper after renovation. An excellent option is to use a high-quality vacuum cleaner with an aqua filter and a soft brush with long bristles. Conventional equipment can raise additional dust, and the work will be double. In this case, you need to take a break to let everything settle and repeat the process. There are several rules for cleaning walls from construction dust.
- Vacuum from top to bottom, including the ceiling if necessary.
- If the wallpaper allows, wash it with a slightly damp cloth.
- Finally, wipe with a dry cloth.
Tip: instead of a vacuum cleaner, you can use a special high-quality antistatic dust broom - electric or simple. Only this process will take longer, and it is also advisable to protect your face with a mask.
After renovation
Only after a thorough cleaning of the workplace and all rooms where repairs were carried out can the curtains be removed from the doors and windows. When cleaning, frequently change the water in which you rinse the cloth or mop. By the way, the easiest way to wash off construction dust is with a mop that is equipped with a sponge. Expect that you will need several replacement mop heads, and sponges and rags will quickly become unusable.
A serious construction vacuum cleaner will be an excellent assistant during and after repairs. If necessary, it can be rented.
Cleaning the floor
The floor is the largest surface, which under any circumstances will become hostage to debris, dust and stains of building mixtures. But I have several proven answers to the question of how to clean floors after renovation without streaks.
Simple recipes for fighting dirt
Photo of the productInstructions and recommendationsVegetable oil
If you can’t get rid of stains with detergent, a recipe with vegetable oil will help.
Pour oil into warm water (2-3 tablespoons per 5 liters), mix thoroughly and wash the floor. You can remove oil from the floor by repeated washing with a solution of vinegar and water.
Salt
You can wash floors with salt. The first cleaning step is washing with warm water and adding a suitable detergent.
Then add 150 grams of regular salt to a bucket of warm water (7 liters) and rinse the floor.
Manganese
Potassium permanganate (potassium permanganate) can be used to remove dirt from a wooden floor.
The powder is diluted in water so that it acquires a rich, bright pink color.
Kerosene
You can remove construction dust after repairs using kerosene, which is added to warm water at the rate of 100 grams of kerosene per 5 liters of water.
Ammonia
A solution of ammonia, prepared at the rate of 1 tablespoon of alcohol for every liter of water, will help to wash the laminate after repair. And don't forget to rinse the floor with clean water.
An excellent product - effective and low price.
Hard case
Now let's look at more serious cases, such as paint spilled on the floor. The choice of product and recipe will largely depend on the type of surface and paint.
If you plan to remove old traces of paint with your own hands, I strongly recommend using special products
- PVA-based polyvinyl acetate paints
can be removed with a saturated soap solution. To help you, use a kitchen sponge with a hard side for cleaning. - Dried acrylic paint
gives way to the pressure of degreasers such as alcohol, thinner or detergent. If the stain remains on your floor for more than a day, then the above-described recipes may be ineffective; now heavy artillery is used: gasoline, white spirit, kerosene, acetone and brake fluid.
The liquids described above are extremely aggressive, so they can only be applied pointwise using a soft cloth. The procedure is repeated 3-4 times with a break of 10 minutes.
The use of chemical solvents should take place in a well-ventilated area
If you choose special products, carefully scratch the paint stain before applying. This simple action increases the penetrating properties of cleaning liquids and pastes.
Now the only thing left to do is to restore the “healthy” shine to the floor. And for this, manufacturers have prepared a whole arsenal of products, from aromatic creams to foaming mixtures
Preparatory work
You should not start renovations without first preparing the room, then during cleaning the question of how to remove construction dust will not arise unexpectedly.
Required:
- take down the curtains
- take out indoor flowers,
- Small items should be packed in boxes and stored away from the work area.
The fewer things left in the room, the easier it will be to clean up after the renovation.
- It is better to take out small household appliances, but large ones must be packed.
Static electricity attracts dust well, which can easily penetrate into unprotected equipment.