Wallpapering is a simple and cheap way to update the finishes in any room. But even such a simple task can turn into torture if you don’t know all its subtleties. Anyone planning to glue vinyl wallpaper will have to figure out where to apply the glue - on the canvas or on the wall - what tool to use, how to prepare the surface and how to finish hard-to-reach areas. All this is discussed in our article.
Features of gluing vinyl wallpaper depending on the base material
Vinyl-coated wallpaper can have a paper or non-woven base. Not only the characteristics of the coating, but also the principles of gluing depend on the substrate material.
What you need to know about non-woven vinyl wallpaper:
- The adhesive mixture is impregnated with the wall, not the canvas, which simplifies the work process.
- This backing is much stronger than paper, has high wear resistance, and can hide small irregularities and cracks on the walls.
- The disadvantages of non-woven wallpaper include the rigidity of the material. The low plasticity of the panels does not allow for quick and efficient finishing of convex areas.
The nuances of working with paper-based vinyl wallpaper:
- The glue is applied not only to the surface of the wall, but also to the canvases themselves.
- The material stretches well, and can be used to quickly cover protruding surfaces, such as niches, columns or corners.
- The disadvantages of vinyl wallpaper on a paper backing include the possibility of fibers breaking due to minor mechanical stress and increased glue consumption.
Types of vinyl wallpaper based on
Vinyl wallpaper consists of two layers: the top one is made of polyvinyl chloride film (hence vinyl), the bottom one can be made of plain paper or non-woven material. It is the substrate that shapes not only the general characteristics of the material, but also the gluing technology.
So, when working with vinyl on non-woven fabric :
- glue is applied to the wall, not the trellis sheets;
- easily mask small unevenness of walls (as the wallpaper dries, it stretches, hiding traces of fasteners and small cracks, sinks and chips);
- it is difficult to adjust the joints - this is one of the disadvantages of this type of trellis;
- use specialized glue (for vinyl with a non-woven backing).
Attention: not only among consumers, but also among specialists, vinyl wallpaper on a non-woven basis is often called non-woven wallpaper. Such confusion would be harmless if not for one thing: glue for non-woven trellises does not hold vinyl wallpaper with a backing made of this material.
For the paper base of vinyl wallpaper you need:
- prepare the walls well if the trellises are thin;
- spread the adhesive mixture on both the walls and the trellises themselves, which leads to excess glue consumption.
The finishing material glides easily along the wall and stretches well, which allows you to quickly and efficiently cover corners and join joints. The disadvantage is low strength - they are easily damaged.
Tools and materials for work
To carry out high-quality finishing work, in addition to vinyl wallpaper and adhesive, you will need the following tools and materials:
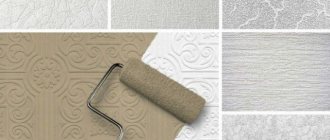
- Paint brush or roller with soft bristles - for applying primer to the base and glue to the wallpaper or wall.
- Rubber rollers. A tool with a wide working surface is used for smoothing fabrics, a narrow one is used for high-quality joining of joints.
- Ruler, plumb line, building level, square and pencil - for marking.
- Masking tape – to protect individual elements from adhesive.
- Plastic spatula - for removing air bubbles and excess glue.
- A sharp stationery knife and scissors - for cutting strips.
- Wide metal spatula - for trimming canvases near the ceiling and floor.
- Container for glue mixture.
USEFUL INFORMATION: Which wallpaper to choose for the kitchen?
Advice! To speed up work, use glue with an indicator, which makes it easy to control the uniformity of application of the mixture to the surface of the walls or canvas.
Preparation
Before completing the final interior finishing, you must do the following:
- Decide on the selection of vinyl wallpaper and glue.
- Prepare surfaces.
- Remove all consequences of repairs.
- Cover the floor with polyethylene.
- Turn off the electricity.
- Remove the covers of sockets and switches.
- Buy the necessary tool.
In addition, before gluing wallpaper, you need to familiarize yourself with the recommendations for diluting glue and preparing wall surfaces.
How to dilute glue correctly?
Dry granules are poured into water. The solution is constantly mixed manually or using a special attachment on a drill or screwdriver. Cooking instructions are on the packaging. The main thing is that you don’t need to knead the whole pack. Sufficient quantity for three or four stripes.
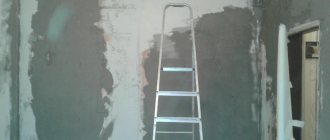
Surface preparation
Preparing the surface
Before gluing vinyl wallpaper, you must carry out the following operations:
- remove the housings of switches and sockets, having previously de-energized the room, seal the areas with masking tape;
- remove protruding fasteners (dowels, screws, nails);
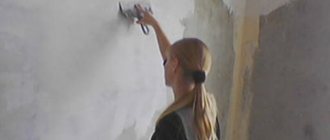
- clean the surface of the old coating;
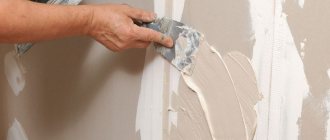
- repair uneven areas with plaster or putty;
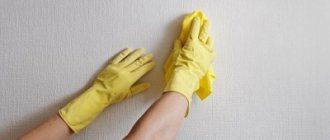
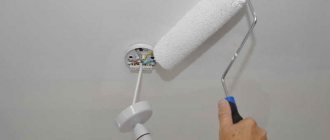
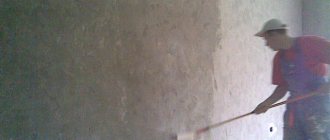
- Apply a deep penetration primer to the base and wait for it to dry.
Wallpaper can only be glued to dry and clean walls. Checking the dryness of the base is quite simple. To do this, take a small piece of polyethylene film 50 × 50 centimeters and secure it with tape on the wall so that a sealed space is formed inside. After a day, the polyethylene is checked. The protruding drops indicate that the wall has not dried out.
All the nuances of preparing concrete surfaces for wallpapering are described in detail here.
Step-by-step instructions for treating a plasterboard wall or ceiling before covering it with wallpaper can be found in this article.
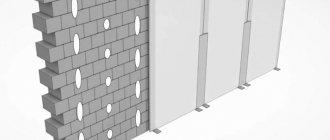
Important! Surfaces under wide meter-long wallpaper must be leveled especially carefully; even with small differences, problems may arise with the joining of adjacent strips.
Materials and accessories
To ensure that wide vinyl wallpaper can be hung correctly and accurately, you need to prepare the following materials:
- primer;
- glue that is suitable for working with vinyl wallpaper;
- a roller made of rubber;
- ruler at least 1 meter;
- large width brush for convenience;
- sharp legs;
- scissors;
- plumb and level;
- pencil;
- clean cloth that can be cut and used as rags.
It is very important to choose the right adhesive suitable for use in repairs. If you buy the wrong product, a problem will arise the next time you try to remove the wallpaper, when another cosmetic repair is required.
Gluing wide vinyl wallpaper is easy and quick, having all the equipment at hand.
Making the markings
After the preparatory stage, markings are carried out to ensure the correct placement of the canvas on the surface. Mark the walls using a long ruler, chalk and plumb line.
- The first line is aligned with the edge of the window, gradually moving to the left along the perimeter of the room.
- Further lines are drawn taking into account the width of the wallpaper.
- From the window to the left, markings are made to the corner of the wall with the doorway, numbering each section.
- Next, lines are drawn to the right from the window to the door.
Preparing wallpaper for hanging
Before carrying out the main work, rolled materials are cut into strips, the length of which corresponds to the height of the wall plus a margin of 5–10 centimeters. For greater accuracy, the height of the room is checked in different places. If the sizes match, several strips are cut, the total width of which allows you to cover the entire plane of the wall.
If the height of the ceiling in the room is not the same, each subsequent strip is cut off after gluing the previous one, or before cutting, each section between the marking lines is carefully measured.
When preparing strips with a pattern, make sure that the pattern matches. To do this, you need to combine adjacent canvases so that the image elements are joined in the correct order. The finished strips are stacked on top of each other in the required sequence.
USEFUL INFORMATION: How to glue the ceiling in a room: options, 18 photos
Gluing vinyl wallpaper: step-by-step instructions
Work on covering walls with vinyl wallpaper is carried out in the following sequence:
- We dilute the glue according to the instructions on the package. The finished solution should have a uniform consistency without clots or lumps.
- Close the windows in the room tightly, turn off the air conditioners and fans.
- We spread the glue on the paper-based wallpaper or on the wall if the material is glued to non-woven material. In the first case, we fold the canvas into an “envelope” - the edges are aligned with the middle of the strip, and wait 5-10 minutes until the paper layer is saturated with glue. We glue the non-woven vinyl immediately after coating a section of the wall slightly larger than the width of the wallpaper.
- We apply the prepared strips to the base along the drawn line, joining adjacent elements taking into account the pattern.
- Using a rubber roller, smooth the fabric from the middle to the edges, getting rid of bubbles and achieving a perfect fit of the material to the surface. Remove protruding glue residues with a piece of foam rubber or clean cloth.
- After drying, press the edges of the wallpaper with a wide metal spatula and trim with a sharp utility knife.
How to properly glue vinyl wallpaper, preparation, gluing, working with corners.
Save the article for yourself or share it on your favorite social networks:
How to properly glue vinyl wallpaper, preparation, gluing, working with corners.
In the previous article we examined in detail the types of vinyl wallpaper:
Vinyl based wallpaper
Some will say that gluing vinyl wallpaper is not much different from gluing paper-based wallpaper. But when you read this article, you will understand that there are quite a lot of differences. And if you don’t take them all into account, then the wallpaper may fall off the next day, and you will have to do everything again, taking into account those nuances that you did not want to remember.
Tools
So, you will need to stock up on a fairly serious list of tools. First, you need a special brush designed for priming the wall and then applying glue to the vinyl wallpaper. Next, instead of a sponge, it is better to take a roller that will be used to roll the seams. You will also need a special spatula with which you will smooth the wallpaper, a soft sponge or cotton rag with which to remove excess glue, and a brush with which you will coat small areas of wallpaper. Little by little, you need to have scissors, a trimming knife, a level, a tape measure, paper tape, a ruler, and a wooden spatula with which you will press and straighten narrow sections of wallpaper, for example, at corners. Perhaps that's all.
Preparing the walls
Before hanging vinyl wallpaper, do the traditional wall preparation. You will need a special dry adhesive mixture for vinyl wallpaper, which must be diluted with water according to the instructions. Prime the walls with this glue over the entire surface. If you don't find glue, you can stock up on deep penetration primer, which is widespread everywhere. Further, since the wallpaper is heavy and does not allow air to pass through very well, the walls need to be treated with a fungicidal compound, protecting them from the appearance of mold under the canvases. After the glue and composition have dried, take a thread with a weight and fill a vertical line on the wall. This will be your guide for gluing the first piece of wallpaper. At the end of the procedure, turn off the electricity and remove all switches and sockets.
Additional Information
• If you do not know how to glue vinyl wallpaper, and have never done this before, it is advisable to have a person nearby who, as they say, is “in the know.”
• Wallpaper is glued only to a dry, leveled surface, which is especially important for wide textured vinyl wallpaper. The old coating needs to be removed from the walls. Cracks need to be filled and the surface leveled.
• You can check the dryness of the walls with a small piece of cellophane and masking tape, which will be used to stick this cellophane to the wall. Leave the material overnight. If in the morning drops of water have formed on the inside of the cellophane, then the walls are not dry enough to glue vinyl wallpaper on them. You'll have to dry it further.
• The strength of the wall covering is checked using ordinary tape. Stick a piece on the wall and pull it away sharply. Look at the back of the tape. If there are particles of plaster or old paint there, then the wall needs to be prepared: remove old layers, prime and level.
• Any person who knows how to properly glue vinyl wallpaper will tell you that there should be no drafts in the room under any circumstances. Air conditioners, fans, windows open wide – all this is a terrible taboo! Drafts are welcome only after the wallpaper is completely dry.
• Never glue new wallpaper onto old wallpaper. The latter must be completely removed from the wall. Wet them with water, wait a little, and then they will be removed with a spatula without any problems.
Preparing wallpaper
Cut the wallpaper into strips according to the height of the wall, but with a 10-centimeter allowance in reserve. If you are cutting vinyl wallpaper with silk-screen printing or a regular pattern, then you first need to select the pattern of the adjacent canvases with the maximum match. Place the wallpaper strips together with the pattern facing down. Each stack should consist of 10 strips of wallpaper, no more. And each strip should move relative to the adjacent one by at least 1.5 centimeters. It is best to take meter-long wallpaper, which allows you to minimize problems with selecting a pattern and cutting it correctly.
How is the glue applied?
Vinyl wallpaper is glued only end-to-end. This means that the panels should not overlap one another. After the primer has dried on the wall, you can begin the gluing process. First, apply glue to the section of the wall where the first panel will be located. Stick the canvas on the wall, coat the next one and glue it. The sequence of actions is repeated until the end of the work.
Additional Information
• You need to work with glue very carefully, since carelessness will lead to the adhesive getting on the front side of the wallpaper.
• Allow the mixed glue to swell thoroughly by standing for 5-10 minutes after mixing. This rule must be stated in the instructions.
• Read the information on the vinyl wallpaper roll. It is quite possible that the glue needs to be applied not only to the wall, but also to the wallpaper.
How to properly glue vinyl wallpaper?
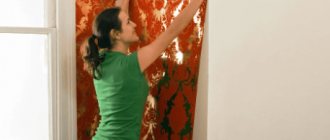
Correct gluing technology. Wallpapering alone will not work. Only double. And even faster - three of us. One worker stands on a stepladder or on a chair and places the top edge of the canvas against the wall. Another worker holds the bottom end of the strip on the floor, aligning the edge of the wallpaper with the designated vertical line. Next, lightly press the wallpaper strip towards the base, after which all air bubbles are forced out with the help of a brush. The brush is used from top to bottom and from the axis towards the edges. If you notice any glue coming out at the edge of the canvas, quickly wipe it off with a clean rag, not a brush!
Trimming the edges
When gluing wallpaper under the ceiling and in the area of the baseboards, you should have excess material left, which can be trimmed along a ruler with a knife. In this case, the lower edge of the strip should extend onto the baseboard by about 5 millimeters. Wallpaper should only be trimmed with a sharp knife. If the blade is dull, it will tear or dent the wallpaper that has not yet dried from the glue. During the pruning process, regularly replace the quickly dull blade.
Canvas at the baseboard
If you did not remove the baseboard before starting work, insert the bottom edge of the wallpaper between the wall and the baseboard. The remaining part is cut and glued in a strip on top, which will cover the seam and the top of the baseboard. I strongly recommend removing the baseboard before wallpapering so that it does not interfere with your work. At the end of gluing, it is nailed down or put back.
Gluing the top
The edge of the wallpaper adjacent to the ceiling must be turned up 5 centimeters to protect the ceiling from glue. After this, the wallpaper strip is pressed against the wall from above and smoothed downwards with a brush. Other canvases are glued in a similar way. If you are not gluing wallpaper up to the ceiling (for example, you have paint or plaster on the top of the wall), then you must first mark the upper boundary of the gluing area on the wall with a pencil. This should be done around the entire perimeter of the room. The strip will help you navigate the work process.
Working with corners
In the corners you need to leave excess vinyl wallpaper to the depth of the existing niche, taking into account the allowance. After this, cuts are made at the top and bottom, and the panel is folded around the corner using the pressing method. Next, the wallpaper is carefully trimmed, and in the corners where the panels overlap and the joints are pressed firmly against the wall, ensuring tight adhesion. I note that in the corners of the room the wallpaper should extend to the other side by a maximum of 3-4 centimeters. At the same time, on the other wall, the first canvas is glued from the very corner, covering the previous 3-4 centimeters.
Sockets, switches, batteries
Behind the batteries, the walls should be covered with approximately 10-20 centimeters, no more. The wallpaper is pressed against the wall using a narrow roller equipped with a long handle. They can work both behind the battery (top, bottom, side) and through the radiator fins. Wallpaper near switches and sockets is not cut in advance. They are glued directly to the holes. Only after the glue has dried can the cut be made.
General information on wallpapering walls:
How to glue wallpaper correctly?
How to hang wallpaper near window and door openings?
The process of gluing wallpaper near openings causes difficulties for inexperienced craftsmen. The canvases must be joined so that their edges do not touch the corners of the window or door opening.
If the door is located in the corner of the room, the discrepancy between the patterns on the wallpaper will remain invisible. If the door structure is located in the center of the room, the pattern should be combined both before and after the opening.
- The last canvas is glued in such a way that it can cover the casing.
- Then the limiting decorative element is secured and the hanging part of the canvas is cut off with a sharp knife.
- Next, smooth out the wallpaper at the joints, as well as between the wall and the casing.
- A short piece is glued to the top of the door, observing the sequence of the pattern.
Procedure for gluing near window openings:
- The strip is glued so that it covers the slope.
- Several horizontal cuts are made at the edges, which will allow the wallpaper to be bent downhill.
- The edges of the canvases are trimmed along the border of the opening.
- After gluing one of the side strips, fix short sections of wallpaper on the top and bottom of the opening.
- After this, they begin finishing the other side of the opening.
USEFUL INFORMATION: How to properly glue wide meter wallpaper
Advice. Before wallpapering the second side of the window, apply an additional marking line. This makes it easier to achieve the correct vertical position of the canvas.
Wall gluing technology
When cutting strips, you need to take into account the presence of a pattern. If it is necessary to glue with a shift, take into account the margin that is laid in order to adjust the pattern. The strips are glued end to end without overlap. If the base is non-woven fabric, there is no need to coat the stripes. The sequence of actions comes down to four stages.
- Stage 1: diagram and marking of walls. You need to glue from the window. To do this, the width of the strip is measured and a vertical line is drawn along the level or plumb line. The entire wall is marked, which gives an understanding of how many strips need to be prepared.
- Stage 2: preparing the wallpaper. The stripes are spread on the floor. The drawing is customized. The length is 3-5 cm greater than the height of the ceilings or the width of the room (if the ceiling is pasted over). Prepare such a number of strips that all the finished glue is used up.
- Stage 3: gluing. The top of the strip is applied to the coated wall. The central part is pressed with a roller or cloth along the longitudinal axis to the very bottom. In the same way, residual air and excess glue are expelled from the middle to the edges.
- The joints, upper and lower ends are rolled with a narrow roller, and any excess glue is removed with a rag.
- Stage 4: final. The excess is cut off with a wallpaper knife along the attached wide metal spatula.
How to properly hang wallpaper in corners and hard-to-reach places?
There are two methods of gluing canvases in the corner part of the room: overlapping and end-to-end with trimming.
- In the first case, we glue the strip, making an overlap of 1–2 centimeters on the other wall. Next, we draw a marking line along the width of the roll on a perpendicular wall and fix the second canvas so that its edge runs strictly along the corner of the room and does not interfere with another plane. After this, the wallpaper is carefully rolled with a roller.
- The overlap and trim method is used to fix heavy vinyl wallpaper with a large pattern. The technology for carrying out the work is initially similar to the previous method, but at the junction the second sheet does not need to be coated with glue. Next, take a long rule and a sharp utility knife. We make an even cut, bend the edge of the rolled material, apply glue and roll this area with a roller.
In hard-to-reach places behind heating radiators, wallpaper is installed from behind. After fixing in the desired position, the blades are rolled with a narrow roller with a long handle.
In places where sockets or switches are located, rolled materials are glued over the boxes, then cross-shaped cuts are made with a knife. The resulting triangular tails are bent, all excess is trimmed, and the socket bodies are installed in place.
How to properly work with non-woven rolls?
- It is better to start gluing non-woven wallpaper from the window, gradually moving deeper into the room. When gluing, a special glue is used, intended specifically for non-woven wallpaper. The glue must be applied to the surface to be glued (you can find out how to make the glue yourself here).
- To obtain the most accurate result, non-woven wallpaper must be glued end-to-end.
After applying wallpaper glue and laying the first strip, the next strip is joined to the edge of the previous one. If the edges of the wallpaper are laid evenly, the second strip is applied to the wall and smoothed out to avoid the appearance of bubbles and creases after drying. When laying wallpaper in this way, you cannot pull the wallpaper strip to join the edges with the previous one - after the wallpaper dries, the edges will separate. - After laying the wallpaper strip, it is necessary to trim off the excess material using a sharp knife and spatula. A spatula is applied to the junction of the wall and ceiling, and excess material is cut off with a knife.
Next, we offer a visual video on how to glue non-woven wide wallpaper:
Gluing borders
Gluing the border or frame begins with inconspicuous areas, since at this point the elements will be combined. Typically, decorative items are fixed at the top along the entire perimeter of the room.
When combining two types of canvas horizontally, the border is glued at a certain height relative to the floor. In this case, markings are applied to the walls using a pencil and a building level: you cannot focus on the edges of the wallpaper being joined. The upper part of the decorative element is fixed along a pre-drawn line, after which the border is smoothed with a roller, and the remaining glue is removed with a soft cloth or sponge. In the places where the tape joins, an incision is made with a sharp knife and the fabric is smoothed.
The subtleties of gluing vinyl wallpaper, cutting rules and some useful tricks are clearly demonstrated in the video.