Decorating walls in rooms is a labor-intensive type of work. For this reason, apartment and house owners choose foundations that are easy to maintain and use. One of the acceptable options is wallpaper. If these are rolled varieties with texture, they serve as decorations and hide defects on the surface. Next, we’ll look at how to glue wallpaper for painting.
How to prepare the surface
The results of the work depend on how the surface is prepared. It is important to make sure that after this the walls meet certain requirements. In this case, the preparation technology involves the following steps:
- To begin with, the entire apartment is disconnected from electricity. Otherwise, sockets and switches cannot be removed from their mounting location in a safe way. It is better to take separate care of the wire insulation.
- The previous finishing material is removed if the room is old. The trellises are soaked, removed manually, or spatulas are used. The tiles are bleached. Paint is removed mechanically or with chemical compounds. The main thing is to preheat the layer using a hair dryer. A warm soapy solution helps remove the whitewash before gluing.
- Antibacterial impregnations are used to treat suspicious areas associated with a high risk of fungi and mold formation.
- The joints between ceilings and walls and floors receive the most attention. It is necessary to level the surface so that only right angles are preserved. Then it will be easier to glue wallpaper for painting.
- The surface is treated with a primer, then adhesion between surfaces becomes better. The easiest way is when the repair is completely done by hired craftsmen.
All you have to do is wait until the primer dries, then proceed with subsequent work with glue.
Marking and cutting
The main thing is that the sections of wallpaper are connected to the surface as evenly as possible. Otherwise, the appearance will only worsen with each new trellis. Creating markings before moving on to other stages protects against such troubles when processing walls.
The sequence of work is not so complicated:
- First, choose a corner with wallpaper from which to start working. This is usually the wall on which the window is located. This is how a starting point is chosen. A distance equal to the width of the purchased trellises is marked from the edge. Subtract 2-3 cm from the value. This is the so-called pass for arranging corners.
- Ideally straight vertical lines are marked using a plumb line. This is a guideline for further work, including along the edges.
- Use a starting strip drawn in pencil. We retreat from it a distance identical to the width of the trellis. After this, draw a second line. This marking technology is used for all walls. Then it will be impossible to fix the pasted wallpaper.
- After this, they move on to cutting the roll. The distance from floor to ceiling is measured using a tape measure. This needs to be done in several places. A 10 cm margin is added to the results. The use of baguettes involves reducing this figure to 3 cm. Then a construction knife is taken for leveling.
Particular care is required when working with glass wallpaper. The respirator provides complete protection against damage. Then the materials will be glued without harm to health.
If the walls are painted without wallpaper, the surface must be perfect. Otherwise, most of the defects will be visible on it. Thanks to the wallpaper, this issue is partly removed. The canvases will be easy to remove and repaint in a different color if necessary.
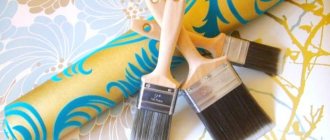
Wallpaper painting
Paint the wallpaper in at least two layers. In some cases, especially when it comes to inexpensive coatings, you will need to apply paint three or four times. The best tool option is a medium-length pile roller made of sheepskin or velor. To paint corners and hard-to-reach areas, you need to have a brush.
Vinyl and non-woven wallpaper
For vinyl and non-woven wallpaper, it is best to use acrylic or water-based paints. Oil-based ones are unacceptable because they contain an organic solvent that destroys the material.
Advice! To avoid damage to the material, it is recommended to first apply a test coat of paint on a small piece of wallpaper and wait for it to dry. Moreover, one more nuance should be remembered: the dried coating will be a slightly different shade than the liquid dye.
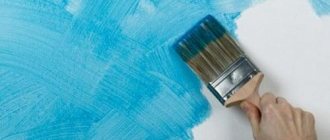
The roller is lowered into a container of paint and wait until the tool is saturated. Strokes are made from the corner of the room - vertically. Movements should be smooth, without significant pressure. If, after the surface has dried, there are still insufficiently painted areas on it, re-painting will be required. The second and subsequent layers are applied only after the coating has completely dried. A detailed process for painting vinyl wallpaper is available in a separate material.
Glass wallpaper
Painting of fiberglass wallpaper begins only 2-3 days after gluing it. The reason for this break is the need for the material to dry completely.
Acrylic or latex paint is best suited for glass wallpaper. Wallpaper with a semi-gloss effect looks very good. You should not use too thick paint or overdo it with the number of layers, as this can easily level out the texture.
Before applying paint to glass wallpaper, it is recommended to thoroughly prime the surface. The primer will help create a coating that holds the fiberglass particles in the structure of the material. As a result, fiberglass becomes completely safe for residents.
As with other types of wallpaper, start painting from the top corners of the room. You should not try to paint the entire wall area at once. It is more correct to treat the surface in small areas.
Fiberglass wallpaper provides the craftsman with significant opportunities for creativity. To create different visual effects, stencils and curly rollers are used.
Paper wallpaper
To paint paper-based wallpaper, water-based paint is used. Apply it with a roller or spray gun. With the help of the latter, you can work much faster.
Paint after the glued canvases have dried. To create a full coverage, you will need two layers of dye. The second layer is applied only after the first has dried. Just as in the case of other types of wallpaper, it is possible to use stencils, a figured roller, or paint with a gradient effect.
In some cases, a third layer is also made - varnishing. Thanks to the varnish layer, increased surface resistance to moisture is ensured. However, the creation of three-layer coatings requires high qualifications from the worker, since defects during varnishing will result in the visibility of all surface defects.
We glue paper wallpaper and vinyl wallpaper on a paper backing
There are practically no differences here from working with conventional trellises. The canvases themselves in this case are distinguished by increased thickness and length. Wallpapering for painting has the following nuances:
- The cut sheets are laid out on the floor. The main thing is that the surface is smooth and clean.
- The back side is covered with adhesive. A maklovitz brush is a must-have device for carrying out work. Corners and edges of canvases are the weakest points; they are handled especially carefully. No part of the materials should protrude.
- It is unacceptable to leave areas that have not been coated. Otherwise, air bubbles will form. It is best to use glue with special additional indicators. A special dye in the composition helps to evenly distribute the material over the surface. The adhesive becomes transparent when it dries.
- The strip is folded like an accordion or in half. Then the sheet is better saturated with the composition. The adhesive for processing is selected depending on what base is used.
- While the base is impregnated with the composition, you can cover the walls with a thin layer of the mixture. The area behind the marking line is also captured, but not much. Excess glue is removed in a couple of minutes.
- The starting strip is fixed in its place. The main thing is to glue it clearly and evenly in accordance with the markings.
- Air and excess glue are expelled with rollers and spatulas. Use a sponge or rag to get rid of any remaining glue. It is important to ensure that tools and materials do not dry out too much.
- The entire wall is covered using this principle. The next strips go end-to-end with the previous ones. The edges must be placed close to each other, because after drying the paper shrinks somewhat. You need to be especially careful in corners and near openings.
- After drying, get rid of excess edges, very carefully, otherwise gluing will not give good results.
The process is simple, everyone can figure out how to properly glue wallpaper.
Glue wallpaper on non-woven fabric and glass wallpaper
Working with non-woven and glass wallpaper is easier than with paper. Such fabrics do not tear, do not stretch and do not need to be coated with glue.
- Using a paint roller or brush, glue is applied to the work surface, capturing the marking line.
- Immediately apply a dry cloth and level it simultaneously horizontally and vertically.
- The sheet is pressed tightly in the center and smoothed from top to bottom towards the edges, the protruding glue is removed with a sponge or rag.
- The resulting seams and joints are additionally rolled tightly with a plastic roller. After drying, excess parts of the wallpaper are trimmed.
Note! While gluing and drying the wallpaper (at least 24 hours), drafts should be avoided in the room.
Pasting in corners and near openings
The wallpaper in these places always overlaps; the materials do not affect the process. Coloring involves actions performed in the following order:
- Part of the strip with a width of up to 5-7 cm is inserted on each side.
- The resulting overlap is carefully trimmed in the middle. It is imperative to remove the strips that turn out to be superfluous. The main thing is that the material overlaps on each side.
- Roll the resulting edges with a plastic roller with strong pressure. All irregularities are corrected.
When the wallpaper glue for painting dries, the owners will see a neat seam with nothing superfluous.
Wallpaper for painting: how, when and what to paint with
A minimum of 24 hours should pass between gluing the canvases and painting them. That is, the surface should become completely dry. This is required for any wallpaper to be painted.
Fiberglass wallpapers are known for their finely porous structure, which distinguishes them from their analogues. Because of this, the paint is absorbed very strongly. For this reason, a thin layer of primer is required to be applied to the surface. Regular glue is suitable, diluted in a ratio of 50 grams per 5 liters of water.
Paint the surface with one of the following compositions:
- latex;
- acrylic;
- water-based with the addition of glue.
The color of water-based paint is white. You will have to tint the composition to get the desired shade. It is difficult to obtain such a tone again, so it is often diluted once for the entire volume of the room.
Using the adhesive mixture will not cause any trouble if the following conditions are met:
- It is better to use paint rollers of different sizes for the job. And any type of paint is suitable for this.
- Paint the entire room at once. Otherwise, the shade will turn out with noticeable transitions.
- Joints and hard-to-reach places are painted over first. Then they roll the entire surface, from top to bottom. This also applies to corners; standard tools are too large for them.
- The next layers are applied only when the previous ones are dry.
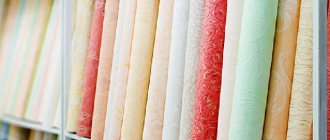
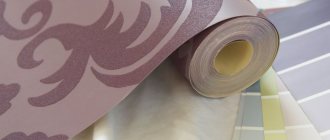
Choosing wallpaper for painting
This type of product involves further contact of the front part with the paint and varnish material, so you cannot choose any wallpaper you like. There are several types of products, for example:
- Non-woven products for painting.
- Paper trellises for painting.
- Glass wallpaper.
The first two options have a thin protective vinyl layer. Products based on non-woven fabric are much stronger, more durable and of higher quality. And gluing such wallpaper for painting with your own hands is much easier and more convenient.
Glass wallpaper is no less popular. They are strong, durable, practical and beautiful. They are often used not only in apartments, but also in office spaces. Therefore, if you want to repaint your wallpaper with paint and varnish material, you need to use one of the options provided above. You can even check with a consultant whether the option you like is suitable for this purpose.