New and improved versions of products regularly appear in all areas of life. Likewise, in the repair and construction industry, materials are becoming better, more convenient and attractive. The huge variety and wide range of wallpapers has been supplemented by meter-long varieties, which are made from bamboo, fabric, paper, and non-woven fabric. Despite the enormous number of benefits, they have not yet been as popularized as they could be. People prefer to use standard and familiar 53 cm rolls. A possible problem is that they simply do not know how to glue meter-long wallpaper.
Advantages and disadvantages of meter wallpaper
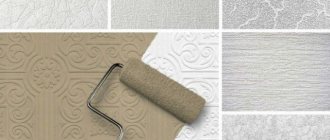
The name “meter-long wallpaper” is considered conditional, since under it you can find varieties 1 meter wide, 90 cm wide, and much larger rolls. Belgian brands produce various wallpapers in 1.4 m wide rolls.
This variety appeared from abroad, and there users managed to appreciate all the positive characteristics of the paintings:
- Reducing the number of joints on the walls by half or more allows for a higher quality finish.
- Saving time and effort in preparation for pasting the material. It is easier to cut 5 meter strips and stick them on the wall than 9-10 regular-sized canvases.
- Lower cost compared to standard material. It is more profitable to buy a 1 meter roll than two standard ones.
But materials of this size also have several disadvantages:
- The need to glue on a prepared and perfectly flat surface. Otherwise, the materials will not be able to fit together perfectly.
- Possible excess costs compared to purchasing traditionally sized materials. You need to first calculate the dimensions of the room so that you don’t have to buy a whole roll because of one missing strip.
- Since gluing meter-long wallpaper for one person is very difficult, and sometimes almost impossible, it is necessary to involve an assistant in the work.
Flaws
- More serious preparation of the base is required. If the wall or ceiling is uneven, it will be impossible to properly glue such products. The joints will turn out uneven.
- As a result, wallpaper consumption may be higher. For example, if you have another piece of 20 cm left to glue and you need to start a new piece. Thus, almost the entire meter roll will remain untouched.
- Of course, it is more difficult for one person to work with such material. This is especially true if you need to glue the ceiling.
First of all, you need to very carefully prepare the surface. The old finish needs to be removed. The surface must be cleaned with sandpaper or a grinder with an attachment. If there are significant irregularities, they will have to be removed using putty. Before using it, the surface is primed. After puttying, the walls are sanded again, this time with sandpaper or a finer-grit wheel.
Finally, you need to prime the surface several times to ensure proper adhesion.
When starting gluing, you should maintain the correct temperature conditions. Otherwise, it may cause problems during operation. Therefore, it is better to carry out gluing before the start of the heating season. After all, in the radiator area the temperature will be different from the rest. In this case, the surface will have to be glued more carefully.
Drafts should not be allowed in the room. Therefore, windows and doors must be closed.
It is worth cutting the canvas as you glue it, and not in advance.
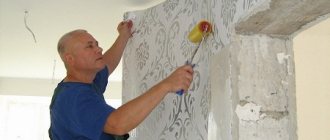
It will be easier for one person to handle wide wallpapers, because they are usually non-woven. And they don’t need to be coated with glue. It is applied only to walls. For such wallpaper, special glue is used. Moreover, it is worth choosing products from a recognized manufacturer; this will simplify the task and also improve the quality of the result.
After applying the glue and cutting the wallpaper to size, take a strip and apply it to the junction of the wall and ceiling, grabbing a little more material towards the top, which will then be cut off. When gluing, you need to focus on a vertical mark made in advance using a plumb line. It is most convenient for one person to first glue the middle part so that the canvas is fixed to the surface. And then smooth it over the entire width. The other canvas is glued end-to-end - as close as possible to the first. If non-woven material is used, the position of the strip can still be adjusted for some time. However, this is only possible if quick-drying glue is not used.
For smoothing, it will be convenient to use a rubber roller when working with a wide canvas. This way, it will be easier to reach both edges, and uniform smoothing will be ensured.
Gluing hard-to-reach places with meter-long wallpaper is more difficult than usual. Therefore, they can be cut into pieces. For example, if you need to stick them on the area around the radiator.
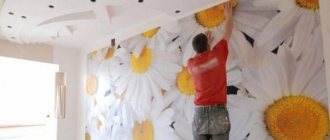
Wallpaper even a meter wide can be hung alone
Even if wide wallpaper is used, this does not mean that one person cannot cope with the task of gluing it. It is only important to prepare everything, including tools, and then there should be no problems. Yes, physically it can be more difficult than working with standard-width wallpaper. However, you will have to make fewer movements. Therefore, you can additionally watch the video instructions, which will allow you to better understand the issue.
Recently, on the shelves of construction hypermarkets and in the virtual windows of specialized online stores, you can increasingly see wide meter-long wallpaper for sale. They differ from rolls of standard sizes by almost 2 times, having a width of 1 meter, or more precisely, 106 cm.
What are their main advantages when compared with their usual analogues and how to choose them correctly? And most importantly, how to properly glue wide wallpaper? After all, over the years, many of us have become accustomed to gluing standard rolls half a meter wide. So let's move on to look at these interesting questions.
Tools and materials for gluing
Before gluing meter-long wallpaper on the wall, you need to prepare the necessary tools and materials for the work.
Among them:
- Plumb.
- Roulette.
- Pencil.
- Putty knife.
- Roller.
- Masking tape.
- Wide brush.
- Sponge or clean rag.
- Knife.
Note! The walls must be prepared for wallpapering with meter-long wallpaper. Therefore, it would be correct to apply a layer of putty, primer or grout with sandpaper.
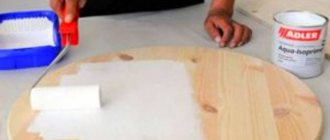
You need to purchase wallpaper glue in advance, taking into account the type of wallpaper, or choose a universal composition.
Glueing tools
Before you hang wallpaper, you should purchase the necessary tools for this. If some things are missing, it will not be possible to glue them using the correct technology that allows you to do the job efficiently and reliably.
Required items:
- meter rolls on a non-woven basis;
- laser level or spirit level;
- roulette;
- plastic spatula;
- cutting knife;
- stitching roller;
- roller for applying glue;
- pencil;
- special glue;
- two containers: for water and for adhesive;
- fabric that will remove excess composition.
- scissors.
Having collected all the necessary tools, you can get to work.
Preliminary preparation of walls
It’s not enough to know how to properly glue meter-long wallpaper on a wall. You can glue them in accordance with all the rules, but unprepared walls will turn this into a completely unattractive finish.
To perfectly match the seams of the canvases, you need to carry out a number of standard steps to level the walls:
- Remove any foreign objects from them, for example, nails, self-tapping screws, remove switches and sockets and temporarily seal the holes with masking tape.
- Get rid of the remnants of the old coating: paint, plaster and wallpaper.
- Clean the surface of the base using sandpaper.
- If there are large defects on the wall, then you need to use putty to smooth them out. Then you need to apply 2 layers of primer, as this will prevent the glue from being absorbed into the walls and increase adhesion.
Note! If non-woven wallpaper was chosen for work, it tends to be translucent. Therefore, under them, paint or a white primer is applied to the walls.
As a rule, you can start gluing wallpaper on the wall only when the primer layer is completely dry.
Marking walls and cutting canvases
The material from a meter roll is glued to the joint, so you can start work from any suitable place in the room.
Basics:
- To glue the first strip of wallpaper onto the wall evenly, you will need both a plumb line and a pencil to draw a vertical line. The wallpaper is glued from the drawn line.
2. Before cutting the paper sheets, you need to accurately measure the length of the walls and their height in order to determine the required number of sheets that will fit on it.
3. Also, when cutting, leave 10 cm at the bottom and top of each wallpaper strip for reserve. It is necessary to remember about combining the patterns on the canvases. After gluing the wallpaper to the walls and the glue has completely dried, excess parts of the wallpaper can be easily cut off with a knife.
4. You need to start rolling out the rolls on a dry, clean surface, face down. Using a tape measure, the required length is marked, then notches are made, the roll is bent in half and then cut along the fold.
It is important! It is necessary to ensure low humidity in the room where repairs are being carried out. You should also completely eliminate drafts in this room, as well as sub-zero temperatures. The optimal conditions for this are 15-25°C.
Surface marking, sheet cutting
Wallpapering end to end means you can start anywhere in the room. However, for your own convenience, it is recommended to make the starting point in a corner or on the edge of a window opening, and then move to the right. Nuances of work:
- It is necessary to mark the surface before gluing the first strip of wallpaper to the wall. To do this smoothly, you need to use a building level and a pencil to draw vertical lines that will serve as a guide for your work.
- When cutting the canvas, you need to leave 5-10 cm as a margin on both sides, not forgetting about adjusting the pattern. Trimming later is easy after the glue has completely dried.
- Wallpaper must be rolled out on a clean floor. If it has been recently updated, then it is better to protect the surface with plastic film or move to another room. You should measure the required length with a tape measure, make notches on the sides, bend the strip in half and cut along the fold with a knife.
It is not recommended to carry out repairs in a room with air humidity above 65%, draft or sub-zero temperature, as this affects the quality of finishing work.
Sticker process
The method of wallpapering depends on its type:
- Paper. It is necessary to apply glue to the material. Pasting is done on dry walls.
- Non-woven wallpaper. You need to work with them using reverse technology, that is, glue is applied to the wall and a dry strip of wallpaper is already attached to it.
- Meter vinyl wallpaper. It is necessary to coat both the canvas and the wall with glue. You should not attach baguettes to the pasted wallpaper base. They must be fixed before pasting begins.
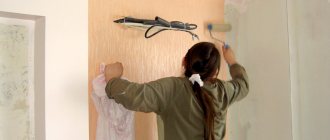
When working with meter-long wallpaper, you need to have a team of at least two people so that you can comfortably hold the piece of canvas on both sides.
Main stages of work:
- A layer of glue is applied to the reverse side of the finish. Wallpaper is applied to a dry wall or pre-lubricated with glue.
2. The adhesive must be applied to the wall with an additional grip of about 20 cm nearby. All corners and joints must be generously coated with glue using a brush in a thick layer.
3. Since the sheets need to be glued from the ceiling vertically, one person should hold the strip from above and place it exactly at the junction of the wall and ceiling. The second person must not only hold the bottom edge of the canvas, but also check that the canvas coincides with the drawn vertical line.
4. Then the strip is leveled. You can remove bubbles from under the wallpaper using a rubber roller or a plastic spatula in the direction from the center to the edges.
5. After placing the first sheet of wallpaper on the wall, you can proceed to gluing another. The glue is also applied with a margin of 20 cm to the wall. The procedure is important so that the next time the adhesive is applied, it does not fall on the already glued sheet of wallpaper.
6. It is necessary to perfectly match the pattern on the canvases, to ensure a good quality joint.
Advice! You need to plan repairs for the warm season, when the heating season has not yet begun. Hot air, like drafts, negatively affects the quality of gluing. In the battery area, the wallpaper may begin to wrinkle.
In the video: Pasting meter-long wallpaper on the wall.
Useful tips
Before working with meter-long wallpaper alone, it is recommended that you familiarize yourself with some expert advice:
- There should be no drafts in the room, a suitable temperature range is from +5 to +25 C. In addition, it is also quite difficult to work in damp rooms, so at the preparatory stage it is necessary to ventilate and carefully close the room.
- If gluing is planned in the cold season, then it is better to turn off the radiator. If it is not possible to do this, it is recommended to reschedule the work while the central heating is turned off.
- Most adhesives are universal, but when choosing, it is better to ask the seller what type of products this composition is suitable for. This will help fix the wallpaper on the surface better.
- If immediately after pasting, defects are noticed, in particular uneven joints, it is necessary to lift the canvas with a spatula and correct the problem. It is very important not to pull the stripes.
- After gluing, sometimes difficulties arise with cutting the material. To do this, use a stationery knife or scissors. You need to press the excess part with a spatula and run a knife along the markings. In the case of scissors, you need to bend the edge along the markings and cut it off.
- If there are uneven cuts at the top or bottom of the wall, you should not try to fix it. As practice shows, this will lead to bad consequences. It is better to purchase skirting boards that will hide imperfections.
If ceiling fillets are not provided, then the perimeter can be cultivated using a frieze.
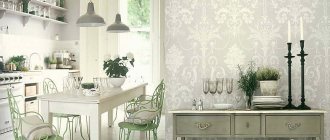
To obtain an original coating, it is recommended to combine meter-long materials. Using different patterns, you can create accents in the interior or visually expand the room. The main thing is not to be afraid to fantasize.
Still have questions? We recommend watching the following video (master class):
Working in difficult areas
Usually people have difficulty with those areas where it is not very convenient to stick wallpaper - these are corners, areas near radiators, above windows and doorways.
In these areas it is recommended to glue wallpaper cut into small pieces. You need to use slow-drying glue, which will allow you to correct shortcomings and remove errors.
Angles
Since gluing corners with wallpaper measuring a meter wide is not very convenient, most often all attempts come down to distortions, the formation of folds and other defects.
Therefore, to get a high-quality result, you should use the following tips:
- In the corner area, the sheet must be glued in such a way that most of the sheet is on one wall and extends 5 cm onto the adjacent one.
- For the allowance, you need to find the narrowest place, step back 1 cm from the edge of the wallpaper, and apply markings to draw a vertical line.
- The next canvas is glued overlapping this marking.
- Seams can be trimmed using a spatula, ruler, or stationery knife.
Batteries
The area around the battery needs to be wallpapered at the very last moment, while showing maximum accuracy, ingenuity and resourcefulness:
- It is necessary to cut a sheet of wallpaper to fit the niche for the radiators.
- In the place where the battery mount will be located, you need to make a vertical cut.
- The sheet is covered with glue and placed behind the pipes. You need to carefully straighten the folds that appear on the sheet and press it tightly against the wall.
- It will be inconvenient to use a roller in such a place, so a rag will come in handy.
- The excess part is overlapped onto the edge of the wallpaper and pressed tightly with a spatula. The excess is trimmed off.
If it is not possible to place the wallpaper near the battery in this way, then you can cut the canvas into smaller pieces and fill the hard-to-reach area with them.
Sockets and switches
Since all switches and sockets were removed before wallpapering, it is necessary to stick entire sheets onto the wall. The contours of existing holes will appear through them.
Using a stationery knife, you need to make a cross-shaped cut, and then tuck the remaining paper inside.
Advice! If the holes for the sockets are round, then you need to make a star-shaped cut.
Openings
When working with door and window openings, it is necessary to trim the wallpaper. They must first be cut to the size of the opening and do not forget to combine the pattern.
How to glue meter-long non-woven wallpaper - step-by-step diagram
Step 1: Surface Preparation
However, we note that non-woven fabric, thanks to its characteristics (thickness and softness), can still hide the smallest irregularities. Old wallpaper, even from perfect walls, needs to be removed; if it doesn’t give in, then wet it and the paper will give in. If after treatment the wall is rough, this is even good - the connection between the wall, glue and canvas will be better.
Step 2: Eliminate drafts
Remember that when covering walls with any wallpaper, the temperature regime is important, and the absence of drafts before complete drying is a guarantee that the joints will not separate, the canvases will not “bubble” and will not “sag”. This may take a day, or it may take three.
Step 3: Turn off the lights, remove everything unnecessary
Before starting work, do not forget to turn off the electricity in the room being repaired and remove the top covers of sockets and switches. When the wallpaper is dry, you will cut the canvas in the right places crosswise and return the covers to their original places. You should also temporarily remove all fasteners, screws, nails, and dowels from the walls.
Step 4: Prepare the glue
Let's start preparing the glue, which, as you remember, must correspond to the type of wallpaper you have chosen. Pour water into the vessel in which you are going to dilute it and, shaking in a circle, pour out the glue in a thin stream. After thoroughly mixing the mixture, let it brew - the required time and other features will be indicated on the packaging. Usually it's 15 minutes.
Step 5: Marking the Wall
As with any wallpaper, experts recommend starting to cover the walls from the window. Although in the case of meter rolls and non-woven ones, in particular, due to the fact that they are glued end-to-end, you can start from where it will be more convenient and economical for you in terms of material consumption. To glue the first fragment evenly, using a plumb line, a ruler and a pencil, draw a perfectly vertical line, from which you will begin gluing.
What to do if you have to glue alone
If you have to carry out the repairs yourself, then you need to choose non-woven wallpaper for the job. In this case, the glue needs to be applied only to the wall.
Non-woven material allows you to work comfortably even in corners and makes it easier to align strips. If mistakes were made when gluing the sheet, this particular wallpaper can be removed and reattached.
Hanging meter-long wallpaper: joints, adjusting the pattern, working with corners (2 videos)
Pasting meter-long wallpaper (30 photos)
Young man and woman doing apartment renovation together wallpapering ?????????????????????????????????????????? ????????????????