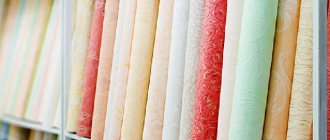
Primer for chipboard for wallpaper and painting - method of application and choice of composition
Chipboards (i.e. chipboards) are a reliable, durable material that is suitable for outdoor construction or even indoor decoration.
But chipboard, which is made using a pressing method from wood shavings with the addition of adhesive resins, is also vulnerable to the adverse effects of the external environment, and wood also served as raw material for it.
You can increase the lifespan of particle boards by using a chipboard primer.
The advisability of priming before finishing fiberboard and chipboard
The properties of particle boards allow them to be used in both interior and exterior decoration of buildings. But since the chipboard is not solid wood, but only compressed wood chips, it is more vulnerable to the adverse effects of the environment.
The same applies to fibreboard (fibreboard). This material is also made by pressing wood fibers.
Both chipboard and fiberboard equally need protection from moisture and temperature changes. For this purpose they are usually painted. It is important to choose the right primer for coating fiberboard and chipboard. The paint must meet the necessary requirements.
The primer serves to bond the porous surface of the slab with the coating. By filling the pores, it makes the slab monolithic. It allows you to save on glue or paint.
Important!
Chipboards cannot be considered an environmentally friendly material, since they contain adhesive resins. Therefore, a primer is necessary not only to protect the coating from adverse factors, but also to protect humans from the toxic effects of resins.
What is a primer
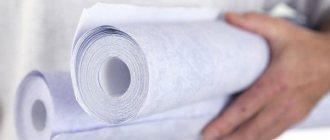
A primer is a suspension in liquid form. If you treat a surface with it, it is able to penetrate the material by 2 cm or more. Primer solutions are necessary to qualitatively change the properties of the treated surfaces before their final decoration, including before wallpapering.
The primer includes a variety of universal components with fillers and has a uniform consistency. Regardless of the material from which the main surface is made, in order to finalize the wallpaper, it must be primed in any case. As mentioned above, this will strengthen the outer layer, optimize glue consumption and improve the overall quality of the glued sheets.
Types of primers for particle boards
For coating chipboard, it is recommended to use the following types of primers:
- Water-based acrylic. The composition is quickly absorbed. To avoid destruction of the material, it is best to apply an acrylic primer to an already prepared surface.
- Alkyd enamels are an excellent option for coating chipboard. They can be applied without prior preparation. Only the soil consumption will be greater.
- Latex compositions are water-dispersed. These soils perfectly protect chipboards from moisture. The only drawback of such products is the labor-intensive removal process. Latex coatings are not cheap.
- Varnish. Compositions of various colors are available for sale. To protect wood material, colorless varnish is most often used.
- Stain is an ideal option for laminated chipboard. The composition is used for impregnation of particle boards. The product allows you to change the texture of the product and make it decorative.
Chipboard products are often coated with spray paints. But it is more advisable to use them for decoration, since with their help it is difficult to paint a product of a large area.
Primer for chipboard for painting
The ideal primer for painting chipboard is acrylic. Especially if you plan to use acrylic paint in the future.
Acrylic primer is easy to apply. But it is important to follow the instructions, observe the time required for the coating to dry and correctly calculate the surface area.
It is faster and more convenient to apply the primer with a roller. This will make the layer thinner and more uniform.
Universal primers
A universal primer is used to reduce and level out the moisture absorption of walls during finishing activities. Often, such compositions do not have other unique properties, although exceptions are possible. We give examples of such exceptions below.
This type of primer is called universal because it can be used to treat surfaces for subsequent most types of work. These include:
- installation of tiles with glue;
- applying gypsum or cement plasters;
- preparing surfaces for screeds and self-leveling floors;
- painting with any types of paints and varnishes;
- wallpapering.
A universal primer, having the property of leveling the moisture absorption of the surface, provides useful properties such as:
- increased working time with solutions when installing ceramic tiles, plasters and putties on highly absorbent substrates;
- reduction of paint consumption when painting surfaces;
- prevents wallpaper glue from drying quickly on the wall and increases the time for applying the canvas.
- Additionally, such soil can strengthen the surface layer, remove dust from the base, thereby improving adhesion with solutions.
Universal primers are great for working with highly absorbent materials. They are ideal for processing foam concrete, gas silicate and other cellular concrete. Plaster (especially gypsum) lays on the treated surface much easier. Complete hydration occurs in it, which ensures the absence of crack formation during subsequent operation.
An example of high-quality universal primers are:
Primer EK G200 is universal. Acrylic primer that perfectly levels out the moisture absorption of porous materials. Recommended for preparing walls for thin-layer plastering, wallpapering, as well as preparing screeds for filling with self-leveling mixtures.- Eunice primer is universal. Composition for preparing walls made of cellular concrete and gypsum-based materials for subsequent laying of gypsum- and cement-based tiles or plaster. The peculiarity of this product is that it contains polymers that increase adhesion. It can even be used for priming wooden surfaces for painting, in particular chipboards, MDV, fiberboard and others.
- Primer Knauf Mittelgrund F. Concentrated universal primer with a special property - frost resistance. This primer can be used indoors on freezing walls. Ideal for foam and gas block, sand-lime brick. It can also be used for processing gypsum-based sheets, bricks, and cement screeds before applying a self-leveling floor. This primer can be diluted in a ratio of up to 1 to 5, which ensures optimal product yield.
Choosing a primer for chipboards and features of its application
The choice of primer depends on many factors, one of which is the location of the surface to be treated:
- In a dry room, you can use any primer designed for wood.
- A damp environment, such as a bathroom, requires a moisture-resistant primer that contains ingredients that resist mildew and mildew. Deep penetration soil is suitable. It will help prevent the slabs from swelling from moisture.
- To cover slabs located outdoors, a wood primer for exterior use is suitable. It will protect the chipboard from UV radiation, moisture and temperature changes. It should contain an antiseptic that resists the formation of rot.
Primer for chipboard should not react chemically with:
- wallpaper glue;
- tile adhesive;
- decorative coating.
Choosing a primer for particle boards
If it is necessary to level the surface, choose a denser coating. It is important to consider what kind of coating will be applied on top of the ground - paint, wallpaper or tiles.
The main reasons for priming walls
Wallpaper can be glued to a wide variety of wall types (brick, wood, concrete). The most important thing is that you can prepare them accordingly. The surface must be strong and reliable, as well as smooth. Experienced craftsmen believe that, regardless of the chosen type of finishing, including wallpapering, the walls must be primed. Experts say that this finishing method should not be neglected, because it is really quite important.
There is no single point of view only in relation to the plasterboard surface. Many people think that this is a pointless waste of money, but experienced craftsmen recommend that in this case, too, apply a primer before filling.
The following functions that the primer performs can be distinguished:
- ensures good adhesion of the wall surface and wallpaper. This is both saving and optimizing glue consumption,
- the surface of plastered walls treated with a primer does not peel off and cracks do not form on it,
- the antiseptic properties of the mixture additionally protect against a variety of pests and also prevent the development of fungus and mold.
Now we list the reasons why using a primer is necessary:
- The surfaces of the walls on which you are going to glue wallpaper most often have a porous or even loose structure, which will ensure very strong absorption of the adhesive composition. As a result, you will have to apply more glue to achieve the desired result. Its ability to securely fix the canvas will also decrease. However, as soon as we cover the walls with soil, it will penetrate into all the pores and fix the surface layer of the material. In addition, a kind of protective film appears that will not allow the glue to penetrate inside; it lays down more evenly, its consumption is noticeably reduced, the benefits are obvious! In addition, the strength of the walls increases and the adhesion of the paintings to the surface increases,
- You've probably noticed that even on perfectly prepared walls there are various dust particles. When applying glue to such a surface, inhomogeneous elements and lumps are formed. All this worsens the quality of wallpaper gluing. As a result, they may begin to peel off. If the walls are primed, then this dust will be isolated under the primer layer and will not come into contact with the glue,
- modern primer solutions contain a variety of antiseptics. Their presence will not allow mold and mildew to form under the wallpaper,
- if you are going to glue light translucent wallpaper, it would be useful to treat the surface with a white primer, this will allow you to get rid of various shades on the wall, remove stains of rust, soot, grease and the like,
- a wall well treated with a primer solution allows the wallpaper to slide for some time when adjusting the canvases. This property makes it possible to optimally place the canvases, which, naturally, will be reflected in the final result - the joints will be smooth, and the canvases will be free of distortions and wrinkles,
- In addition to the above, the primer layer will further protect your wallpaper from temperature changes and humidity in the room.
If you do not prime the walls, this may result in peeling of the panels, as well as the appearance of air bubbles. This is especially possible at corner joints of walls, in particular at the bend of sheets. We believe that in this case there is no need to save time and money, besides, it will not take you very much time, and the primer is quite affordable for the average person.
By neglecting this important stage of wall treatment, you run the risk of having to re-do repairs, and this will require an investment of quite a lot of money and time. Without refusing our advice and priming the walls, you will receive a wonderfully completed repair.
Composition of the primer mixture
Depending on the active component, 2 types of primer for chipboard can be distinguished:
- Acrylic water-soluble primer with antiseptic. It is a non-toxic composition that is easy to apply and dries quickly.
- Alkyd primer that forms a protective film on the surface of the slab. The coating is used for outdoor work. This is a non-toxic composition that dries for a long time.
The following is also used for priming chipboard:
- a mixture of wax and turpentine, which is prepared independently;
- liquid wax in jars or cans;
- a mixture of PVA glue and wood powder.
Priming with wax is not carried out if you are going to glue tiles or wallpaper. It can be used before applying varnishes or paints.
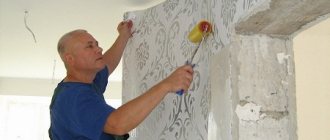
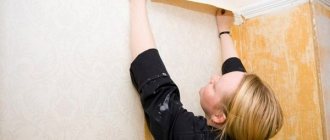
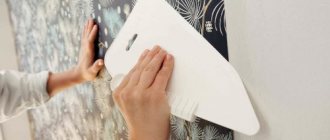
Wallpapering
For this stage of work, the main issues are the choice of wallpaper, glue and the process itself, which is traditional for any walls. Although you can hang any wallpaper on chipboard, most advice agrees on non-woven wallpaper. They are elastic and will “move” with the wall.
Glue is selected as desired:
- Special : dispersion for glass and natural wallpaper, powder with methylcellulose for vinyl; with modified starch for paper;
- Universal.
Depending on the wallpaper, it can be applied only to the wall (non-woven wallpaper) or both surfaces (paper), the instructions on the package contain the necessary information.
The gluing rules are universal:
- Work starts from the window;
- The first page serves as a guide. The vertical line is drawn using a plumb line;
The sequence of gluing the canvases
- The panels coated with glue are soaked for 10–15 minutes, folded with the adhesive side inward;
- Thick panels are joined, thin panels are glued overlapping;
- Smooth out the stripes with a rubber/foam roller;
- Wallpaper above window/door openings should be glued last;
- Cut the strips with 10 cm allowances at the top and bottom, cutting off the excess after gluing.
Stages of wallpapering
Application technique
Before applying the primer, the preparatory stage is carried out:
- Dirt and dust are washed off from the slabs.
- Irregularities are sanded with abrasive paper. First use coarse-grained, then fine-grained. Laminated chipboard is not polished.
- If necessary, wash and dry the surface.
- The slabs are degreased using white spirit or another alcohol-based composition. This is especially true for chipboard. The goal is to increase adhesion and improve the quality of priming.
When preparation is completed, priming begins immediately so that dust does not have time to settle on the surface.
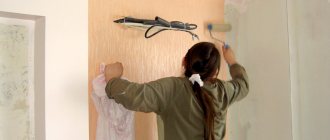
Prepare a primer mixture by diluting the concentrate with a solvent. Pour the composition into a convenient container and begin application. If the area is large, then you need to use a roller. Small parts and hard-to-reach places are painted with a brush.
The first coat of primer is allowed to dry and the second is applied. Usually, when initially applied, the strokes are vertical, and when subsequently applied, they are horizontal. If necessary, apply 3 and 4 layers.
Subsequent finishing - gluing wallpaper, tiles or applying paint - is carried out only after the primer has completely dried.
Selection details
Compatible with different surfaces
The primer composition consists of oil, resin, adhesive, drying accelerator, pigment and other substances, and has an acrylic, alkyd and mineral base. You can decorate the walls in a room using various materials.
Primer for wallpaper
Wallpaper that can be painted or whitewashed is the most popular. On the wallpaper, after the final primer, the paint will be applied in an even layer, and there will be no streaks left on the surface. For a more economical process, you can buy primer-paint. The question often arises about what kind of soil should be used for non-woven wallpaper. Experienced experts recommend that when choosing a primer, you look at the condition of the surface, because the main task will be to make the walls stronger. Under non-woven fabric, you can choose a primer with deep penetration, Cerisit ST 17.
Primer for chipboard, plywood and wood
When choosing a primer composition for plywood, you should make sure that the paint and primer are made from the same base and are intended for such a coating. If plywood is used in a room where there is a high level of humidity, the surface should be treated with a primer with antifungal compounds. When processing plywood, chipboard and other wood coverings, the ends and joints should be treated with a water-repellent primer mixture. For such purposes, you can use an epoxy or polyurethane mixture.
Please note that when working with MDF, you should be aware that this material has a porous surface, and therefore it is worth buying a primer designed specifically for such substrates.
For wooden panels I use primers such as drying oil, acrylic primer, alkyd primer paint and varnish, styrene primer, nitrocellulose varnish for priming, phthalic oil primer paint.
When priming glass surfaces and plastics, use:
Alkyd-based primer paints - this type of primer is also suitable for working with ceramic tiles, plastics and metal products.- An epoxy two-component primer varnish, and with its help you can obtain excellent adhesion to slippery metal or glass surfaces, on ceramic products.
- For polystyrene foam, a primer and oil-based materials are used; alcohol-based varnishes can be used. The surface should be painted with oil paints, and acetone, as well as aromatic solvents and butyl acetate, should not be used.
And one more use of the composition.
Metal primer
Using a primer, metal surfaces will be protected from adverse influences, and the metal will not be subject to corrosion. For priming, primer paint and anti-corrosion paints and varnishes are used. If there is rust on the product, it should be cleaned in advance, dust removed and degreasing carried out. To do this, you can use a detergent, and trichlorideethylene is also used. If there is old paint on the metal surface, it should be rubbed off with sandpaper. Remove old layers with a wire brush, electric heat gun or use special chemicals. Primer paints should be stirred before application and should be thinned if necessary. It is important to apply it with a brush or spray. The exact number of layers to apply is indicated on the packaging. After the first layer, each new one should be applied no earlier than 3.5 hours later.
Paints are applied to the treated surface the next day. If nitrocellulose paints are applied to metal surfaces, wait at least 3 days.
The following products are suitable for metal surfaces:
- Alkyd primer enamel.
- Polyvinyl acrylic primer paint.
- Nitrocellulose primer paint.
- Polyvinyl and vinyl paint.
- Anti-corrosion based on phthalic resins.
- Rust stabilizer.
- Chlorinated rubber.
If cast iron bathtubs or radiators need to be painted, a cast iron primer should be applied. Such products are painted with alkyd enamels. When preparing for painting, cast iron products are cleaned of dirt, and the surface must be perfectly dry. You should also degrease cast iron with white spirit in advance and coat it with GR 021 primer; you can use Hammerite. It is convenient to paint openwork cast iron gratings with aerosol paints; the surface should be prepared using the method described above.
Application method
Priming of chipboard is carried out in a similar way as for simple wooden bases:
- Before applying the primer mixture, the base area is cleaned of dirt, dust, and decorative finishing residues. This can be done with a damp cloth and a vacuum cleaner.
- Irregularities and “hairs” that have risen are leveled using abrasive paper (sandpaper), gradually moving from coarse to finer grains. For a laminated smooth base, leveling is not carried out.
- After leveling, clean the surface from dust again, and if you have the opportunity, wash and dry it.
- Degrease. This procedure is required for laminated wood boards, and it also increases adhesion and improves the quality of the final decorative finish. Inexpensive white spirit or other solutions that contain alcohol can be used as a degreaser.
When the preparatory work is completed, priming should begin immediately. If this is not done, then dust may begin to accumulate on the prepared base, which will prevent the primer mixture from being evenly absorbed over the entire treatment area. This reduces its protective properties and negatively affects the final finish. The process of priming chipboards is practically no different from wood processing.
It is carried out this way:
- Prepare a solution - dilute the concentrates with a solvent as prescribed in the instructions. Mix the prepared mixtures thoroughly.
- Pour the composition into a convenient container.
- Apply the mixture evenly, use a roller on large areas, and it is better to paint hard-to-reach areas or small parts with a brush.
- After the first layer has dried, re-prime. If the first layer was made with vertical movements of a brush or roller, then when re-processing the mixture should be applied with horizontal movements.
- If necessary, apply a third and other layers, but usually priming a couple of layers is enough to prepare the material for decorative finishing.
- When the last layer has dried, you can begin the final finishing - gluing wallpaper, laying tiles, painting or decorative painting on the surface.
Unlike wood, chipboard is not an environmentally friendly material due to the adhesive resins that it contains. A primer selected taking into account all the parameters of further operation not only protects the base from damage, increasing the quality and durability of the finish, but also greatly reduces the negative impact of resins on the human body. Wood boards coated in several layers not only absorb less moisture, but also stop emitting harmful substances.
What primer is needed for fiberboard - preparing the surface for finishing
To coat fiberboards, you cannot use the same primer as for chipboard. Since fiberboard contains paraffin, which repels water, water-soluble compounds are not suitable. They will not provide the necessary grip. If you plan to apply acrylic paint, then it is worth applying a deep penetration primer.
The following compositions are used to cover fiberboard:
- drying oil protects against moisture, requires additional varnish coating;
- water-based paint;
- alkyd primer;
- stain is similar in properties to drying oil;
To create a decorative coating, colorless varnish is also used, which dries quickly. Oil paint is rarely used due to its toxicity, long drying period and unpleasant odor.
What primer is needed for fiberboard?
Primer for fiberboard for painting
For priming fiberboard for painting, it is best to use a deep penetration composition that will reduce the porosity of the material. Acrylic primer with latex filler and an antiseptic additive works similarly. It will not only fill the pores in the fiberboard, but will also protect against mold.
Important!
For the best quality coating, select a primer with a similar composition to the paint that is planned to be applied to it. For example, it could be acrylic primer and acrylic paint.
Drying oil can be used for painting with alkyd enamel. It is applied in two layers, allowing each to dry.
Fiberboard primer for wallpaper
Do not use deep penetration soil under the wallpaper, as it contains a lot of water. Alkyd primer is more suitable, as well as regular paint such as PF-115. They will provide better adhesion to wallpaper glue.
You can prime the fiberboard panel with PVA glue. Then glue the fiberglass mesh or fiberglass. Next, gypsum putty is applied. Grinding is carried out to remove unevenness and a penetrating primer is applied. Now you can glue the wallpaper using regular wallpaper glue.
Another option is to impregnate the fiberboard on both sides with drying oil heated in a water bath. It is applied hot. But since you can’t stick wallpaper on drying oil, contact concrete is used. This is an adhesive primer containing quartz sand.
Painting technology
The painting of chipboard furniture itself will include 2 stages: preparatory and main. Additionally, the furniture can be decorated, but this third stage is not mandatory.
Preparation
The adhesion of paint is primarily affected by how well the old coating is removed from the surface of the furniture. If, for example, there is dust, dirt, grease stains, or moisture on the bedside table, this is a big gap in the work. Everything must be done thoroughly; this is the only way in this case that furniture can be repainted correctly and efficiently in modest home conditions. Preparation involves a number of steps.
Sanding
This is the most affordable option for this treatment. If you have a sander, it will speed up the process. But people without experience can accidentally touch the veneer layer. Varnish is usually removed with a metal scraper, brush or coarse sandpaper. To achieve a smooth surface, movements must be carried out along the grain. If you have to work with sandpaper, it makes sense to use sanding pads equipped with clamps. They are replaced with a not very large block of wood or foam, and the sandpaper itself is already attached to the bars.
Sand the surface to an optimal dust-free appearance.
Removing varnish/paint by heat treatment
Varnish or paint can be easily removed with a hair dryer. Materials with the action of this device are softened and then removed with a regular spatula. Cleaning occurs using an abrasive material. Only this work with chipboard requires caution - otherwise the wood may darken. If the varnish, for example, becomes charred and does not come off in layers, you cannot do without special chemicals. They are sold in powder or gel form, as well as in the most common liquid version.
Wood putty
Cracks, chips and noticeable pores on the furniture surface must be filled with putty. All putty areas must be level with the main surface. It’s easy to prepare a leveling mixture with your own hands from PVA glue and the waste left over from sanding.
You also need to remember to degrease the surface: this is done with a cloth soaked in white spirit or acetone, for example.
Primer
It also helps the paint adhere to the surface of the countertop or kitchen facades (if we are talking about them). The primer composition will glue the fibers together and significantly reduce the absorbency of the material. It is advisable that the primer and paint be of the same type of adhesive. True, there are also universal remedies. And in order not to make a mistake and treat the furniture correctly, you need to read the label: it will be clear whether the acrylic primer is suitable for oil paint.
If the material is already old and loose, it is primed with a deep penetration compound.
Coloring
If all the previous steps have been completed flawlessly, repainting old (and sometimes not so old) furniture in a different color will be the dessert of the entire renovation project. Because this is truly the most interesting thing in this process. The result, do not forget, will depend on the quality of the paint.
The coloring algorithm consists of several steps.
- Preparation of the composition for work. The paint must be stirred thoroughly to achieve uniformity. If necessary, tinting is done again. And again the paint is stirred, after which it is poured into a tray or tray.
- If you are going to paint a façade or a tabletop, for example a desk, a roller is placed into the tray. The roller is impregnated with the composition on all sides. Then it is rolled along the wall of the tray or pallet. The excess must be squeezed out.
- It's time for the first layer. It is advisable to start painting from the middle, carefully, without haste, rubbing the coloring paste over the base. The output should form a more or less uniform coating with a very small thickness. There should be no sagging or leaks. Hard-to-reach and end areas are painted with a brush. Now there is nowhere to rush, you must wait until the composition dries.
- The second layer is applied similarly to the first. Usually two layers are enough, but individual variations are possible.
A typical beginner mistake is not waiting for the layers to dry. Oddly enough, many people don’t even realize that all this hand-painted beauty is not limited to one layer. People see an imperfect surface after the first painting and despair. But the point is really in the number of layers - therefore patience and endurance must be companions of the repainting process.
To obtain a protective layer of the painted coating, the furniture can be varnished. It can be either colorless or tinted. It is applied to a perfectly dry surface.
Working indoors with varnishes/paints, of course, is not always pleasant, but even in an ordinary house or apartment, everything can be done with minimal discomfort. The main thing is to strengthen the ventilation regime and protect children, animals, and allergy sufferers from such disadvantages of repairs.
Where to work, everyone decides individually: in the kitchen or on the balcony - you can paint furniture anywhere if you wish. If the painting concerns something small, a shelf or a stool, this is not at all important.
The main thing is to protect the floor and walls from possible splashes and traces of work.
Main characteristics and features of soil for fiberboard
The soil is selected taking into account operating conditions. For priming fiberboard, use any wear-resistant flooring compositions that contain natural or synthetic drying oil, for example pentaphthalic. The composition may include modified alkyd resins.
A coating based on water dispersions is suitable for living rooms.
Epoxy and alkyd-urethane compositions are reliable and highly durable.
Selecting a primer for fiberboards
The main condition for choosing a primer for fiberboard is the absence of a water base. Due to its increased porosity, fiberboard absorbs moisture well and swells. In this case, the service life of the product is significantly reduced. To avoid this, you need to ensure that the stove is dry and protected from moisture.
For this purpose, various impregnations are used. They fill the pores and prevent moisture from penetrating into the fiberboard structure.
Features of applying liquid wallpaper
Working with this material differs from the previous process in the technology of the last stage. This variety must be laid with a spatula and a trowel according to a pattern identical to puttying. To do this, the pre-prepared mixture is distributed into sections in an even layer.
The technique of gluing liquid wallpaper is similar to applying putty
There is an opinion that when using liquid wallpaper, putty is not needed, but the technology should not be violated.
Why should you use a primer on fiberboard?
A primer for fiberboard is required. The main reasons for its use are as follows:
- it reduces moisture absorption, increasing the resistance of fiberboard to its effects;
- reduces glue or paint consumption;
- improves the adhesion of glue or paint to the surface of the fiberboard.
The use of primer increases the durability of the coating and improves the quality of the finish.
Why should you use a primer on fiberboard?
Preparatory work
In order for the result of painting chipboard to be of high quality, you need to complete all stages and not neglect them. Painting chipboard begins with surface preparation.
We recommend: MA-15 paint – description, technical characteristics and varieties
An action plan is built with answers to the questions:
- a complete painting of a piece of furniture or part of it will be carried out;
- The coloring will be single or combined.
Preparatory work boils down to cleaning the coating on the chipboard, which is applied during furniture production. The methodology for working with each type of coating is different.
All activities are carried out in a room with good ventilation.
Preparation of varnished or painted sheets
The surface of the stove, covered with varnish or old paint, is heated with a hairdryer. The flow of hot air softens the paint and can be easily removed with a spatula. The thicker the layer of old paint, the easier it is to remove it. The hot air causes it to swell with bubbles.
A flat horizontal surface is heated with an iron. The plate is covered with foil and ironed with a hot iron. After this, the old CM is removed with a spatula.
Relief surfaces (on the chest of drawers) are cleaned with a blowtorch or torch. Any device that will be a heating source is used. You need to be extremely careful when working and follow safety precautions.
Dye is effectively removed with solvents. The paint layer is coated with an organic solvent using a brush. It is left in this state for some time (exposure time is indicated by the manufacturer). The dye layer becomes soft and is removed with a knife or spatula. You need to work in a respirator due to the high volatility of the solvent and away from the fire source.
Cleaning boards coated with polymers, veneered, with a laminated layer
Cleaning a laminated, veneered or laminated layer will require more time and effort. If you use surface heating technology as when removing a layer of old paint, you can damage the wood-based base.
Emery cloths are used for cleaning. Before painting chipboard, you need to formulate the roughness of the coating. This will ensure that the new dye adheres firmly to the surface of the slab.
Stripping the laminated outer layer
Owners of furniture made from laminated boards are interested in the following questions: is it possible to paint LDPS, what color is recommended, how to prepare the coating.
The first cleaning is carried out with coarse sandpaper. The brush sweeps away the dust. If a cloth is used to remove dust, then all the debris will clog the pores and the dye will not adhere to the surface.
Subsequent sanding is done with fine-grain sandpaper. Areas that were previously difficult to treat are treated especially carefully. The brush sweeps away the dust.
Important : coloring is carried out in a clean room (you need to vacuum it first). Otherwise, debris will stick to the new coat of paint.
The laminated layer does not need to be completely removed when sanding. The main task is to make the coating rough. LDPS is not primed with a composition that penetrates into the internal structure of the slab.
Sealing cracks
When cleaning is completed, the surface of the slab is checked by hand for the absence of cracks. If they are not removed before painting the chipboard floor or furniture, then moisture penetrating into the structure will deform the material.
A syringe with a needle pre-filled with PVA is used. The adhesive is squeezed into the cracks with a syringe. The clamp is attached to the plane for 24-48 hours. As time passes, restoration work continues.
Cracks are also sealed with putty. The material is applied in 2 passes. The second layer is applied after the second has dried.
Padding
The primer is applied to improve the adhesion of the paint to the surface. The composition dries in about 24 hours if work is carried out in a warm room. If the temperature is closer to +5°C, then the time increases and it will take at least 48 hours. Do-it-yourself painting of chipboard without priming is not recommended.
Priming is carried out:
- to save CM consumption: brand Lakra GF-021;
- for leveling and strengthening the surface: Helios Tessarol, Dyostar;
- as an antiseptic: Belinka Base.
Technique for applying primer for fiberboard
Fibreboard priming is carried out in stages:
- Surface grinding.
- Puttying joints when connecting several sheets of fiberboard. Putty with increased plasticity, for example, acrylic, is suitable. Acrylic or silicone sealants are also used.
- Degreasing the slab with solvent or alcohol.
- Apply heated drying oil.
- Apply primer.
Important!
Alkyd enamel is toxic. Therefore, it should be used in a well-ventilated area. The work is performed in a respirator.
How to prime a linoleum floor?
The base is primed shortly before laying the linoleum covering. First, all construction debris and dust contamination should be carefully removed from the rough foundation.
When a linoleum floor primer is purchased in powder form, it must first be dissolved and brought to the required consistency. The required volume of drying oil, water, and solvent is usually indicated on the packaging box. Manufacturers' instructions must not be ignored; this may adversely affect the quality of the work performed. If the primer composition is purchased in liquid form, it must be mixed until a homogeneous mass is obtained.
After proper preparation, the primer should be applied evenly to the clean surface. In this case, as a rule, a roller is used.
Primer work should begin from the side opposite to the door Source remontik.org
How long does it take for soil to dry?
The duration of drying of the soil depends on its type, ambient temperature and the properties of the surface where it was applied. For example, a primer for putty dries in about 1.5 hours at a temperature of 24 degrees.
Latex primer can dry for about 40 minutes at a temperature of 18-20°C. Deep penetration primer dries much longer - from 1 to 6 hours, depending on the number of layers. Acrylic primer can dry up to 6-12 hours, and alkyd – 10-16 hours.
The primer applied to cement-sand plaster dries for 2-3 hours at a temperature of 25-30°C. And when applying the composition to cement-lime putty, the drying time will be 4-6 hours.
The adhesive primer can dry for 1-3 hours at a temperature of 15 to 30°C. The water-repellent composition dries in 1-2 hours. Anti-corrosion primer dries from 6 to 12 hours at a temperature of 2-15 oC.
Why prime chipboard?
Depending on the room (for example, the kitchen differs significantly from the living room in the number of negative factors affecting the chipboard), the appropriate type of soil is selected:
- Moisture resistant with antifungal additives.
- For the tree.
- Universal.
The choice of primers is huge
The key component in the primer determines its drying time. While alkyds require approximately 18 hours, water-soluble acrylics dry in a maximum of 3 hours. Priming is carried out on the cleaned surface.
Choose the right primer
How to prepare chipboard for primer application:
- Remove dust with a damp cloth/vacuum cleaner;
- If small fibers have risen, rub them with coarse to fine-grained sandpaper. You can use a grinder if you have experience working with it;
- Remove the dust again with a damp cloth/vacuum cleaner.
The base is primed with a roller, and hard-to-reach places with a brush in two steps: before puttying and after. Each layer is applied perpendicular to the previous one. So, if at first the roller movement was horizontal, then the next layer is applied vertically. Usually the primer used for wallpaper is 2-3 layers.
Sequence and direction of applying primer
By choosing a white primer-paint, you will kill two birds with one stone: you will be safe if you think that thin paper wallpaper will look darker against a “wooden” background. White primer will also hide tightly dried old wallpaper, which cannot be removed.
Thick primer makes the walls lighter
Soil consumption
The consumption of deep penetration soil is approximately 80-160 g per 1m2. The same amount of alkyd primer will be needed. The consumption of moisture-resistant soil is from 70 to 100 ml.
Oil primer is consumed at 50-100 ml per 1 m2. The same applies to the adhesive composition.
Primer consumption can be reduced by pre-treating the surface with coarse sandpaper. Dust will fill the pores, preventing the coloring composition from penetrating deeply into the fiberboard structure. In order to save soil, drying oil is also used.
As you can see, using a primer before wallpapering or painting walls made of chipboard and fiberboard is simply necessary. Its use not only increases the service life of the product, but also reduces the consumption of decorative coatings, and also serves as additional protection for wood-based panels from moisture and other adverse factors.
Specifics of chipboard cladding
Wallpapering chipboard walls is in many ways similar to working with concrete or plasterboard walls. Although the base has specific preparation for work, it can be done with your own hands.
Features of conventional chipboard:
- Rough surface.
Wallpapering can also be done on chipboard. They are treated with sandpaper and degreased with an alcohol-containing solution. Use a deep penetration primer.
Laminated chipboard is usually used as a topcoat
- Expansion gaps.
- Open nail/screw heads.
Standard sheet sizes
Such cladding does not turn out to be continuous, because openings and niches break the geometric monotony of the walls. You have to use fragments of different sizes. Even making a sheet to order that would cover the entire wall at once will not work; the larger the area of the sheet, the lower its fracture strength.
Fragments of chipboard in cladding
To avoid inconsistencies with joints
While the front part is relatively resistant to moisture, the same cannot be said about the edges. Just as a fish rots from the head, so a particle board begins to “deteriorate” from the ends. Caulking seams is similar in nature to edging. Only after completing this stage can you decide how to apply wallpaper and what kind.
The edge is the Achilles heel of chipboard
What can happen if you leave the joints open:
- Bloating.
- Cracked wallpaper.
You can go over the seams with a brush, covering the edges with drying oil.
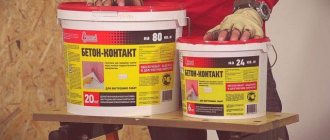
- Epoxy based (universal “Aqua-Color”);
- On acrylic, latex, silicone base - Belinka, Tikurilla, Ticiana;
- Oil-adhesive – “Lakra”;
- Finishing dry on a gypsum basis , for example, Satengips from Knauf, “Volma Shov”, “Volma Finish”;
- Polyester from Borma Wachs.
German quality, proven over the years and through walls
Depending on the manufacturer and volume, the price of the product ranges from 200 rubles. and higher. Prices are valid for spring 2021.
What to do with driven nails
The question is, what can hinder the heads of nails/screws when they are hidden under the wallpaper? Answer: rust even from the small amount of moisture contained in the primer or putty. It’s not a fact that this will happen tomorrow, but the possibility of such “freckles” cannot be ruled out.
In the photo there is a rusty stain from a screw head.
Required materials and tools
Before you start painting, you need to stock up on the necessary materials: construction tape; napkins or rags or sponges; sandpaper of various grains to remove the previous layer of paint; degreasing agent; primer; putty (car putty is quite suitable); solvent or white spirit - will remove remnants of the previous paint; glue; dye; varnish; gloves, for painting it is better to take rubber ones.
Materials and tools for work.
Tools you will need: stationery and carpenter's knives; a construction hair dryer to dry the painted surface; flat brush – it’s better not to skimp on brushes, buy high-quality ones so that no lint remains on the surface; roller; putty knife; screwdrivers; hammer; nails; drill.
You need to remove the fittings from the furniture, take out the shelves, remove the doors. Then get to work.
Surface treatment of plates
The front and back surfaces of the slab, as the largest contact areas, without any protection, can pass through and absorb, accordingly, the largest amount of liquid. It would be a good idea to cover these surfaces with something moisture-proof. Some of the methods of such coating are possible only in factory conditions, some are also possible at home.
There is another method that is performed in the factory - laminating. Pressure and heat are also used here, but more gentle. The already hardened film is pressed against the glue-coated slab. If lamination is a chemical process, then laminating is a mechanical process.
Features of laminated chipboard
The question often arises of how to repaint furniture with a laminated surface. The process of painting laminated chipboard is almost no different from those carried out when working with painted material. It consists of three stages:
- treatment;
- primer;
- painting.
The only difference is the process of initial sanding of the chipboard. The lamination is not completely removed. The main thing is to bring it to a rough state. The primer should be used as a surface primer; a composition with penetrating properties is not suitable for laminated chipboard.
So, by choosing the right paint tone and studying the repainting technology, you can restore the color of furniture, update a table, or paint a chipboard floor. A thing repainted in this way can last for a long time.
Specifications
During times of shortage, ordinary glue was used as a primer. Now that the range of compositions offered is wide and varied, it is not so easy for the consumer to answer the question - which primer to prefer? Let's try to understand the intricacies of choice.
In order to correctly decide and choose a suitable primer, first of all you need to know what type of surface the composition will be applied to, as well as study the characteristics of the room (humidity, temperature conditions) and the type of finishing material.
The choice of primer is based on several aspects:
By type of wall covering
Construction stores offer a wide selection of dry and liquid primers for hardboard, OSB boards, brick, metal and wood.
It is very important to take into account the condition of these surfaces. When they crumble, it is worth purchasing a suspension with deep penetration; if the walls are affected by fungus or dangerous mold, it is better to treat them with a quick-drying mixture with fungicides
Different surfaces require different primers. For example, drywall will not “accept” every primer: it absorbs moisture, and if the composition for processing is chosen incorrectly, then the wallpaper layer will be removed in the future only along with the cardboard. That is why special requirements are imposed on primers for this type of material: no solvent is allowed in its composition and it must have moisture-resistant properties. The best choice would be an acrylic primer; it will protect the material and ensure maximum adhesion of surfaces.
Not every soil is suitable for plywood due to its porous structure and high water absorption rate. The best choice would be an alkyd suspension based on drying oil or water-acrylic compositions.
For fresh, untreated wood, as well as fiberboard and chipboard, it is better to purchase improved alkyd primers; they strengthen the pores and prevent the panels from swelling. However, they contain an organic solvent, so the soil cannot be used in residential areas. In houses and apartments, you should give preference to acrylic primers - they have the same properties, but are completely safe for human life and health.
Concrete surfaces, as well as brick, are treated with mineral compounds based on cement or gypsum.
If the walls are covered with old putty, then in addition to the primer, it is advisable to cover the walls with diluted glue. Otherwise, the wallpaper will stick at first, but after a while it will fall off along with the top layer of putty.
By wallpaper type
When choosing a primer, you should take into account what material it is applied under - wallpaper or painting. In theory, you can use universal mixtures, but it would be more correct to focus on specific types of wallpaper (vinyl, non-woven or paper), as well as the type of paint and prime the walls specifically for them
Many people apply diluted wallpaper glue, but it can leave stains and cause the wallpaper to yellow, so this option cannot be considered the most successful.
An acrylic primer will be effective for all types of wallpaper. However, non-woven materials will “require” an alkyd suspension. Thanks to the high number of pigmented particles, as well as the ability to form a thin semi-matte film, it perfectly masks dark spots on the walls and forms an ideal basis for shimmering wallpaper, highlighting the color.
For water-based paint, which is mainly used in interior finishing work, it is advisable to use polymer compounds.
Types of linoleum
Based on their constituent components, the following types of material are distinguished:
- Natural. Eco-friendly, abrasion resistant. High-quality fabric of this type is made from resin, linseed oil, cork flour, limestone, dyes, and jute fabric. In addition, it is fire-resistant and inhibits the spread of fire in the event of a fire. The main disadvantage is the high cost.
- Polyvinyl chloride. It is quality controlled, so it can be laid in sleeping areas. This coating can be multi- or single-layer, with or without a base. Pros: durability, low price, variety of colors.
- Alkyd. It has excellent sound and heat insulation properties and is most often made on a fabric basis. Main disadvantages: easily deformed, loses quality when exposed to low temperatures.
- Relin. Strong, elastic, tolerates high humidity. This coating is made from bitumen, synthetic rubber. It cannot be used indoors.
Nitrocellulose linoleum is made without a base. It tolerates moisture well, is quite attractive, but at the same time it is prone to shrinkage and does not withstand temperature changes well.