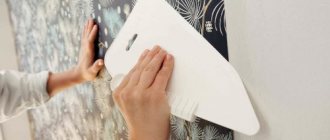
Wallpapering walls is the most popular type of finishing.
The quality of the pasting largely depends on the condition of the base.
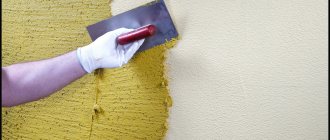
A prerequisite for preparing the base for wallpapering is puttying.
Putty walls are a perfectly flat and smooth surface.
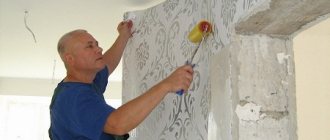
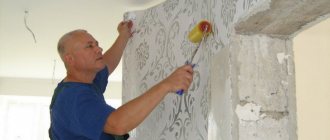
Figure 1. Puttying walls for wallpapering.
Why putty the walls?
Puttying surfaces allows you to eliminate minor defects and flaws: cracks, chips, scratches and unevenness.
The adhesion of the wall surface to the wallpaper improves, and the strength of the base increases.
Due to reduced water permeability, glue consumption is reduced.
A homogeneous white putty surface will ensure uniform color even with translucent wallpaper.
Depending on the type of wallpaper, different requirements are imposed on the preparation of walls:
- liquid wallpaper does not require careful leveling, since its textured surface hides small cracks and irregularities;
- thick vinyl wallpaper will hide minor flaws;
- thin wallpaper requires a perfectly flat base, since the slightest defects and irregularities will be reflected on the pasted surface.
If the walls are finished with plasterboard, puttying them is also necessary. Putty will increase the strength of the surface of the sheets, improve adhesion and prevent the cardboard layer from damage when removing the wallpaper.
Conclusion
Now you know whether you need to plaster the walls before wallpapering, as well as what and how to do this work. Additionally, watch the video in this article. If you have any questions regarding plastering walls, you can contact me in the comments.
Did you like the article? Subscribe to our Yandex.Zen channel
June 6, 2021
Wallpaper, Plaster and putty walls
If you want to express gratitude, add a clarification or objection, or ask the author something, add a comment or say thank you!
Tools and materials
Puttying walls requires the presence of tools and devices, without which high-quality work is impossible:
- A drill or hammer drill with a special mixer attachment for preparing putty. The device will help achieve a homogeneous, uniform composition.
Figure 2. Drill with attachment.
Important!
It is almost impossible to make a putty solution from dry mixtures without using a mixer, so if you don’t have one, buy putty in the form of a ready-made paste.
- A container in which we will stir the mixture. It is good to use round-shaped construction basins made of impact-resistant plastic for this. They are easy to clean, convenient to mix the solution and collect the mixture.
Figure 3. Construction basin.
- Rule for leveling thick layers of putty in case of significant deviations.
Figure 4. Rule.
- Spatulas with a width of 300 and 100 millimeters for distributing and leveling putty. Choose a tool with a perfectly straight blade and a comfortable handle.
Figure 5. Wide spatula.
Important!
A wide spatula is the main tool when applying putty. Choose it in a higher price segment, because the ease of application and the quality of the putty surface depend on the evenness and reliability of the blade.
- Special profile spatulas for finishing internal and external corners.
Figure 6. Angled spatulas.
- A manual grater-skinner on which sandpaper or a special mesh is attached for grinding the surface.
Figure 7. Devices for grinding putty surfaces.
- A fur or foam roller for applying primer and a painting tray for distributing the composition and removing excess.
Figure 8. Paint roller and tray.
- Construction level for constant monitoring of the straightness of the wall.
Figure 9. Construction level.
- Protective equipment: gloves, goggles, respirators to protect against dust and small particles formed when sanding putty layers.
Figure 10. Gloves, glasses, respirator.
In addition, you will need materials:
- Primer for treating walls before filling and before wallpapering. It is better to choose formulations with antiseptic additives to protect against mold and other microorganisms;
- Putty mixtures for starting and finishing layers.
- Special polymer-based putties for leveling significant unevenness.
- Serpyanka tape for reinforced joints between sheets of drywall.
TOP 3 best products according to customers
Putty Basic cement Prospector 20 kg
240.00 rub.
Product code 12155
Purpose: Used for leveling walls made of concrete, brick, plaster indoors.....
Gypsum putty Knauf Uniflott/Knauf Uniflot 5 kg
550.00 rub.
Product code 294
The dry mixture is a fine powder of gypsum and modifying polymers. AREA P…..
Universal gypsum putty Knauf Fugen/Knauf Fugen white 25 kg
405.00 rub.
Product code 268
Dry putty Knauf Fugen with a fine-grained structure made of natural gypsum and polymer modifications.....
Plasterboard putty under wallpaper
It happens that the walls and partitions are made of gypsum plasterboard, plywood, and other sheet materials. After pasting with expensive wallpaper, it will be very annoying if the joints of the drywall sheets and screws become “treacherously” visible.
Plasterboard putty comes down mainly to masking rough seams. The gypsum board itself is a smooth and even material. Gross defects in a structure made of a fairly fragile material can be hidden under putty with reinforcement made of sickle mesh. Protruding joints will have to be cut off, and the screws will need to be deepened. After eliminating the defects, you can putty with a finishing composition based on gypsum or acrylic.
Plasterboard putty comes down mainly to masking rough seams.
Types and purpose of putties
The construction market offers a large assortment of ready-made paste putties and dry mixtures that need to be prepared immediately before starting work.
You need to choose a mixture taking into account the characteristics of the walls and the type of wallpaper.
Ready-made putties are very easy to use; no mixer is required for stirring; the finished mixture is stored for a long time in a closed container. Its significant drawback is its too high cost.
Dry mixtures are much cheaper and are not inferior in quality to ready-made mixtures. This putty should be used immediately after preparation.
There are starting, finishing and universal putties.
The starting putty is made from components with coarser grains and creates a strong base with good adhesion for applying the finishing layer.
The finishing putty consists of finely ground gypsum powder, capable of creating an impeccably smooth, glossy base for any type of wallpaper or color.
Universal mixtures are suitable for applying any layers in several stages.
Cement
They are resistant to moisture and temperature changes. Used for leveling walls made of concrete and brick. Suitable for finishing kitchens and bathrooms.
Figure 11. Cement putty.
Plaster
Plastic, easy-to-use putties. Perfectly eliminates unevenness and defects in the base. They are environmentally friendly and safe. They create breathable surfaces that can regulate humidity and create natural air exchange in rooms.
They do not lose their properties within two hours after production.
Can be applied in a layer of up to 30 millimeters. Suitable for starting and finishing coats.
Figure 12. Gypsum putty.
Polymer
Modern polymer-based putties, characterized by plasticity, impeccable smoothness of treated surfaces and cost-effectiveness. Can be applied in layers up to 0.5 millimeters. There are latex and acrylic. There are starting and finishing acrylic mixtures, suitable for any substrate. Latex ones are used for finishing leveling and are able to eliminate even the smallest flaws, creating a perfectly flat surface. The most expensive type of putty.
Figure 13. Polymer putty.
Water-dispersed
Acrylic or latex based putties with high performance qualities. Suitable for leveling any base, even wood, concrete or fiberboard. Due to the presence of resins, the putty dries quickly after application, but is easily diluted with water if the mass thickens.
It is characterized by high moisture resistance, resistance to high temperatures, good adhesion and shrinkage resistance. It belongs to the middle price category and is produced completely ready for use.
Figure 14. Water-dispersion putty.
All putties are suitable for leveling walls under wallpaper; it is only important to choose mixtures that are suitable for the base, type of wallpaper and are affordable for you.
I recommend!
If you do the puttying yourself, purchase a ready-to-use polymer-based mixture. It has an ideal consistency, is easy to apply and can be stored for a long time in a closed container.
Which putty to choose
When selecting such finishing material, the condition of the wall is taken into account. Surfaces covered with cracks must be treated with a starting putty mixture. Puttying is completed with a finishing layer. For smooth surfaces, only the finishing type of material is used.
Putty is sold in the form of a dry powder or solution or mass. The finished product is of high quality, but its cost is higher than that of the dry mixture.
The putty mixture is selected according to the type of base:
- Gypsum - most often used in finishing work. The composition has an affordable price, is easily applied to the base, and is not subject to shrinkage. Gypsum putty is used in rooms with dry air (living rooms, bedrooms) and is not recommended for the bathroom and kitchen.
- Cement putty is affordable, moisture resistant, but can shrink. This mixture is recommended for utility rooms, but is not used when renovating living rooms.
- The polymer putty is of high quality, easy to apply and corrects unevenness, cracks, and does not shrink. The cost of production is high.
When purchasing a putty mixture, it is recommended to consider the following parameters:
- shelf life of the material;
- packaging quality;
- time for the solution to harden, etc.
Preparing walls for puttying
Walls to be puttied must be cleaned of old coatings, peeling plaster, oil stains, dirt and dust.
To remove wallpaper, you can moisten it with water using a roller or brush. You can make notches on thick vinyl wallpaper for better moisture. We remove the wallpaper by prying it off with a scraper or spatula, starting from the joints.
Figure 15. Removing old wallpaper.
It is better to completely remove oil-based paint with a scraper or using a grinder with a stiff brush attachment. Heat treatment with a hair dryer or gas torch will make paint removal easier.
Figure 16. Heat treatment for paint removal.
We remove old whitewash from walls and ceilings using a wet sponge and spatula, having previously soaked it.
We remove damaged areas of plaster using a spatula or a hammer and chisel.
We fill out the cracks and wash them thoroughly with water to remove dust.
After cleaning the walls, we check them for evenness.
We treat the surface requiring repair with primer mixtures.
In case of significant damage, unevenness and deviations, we level the walls with ready-made repair compounds, gypsum or cement plaster. We carefully repair all cracks and chips.
Figure 17. Repair of old plaster.
The dried plaster layer must be sanded with coarse sandpaper.
After the repair is completed, we prime the entire surface with penetrating primers with antiseptic additives that prevent the appearance and development of mold.
The primer will increase the adhesion of the base to the putty and extend the service life of the finish.
Figure 18. Priming surfaces.
We apply priming with a roller or brush in two layers. Apply the second layer after the first has completely dried.
If there are plasterboard walls, we cover the joints and seams with serpyanka mesh to prevent cracks from appearing during operation. We cover the sheets with primer. We fill the recesses from the screws and the joints of the sheets with starting putty.
Figure 19. Preparing plasterboard walls for puttying.
Plaster or putty
Before answering whether it is necessary to plaster the walls before wallpapering or not, let’s understand the concepts of “plaster” and “putty”. The fact is that beginners often confuse them, since both operations allow you to level the walls. But they have certain differences:
- Putty . Allows you to eliminate chips and cracks on the surface of the walls, as well as level them if the differences are no more than 7-10 mm.
Putty is applied in a thin layer
There is also such a thing as finishing putty, which allows you to make the surface smooth, but it is usually not used for wallpaper, since there is no need to obtain perfectly smooth walls;
- Plaster . It is applied in a thick layer (up to 70 mm), which allows you to eliminate more serious irregularities.
The layer of plaster can reach 7 centimeters
The difference between puttying and plastering lies not only in the thickness of the layer, but also in the technique of performing the work. If the putty is applied using a spatula and leveled with a spatula, then the plaster is thrown onto the wall with a ladle or trowel, after which it is leveled using a rule that is pulled along pre-installed beacons.
True, a thin layer of plaster can be applied with a spatula without beacons. Moreover, there is essentially no clear “border” where the plaster ends and the putty begins. That's why sometimes there is such confusion in concepts.
How to calculate the required amount of putty
Before purchasing putty, you need to correctly calculate the required amount. The average consumption of the mixture can be found on the packaging.
Material consumption depends on many factors:
- Areas of leveled surfaces. It can be determined by measuring the perimeter of the room and multiplying it by the height of the wall.
- The thickness of the applied layers, which directly depends on the size of the irregularities and deviations. The size of the irregularities can be easily determined by applying a two-meter strip to the walls. We measure deviations from the vertical using a plumb line.
- Wall material. Depending on the material of the walls, we select the type of putty. Smooth plastered walls can be covered with a thin layer of polymer or water-dispersion putty, up to 1 millimeter layer.
- Type of putty. The consumption of cement putties is much higher than latex or acrylic ones.
The average starting putty, with a layer thickness of two to five millimeters, will be from one to three kilograms per 1 m2. The consumption of cement or gypsum putties with a layer of 6-9 millimeters will increase from four to six kilograms per square.
The final coating is applied in a layer of no more than one millimeter, and ranges from 500 grams to 1.5 kilograms of putty per square meter.
Puttying brick surfaces
The specificity of brickwork is its heterogeneity, deepening of the seams and possible vertical deviations. It is important to ensure that the wall does not have any bulges by using a plumb line. If there are no problems, the work will be easier and there will be minimal consumption of materials. In case of large deviations, alignment is performed using beacons.
To level the masonry, an inexpensive putty for wallpaper on any base is suitable:
- Polymer;
- Cement;
- Plaster.
Select a variety that meets functional requirements. If you have to do multi-layer leveling, there is no point in buying the most expensive compound.
The cement that sticks out at the seams must be chipped off or beaten off, but the masonry itself provides high adhesion. After preparing the surface, a working solution is prepared and distributed over the wall. The technology for applying the finishing layer of wall putty under wallpaper with your own hands is no different from working on any other surface.
In case of large deviations, alignment is performed using beacons.
Wall putty technology
The quality and durability of the final finish depends on the correct preparation of the putty, adherence to the technology and procedure for performing the work.
We carry out puttying at positive outside temperatures, not lower than ten degrees.
We carry out the work in the following sequence:
1.Preparing putty
We dilute dry construction mixtures strictly following the manufacturer’s recommendations.
Pour the dry mixture into a container with water at room temperature, based on the production of the solution within the estimated time indicated on the package.
Stir the solution with a mixer until it reaches a homogeneous, easy-to-work plastic consistency.
I recommend!
After producing the solution, rinse the container and all tools with water. Even the smallest grains of dried mortar can ruin the entire work, leaving streaks and furrows.
To improve the ductility, strength and reliability of the coating, we add PVA glue, deep penetration primer and hydrophobic additives.
Mix the mixture thoroughly using a mixer or drill with a special attachment.
Figure 20. Preparation of putty.
Mix the prepared putties thoroughly with a mixer at low speed. Slight dilution with water is allowed, but not more than 30 milliliters per kilogram of composition.
2. Starting layer
Using a small spatula or trowel, the putty is taken from the container and applied to a wide spatula.
The leveling mixture is applied to the base using a wide spatula, holding it at an angle of approximately 45 degrees.
Figure 21. Applying putty.
We start the work from the bottom from the corner of the wall, distributing the solution in an even layer over the surface with smooth zigzag movements.
We putty the corners of the room using a special corner spatula. It makes the job much easier by creating a perfectly even 90-degree angle.
Figure 22. Puttying corners.
The thickness of the starting layer can be from one to three millimeters. If it is necessary to apply a thicker layer, the wall must be reinforced with a mesh of fiberglass or polymers. In this case, the mesh should be in the mass of the putty solution.
Figure 23. Reinforcement of the putty layer.
Rub the dried starting layer with a hand grater with a mesh attached to it or fine-grained sanding paper. Large surfaces are best treated with an electric grinder.
We control the evenness of the surface using the rule.
The putty dries, depending on the thickness of the layer, temperature, humidity and the presence of ventilation in the room, for at least 24 hours.
In hot, dry weather, for uniform drying, the putty surface must be periodically moistened.
3. Finishing layer
The finishing layer is applied to the completely dry starting putty.
The solution for this layer should be of a more liquid consistency and applied with a thickness of no more than one or two millimeters.
The finishing layer must be applied in two layers, the second - after the first has completely dried.
Figure 24. Grouting putty.
The first layer is sanded with fine sandpaper, and the final layer is sanded with a leather or suede pad.
The finishing layer should completely hide the smallest irregularities and pores in the coating and create a perfectly smooth surface.
How to putty on wooden surfaces
Wood is a living material that is susceptible to rotting. When choosing a mixture for wood, you need highly specialized and universal compositions that retain some plasticity.
In rooms with specific conditions, it is important to choose appropriate labeling offers:
- Standard KR – normal conditions;
- The LR standard is used for places with high humidity.
Polymer compositions are ideal for “living” building materials due to their elasticity. You can trust the compositions of trusted manufacturers:
- VGT (acrylic wood putty);
- Eurocol;
- Eurofiller Wood Plus;
- Tikkurila Lakkakitti;
- Eurotex (acrylic);
- KNAUF Polymer Finish.
Puttying is performed on old wooden surfaces, partitions, beams and attic floors. Some design and architectural forms involve structures made from wood-derived materials. Under wallpaper they are also coated with a specialized primer.
When choosing a mixture for wood, you need highly specialized and universal compositions that retain some plasticity.
Useful tips
When starting puttying work, listen to the advice of professionals:
- When purchasing ready-made putty mixtures, pay attention to the production time. It is better if they were produced no more than two months ago.
- Buy putty from reliable construction supermarkets. Here, unlike markets, storage conditions are observed and there is less chance of stumbling upon a fake.
- Use putty from the same manufacturers for the starting and finishing layers. They are most compatible with each other.
- The main tool when applying putty is a wide spatula. Choose it in a higher price segment, because the ease of application and the quality of the putty surface depend on the evenness and reliability of the blade.
- Take precautions when preparing the solution and sanding the surface, protecting your eyes, skin and respiratory tract from contact with dry components. Wear rubber gloves, goggles, respirators and special protective clothing. Keep animals and children away from work.
- Do not pour dry mixtures or putty residues down the drain or throw them in the garbage chute.
When can I start gluing?
After the obligatory sanding and priming, you can begin wallpapering. In houses where there are “damp” corners, waterproofing is done and problem areas are treated with a fungicide (a solution for mold and mildew). It is important that all layers dry well for 3-5 days before the final stage of repair.
After the obligatory sanding and priming, you can begin wallpapering.
A base coat without primer will absorb a lot of moisture. Therefore, sticking can present unpleasant “surprises”. For some types of wallpaper, it is not necessary to saturate the walls with glue, for example, when it comes to non-woven or fiberglass options. Under “liquid” wallpaper, it is enough to apply only the starting leveling layer and soak it with a primer.
Sequence of work on leveling walls
In general, plaster for painting or wallpaper looks like this:
- wall primer;
- leveling the base with plaster mortar;
- applying a primer to a leveled surface;
- puttying;
- grinding;
- surface primer;
- painting or wallpapering
A detailed video about how and in what sequence to prepare a wall for painting. A small area shows the process from attaching the mesh to the final primer treatment. It is better to use the mesh in private houses made of blocks or bricks, where the house can shrink.
You probably noticed the abundance of primer layers. Their application is very important in terms of increasing the adhesion of leveling solutions to the base. Simply put, they are the ones who in most cases determine how well the plaster or putty will stick to the base. The peculiarity of the primer is that it allows you to bind the dust (no matter how you remove it mechanically, it will still remain) located on the wall, as well as strengthen the surface layer of the plane.
Primer options for strengthening the base
| Manufacturer | Name of product | Approximate cost* |
| Leningrad colors | Acrylate primer Tex Optimum penetrating | 225 rub. for 5 kg |
| Oscar | Universal latex primer | 230 rub. for 5 kg |
| Ecoroom | Universal acrylic primer | 210 rub. for 10 kg |
| Knauf | Betokontakt | 2500 rub. for 20 kg |
| Bergauf | Adhesive primer Beton Kontakt | 330 rub. for 7 kg |
| Tex | Strengthening acrylate moisture-resistant primer Profi (concentrate). Diluted 3 times | 910 rub. for 10 kg |
| Symphony | Acrylic primer Deep Contact | 980 rub. for 10 kg |
| Commander | Tasmania interior. Strengthening acrylic primer (concentrate). Diluted 3 times | 1340 rub. for 10 l |
| Dufa | Tiefgrund LF universal acrylic primer | 890 rub. for 10 l |
When to glue and when not to
It is possible when the old wallpaper is removed and new ones are glued in its place. The surfaces are wetted and then the soaked wallpaper is removed using a spatula. The main thing is not to damage the plaster. Old wallpaper must be removed completely. To remove the remnants of the fabric, you need to wet them and after 15 minutes tear them off completely.
The next stage is ventilation of the room and subsequent drying, checking for possible deformations. If cracks are found, they must be repaired using a primer. In this case, they will no longer appear.
Bolts or screws must be coated with paint to prevent possible corrosion on the metal. You can also pull them out of the wall and throw them away or use them in another place.
The final stage is to clean the surface from dust with a rag or brush. The main thing is to achieve maximum evenness of the walls. Then gluing can be done.
The main thing is to achieve maximum evenness of the walls.
You should avoid gluing wallpaper onto a cement base. The glue applied to the surface will be absorbed into it, then dark spots will appear, degrading the beauty of the finish.
You cannot glue canvases onto a clean rough surface. The glue will be absorbed into the cement and the canvases simply will not stick to the wall. You will have to spend more adhesive. But if the wallpaper sticks the second or third time, another problem will appear - dark spots showing through the wallpaper. First you need to further process the wall. This will allow you to avoid all possible problems, then the decorative renovation will last a very long time and will delight the eyes of household members and guests.
You need to do the following:
- Remove everything unnecessary from the walls. Clean, get rid of cracks.
- Treat all bolts, screws, nails, screws and other metal products with compounds that protect against corrosion.
- Apply primer to the wall.
- Putty the surface.
- Repeat the third step again.
You should avoid gluing wallpaper onto a cement base.
Wallpapering without first plastering the walls (video)
Not only the preparation of the surface for wallpapering affects the final result. Success also depends on the chosen adhesive composition for the material. The type of glue is selected strictly based on the selected type of canvas.
For regular paper materials, the standard methylcellulose-based option is suitable. To hang heavier wallpaper, you should choose an adhesive composition that contains PVA. Fiberglass wallpaper is attached using a special type of glue that increases adhesion to the surface.
Luxury or necessity
Even high-quality expensive wallpaper applied to a base with defects will begin to peel off and bubble.
Modern technology for finishing walls with wallpaper requires the mandatory application of a leveling layer, which is due to new building materials used in repair work. The common practice of removing the old coating and applying a new one immediately after this process is not applicable when finishing work with OSB boards, plasterboard, concrete or brick walls.
The most fashionable and expensive coatings lose their appearance immediately after application if it is applied on an uneven surface with cracks, chips or pits. A smooth wall contributes to both greater preservation of the finishing material and less consumption of applied glue.
If you putty the walls under wallpaper, the applied composition promotes greater adhesion between the wall and the coating, significantly increasing the adhesive ability of the base.
This guarantees long-term operation without bubbles, peeling and deformation, which is especially necessary if you choose universal wallpaper, which has excellent properties, but is not nearly as cheap as paper wallpaper.
Leveling the surface is not just making it even and smooth, but also ensuring significant strength of the material used for rough finishing of the wall.
Is it possible to glue new wallpaper onto old ones?
Not always.
New wallpaper sticks well only to a flat and smooth surface, and it’s not often possible to remove old wallpaper carefully. If you want to find out for sure whether it is possible to glue wallpaper onto wallpaper in your case, carefully inspect the walls and run your hand along the joints between the strips. If you are satisfied with the condition of the surface, feel free to get down to business.
Modern wallpaper is usually two-layer. If you carefully remove the top layer, you will be left with a paper base. If it is glued firmly, then in this case the answer to the question “is it possible to glue wallpaper onto wallpaper” is: yes.