Finishing of wood - what and how to coat the material.
The main enemies of wood are water and fire, the rays of the sun and living microorganisms, insects that gnaw on wood or choose it as a place for reproduction (here we are talking about mold fungi).
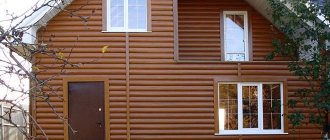
And wooden structures that are located in the open air especially need protection from aggressive opponents, which have a negative impact on the structure, affect the strength and appearance.
For this reason, the question of how to cover wood, especially outdoors, will be relevant for owners of a country house. When you get acquainted with all the variety of protective compositions, you will be able to choose the composition that is suitable for your purposes and will be affordable for you.
How to paint lining like bleached oak
Often it is necessary to paint the wood white, but so that the veins are visible. They also say to create the effect of bleached oak. There are several ways:
- Use tinting with the appropriate name, which is also called stain. Different manufacturers have these. They usually have the names "frost", "bleached oak" or something like that. Application feature: do not pour too much composition. If you overfill it, the surface will begin to peel off over time. To achieve the desired degree of coloring, apply several very thin layers. After each, give it time to dry thoroughly.
- Oil with wax with a similar name. The application technique depends on your desire: one or two layers for an almost opaque coating, or one layer followed by rubbing with a rag for a pronounced texture.
- Pigmented polyurethane primer called “white” or “bleached”. To obtain a translucent coating, the composition is diluted with a large amount of thinner. Its amount can be 80-100% of the volume (determined by samples). The disadvantage, like all polyurethane paints and varnishes, is that they turn yellow over time.
- Pigment acrylic primer, also diluted by 80-100%. The color remains white for a long time, but this primer costs more than polyurethane.
It’s difficult to say which composition to choose - you need to try. It is advisable to paint the lining with several compositions and compare the results. The effect when using different products is slightly different, but it also greatly depends on the wood. The reviews are also very different - some whitened with tinting, others with oil. Soils are rarely used for these purposes, but mainly because not everyone knows their properties.
Tree bark as a material for creativity
In interior decoration, not only branches and logs are used, but also tree bark. It has a beautiful textured surface, the relief depends on the type of wood. Jewelry, photo frames, boxes and vases are made from this material. How to properly collect the bark and prepare it for further work?
Where can I get bark?
Bark is the top protective layer of a tree. You cannot remove it from a living plant, otherwise it will die. For preparations, either a dry log or a freshly cut tree is suitable. Good material can be found on the street, in the nearest park or forest belt, because trees periodically shed their protective layer as they grow. For crafts, the bark of birch, oak, pine, maple, and chestnut is usually used.
So, a suitable tree has been found. How to remove the bark from it:
Depending on the required size of the workpiece, cuts are made. One cut goes along the trunk, and the other two are perpendicular to it on both sides. Along the line of the longitudinal cut, the bark is carefully lifted and slightly bent
It is important to ensure that it does not crack or break. It is best to use a log that was cut down 2-3 weeks ago. The designated piece is slowly separated from the wood
It is convenient to use a knife or ax.
How to process the material and prepare it for work?
The removed layer of bark needs to be prepared for further work. The plate is inspected, material is selected that is not damaged by rot, fungus or bark beetles. The inner surface is cleaned of debris with a soft cloth and then sanded.
In order for the product to last as long as possible, the bark is dried in the oven before starting work.
It is important to ensure that it does not dry out, otherwise the material will become brittle and impossible to use.
After drying, the material is impregnated with oil or wax. This will prevent the bark from rotting and there will be no bugs in it. If necessary, cover with acrylic paint or just varnish.
Where and how can you use tree bark?
Tree bark is an unusual, original material for interior decoration. Children love to work with bark - it is not difficult and does not require special skills or equipment.
Figures of animals, people, and birds are cut out of dense, thick bark with a knife. You need to work with a knife as carefully as possible, because bark is a very fragile material. The carved figure is sanded, varnished or painted.
Frames for photographs and paintings made from bark look interesting. A frame is cut out of cardboard, onto which the photograph is glued so that there is a gap of several centimeters on each side. Pieces of bark are glued onto the protruding parts of the cardboard, like a mosaic. The gaps between the wooden mosaics are filled with moss.
The most skillful crafts are made from birch bark - birch bark. It is elastic and flexible, so it makes very thin, delicate jewelry. Bouquets of artificial flowers are made from birch bark, they are woven into pots for indoor plants and jewelry boxes, and all kinds of appliqués are made.
Impregnation for fence
Treatment of fences with impregnating compounds is the most popular. Therefore, it is worth telling about them in more detail. When thinking about how to cover a wooden fence quickly and inexpensively, you can choose from folk or industrial remedies against rotting and moisture on the street.
| Traditional methods - time-tested | Industrial options – modern |
Traditional methods of protecting wood
In the first place in the popular rating of protective impregnations for wooden fences is the processing of technical oil. It can be collected among fellow car enthusiasts or bought for almost nothing at a service station.
DIY processing
The wooden fence is impregnated with a preheated composition. After treatment, no harmful insects will enter the structure. No moisture will penetrate through the capillaries of the wood.
If there is no detention, there is no need to look for her “nosebleed”. You can coat a board fence with drying oil or vegetable oil, preferably linseed. There is no need to work them out.
The most vulnerable part of the fence is the posts, especially their bottom, which is in the ground or embedded in a concrete foundation. It most often begins to collapse and rot due to waterlogging and the activity of harmful insects and microorganisms.
At the summer cottage
Numerous videos show that when repairing a fence, the decaying sections of the posts are first treated by firing. The flame destroys fungi and bacteria.
Rotten, burnt organic matter is scraped off with a piece of glass, then the supports are covered with molten bitumen. On the forums it is recommended to additionally wrap the bottom of the pillars with water-repellent material. It can be glassine, roofing felt or roofing felt.
Another effective antiseptic is copper sulfate. Experts give advice: keep the boards and timber in a container with it for 24–48 hours.
Pillar covering
Wood impregnated with vitriol in this way does not rot for up to 20 years. In this way, it repeats the qualities of larch and reeds, which do not decompose for many years, even when completely submerged in water.
Acrylic paint
The composition is simple, because it is made on the basis of water in which acrylic resin is dispersively dissolved - this is a coloring substance in the form of larger particles - pigments and fine insoluble powder that gives the composition color.
A distinctive feature of acrylic paint is the absence and speed of drying. smell and quick
Coloring powders can be of various origins:
- natural;
- organic;
- inorganic.
Pigments and larger particles act as fillers and are added to the composition to improve its binding properties during drying, strengthen the ink coating film and increase adhesion.
With the development of technology and the emergence of new substances, these products include various additives that act as auxiliary elements in enhancing certain qualities. But the main advantages of the main composition (durability, environmental friendliness and quick drying) remain unchanged.
Preparing for painting
- Thoroughly wash away dust and dirt using any detergent and a soft sponge.
- Degrease and, if necessary, lighten darkened boards; for this purpose, special products are sold in stores, or you can use regular “Whiteness”.
- Sand with fine sandpaper, ordinary pumice or a special grinder with fine and coarse grit attachments.
- Wipe with a dry cloth to remove fine dust and sawdust remaining after sanding.
- Treat with a colorless antiseptic suitable for this type of work. It can be applied with a spray gun, roller or wide brush, carefully covering all the cracks and recesses. This will significantly extend the service life of the decorative wood coating.
- Dry the surface overnight.
Video - painting the lining white:
https://youtube.com/watch?v=DpzKTfo1u4g
Lining painting technology
In principle, there are no special secrets or fundamental differences in applying decorative enamels to boards.
It is enough to take into account a few basic rules and carefully follow the instructions on the packaging, which must indicate: drying time for intermediate layers, method of application, means for thinning the paint if it has thickened, and cleaning the tool at the end of the work.
You should also remember that:
- The transparent varnish is applied at least twice in a very thin layer. It is necessary to apply the last layer along the grain of the wood, this will avoid the formation of visible stripes.
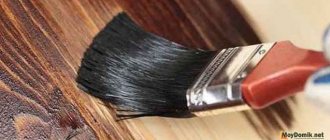
- You can paint with a small roller; But it’s better to paint, even if for a long time, with an ordinary brush made of natural bristles, which perfectly penetrates into all the irregularities of this material.
- Mix the paint intensively with a mixer or by hand until smooth, so that the color is uniform over the entire treated area.
- First paint a small piece of the board and make sure the result is correct.
- Work should be carried out in dry, calm weather and in the absence of direct sunlight, which can have a detrimental effect on the quality of the applied coating.
- The ends of the finishing boards must also be sanded and processed to avoid damage to the wood in these unprotected places.
Video - painting lining walls with water-based paint:
Prices for some types of coatings
Different suppliers produce entire lines of wood preservative products in completely different price ranges.
Approximate prices are shown in the following table (prices):
| Name | Manufacturer | Volume | Price, rub |
| Semi-matt yacht varnish | "Premia", Yaroslavl | 1l | 300 |
| Yacht alkyd-urethane varnish, glossy | Neomid, Russia | 0.75l | 195 |
| Antiseptic, white, wood-colored, colorless | Luxenc, Russia | 1 l | 197 |
| Water-based antiseptic | "Vinha" | 0.9 l | 652 |
| PF-115 glossy enamel, different colors | "Flourishing", Rostov | 0.9 l | 150 |
| Acrylic enamel, semi-gloss | Atlas, Russia | 0.9 l | 275 |
| Semi-matte | "Unika", "Tikkurila", Finland | 0.9 l | 558 |
Prices for work may vary, but usually from 500 rubles. per m2.
Every hardware store offers a huge assortment of varnishes, paints, impregnations, antiseptics, wood primers, which have different colors, composition and price. When making a choice, you should take into account the scope of application of the coating, your own preferences regarding color and financial capabilities.
Types of varnishes and application
Today on the market and in hardware stores you can purchase a large number of different types of substances produced on all kinds of bases.
Main varieties:
- Oily.
- Resin.
- Alkyd.
- Alcohol.
- Epoxy.
- Acrylic.
- Polyester.
- Polyurethane.
Oily
Description: high absorption into the structure of the material, drying time - from 24 to 72 hours.
Purpose: practiced exclusively for interior work. Furniture and other wood items are covered. Not used for flooring.
Resin
Description: the composition may include natural amber, synthetic thermoplastic and thermosetting resins.
Purpose: used for similar work as oil ones.
Alkyd
Description: consists of alkyd mastics, petroleum products (white spirit, solvent), which accelerate the drying of driers. Increased moisture resistance and weather resistance. Complete drying time – up to 48 hours.
Purpose: processing of laminate, parquet, floating floors, designer furniture. The service life of the film on the floor covering is 2-3 years.
Alcohol-containing
Description: the preparation includes ethyl alcohol and resin diluted in it from 20 to 40%. Dries in 20 to 30 minutes.
Purpose: processing furniture, interior elements, musical instruments, glass and leather items. A specialized type, such as shellac, is used for decoupage.
Epoxy
Description: composition – two-component. Epoxy resin serves as a film former. Increased hardness, water resistance, shock resistance.
Purpose: processing of parquet, solid flooring, doors. To withstand high loads, they almost always acquire this type.
Acrylic
Description: diluted with ordinary water, odorless, harmless. Fire-resistant, water-resistant, steam-permeable. High-quality adhesion to wooden substrates.
Intended use: the product is used indoors. Mainly where there is an increased threat of fire or explosion. Rich properties allow you to coat even damp wood, as well as brick walls and concrete. We also recommend a review: how long does it take for a floor screed to dry after pouring, and how long does it take for the concrete to harden?
Polyester
Description: composition – multi-component, made on a polyester basis. The layer is thick, durable, colorless, glossy. The film is resistant to chemicals, water, and heat.
Purpose: Covers bases that require a thick, shiny film, protection from impact and abrasion (musical instruments, doors, furniture).
Polyurethane
Description: there are two-component (base with hardener) and three-component (base, hardener, solvent). High adhesion, diamond hardness. The smell is specific, pungent, persistent. The dried layer is reliably cleaned from water, chemicals, and corrosion. The period of complete hardening is up to 3 weeks.
Purpose: these products are applied to garden structures, external and internal foundations during the construction of houses, yachts, flooring.
NOTE! When purchasing a product, you need to take into account the characteristics and conditions in which the processed products and objects will be used in the future. Will they withstand sudden temperature changes, high humidity, and high loads? Also, be sure to pay attention to the smell - if interior work is planned.
How to paint wood
Depending on the purpose of the product, two main types of coatings can be used for painting wood:
- opaque paints and varnishes - or, more simply, enamels and paints. Unlike old oil paints, acrylic, polyurethane and alkyd paints are less toxic, have a shorter drying time and are relatively durable. It should be remembered that alkyd paints do not form a particularly stable film, so they should be used for painting wood inside the house. Acrylic paints are more resistant to atmospheric influences, which makes their range of applications much wider - they are great for both interior and exterior work.
- transparent paints and varnishes – this category includes stains, impregnations, and varnishes. A mandatory component of these coatings is a component that protects wood from exposure to ultraviolet radiation. Therefore, these paintwork materials can be used inside or outside the house. Moreover, modern industry offers not only transparent, but also tinted varnishes, which allows you to add the necessary variety to the painting of wood. You can also give the desired shade using stain, then opening the wooden surface with colorless varnish. If we are talking about painting furniture, then simply use a stain, which will give the wooden surface the desired color, but will not protect it from the negative influence of the atmosphere.
Another option for transparent paints and varnishes is impregnation, which can simultaneously protect the wood from parasites and atmospheric influences, and also give the material a noble shade.
This wood coating can be used both as an independent element and as a base for varnishes. Moreover, now there are bioprotective impregnations that can be applied under a decorative layer of paint.
Can varnish be applied to paint?
As a rule, wood is coated with this substance. However, sometimes there is a need to protect, provide additional gloss, hardness and strength to coatings made from other materials. In most cases, we are talking about water-based or acrylic paint.
The dye on the material must adhere firmly and retain its properties and color. The substance will help increase the strength of the prepared surface and enhance the shine effect. But a special composition should be used. It is recommended to use acrylic products that are odorless, quick-drying, and do not allow the paint to flow.
Do I need to prepare the painted surface for coating? Certain actions will still need to be taken. There should be no traces of dust, grease or other contaminants on the surface. Therefore, the painted base must be primed. You can find out how long it takes for the primer to dry on different surfaces from our article. In addition, the substance and dye must be compatible.
How do you know if the varnish product and paint are compatible? To determine their compatibility, the emulsion is lightly applied to the surface in an inconspicuous place, using a small area for the experiment, just for testing. If no negative changes are found on the surface, then the entire area can be varnished.
IMPORTANT! Do not apply the product to a wet surface. The item must be completely dry.
Applying dye to wood
A special atmosphere in the house is created by ordinary wooden objects, which, after painting, turn into exquisite things. You can change the look of interior items that are already in the house. Antique painting of wood with your own hands is done with simple tools. Before applying a special dye, prepare the surface:
- The work begins with cleaning. The old coating in the form of varnish and paint is removed. The fittings are removed if they are not being processed.
- Dirt and dust are removed by sanding the wood.
- To resist the appearance of mold and mildew, the material is coated with a special antiseptic. Priming with this composition will also increase the adhesion of the paint to the wooden surface.
Interesting video on the topic:
Stages of wood processing before painting
Processing wood before painting consists of the following steps:
- The first step is to clean the wood from dirt and dust. Remove the old coating, if there was one, and so on. After cleaning, uneven surfaces must be removed and sanded. So that the surface is as smooth and even as possible.
Wood painting process
Wood is painted with acrylic paints by air spraying. In this case, the pressure should be in the range of 2-4 atmospheres, and the dose in the spray gun should be 1.6-2.4 mm. Wood is painted in one layer 80-120 microns thick. It is also possible to apply paint using a roller or brush. It is best to place wood to be painted at an angle of 15 – 20°.
It is advisable to dry painted wood at a temperature of 35-60°C with a relative humidity of 50-80%. In this case, the drying time of the wood will take 90-120 minutes. If possible, it is best to use convective drying, that is, using hot air.
Immediately after painting wooden surfaces, it is important to protect them from negative influences, since the freshly applied coating may be damaged, which will require re-painting. Like
Like
Like and get a discount!
The procedure for performing painting work
The technology for painting wooden products assumes that the work will be carried out in several stages:
- Selection and preparation of tools.
- Preparation and processing of the base.
- Painting.
- Additional processing (if necessary).
All processes are carried out carefully. It should be remembered that wood is a capricious material and is easily deformed.
Stages of preparing and painting a wooden product: sanding, dust removal, degreasing, priming and painting
Tool
For painting you may need:
- Spray gun and compressor. This system allows you to process large areas in a short period of time. At home, an alternative can be a mechanical sprayer.
- Brush. Necessary for painting hard-to-reach places, as well as for interior painting.
- Roller. It is better to choose a fur coat with medium-length pile.
- Convenient container. If you plan to paint with hand tools.
- Rags. To quickly correct errors.
Necessary tools for painting
Everything necessary is prepared in advance.
Preparing wooden surfaces for painting
Preparation has a special role to play. If you follow all the procedures correctly, then no problems will arise in the future.
Process diagram:
- If surfaces have previously been treated, they are thoroughly cleaned of the existing coating. For this purpose, a mechanical, chemical or thermal method is used. The main thing is that the base must be completely clean.
- To properly prepare a work site, you need to assess its condition. If the previous coating quickly deteriorated, the reasons for this are first identified and eliminated. Thus, the wooden facade is influenced by water that flows from the roof. In the absence of a drainage system, the impact will be destructive.
- Grinding in progress. This procedure is necessary for both new and old grounds. The resulting dust is removed.
- Traces of resin are cleaned off, areas are washed with white spirit.
- The surface is treated with protective agents. Fire retardants and antiseptics are applied first. Then, if necessary, the areas most susceptible to destruction are coated with oils. The impregnation is applied in several layers with a roller and brush.
- Further work is carried out after complete drying. Existing cracks and defects are covered with special putty. After it has set, the areas are sanded.
- Primer is applied. If required, it is necessary to treat the surface with drying oil or stain.
The coating is left to dry thoroughly; it is unacceptable to act on a wet base.
Applying paint
Painting wooden surfaces is carried out as follows:
- The process starts from the corner when working with walls, facades, floors and ceilings and from one of the ends when designing objects, furniture, and individual wooden elements.
- Oil and alkyd paints are applied using vertical strokes. Next, the composition is rubbed well, after which the movements become horizontal. Acrylic paints can be immediately laid horizontally (along the grain of the wood).
- The first layer is considered the base layer. To do this, the solution can be diluted slightly to ensure better styling. The second layer (if painting is done in three layers) creates a reliable base. After this, in places of defects, the surface is ground with fine abrasive. The last coating is applied most carefully.
- Spraying tools make it much easier to work over large areas. But when using them, the movements should be uniform and at the same distance from the base.
Rules for applying paint with a spray gun
If required, after drying, a layer of varnish is placed on top. It not only protects the paint, but also adds shine.
Technology of painting wood with varnish
Varnishing is carried out after preparing the surface. If a colorless composition is used, then the base can be treated with stain to give the desired shade.
The varnishing process itself looks like this:
- The first layer is applied evenly. Drips should be avoided.
- To achieve a better effect, grinding is carried out. It allows you to remove invisible imperfections.
- The second layer is laid. The main thing is to distribute the mixture evenly to avoid its accumulation in some places.
- The third layer completes the work.
When applying all coatings, wait until the previous one has completely dried. If necessary, the product is polished after a few days.
Work technology
Before processing wood, you need to properly prepare it, and it is from this stage that we will begin our consideration.
Preparation
At this stage the following activities are carried out:
- First of all, the surface is cleaned of dirt and dust; if the base is dirty, it should be washed with warm soapy water; stains from bitumen and other similar compounds are removed with a solvent.
- If there is already old paint on the wood, then it must be removed; this is done using different methods: either using a scraper or using a hair dryer. And if the volume of work is large, and there are several layers of old paint on the base, then the easiest way is to use a special remover; sometimes to completely remove it you need to apply it 2-3 times, after which the surface is washed with warm water.
The remover does an excellent job of removing old paint.
- If the material is wet, it must be dried, otherwise, after applying the protective composition, the surface may lead or cracks will appear on it. The wood moisture content should in no case exceed 20%.
- Next, you need to carefully inspect the surface for cracks, crevices and other flaws. If there are any, then they need to be puttied using special compounds; to give the composition a shade closer to the material, you can add sawdust to it. All damage is filled with putty, after which it is necessary to wait until it hardens completely.
Putty allows you to perfectly level the surface
- Next, all treated areas must be sanded so that the plane is even; for this, sandpaper with a grit of 240 or even less is used. It is best to sand the entire surface; this will smooth out minor imperfections and make the structure more uniform, which will have a positive effect on the final result.
- Lastly, impregnation or primer is applied, this allows you to balance the absorbency of the surface, due to which the topcoat will lie much smoother. This type of processing can significantly improve the quality of processing, so do not neglect it.
Main stage
The prepared surface is wiped again with a damp cloth to remove dust, and after drying, you can begin work:
- The choice of working tool depends on the type of composition that will be used, as well as on the type of product that needs to be processed. For various joints and small elements, a brush is most often used; to apply paint or varnish to the facade, it is better to use a spray gun, since work with it will take much less time.
- The first layer is applied carefully and evenly, try not to miss a single area, the layer should cover the entire surface. If you work with a brush or roller, then the direction of application should be along the fibers, this way you will achieve better quality, and small stains, if any, will not be visible.
How to treat a wooden table? A small brush and polyurethane-based varnish is the simplest and most reliable option.
- After applying the first layer, you need to wait for it to dry completely. After which you need to carefully inspect the surface; if fluff has risen on it in places, then it is not difficult to fix this problem - take a small wooden block, apply fine-grained sandpaper to it and carefully remove all the flaws. Where there are no special quality requirements, this process may not be carried out.
- Next, a second layer is applied, this allows you to add shine to the surface and makes the shade of the solution deeper; you cannot apply only one layer, as it will not provide the required reliability.
The second layer goes on much smoother and allows you to create a durable film on the surface.
- A third coat is applied if necessary or if you want to protect the wood even better.
General progress of painting the wooden facade
Painting a wooden house from the outside conventionally occurs in two main stages: preparing the wooden surface for applying paint and varnish and directly applying the paint and varnish coating.
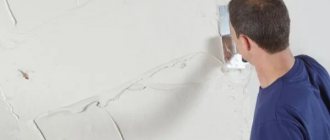
Surface preparation
This is an important point in determining how to paint a wooden house with maximum protective effect. Applying paint to an unprepared wooden surface is extremely undesirable, since conditions for good adhesion of paintwork materials will not be provided and the rules for treating wood against negative biological influences will not be followed. Preparing the surface for painting involves the following activities:
- if the building is new, then it is enough to clean the wooden surface from dust and dirt using any available means.
- if it is necessary to paint the facade of an old building, then first remove the remnants of the old paintwork and destroy traces of mold;
Old paint is removed as thoroughly as possibleSource purpleclover.com
- damaged areas of the wooden surface are repaired, all irregularities are smoothed out, cracks are puttied;
- nail heads and metal inclusions are coated with a metal primer;
- It is advisable to carry out final leveling with a primer.
Applying paint and varnish to the prepared façade surface
It is carried out in the following sequence:
- the wood is impregnated with a primer antiseptic in order to enhance its protective qualities and improve its adhesive ability;
- a finishing coat is applied, consisting of a layer of wood primer and several layers of paint, with a time interval to ensure complete drying of each previous layer.
Painting the new and old surfaces is carried out in the same sequence, but several nuances should be taken into account:
- the façade surface of the old building must be painted with the same type of paint and varnish that was originally applied;
- When painting old wood, the use of a roller is not recommended, since microcavities are formed in its structure due to cyclic swelling and shrinkage, which the paint from the roller does not fill. It's better to use a brush.
The process of painting a house is clearly shown in the video:
Bleaching and staining
To lighten wood of any species, bleaches are used. Usually oxalic acid is used, as well as household chlorinated bleaches. It is necessary to work with them in rubber gloves, avoid contact with the skin of your hands. For work, brushes made of synthetic material are used.
Buy stain for wood and wood at an attractive price
The stain is produced on water, alcohol and oil bases. The product is applied only to a surface that has been thoroughly cleaned of old finishes. Work with stain according to the instructions; it is better to do a small stain on a small piece of wood before starting the process.
General tips and tricks
When painting the exterior wooden surfaces of a residential building, it is recommended to “listen” to some advice from experienced craftsmen.
- The paint is applied only to a dry surface. When painting in several layers, the interlayer exposure is observed, which for alkyd compositions is 24 hours, and for water-based ones - from 2 to 12 hours.
- Paintwork materials are applied in the longitudinal direction relative to the fibers.
- The consumption of façade paint will be noticeably reduced if the surface is primed.
The facade of the building is the face of the building. By the appearance of the facade, one judges not only the quality of a residential building, but also the tastes of its owner. Therefore, painting the facade should be considered one of the main measures to shape the appearance of the building and ensure its readiness for many years of use.
How to choose paint
The basic rule when purchasing this product is to choose only high-quality material from a trusted manufacturer. Containers with questionable details may contain products of unknown origin. Its performance characteristics may be infinitely far from the declared parameters. Today, masters recommend purchasing acrylic paints from the following manufacturers:
- “Yaroslavl paints”, “Aquatex”, “Drevoplast”, “Extra” (Russia);
- Tikkurila (Finland);
- Pinotex ultra (Estonia);
- Belinka (Slovenia);
- Dulux (UK);
- DUFA (Germany-Russia).
You can confidently trust these products. Its quality has been tested over the years on objects of the most varied sizes and configurations.
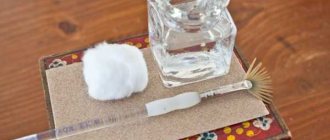
No. 3 Painting method using a candle
Worn white paint, through which in some places you can see the wood itself in its natural color, is wonderful when restoring antique furniture or creating new ones, but in the same style.
In the photo below you can see an example of such painting of wood with wonderful designer pens laid out on it.
Instructions:
Take a clean wooden board (no matter sanded or not) and a candle. Rub the candles onto the surface of the wood in several places
You need to press quite hard on the candle so that a clear trace of wax or paraffin remains on the wood. After this, paint the wood with white paint and let it dry completely. Wipe the dry painted surface with a rag, applying some pressure. In those places where there was a trace of a candle, the paint will come off the surface.
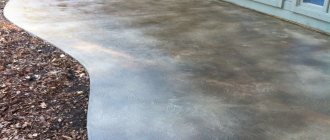
Below is an example of a white wood floor painted using this method. It is worth noting that when using this, it is better to apply a layer of protective varnish on top of the paint for more durable use.
How to process other materials?
Varnishing, intended to impart a protective layer, is also used on other substrates. For example, cardboard, liquid wallpaper, paper, plastic, metal, etc.
Even old tiles can be updated with this solution. But it must be a special composition; the usual one is not suitable. Such a coating must necessarily contain: a primer; special tile mortar.
First apply a primer. Next, the tiles are coated with the product.
YOU NEED TO UNDERSTAND! Tile seams at the junctions of tiles may be filled with silicone. These areas cannot be updated using this method. First, remove the silicone using special means. Then the surface is varnished, only after that the seams are sealed again.
Types of paints for painting wood
The choice of wood paints for interior work is quite wide. Initially, you need to decide whether you want to hide the texture of the wood or, on the contrary, want to preserve it. Based on this, the coating is selected:
- Transparent. Transparent coatings clearly reveal the structure of wood and protect the surface from exposure to ultraviolet radiation and other negative factors. These include: transparent and tinted varnishes;
- protective glazes;
- stains;
- oil impregnations.
- Paints based on organic solvents: Alkyd. They are distinguished by high water-repellent qualities, good drying speed and resistance to temperature fluctuations. However, they are fire hazardous and have a pungent odor.
Required materials and tools
Painting wood with your own hands requires the following materials and tools:
- putty;
- primer;
- putty knife;
- brushes;
- sandpaper or sander;
- dye.
Surface preparation
Painting wooden products should begin with preparatory work. This stage is the most important, since the quality of the final result depends on it. Surface preparation consists of:
- Peeling off old paint. It is necessary to carefully remove all layers of paint, primer and putty. For this purpose, you can use sandpaper, a sanding machine (a separate article on sanding wood), a hair dryer, or a special wood remover.
- Grinding. Using a sander or sandpaper, dents, scratches and other surface defects, as well as paint residues, are removed.
- Putties. It is necessary to putty large imperfections, depressions and cracks between the canvases and other parts. If the surface will be painted with transparent coatings, then it is better to use a special putty suitable for wood. After the putty has completely dried, the surface is sanded again and cleaned of dust and dirt.
- Primers. Before painting, it is advisable to prime the surface with a special compound intended for wood ().
Painting technology
It is advisable to paint a wooden surface in parts in three stages:
- Rough coating. The paint is applied in thick strokes to a small area of the surface.
- Cross rubbing. The applied coating is rubbed with transverse zigzag movements of the brush.
- Longitudinal coating. The paint is applied in long vertical strokes along the grain of the wood.
When carrying out painting work, you must remember the following nuances:
- Work can be carried out at air temperatures above +5°C.
- The wooden surface must be dry.
- Before using new brushes, it is advisable to wash them in warm water and detergent.
- It is not recommended to carry out work in strong winds and direct sunlight.
- It is better to start painting from the upper parts of the surface to avoid drops falling onto the painted surface.
- If the applied paint begins to dry out, it is advisable not to touch it, as rough brush marks may remain on the surface.
To make painting work as safe as possible, it is advisable to use a respirator, gloves and special clothing. And compliance with all the necessary requirements for preparing and painting a wooden surface guarantees you a high-quality and durable coating.
Can varnish be coated with varnish?
Over time, the varnish film becomes cloudy, wears out, and becomes covered with microcracks and scratches. Usually the owners decide to re-coat the interior detail with the substance. That's when you have to decide whether you can apply varnish over the varnish, or whether you will need to remove the old treatment first.
Let's say the old layer is so worn out and cracked that it spoils the appearance. According to experts, such a foundation requires complete replacement. If this is not done, attempts to update the item will remain unsuccessful. Chips, cracks, peeling areas will begin to stand out. Moreover, in some places the old emulsion will begin to swell when coated with a new composition (the effect of an unsuitable solvent will appear) and peel off from the base.
You will also need to remove the old composition if it has become cloudy, faded, or dull. This surface is first sanded using fine-grained sandpaper. And after that you can apply the product.
And yet, is it right to carry out such work? There is no consensus. Many experts are convinced that the previous coating should be completely removed. After all, you need to take into account such a factor as incompatibility of products. If the old and new compositions turn out to be incompatible, the subsequent layer will begin to peel off.
Other experienced craftsmen recommend not wasting energy on doing unnecessary work. And if you follow certain rules, after such preparatory measures it is quite possible to cover the previous layer with a new one.
IMPORTANT! If a water-based solution was used, then it is necessary to use the same type. Polymer mixtures and nitro varnishes can be renewed with various liquids, including water.
Selecting a pre-treatment agent
A separate category consists of impregnations, which are necessary to improve the structure and durability of wooden elements.
Such mixtures include:
Drying oil. It is applied to protect the base from any harmful influences. It is better to lay several layers to achieve deep penetration. Can be used before oil paints to reduce their consumption.
The oil is ideal for processing wood indoors with temperature changes and high humidity.
Special antiseptics. Protect from microorganisms and insects, prevent rotting.
Fire-retardant composition for wood Phenilax
Industrial Processing Technologies
Today there are three main types of wood processing:
- biological treatment,
- chemical treatment,
- mechanical restoration.
Mechanical processing of wood
The most common method of primary wood processing is mechanical impact in order to obtain valuable timber. In the process of such processing, the shape and size of the original wood raw material changes.
During mechanical processing, sawing, planing, cutting, milling, crushing, bending, and pressing of wood occur. During the work, a physical impact is exerted on the workpiece in order to change its shape. Technologists use the special quality of wood structure in the form of its ability to divide along the fibers. Mechanical processing of wood involves changing its shape through sawing, planing, milling, peeling, drilling, turning, carving, splitting and grinding.
Wood initially has excellent mechanical characteristics:
- high bending strength;
- good resistance to shock loads;
- high resistance to vibration;
- ease of processing;
- low volumetric weight;
- beautiful appearance;
- unique natural decorative effect;
- with the right processing technology, high durability;
- low thermal conductivity;
- low cost of processing on an industrial scale;
- 100 percent environmentally friendly.
Mechanically processed wood is further used for the production of building materials, the production of wood products, the production of high-quality furniture and household items.
Woodworking is performed using various woodworking tools and machines. Woodworking products: materials and semi-finished products - boards, bars, plywood, wood boards; finished products - wooden structures and structures, wagon and cooperage products, furniture, musical instruments, sports equipment, stationery, containers, pallets, etc.
Wood waste from mechanical processing is used as a raw material for the manufacture of boards and sheets, and filler for building materials. As a result of crushing, chips of different fractions are obtained - from the smallest for fiberboard to large, used for the production of wood-oriented boards.
Chemical wood treatment
Chemical methods of wood processing are widely used in the chemical industry, pulp and paper production, and hydrolysis production. Chemical treatment of wood involves changing the substance of the material.
From wood, chemical methods are used to produce: paper, cellulose, monosaccharides, glucose, xylose, charcoal, alcohols, acids, resins, raw materials for pharmaceuticals and perfumes.
To obtain valuable gaseous fuel from wood waste, the wood gasification method is used. This method is based on the process of decomposition of wood molecules and the transformation of simple substances into gas.
Biological wood treatment
Biological wood processing is today used to process waste generated during the production of timber or chemical raw materials. As a result of biological processing, it is possible to obtain valuable proteins and yeast for animal feeding and raw materials for microbiological synthesis. Sawdust, shavings and wood chips are actively used as feedstock for biological processing methods.
The simplest biological processing method is the production of valuable fertilizer - humus. In the process of such processing, shavings, sawdust and wood chips and other wood waste are decomposed under the influence of bacteria, forming a valuable product for increasing soil fertility.
The integrated use of various wood processing technologies and the use of modern technological solutions make it possible to obtain a wide range of wood products from timber and furniture to acids, varnishes, resins and fertilizers.