New construction necessarily includes plastering work, with rare exceptions when the walls are lined with curtain walls (plasterboard, plastic panels, etc.). Before painting or wallpapering, all vertical planes of indoor fences are plastered. What to do after plastering the walls in order to prepare the bases of the fences inside the building for subsequent finishing? All plastered surfaces are puttied. The finishing of the walls after plastering should form a smooth surface. During major renovations, wall plaster is applied to the walls after the wallpaper.
Why do you need to putty plaster?
Cleaning plaster with sandpaper
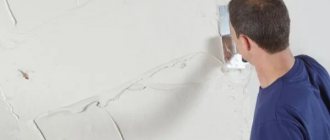
Before plastering, evaluate the amount of work and select the type of plaster solution. All this affects the timing and quality of work. No matter how carefully the plastering work is performed, it is impossible to obtain a perfectly flat surface. Due to the large fraction of solid fillers in the finishing mortar, the surface of the walls turns out to be porous with small dents and cracks. To remove mortar build-ups, the walls are sanded with a grinder or sandpaper.
As for dents and cracks, they need to be puttied. Putty is a material that you can use to level the walls with your own hands until they are perfectly level. People often wonder whether it is necessary to prime plastered walls. The short answer is definitely.
Before plastering the walls, they must be coated with a primer after plastering. This significantly increases the adhesion of the wall surface. Treat the walls with primer after the plaster has completely dried.
Methods for leveling brick walls
All types of finishing can be divided into dry and wet, but each method requires preparatory work. When deciding to finish a brick wall inside a house using the wet method, you need to weigh the pros and cons of this method.
- Additional insulation is achieved by using Teplon mixtures and their analogues;
- The use of acoustic plaster will increase sound insulation;
- Possibility of attaching heavy furniture and equipment to a finished wall.
- Variety of decor on plastered walls.
- Impossibility of performing work at subzero temperatures;
- Long drying time;
- High cost when using hired labor.
Attention! Do-it-yourself wet finishing will require the purchase of tools and at least basic plastering skills.
The dry method of finishing the interior walls of brick houses is done using sheets of plasterboard attached to aluminum guides or a frame made of timber. This method is justified in cases where the deviation in the level of the walls exceeds 5 cm. Dry finishing is not prohibited even with a smaller deviation.
Types of putties
Putty is a paste-like mass. It can be used to level walls and ceilings before final finishing of surfaces.
Based on the quality of formation of the putty surface, leveling materials are divided into three groups: starting, finishing and universal:
- Starting solutions are intended for sealing gross defects of treated surfaces. The name of the product indicates that the putty mixture is used for the initial treatment of plastered surfaces. Unlike the finishing coating, the starting solution has a coarser grain size of the solid filler (usually quartz sand). The starting composition is applied to the cement surface in those places where there is curvature of the coating, there are cracks and holes.
- The finishing putty is applied over the starting coating. It is intended to be the final finish before painting or wallpapering the walls. If the worker is sufficiently qualified and the material is of high quality, the finishing coating is completed in one go. The thickness of the finishing layer on plaster is made in the range from 0.5 to 2 mm. The finishing coating has plasticity, so the dried layer can be easily sanded with abrasives, thereby achieving a glossy effect.
- The universal mixture is used as a starting and finishing coating simultaneously. Like all universal products, putty is the most expensive compared to its analogues. The universal product is applied in one layer at once and forms the final finish of the walls before the final coating.
Finishing of a plastered brick wall
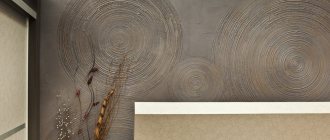
The final finishing of the plastered interior walls of a brick house is limited only by the owner’s imagination and financial capabilities. If the preparatory work is done efficiently, the thickness and phasing of the applied solutions is observed, and the intermediate drying time is maintained, you can begin to design the interior of the brick house.
Painting the walls
This type of finishing requires the most careful surface preparation. The slightest unevenness made when plastering walls or applying finishing putty will be noticeable under a layer of paint, so it is necessary to sand each finishing layer. Irregularities in the plaster can be removed with coarse sandpaper or a metal mesh, and the finishing putty must be sanded with fine sandpaper, periodically checking the walls with a long level. To achieve an ideal surface, the puttying and sanding cycle must be repeated several times. Before painting, the surface must be primed. Depending on the hiding power of the paint, two or more layers will be required.
Composition of putty mixtures
Based on their composition, putties are divided into three groups:
- gypsum;
- cement;
- polymer.
Plaster
Gypsum gives the solution increased plasticity. Thanks to this property, it is possible to achieve a very even plane of the walls. When making the next batch of gypsum putty, you need the correct measure of the volume of the solution. The liquid solution hardens quickly, so it is necessary to balance the volume of the finished mixture with the time of its production.
On the packaging of the powder, the manufacturer indicates the time for producing a certain volume of the finished mixture. Gypsum putty is used only for interior work.
Cement
Cement plaster is used in rooms with high humidity. In bathrooms, toilets and kitchens, the walls are leveled using cement putty. Tiles are laid over the cement finish.
With cement putty after plastering, you can immediately treat large areas of walls with your own hands in one batch. It takes much longer to harden than the gypsum composition requires.
Polymer
Polymer-based putties are called universal compounds. The main advantage is the virtual absence of shrinkage. Among putty mixtures, universal is the most expensive material.
All of the above is presented in this table:
Table of properties of basic putty compositions
| № | Putty composition | Application | Flaws |
| 1 | Cement based | Sealing irregularities | Takes a long time to dry |
| 2 | Plaster | Final formation of a smooth surface | Gives more shrinkage |
| 3 | Polymer | No shrinkage | High price |
Gypsum compositions
Houses differ in building materials, therefore they have different thermal output or vapor barrier; the choice of plaster mixture will depend on this. The most popular is gypsum-based plaster, which is very easy to work with and the drying process is very fast. The most important component of this plaster is considered to be gypsum. And the remaining additives, which provide the material with plasticity and strength, are complementary. The dry material is diluted with water, it thickens within an hour, so you need to prepare the composition in such a quantity that you can use it at one time, without leaving it for later.
Prepare the mixture according to the special instructions indicated on the packaging, and not “by eye”. Thanks to the work done correctly, you can obtain a high-quality mixture, as well as prevent errors during application and various problems during operation, such as cracks or smudges. Gypsum plaster is used only for interior decoration of premises, and the humidity should not be high. In some rooms with high humidity, this composition is not used, since the material accumulates moisture, resulting in mold. The possibility of vapor permeability of the plaster composition depends on the manufacturer. For example, the Rotband composition is not used for plastering foam block houses, since it removes moisture from the house through the pores. The Volma Layer mixture is excellent for such material. Therefore, before purchasing, you need to familiarize yourself with the scope of application of the material; this should be indicated on the packaging.
Delivery form for putty mixtures
Form of supply of putty to the retail chain
In building materials stores, wall putty mixtures are sold both in the form of dry powders and in a ready-made state.
Dry formulations are packaged in paper bags weighing from 5 to 25 kg. Dry mixtures are inexpensive and have a long shelf life. Each manufacturer prints instructions on the bag for preparing putty. Only strict adherence to it allows you to obtain a high-quality solution.
The prepared solution is sold in plastic buckets. Before you buy a solution, you need to pay attention to the production date and shelf life of the putty.
Preparing walls for putty
If you have minimal experience in construction and are near an experienced craftsman, you can learn to do all the work yourself.
To begin finishing the walls, you need to prepare the plastered surfaces for putty:
- after the plaster has completely hardened, vertical beacons are removed from the walls;
- beacons made of metal profiles, when removed from the walls, leave behind vertical grooves; they can be sealed with cement mortar, but this will prolong the hardening time of the wall cladding;
- gypsum putty is best suited for filling cavities in walls; if this is done in rooms with high humidity levels (bathrooms and kitchens), then cement or polymer-based putty is used;
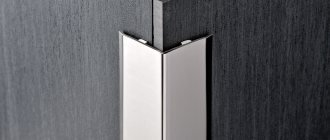
- Aluminum perforated corners are installed on the external and internal corners of the room, which are secured with putty; in problem areas, the corners are installed with self-tapping screws;
- all surfaces are primed; The primer increases wall adhesion and reduces the consumption of leveling material.
Sealing cavities left after dismantling beacons
Plaster finishing of brick walls
Finishing brick walls begins with plastering work. If the walls have significant curvature, it is necessary to install beacons, which are T-shaped guides made of light metal alloys. Installing beacons will make the process of wall alignment easier. You will need:
- Long rule, its height should be slightly less than the height of the walls;
- A short rule: choose its length based on your convenience; you will use it to level the mixture between two adjacent beacons;
- Self-tapping screws;
- Pencil;
- A thread;
- Gypsum mixture;
- Building level;
- Trowel;
- Putty knife
The process of installing beacons is painstaking and quite lengthy, but the final result depends on the accuracy of this work.
Preparatory work
First of all, beacons are installed along the edges of the wall. The evenness of their installation is achieved by screwing in self-tapping screws at the top and bottom on both sides of the wall.
- Secure the thread between the top left and bottom right screws;
- Pull the second thread between the upper right and lower left screws;
- Remove the threads, apply gypsum mortar in a vertical stripe;
- Install the beacons all the way to the screws;
- Check the level for accuracy and, if necessary, adjust the rule.
The installation of the main beacons has been completed. Intermediate ones are installed according to the same principle, only the threads are stretched horizontally, from above, below and in the center of the wall. After installing intermediate beacons, you need to check their level.
Using a primer on a brick wall
Before attaching the beacons, it is necessary to prime the wall with a deep penetration primer, which will remove dust from the surface, strengthen the brick and reduce its absorbency. An unprimed brick wall absorbs moisture from the plaster wall, which negatively affects its strength.
Reinforcing materials
When applying a thick leveling layer, there is a possibility of cracking of the plaster layer. Reinforcement, which is performed using metal or fiberglass mesh, will help reduce risks and increase the strength of plaster. Reinforcement is required when the layer of cement-sand mixture is more than 3-4 cm. For gypsum plasters, reinforcement is used when the layer thickness is more than 5 cm. If the brickwork is fairly level and the differences are not particularly large, you can reinforce places with a high risk of deformation:
- window and door openings:
- corners;
- joints of dissimilar materials;
- arches;
- exterior walls.
The fiberglass reinforcing mesh is applied to the freshly applied mortar by pressing. It is necessary to recess it in such a way that it remains in the upper third of the plaster layer.
Installation of the metal mesh is carried out at a distance of 5-10 mm from the wall from top to bottom. The upper edge is fastened with self-tapping screws, then the self-tapping screws are fastened in a checkerboard pattern at a distance of 40-50 cm from each other. At the junctions of the mesh, it is necessary to maintain an overlap of 10 cm. Beacons are installed after installing the mesh.
Polymer compositions
In the case where the thickness of the plaster layer does not exceed the permissible values, it can be reinforced by adding polypropylene fiber fiber to the solution. The thread diameter is about 30 microns, length up to 30 mm. The low weight of the additive reduces the load on the walls and foundation, increases the strength of the plaster, and increases its service life.
Applying plaster
After the gypsum mixture has hardened, a solution is thrown between adjacent beacons and leveled with a short rule. After the mixture has dried, the beacons must be removed by plastering the places where they are installed. The beacons left in the thickness of the plaster are bridges of cold.
Preparation of putty
To prepare the solution with your own hands, you need the following tools, materials and equipment:
- container for diluting the solution; it must have sufficient volume to freely mix the mixture using a mixer;
- mixer; it can be done by inserting a screw attachment into the drill chuck;
- dry putty mixture;
- water at room temperature.
Prepare the mixture as follows:
- Water is poured into the container.
- The powder is gradually poured into the water. At the same time, the solution is mixed with a mixer.
- Stirring is continued until a paste-like mass is obtained.
Water and dry mixture are added in the proportion specified in the instructions. If there is none, add the dry powder by eye until you get a solution with a consistency similar to sour cream.
Putty kneading
Varieties
According to their purpose, all plaster is divided into ordinary and decorative. Common types are divided into the following types:
- Simple - this building material is used for finishing non-residential premises, attics, sheds, boiler rooms. Usually applied in two layers;
- Improved - it is used in residential premises, as well as public places - in hospitals, schools, shops. In addition, it is used for decorative finishing of buildings and structures. This material is applied sequentially in three layers;
- High-quality - used to decorate places of special importance - museums, theaters, hotels. It is applied in several layers using special tools.
According to the application method, all plaster is divided into wet and dry. The wet composition is prepared in the usual way, with the addition of water. The advantages of this option are solidity and lack of seams. The only drawback is the difficulty of preparing the solution and the long drying time. The dry type does not have such disadvantages, but when finishing with dry plaster, the humidity in the room must be taken into account.
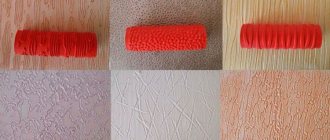
Technique for filling plastered walls
How to putty the walls in order to do it correctly with your own hands? It is necessary to follow the puttying sequence in the following order:
- First, deflections, cracks and dents are sealed with the starting composition. Align the corners of adjacent surfaces. If the internal corners are simply pulled out with putty, then the external corners will be ideal if you install perforated metal corners on them.
- To apply a portion of putty, use two spatulas. On a wide tool, apply a liquid solution along the entire blade, and with a narrow tool, apply it directly to the wall.
- Puttying with the finishing solution begins from the corners to the center of the wall.
- Excess mortar is removed with the same spatula, holding it almost at a right angle to the base of the wall. This process is called stripping the putty.
The lower the angle of inclination of the spatula, the thicker the finishing layer will be, or vice versa, a high angle of inclination of the tool will allow you to make the thinnest layer of coating.
The final coating may be glossy. Gloss does not promote high surface adhesion, so before subsequent painting or wallpapering, the walls are sanded with fine sandpaper.
Decorating a brick wall
Wet finishing of brick walls is carried out after complete shrinkage of the house. Haste will lead to subsequent cracking of the plaster, tearing of the tiles, and tearing of the wallpaper. Using plasterboard along aluminum guides can reduce the waiting time between building a house and finishing it.
Advice! Installation of gypsum plasterboard sheets is carried out with a compensation gap vertically at the top and bottom, then shrinkage of the house will not have a negative impact on the final finish.
After installing the drywall, it is necessary to putty the joints of the sheets. To reinforce the seams, use perforated paper tape. Serpyanka is not recommended for these purposes, because the plaster solution is applied on top of it, while the perforated tape is located in the thickness of the plaster. When moving gypsum board sheets, punched paper tape prevents the formation of cracks, while serpyanka will not cope with this task. After sealing the joints, go through the places where the screws are attached.
Important! Do not use finishing putty to putty joints and screws; after drying, it shrinks significantly.
Wallpaper on walls
There is an opinion that for further finishing of gypsum boards with wallpaper, finishing putty is not needed, because small errors under thick vinyl wallpaper will not be noticeable, however, a thin layer of finish will not only even out minor errors in the walls, but will also prevent damage to the drywall paper when removing the wallpaper. Before gluing wallpaper, it is necessary to remove dust from the surface using an acrylic primer, which impregnates and fixes the previous layer and reduces the consumption of wallpaper glue. Wallpaper on gypsum plasterboard walls is glued according to the manufacturer's recommendations; the work is no different from gluing wallpaper on other surfaces.
Surface tiling
Due to their low hygroscopicity and ease of maintenance, ceramic tiles and porcelain stoneware are perhaps the most practical way to decorate surfaces with high loads. Tiling is appropriate in bathrooms, boiler rooms and the kitchen. There are fewer requirements for leveling the walls, because minor errors will be compensated for by tile adhesive, so applying finishing putty and priming the surface can be skipped. The tiling of a pre-plastered brick wall is carried out according to general rules, including:
- Marking the wall vertically and horizontally;
- Pre-lay out tiles to minimize undercutting.
To avoid problems when using tiled walls, use crosses to separate the rows. Depending on the size of the tiles, lay 2-4 rows, wait for the glue to dry completely, then continue to increase the height. Failure to comply with this rule will result in the tiles sliding under their own weight.
Wall painting
Before painting, putty walls are primed. The modern building materials market offers a wide selection of paints that can be used to create original interiors. The combination of different colors and their shades forms colorful and soft panels and accent vertical planes in the home.
There are interior and exterior paints. According to their composition, paints can be oil (based on natural drying oil), acrylic, water-dispersion, pentaphthalic, nitro enamels and others. Each type of dye meets one or another requirement of the homeowner.
Many factors influence the choice of paint:
- quick drying;
- resistance to the negative effects of fungi and microorganisms;
- durability;
- immunity to moisture and ultraviolet radiation;
- ease of application;
- environmental friendliness (no harmful fumes);
- paint consumption rate per 1 m2 of wall;
- price;
- When buying paint, you need to pay attention to the presence of the inscription on the container “For walls”.
Features of brick walls
For all its advantages, brick does not have ideal geometry, and the final result largely depends on the skill of the masons, so the choice of method for interior finishing of the house is influenced by:
- the amount of deviation of the walls from the vertical and horizontal axis;
- accuracy of angles;
- financial opportunities;
- aesthetic preferences of the owners.
Important! When finishing the interior of a brick wall of a house, it is necessary to provide external insulation of the walls; insulation from the inside causes damage to the structure.
Wallpapering
The choice of wallpaper material is so wide that a separate article should be devoted to this. The most common types of wallpaper are:
- paper;
- vinyl;
- non-woven;
- fiberglass;
- PVC coating;
- cork
Respirator required when carrying out work
Liquid wallpaper deserves special attention. They are applied without glue directly to the primed wall. This type can be reused, unlike other types of wallpaper.
Each type has its own glue. Along with this, the industry produces a wide range of universal adhesive materials that are suitable for most wallpapers.
When working with wallpaper, you must use personal protective equipment.