The need to treat drywall seams
Putty for drywall joints is used to solve the following problems:
- increasing the strength of sections of such a foundation;
- leveling the surface, giving a uniform texture before decorative finishing;
- increasing the durability of subsequent coating design;
- prevention of cracks and chips;
- sealing self-tapping screws, fastening angles and other metal elements with putty;
- preparing slabs for painting, gluing thin wallpaper;
- creating a protective moisture-resistant layer for plasterboard sheets, etc.
Is it possible to putty drywall directly with finishing putty?
- Seams, joints and irregularities must be treated with a fastening solution; thanks to their special composition, you will subsequently protect the walls from the formation of cracks. These materials are not suitable for finishing; their task is to hold the structure together.
- Finishing putty for drywall is used to create a perfectly smooth surface, subsequently for finishing with decorative finishing cloths.
The modern market is increasingly replenished with new and different materials, and manufacturers are adding universal mixtures to the population, which can be used to simultaneously seal joints and create a finishing coating.
- Putty for drywall must be applied correctly to avoid repeated repairs; experts advise adhering to the technology of applying putty to drywall and using the proposed materials correctly.
Materials, tools for puttying drywall joints
Sealing seams is required using the following tools and finishing materials:
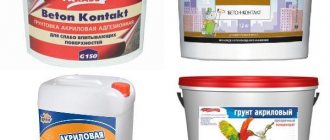
- primer;
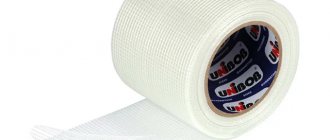
- serpyanka or reinforcing tape;
- putty mixture;
- roller;
- set of brushes;
- electric drill with mixer;
- construction knife;
- grater with sandpaper attachment;
- container for mixing solutions;
- a set of spatulas of different sizes;
- building rule, etc.
When determining which putty the work will be performed, the following nuances are taken into account:
- indoor humidity level;
- finishing coating (for painting or plaster);
- The choice of what to putty the surfaces depends on the features of the design project;
- operational characteristics of the room (living room, bedroom, study, kitchen, etc.).
Based on the type of binding ingredient, putties are divided into the following mixtures:
- gypsum;
- polymer;
- moisture-resistant cement, etc.
Gypsum putty mixtures are suitable for finishing joints of plasterboard slabs. The material is compatible in structure with gypsum plasterboard sheets, is environmentally friendly, safe, the durability of the composition is increased due to fillers. The putty is used for finishing rooms with optimal air humidity and is not suitable for bathrooms, bath complexes, toilets and other similar rooms due to exposure to water.
It is undesirable to use gypsum putties for the kitchen due to temperature changes and possible humidity. After drying, this material can absorb moisture, so during operation the tightness of the seams is broken, they dry out, and the finish loses its aesthetics.
Polymer putty is universal and suitable for finishing work in premises for various purposes. The material has high performance characteristics. Polymer mixtures can be used in places with changes in temperature and humidity levels. The advantage of the composition is that there is no need for sanding after the coating has dried. The putty can be used for wallpapering or painting.
Putties with moisture-resistant characteristics can be used to finish joints in bathrooms, kitchens, basements, rooms without heating, etc. The material is suitable for processing plasterboard floors located outdoors. The coating is resistant to temperature changes. However, it is important to take into account possible shrinkage after drying and apply a denser layer.
In accordance with the joint processing technology, several types of putty are selected:
- starting;
- finishing.
Starting finishing mixtures are intended for applying a rough layer and filling joints. Coarse putties help to level out surface deformations and close gaps with a small amount of material. When calculating the volume of putty, the planned layer thickness is taken into account, which can reach 2 cm if necessary.
Finishing putty materials have a uniform texture and do not contain coarse fillers. The mixtures are applied to prepared drywall to level the surface for painting or other decorative finishing. The standard finishing coat is 1 layer.
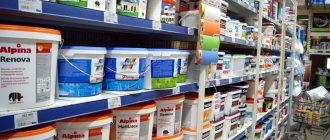
Putties are offered by manufacturers ready-made and in the form of a dry powder.
For plasterboard sheets and joint processing, it is optimal to choose dry putty mixtures that can withstand temperature changes and are durable. The advantage of a dry product is the ability to mix the solution in small portions during the finishing process. The material is offered at an affordable price and is universal.
The advantages are also the mixture’s frost resistance, strength, plasticity, composition stability, and the ability to accurately maintain proportions. When diluting the powder with water, the recommendations indicated on the product packaging are taken into account.
Ready-made putty solutions have a higher price. Before use, the composition is thoroughly mixed in a container, then applied to joints and other plasterboard surfaces. If the rules are followed, such solutions can be stored for a long time.
How to putty drywall correctly
- After installing the sheets, there remain joints, holes from self-tapping screws, corner areas that need to be hidden, avoiding the formation of possible cracks and obtaining a flat surface. The main issue requiring a detailed approach is the creation of a durable surface.
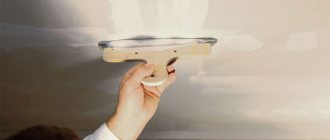
- Preparation. We cut the joints of the sheets where they were cut with a construction knife at an angle of approximately 45 degrees, making a wider and more uniform edge. It is advisable to cover the surface with a layer of primer, the work is carried out with a brush or roller, this way the materials have better adhesion.
When puttingtying joints we use reinforcing tape; consider some of their types.
- Serpyanka.
- Fiberglass tape.
- Paper with perforation. Some companies offer paper tape with a glass fiber composition, which is considered the most modern type.
- Not expensive paper tape.
It is not recommended to use simple tape (paper), it is difficult to install, does not adhere well to the putty, and creates air bubbles and dips after drying. Use only special tapes based on paper with an improved structure, from well-known companies.
Joints and seams
- Using serpyanka.
We glue all the joints
- Serpyanka comes with an adhesive base, sticks to a dry, dust-free surface, and is easy to use. And the dry one, which is attached with paper clips, is more labor-intensive during installation, but cheaper in price.
- Mesh tape is most often used in drywall joints with a thin edge, is easy to use and does not form air bubbles. It is not advisable to use when reinforcing internal corners.
- Having laid the serpyanka along all the joints of the wall, then using a spatula we apply the putty on top and deep into the mesh, evenly distributing it in a small layer.
Also read: Decorating the bathroom with plastic panels; DIY repair in one day
With modern paper tape or glass fiber canvas.
- More often used in drywall joints with a smooth edge, good for external and internal corners, modern paper tapes have a depressed edge in the middle, which makes working in corners easier.
Apply tape to the sealed joint
- The putty is applied in an even layer, without waves or large voids along the joint lines.
- The tape is applied to the joint and adjusted in the middle, pulling it tight and slightly pressing it into the putty.
- Then use a spatula to apply it over the tape, pressing it into the putty; the tape should lie flat, without waves, and exactly in the middle of the joint.
- The next step is to remove the remaining mortar along the longitudinal edges and edges with a spatula.
- We carry out the work in short sections to avoid drying out the top layer of putty, which will significantly worsen the adhesion to the reinforcing tape.
Angles
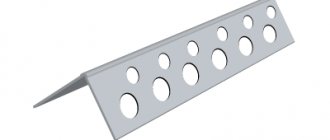
To form high-quality external corners, corners are used, they come in metal and plastic, with corrugated holes, some types are immediately equipped with reinforcing mesh, there are models for even straight corners and special arched ones that accept any bends. Easily trimmed to specific parameters. Convenient to use in uneven relief corners, forming an even angle.
When making corners even, they usually putty in stages, one side of the corner, then the other. Applying the mass begins from the bottom, moving the tool towards the top, rubbing the solution with straight-line movements.
- The corners are attached to putty or additionally fixed with a stapler to staples, then putty is passed over the top to fill the corrugated holes.
- Arched areas are finished with a special corner; it is better to secure them with a stapler and apply putty in two layers. We wait for the first layer to dry and apply again, achieving an even angle.
- How to putty corner seams of drywall without special overlays? In this case, the work is carried out with a spatula, filling the joint with mortar in one or two layers, then leveling it. After drying, it is further trimmed by sanding until perfectly smooth.
- How are internal corners puttied? On the inside of the drywall, the same materials are used and the finishing technology is no different. With or without a corner, using tape, the solution is applied with a regular spatula and equalized to the required uniformity. The direction of movement of the tool can be horizontal; from the corner, the solution is rubbed along the wall. For internal corners, tape is often used.
Also read: MDF panels for walls; interior decoration
Preparation for painting
Having completed the rough work of sealing seams and corners, we proceed to processing with finishing putty. We choose a mixture and get to work. Fine-grained putty is used for finishing. How to putty gypsum boards for painting, wallpapering or decorative plaster? The technology for puttingtying with a finishing solution is the same for all corners and joints, regardless of what kind of putty was used.
- All unevenness and roughness formed from applying the solution at the first stage of installation are rubbed with an emery sheet, preparing the surface for applying primer. Next, the entire surface is primed, this will give better adhesion of the putty to the wall.
If a dry mixture is used, prepare the solution in the required quantity, not in large portions, so that the mixture does not dry out. The dried mixture loses its adhesive properties and is not permissible for further use.
- The mixture is applied with a wide spatula evenly over the entire plane, starting from any corner, wait until it dries completely. It is permissible to apply one layer, if necessary, you can go through it again.
- Then the entire surface is sanded, erasing small irregularities and creating a perfectly smooth layer.
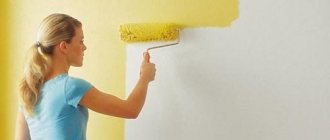
- Puttying is completed at this stage. For further application of finishing coatings, it is necessary to apply primer under interior paint, wallpaper, tiles, cork panels and decorative plaster.
If canvases in the form of PVC panels, MDF and similar building materials are used on drywall, the base does not need puttying; it will be enough to treat it with antiseptic solutions or primer, especially in rooms with a high humidity threshold.
Preparatory work before sealing seams
Before you putty the seams, you need to prepare the surfaces. It is necessary to check the quality of installation of plasterboard sheets, the dimensions of the joints, and the reliability of fastening the screws. The protruding caps of the elements are screwed in, incorrectly fixed screws are removed, and the fasteners are reinstalled in accordance with the requirements. The seams are examined, the areas that need to be unstitched and glued with mounting tape (sickle tape) are determined.
The joints between the plasterboard slabs are cleaned of dirt and dust, and construction debris is removed from the gaps. On the cut or factory edges, using a construction knife, indentations of 0.5 cm in size are made with an inclination of 45°. The procedure is necessary to improve the quality of adhesion of the putty mixture to plasterboard floors.
The next step is priming the surfaces. The treatment is intended for leveling the base, lightly applying putty, preparing slabs for wallpapering or painting. It is recommended to carefully prime seams and corner areas.
For drywall, it is advisable to use a deep penetration primer. After applying the product, you need to dry the surface and the joints of the plates. Then re-priming is performed. The mixture can be applied with a brush or spray. The layer thickness must be at least 0.5 mm. The coverage should be uniform.
After high-quality treatment of the area with a primer, the consumption of the putty mixture is reduced and the durability of the subsequent decorative finish increases.
Preparing the drywall surface for puttying and painting
Before you start puttingty, a few more small preparatory works are performed, for this you need to:
- Tighten the heads of the screws to the limit - do not drown them, since depressions may remain; if this happens, they need to be unscrewed and longer ones installed in their place.
- If the paper peels off at the joints of the sheets, it should be cut off and sanded; if this is not done, the putty on drywall for painting will peel off and cracks will appear.
- Using a carefully sharpened knife, widen the joints between the sheets; to do this, up to 5 mm is cut from the edge of each at an angle of about 45°, this is necessary so that the mixture adheres better to the surface.
- Primer is an important step in preparing a plasterboard wall for painting, as it improves the adhesion of the mixture to the surface. For domestic premises, you should choose a ready-made deep penetration primer. The material is applied in a layer with a maximum thickness of 0.03 mm. Alkyd primers are not used because they cause deformation of the cardboard layer. The paper peels off, bubbles appear, which subsequently burst, turning into rags, so good adhesion will not work. Preparing gypsum boards for painting using a primer is done with a roller or a wide brush.
After the primer has dried (at least 12 hours), you can seal the seams. This requires fiberglass mesh. It is glued so that the joint is exactly in the middle. Internal corners are also treated with sickle tape.
External corners should be protected with corners - metal or plastic. They are attached with self-tapping screws or glue; if the outer corners are shaped, then you need to buy products that can be bent.
Surface treatment
After priming, the joints between the plasterboard slabs are filled. The work is being carried out in stages.
The putty composition is mixed in compliance with the proportions of powder and water specified in the manufacturer's instructions:
- The heads of metal screws and recesses are covered with putty.
- It is necessary to putty the joint areas, the solution is applied deep into the seam.
- Then the mass is distributed along the length of the seam. If there are large joints, they are distributed into sections of 2-3 m and filled with mortar.
- The mixture is pressed into the seams with a spatula to fill the empty space.
- At the end of the work, excess putty solution is removed and the surfaces are dried.
How to remove drywall from a wall
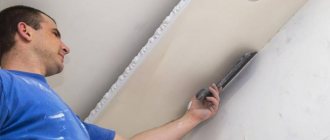
The final stage is finishing putty. Irregularities are smoothed out using sandpaper, then the finishing compound is applied. The layers are made thin and even. This allows you to get chic, smooth surfaces. Plasterboard putty for painting is carried out in stages.
The basic tools you will need are: putty, spatula, primer, finishing putty. First you need to align the layers of the structure. To do this, tighten the screws, check the seams and joints. Please note that the fasteners are screwed in all the way, but without recessing the screws, as holes will form that will also have to be repaired. The advantages of dismantling while preserving the drywall - the customer has the material to build a new wall.
The work is carried out quietly and involves the dismantling of each individual sheet of drywall. No hammers or crowbars. A minimum of debris and dust is generated in the room. Before dismantling, we move the furniture away from the walls and cover the room with durable film.
Turn off the electricity. We remove shelves, switches, sockets, and wall lamps from the walls. We dismantle the door with the frame. It is at this stage that you can determine how advisable it is to dismantle while preserving the material.
Based on the condition of the drywall, it will be possible to understand whether or not it is necessary to leave the sheets or whether it is easier to remove the entire structure. If the drywall is damp, warped, and the screws are rusty, remove this material without regret. There are two types of drywall joints. Along the long side of the gypsum board, the edges are uneven - for easier sealing of this joint.
But the sheets are also connected in height, where there are no ledges. You also have to cut the sheets and the joint is also end-to-end. Such connections require special technology, which will be discussed below. So, it is absolutely necessary to putty the drywall before painting, preferably before wallpapering (at least in one layer) and only seal the screws and seams under the tiles. Prepare the solution according to the instructions on the package.
For the work you will need a metal spatula 10 cm wide. The screws are puttied in 2-3 layers. Each subsequent layer is applied after the previous one has dried.
To read barcodes from product packaging, you need a barcode scanner. High-quality scanners can be purchased from A-TRADE. Wide choice, quality assortment.
Before sealing drywall joints, it is necessary to put the entire surface to be treated in order. To do this you need: Sealing drywall seams is not a difficult task, but it requires a lot of endurance and accuracy, since there can be a lot of seams, but they will all have to be sealed, and if they are also located on the ceiling, the master will be very tired. We advise you to take short breaks so that the quality of the work does not deteriorate, and so that the putty does not fall from the ceiling, you need to press harder on the spatula, so it will penetrate deeper into the seam more tightly. We coat the prepared joints with primer. In this case, it is more convenient to use a brush.
After drying, fill the seam with a composition for puttying drywall joints. It is more convenient to work with spatulas 10 cm wide and hard 20 cm. Apply the composition with a small one, and remove the excess with a large one. Fill well, pressing the composition into the seam. If you did everything correctly, a small roller will form, slightly protruding above the surface.
The primer performs two different functions. The first is that it improves the adhesion (adhesion) of two materials. As a result, when puttying, the chances of bubbles forming and material peeling are reduced. The second function is that it evens out absorbency.
The result is less material consumption, and when puttying, a more even surface. So it is not advisable to skip the primer. Often, when starting a major renovation of an apartment, owners plan to do some minor redevelopment. By dismantling old partitions, they want to increase the usable area and change the design of the apartment.
A partition is, as a rule, a non-load-bearing wall that separates rooms in an apartment.
- You need to start by disassembling the baseboard. As a rule, it is not possible to reuse the plinth, since during dismantling it usually breaks or crumbles. However, if the covering was installed recently and its replacement is caused by the ceiling leaking from above, then you can try to remove the baseboard by prying it off with a spatula.
Choosing a method for puttingtying drywall seams with your own hands
Before puttingtying the drywall seams, a technology for processing the joints is selected.
Builders offer the following repair options:
- use of construction tapes for puttying;
- puttying with serpyanka;
- using perforated paper tape.
Using construction tapes when filling joints
A popular way to treat joints between plasterboard slabs is to use construction tapes during the puttying process. Fiberglass mesh can be standard or self-adhesive, suitable for adjusting longitudinal joints. However, construction tapes are not recommended for cross joints that are susceptible to cracking.
The material is available in standard sizes, so it is suitable for seams of different lengths and widths. The tapes are durable, with reinforcement and a fold in the center; they are easily applied to corner areas and joints. The strips are first coated with glue and putty solution, then applied to the areas. After drying, it is treated with putty.
Puttying with serpyanka
The application of putty for sealing plasterboard seams with serpyanka is carried out in compliance with the following steps:
- The solution is distributed onto the seams to level the base.
- The putty is pressed in to fill the recesses in the joints.
- The serpyanka is measured and cut to the marked length.
- Parts of the serpyanka are applied to the putty at the joints of the plasterboard boards.
- The material is pressed along the length of the seam.
- A wide spatula is passed over the surface of the tape to remove any remaining solution.
- After 12 hours, the next layer of putty solution is applied to the areas. The second coating is necessary to increase the strength of the base and eliminate the effects of slight shrinkage of the first layer.
- After the putty has dried, the joints are sanded using sandpaper or special equipment with an attachment.
- After completing the processing of the seams, it is necessary to prime and putty the surface of the drywall.
Seam filling using perforated paper tape
Puttying seams using perforated tape made of thick paper is carried out in stages:
- The seams are cleaned and the joints are primed.
- The joints of plasterboard slabs are treated with a thin layer of putty solution to fix the perforated material.
- Then tape is applied to the treated surface.
- When gluing, the strip is slightly stretched and held along the central part of the joint.
- The fabric is smoothed with a solution to prevent the formation of bends and unevenness.
- The tape is pressed with a spatula using movements from the middle to the edge.
- Then the remaining putty solution is removed along the perforated sheet.
- After 12-14 hours, a second layer of putty is applied to the joint areas.
- After drying, the coating is sanded.
- Then you can putty all surfaces of the drywall.
- When applying the putty step by step and accurately fixing the perforated tape, the joints will be located flush with the top layer of drywall sheets.
Preparing the walls
Before you putty the drywall, the surface of the walls should be prepared. Some craftsmen advise waiting a few days after installing the gypsum board to allow the material to acclimatize. However, there is no such thing in official recommendations.
It is very important to check with your own hands that all screws are completely immersed in the sheets. If the caps stick out, the spatula will cling to them and this can interfere with work or even cause damage to the material.
It's very easy to check - just run a dry spatula over the surface. If the cap sticks out, the tool will definitely catch on it. This is very easy to fix; you need to tighten the screw with a screwdriver or screwdriver. It is important not to overdo it so that the screw does not damage the sheet.
Next you need to seal the seams and places where the screws are screwed in. You can do this yourself using the same putty that will be used for finishing.
Screw-in areas are sealed using a small spatula; for seams it is convenient to use a large one.
In addition, it is recommended to further strengthen the seams using self-adhesive fiberglass mesh - serpyanka. The seam is sealed with it and then covered with putty. If the serpyanka doesn’t stick well, you can “put it on the same putty. Seams obtained as a result of cutting sheets independently require special attention.
In such places the seam can be very narrow. Therefore, it will have to be first embroidered - expanded with a knife. Otherwise, it will not be possible to push the plastic mass inside.
After sealing the seams, they need to be given a day to dry and harden. After this, you can begin the main part of the work.
If you plan to glue wallpaper, then further work is not necessary, provided that you use moisture-resistant gypsum board, which will not swell from wallpaper glue. But it’s better to make a continuous, homogeneous layer.
Sealing self-tapping screws and gypsum board seams - step-by-step instructions (which one to choose)
Plasterboard joints are puttyed with special compounds Knauf-Fugen, Knauf Uniflot, Fugenfuller or their analogues. After the primer layer has dried, dilute the putty solution to a creamy consistency. The mass is prepared in small portions, because... it dries quickly. The screws are covered with putty mixture with a small spatula, and the remaining mortar is removed. The surface should remain flat.
The nuances of how to properly putty drywall joints differ depending on their location, size and configuration.
The joints along the long side of the slab are uneven and can be easily filled with mortar. Sheets can be connected vertically in height. The technology for processing edged plasterboard slabs at joints is different.
How to putty vertical joints
When puttingtying vertical joints of plasterboard sheets with finished factory edges, the work is performed in compliance with the following steps:
- The joints are cleaned and filled with ready-made mortar.
- Before the finishing mixture dries, the joints of the slabs are glued with reinforcing tape or sickle mesh to prevent the formation of cracks.
- When using paper tape, the canvas is cut into pieces, which are soaked in settled water for 10 minutes. Then the strip is glued to the seam, ironed with a medium-sized spatula and pressed from the middle part to the edge.
- Finally, the surface covered with plasterboard is treated with finishing putty, and the joint is leveled with the base.
- After preliminary work, these areas can be plastered with decorative compounds, painted, wallpapered, etc.
Trimmed seams on drywall
Plasterboard surfaces with cut seams without factory edges can be puttied only after preparation.
The work is carried out in compliance with the following steps:
- The surfaces of the drywall at the joints of the boards are moistened several times with water using a brush.
- Then, using a sharp utility knife, grooves are cut at a 46° angle before priming.
- The prepared areas of the joints of plasterboard slabs are coated with a primer solution using a brush.
- After the layer has dried, the seams are filled with a special putty.
- The cracks are sealed with a solution using a small spatula, and excess composition is removed with a wide tool.
- The mass is pressed into the seams to prevent subsequent cracking of the finish.
- The putty solution is once again applied to the seam in a layer 0.5 mm thick, and reinforcing tape is fixed on top of the solution.
- The material is pressed to the base with a spatula, and the remaining putty solution is removed.
- The reinforcing tape is straightened, a thin layer of putty is applied on top and distributed over the surface.
The second technology for sealing seams for drywall joints: first with tape, then with putty
The next method involves gluing reinforcing paper tape or sickle tape to the drywall, then applying putty. The disadvantage of this option is the possible formation of voids in the joints under the tape. In this case, it is optimal to use self-adhesive sickle tape. After the material has dried, the surface is carefully puttied.
The method can be used in small areas. When finishing long joints and processing a large area of plasterboard floors, irregularities and waves may remain.
Application technology
When applying, you must follow the work technology; the slightest violations can lead to undesirable consequences.
Preparing walls for final finishing
- We clean the surface from dust that inevitably forms during its installation. An industrial vacuum cleaner is best suited for this, but if you don’t have one, you can remove dust with improvised means.
- The next stage is filling of seams, joints and irregularities. For putty, both ready-made and dry putty mixtures can be used. If dry mixtures are used, prepare them immediately before work.
- First, fill the joint cavities and large uneven areas with putty. After the putty has hardened, apply a leveling layer.
- Now you can move on to the key stage of preparation - priming.
Primer
For bases, special primer mixtures are used (such as Tiefgrund LF or similar characteristics). Such primers penetrate deeply into the thickness of the base and strengthen it, ensuring adhesion to the mixtures.
For the best effect at this stage, it is better to use acrylate primers that have vapor-permeable properties (do not isolate water vapor).
Apply the primer in one layer using a roller or brush (for walls with a small area).
Note! Work on drywall is carried out only after the primer has completely dried! For acrylate primers, drying time is 1-2 hours.
After the seams are filled and the primer is applied, you can proceed to leveling the walls.
Applying plaster
Instructions for distributing plaster with your own hands:
The mass is applied in a thin layer (no thicker than 2-3 mm) using a wide spatula or metal trowel. If plaster is used to level out deep unevenness, the distribution is carried out in several stages. Remember that in this case it is better to apply 3-4 layers of several millimeters each than 1 thick layer at once.
Not any plaster is suitable for finishing plasterboard surfaces. It is best to use mixtures based on a gypsum binder (for example, Knauf Rotband). In order for the finish to “stick” better, you can use fiberglass mesh with a 5 mm mesh.
After the plaster layer has completely dried, you can begin finishing the plasterboard walls. In this case, it is better to use vapor-permeable materials for finishing that do not prevent water vapor from escaping from under the finishing.
External and internal corners
For finishing internal and external corners on partitions and walls made of plasterboard boards, the following materials are used:
- serpyanka;
- reinforcing paper;
- aluminum perforated corners;
- metal corners Shitrok with paper inserts.
Reinforcing paper and sickle tape are often used when decorating internal corners (at the junction of wall panels, the junction of walls and ceilings).
The work is carried out in stages:
- a little putty solution is applied to the corner parts;
- Serpyanka or paper reinforcement is placed on top;
- Using a narrow spatula, the canvas is pressed into the mass;
- the remaining putty is removed;
- then treat the corner again with a thin layer of putty.
Perforated corners are used for finishing external corners (slopes, protrusions, etc.).
The work is carried out in stages:
- it is necessary to cut off part of the corner of the required length with scissors for working with metal;
- the edges are cut at an angle of 45° or a smaller slope; it is not allowed to make a corner at 90° for plasterboard structures;
- putty solution is applied to the outer corner on both sides in small parts with an interval of 10 cm in a checkerboard pattern;
- a perforated corner is pressed into the putty solution;
- the accuracy of placement horizontally or vertically is checked, if necessary, the location of the corner is adjusted;
- the remaining mortar is removed with a spatula, the edges are aligned into a single plane with the surface of the drywall;
- the fixed corner is left until the putty dries;
- then the surface is polished;
- If necessary, the putty is reapplied.
Installation of the Shitrok corner is similar to the installation of perforated elements. However, the transition to the plasterboard plane of the corner element is more convenient due to the presence of paper inserts and a metal base.
Types of putty mixtures
According to their purpose, putties are divided into several types:
- Starting – used for preliminary leveling. The main requirements for them are high adhesion to the base, strength and durability.
- Finishing – applied under the decorative coating. With their help, the smallest defects are eliminated, which allows you to get an ideal smooth surface.
- Universal - it is advisable to use by amateurs when they need to level the surface using one composition. There is no need to think about which putty to choose. Professionals prefer to use leveling compounds followed by finishing preparation.
Related Posts
- How to putty drywall for painting: tips from the experts
- Using oil-adhesive putty for finishing work
- Is it necessary to apply the finishing putty after the starting putty if the walls are being prepared for wallpapering?
- How to properly putty walls for perfect painting?
- Sealing drywall seams: subtleties and nuances of technology
- Basic properties of putty and plaster: how do these materials differ?
- Leveling the ceiling and do-it-yourself plaster for painting
- How to sand walls and ceilings after puttying
- How to glue wallpaper on drywall
- Plasterboard ceiling putty
- Painting drywall: 4 finishing features
- Is it possible to putty the ceiling before painting with your own hands?
- Elastic plaster
- How to attach drywall to a wall: 2 installation methods
- How to close the pipes in the toilet
- Choosing dowels for drywall
- Required profile for a plasterboard partition: 3 types
- Moisture-resistant drywall
- How to glue fiberglass correctly?
- How to seal the joint between the bathtub and the wall? 8 popular options
- Is it necessary to prime the walls after the starting putty before the finishing putty?
- Do I need to apply a primer before wallpapering drywall?
- How to update old tiles in the bathroom
- Using a drywall lift and creating a structure with your own hands
- Interior finishing of timber houses with plasterboard sheets
Read with this
- How to putty drywall for painting: tips from the experts
- Using oil-adhesive putty for finishing work
- Is it necessary to apply the finishing putty after the starting putty if the walls are being prepared for wallpapering?
- How to properly putty walls for perfect painting?
- Sealing drywall seams: subtleties and nuances of technology
- Basic properties of putty and plaster: how do these materials differ?
- Leveling the ceiling and do-it-yourself plaster for painting
- How to sand walls and ceilings after puttying
- How to glue wallpaper on drywall
- Plasterboard ceiling putty
Sanding seams and corners of drywall for wallpaper
Finally, the surface of the drywall is sanded with sandpaper of a suitable grain size or with a grinding machine with attachments. It is recommended to check for unevenness using artificial lighting. Grinding work is carried out wearing safety glasses and a respirator.
To prepare surfaces for painting, sandpaper marked P400-600 is used. To give the puttyed drywall a matte smoothness, P1000 paper is used. Final polishing is performed with sandpaper marked P1200.
If there are uneven surfaces, you can treat the walls with coarse sandpaper. Then apply sandpaper with medium grit - P80-280. Rough sanding is performed with paper marked P40-60. After sanding, the surfaces are primed again.
Preparing to seal seams
Walls or ceilings finished with plasterboard are immediately ready for decorative finishing. This could be, for example, finishing with ceramic tiles, wallpapering or finishing with decorative plaster.
Usually, when further painting or wallpapering, the joints must be puttied.
Putty conditions
Puttying must be done at normal humidity and air temperature plus 15 degrees.
Temperature conditions and other parameters must be observed throughout the installation of drywall, as well as for three days after installation.
Tools
To fill the joints between sheets, you must have:
- two spatulas measuring 25 -40 cm,
- drill with attachment,
- containers for mixing mixtures,
- dry mixture for preparing putty,
- reinforcing tape.
Puttying seams is not difficult, but such work requires patience.
Preparation of putty mixture
The putty is prepared strictly according to the instructions indicated on the packaging. Before purchasing a putty mixture, pay attention to its expiration dates.
Many dry putty mixtures contain gypsum powder, which tends to absorb water.
If the putty mixture has expired, it loses its properties and it is better not to use it.
The mixture is prepared by adding the required amount of water to the dry mixture.
After adding liquid, the mixture is thoroughly mixed using a drill with a mixing attachment.
It is better to mix at low speeds and stir until the mixture is homogeneous, without lumps or clots.
The finished mixture must be used within twenty to forty minutes, for this reason the solution must be prepared in small portions in order to have time to use it.