Factors affecting thickness
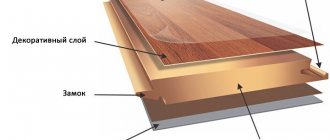
There are no general recommendations for calculating the required amount of solution, because cladding is not a typical job. The thickness of the glue can be several millimeters or exceed a centimeter. The thickness of the layer will depend on the size of the material used. The smaller the tile, the thinner the solution is applied. It is worth considering the type of facing material. To lay porcelain tiles you will need less glue.
Other important factors on which the thickness of the tile adhesive depends include the type and quality of the base. The consumption of the solution when facing concrete and drywall will be different.
The thickness of the tile adhesive on the floor should be selected taking into account the height of the coverings in other rooms. The laid tiles should be located approximately on the same level as laminate, linoleum or parquet. Otherwise, thresholds will form at the joints.
Cladding work should be carried out taking into account the type of glue. The amount of solution will depend on the components included in its composition. The cement mortar can be applied in a thicker layer.
Type and size of tiles
The thickness of the tile adhesive layer is calculated taking into account the dimensions of the facing material. For small-format tiles (up to 10×10 cm) it should not exceed 2 mm. The thickness of the solution for small square elements with sides from 5 to 7 cm after pressing is 1.1-1.3 mm.
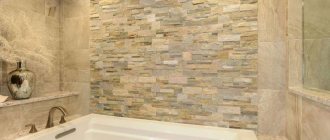
When laying medium-format and large-sized materials, a thicker layer of glue will be required. When facing with square tiles with sides from 20 to 30 cm, after pressing it will be 2.5-3.5 mm. The consumption of the solution will depend on the angle of inclination of the spatula. Large-format facing material with sides from 30 to 50 cm is laid on a layer of 3.5-4 mm. When using rectangular tiles, the thickness of the mortar is calculated based on the area of the element. Tiles with sides of 20 and 25 cm (most often used for finishing walls in the bathroom) are laid on a layer of 3 mm.
The type of facing material must also be taken into account. Tile has high porosity, which leads to strong water absorption. Therefore, when laying it, more solution may be required. The structure of porcelain stoneware is different. This material almost does not absorb liquid, which leads to less glue consumption.
It is also worth taking into account such a parameter of the tile as thickness, since its weight depends on this value. For heavy facing materials, more mortar is needed to ensure they adhere more firmly. It is recommended to lay porcelain tiles on a layer of glue, which is 40-60% of its thickness.
What base is used
Each type of tile adhesive is designed for different types of substrates. The scope of application of the composition and its consumption are indicated by the manufacturer on the packaging.
In the case of plasterboard cladding, the thickness of the mortar for good adhesion should not exceed 5 mm. When laying medium-format tiles on such a base, it is recommended to apply a layer of 3-4 mm. Then it is leveled with a comb with 6 mm teeth. The solution can be applied in a thicker layer to concrete, plastered base or screed.
Before tiling, you should examine the walls and floor. The thickness of the glue also largely depends on the quality of the base. In the absence of differences and unevenness, the solution consumption will be minimal. To cover an imperfect surface, you should choose a leveling adhesive. There are compositions that can be applied in a layer of 1.5 cm. However, it is better not to use such a solution for novice craftsmen.
Without experience in tiling, it will be difficult to lay tiles on a thick layer due to shrinkage. If the differences exceed 3 cm, then leveling with glue should be abandoned. In this case, the quality of the surface can be improved by plastering or screeding.
Laying wall and floor tiles requires different volumes of mortar. In the second case, the layer should be thinner so that the tile does not fall off from the base.
Humidity and moisture absorption of the adhesive
When carrying out repair work, you need to monitor the moisture content of the tile adhesive. Dry mortar cannot be applied to walls, because there will be no good adhesion to the facing material. It is also necessary to take into account such an important characteristic of the base as moisture absorption. It directly affects the consumption of tile adhesive. Porous substrates have high moisture absorption. These include sand-lime brick and some types of concrete.
High moisture absorption increases the thickness of tile adhesive when laying tiles. The situation can be corrected using a primer.
Composition of adhesive
The tiles are laid using various types of adhesive mixtures. They are divided into thick-layer and thin-layer. For plasterboard substrates, you can choose a resin-based adhesive. Its thickness when applied should be 3-5 mm.
Two-component mixtures are also available on sale. They consist of a catalyst, as well as a resin-based paste, quartz filler and additives. Such a solution does not shrink when dried. This means that the thickness of the adhesive when laying the tiles will remain unchanged. The two-component mixture is applied in a layer of 2-5 mm.
Curvature and differences can be dealt with using a cement mixture, which is classified as thick-layer. It is sold dry and consists of sand, cement, and plasticizers. Its thickness can be up to 14 mm. This mixture is applied to floor tiles, which weigh a lot. For wall cladding, 5-7 mm is enough.
Comb tooth size
You can get the correct layer thickness using a special tool for applying glue - a notched trowel. It must be selected based on the size of the material that will be required for cladding. Spreading small tile adhesive with a large-notched trowel results in excess adhesive in the joints. A small comb is not suitable for dimensional facing material, because... When applied to the base, projections are formed that are too low.
The height of the spatula teeth of 5-6 mm is optimal for wall cladding. For working with mosaics, it can be 2-3 mm. The adhesive mixture is applied to large-format tiles with a larger notched trowel (with a comb of 1-2 cm). Similar combs are also used for floor tiles. For small square tiles, it is recommended to choose a trowel with 4 mm teeth. For medium format tiles 20x20 cm, a size of 6 mm is suitable.
It is worth purchasing spatulas with different teeth. The surface may be uneven, causing the need to apply an uneven amount of adhesive.
We count the glue consumption
In addition to the number of tiles, before starting repair work, you should also calculate the amount of glue required. The indicator will be significantly affected by the quality of the subfloor, the installation method, as well as the quality of the tile itself. And, of course, the experience of the master. For beginners, the consumption of the adhesive component is usually higher than for experienced specialists.
The consumption of tile adhesive can also be calculated
Table
What affects glue consumption and why is it important to consider these factors?
| Factor | Explanations |
| Tile porosity | The glue will not only be on the surface of the ceramic product, but will also partially penetrate the structure. Also, such tiles usually absorb moisture from the adhesive more strongly. |
| Uneven subfloor | Cracks, chips, and unevenness can significantly increase consumption, since all identified voids will be filled with glue, and in places with unevenness, a lot of glue will have to be applied. If the difference in floor heights is no more than 3 mm, then you can still use a small amount of glue. But the more curved the base, the more glue will be spent. Otherwise, it will not be possible to make an even floor covering. |
| Uneven tile surface | The voids present on the back side of the ceramic product will also be filled with glue at the time of its application. |
| Dimensions of floor elements | The larger the tile, the more glue it needs. For example, when laying ceramics measuring 10x10, the thickness of the adhesive layer should be about 2 mm. With tile dimensions of 20x30 cm, this layer will reach 3 mm. If the ceramics are even larger, the glue is applied in a layer of up to 5 mm, but not less than 4 mm. |
Ceramic tile sizes
The amount of glue per 1 m2 is calculated as follows: the thickness of the tile is measured and divided by 2, the average value of the consumption of the adhesive composition is taken. The values are multiplied, and the final figure will be equal to the glue consumption. But it is quite approximate, and it is better to buy material with a small margin.
The glue, which is made on the basis of cement, is calculated as follows: take the weight of the bag (the best option is to purchase 1.3 kg bags) and multiply it by the recommended thickness of the glue. The result is a number approximately equal to the glue consumption. Sometimes you can determine the cost of glue using a calculator.
Tile adhesive calculation
Calculator for calculating the amount of adhesive for laying tiles
Go to calculations
After the tiles have been laid, it is necessary to form the seams between the floor elements. To do this, purchase a special grout for joints. It is not difficult to calculate the required amount of this material - for this, the perimeter of one ceramic element is calculated and divided by 2. Then the resulting figure is multiplied by the area of one tile. The final value should be multiplied by the thickness of the ceramic element, and then the new figure is multiplied by the width of the seam that remains between adjacent tiles. The next resulting value is multiplied by the material shrinkage coefficient equal to 1.5. The result of all these calculations will be the required mass of grout, which can be used to process up to 1 square meter. tiled surface area
Features of adhesive compositions
The thickness of the layer of adhesive mixture under tiles or porcelain stoneware can vary dramatically. Of course, the key factor here will be the facing material used and its individual characteristics, but much also depends on the adhesive composition itself.
There are three main types of tile adhesive:
- Cement . Standard dry mixture of Portland cement, sand and modifying additives with plasticizers. An alternative is a homemade mortar made from cement, sand and slaked lime. At the same time, working with such glue is quite simple and convenient.
- Two-component . These are predominantly epoxy compounds, which include an epoxy resin and a catalyst. The result is a viscous adhesive that provides effective adhesion of surfaces with minimal mixture consumption.
- Dispersive one-component . These are ready-to-use mixtures, which mainly consist of resin components of one type or another. They can also be based on polymer components, for example, latex.
Types of adhesives for tiles
When applying cement mortar, you will need a larger layer compared to other types of mixtures, but the material itself has a lower cost, which allows you to compensate for its high consumption.
Minimum and maximum values
Although the thickness of the adhesive composition can be varied during operation, there are some standards and restrictions. First of all, this concerns the laying of porcelain stoneware slabs.
The smallest amount of adhesive mixture is calculated individually and depends on the tile format. Conventionally, you can use the following indicators:
- For ceramic tiles and decorative inserts, a two-millimeter layer of adhesive is sufficient.
- For large and heavy facing elements, for example, porcelain stoneware floor slabs, the minimum adhesive layer increases to 4-5 millimeters.
An increase in the nominal layer is carried out in cases where it is necessary to level the surface before facing, and a screed cannot be used. This is possible with small irregularities, cracks, and depressions. For large deformations, the use of glue is pointless.
All the slightest irregularities are noted on the surface being treated. Among them, the highest is selected. This is the top point to which the glue layer will be reached. All cracks and depressions are filled with the mixture.
Experts have developed recommendations for the maximum thickness of the adhesive layer for all types of slabs:
- When laying small-sized wall tiles, the thickness of the adhesive should not exceed 10 millimeters.
- When installing floor tiles - 15 millimeters.
- When installing ceramic granite, the thickness of the adhesive layer can reach up to 20-25 millimeters, but no more.
If these indicators are exceeded, the adhesion of surfaces deteriorates with a significant excess of glue.
Characteristics of porcelain stoneware
Initially, porcelain stoneware was produced as a particularly durable tile for technical use in public and industrial buildings. Surprisingly, in Europe such material is considered an ordinary tile, only in the CIS countries it was given a separate name.
It is produced by semi-dry pressing under a pressure of 400-500 kg/cm2 and then fired at a temperature of 1200-1300 degrees.
Press powder is made from slip - a homogenized mixture of white-burning clay, kaolin, quartz sand, feldspars, pegmatites and water. Coloring oxides are often added to the composition, which allow the material to be given the desired shade.
Table of technical characteristics of floor coverings
Technical characteristics of porcelain stoneware floor tiles:
- Water absorption: 0.05-0.01%.
- The bending strength of imported collections is 500-600 kg/cm2, while domestic analogues have indicators of 470-550 kg/cm2.
- Hardness on the Mohs scale: 6-8 (domestic analogues 5-8).
- Degree of wear resistance: 3-5 (for ceramic tiles this indicator is 1-5).
- The number of frost resistance cycles is 3-4 times higher than that of conventional tiles: from 100 to 300 cycles at temperatures from -5 to +5 degrees.
No. 3. Types of porcelain stoneware
The following types of porcelain stoneware are most suitable for flooring:
- Technical porcelain tiles. An ideal option for covering floors in industrial premises.
- Matte porcelain tiles. This type of porcelain tile does not lend itself to any additional changes after undergoing a heat treatment cycle. This makes its surface a little rough and discreet. But it has increased hardness and anti-slip properties.
- Polished porcelain tiles. A more capricious appearance than the previous one, it has a smooth, even surface, almost mirror-like, thanks to processing with abrasives. This treatment somewhat reduces its wear resistance. For a longer service life, it must be treated with special mastics, which create an additional protective layer on its surface. Otherwise, with prolonged use, polished porcelain tiles will gradually turn matte.
- Satin. This porcelain tile has an unobtrusive light shine, which is obtained by applying mineral salts to the surface before baking in the oven. This type of treatment does not affect wear resistance.
- The structured type of porcelain tile has a relief surface, allowing you to imitate the texture of wood (parquet porcelain tile), leather or various types of stone. Visually and to the touch it is practically no different from natural materials.
- Glazed porcelain stoneware is produced by applying a special glaze to the surface and then firing it. The glazed surface is much stronger than conventional ceramic tiles, however, this type of porcelain tile is not recommended for use in rooms with high traffic and a high level of mechanical stress. Over time, it loses its visual appeal.
- Lapped porcelain tiles have a mixed texture - half polished, half matte. This effect is achieved by removing a thin, uneven top layer using special polishing stones. This type can be safely used for flooring in rooms with high traffic and high loads.
- Double backfill. The top layer of the tile, approximately 3 mm, is made from the components of the required colors, and the bottom layer is made from the main components. In this way, bright, colored tiles are obtained, the wear resistance of which remains at a high level.
Necessary equipment
Ceramic tile adhesive is sold dry. Accordingly, for use you need to obtain a liquid mass. Depending on the volume of the prepared solution, the tools required for this work will depend.
If you need less than 10 liters of glue, then you should use a rectangular trowel. This is the name given to a steel paddle with a curved handle.
The movements are similar to stirring porridge. From the bottom of the bucket it is necessary to lift all the particles that the moisture has not reached. Stir until the mixture is smooth and free of lumps.
For large volumes, you will have to purchase professional construction equipment. This refers to a paddle attachment for mixing the solution.
You will also need a drill to which the attachment will be attached. It is very important to buy a paddle for grout, not paint. Specialists use a construction mixer with a whisk to obtain an adhesive mass with the desired properties.
You should pay attention to the quality of mixing and the speed of rotation of the nozzle. It is necessary to stir the tile adhesive no faster than 300 rpm, and the blade is completely immersed in the solution to avoid the appearance of air bubbles.
Security measures
Although there is no need to worry about protection from harmful fumes when mixing cement mortars, there is still another problem - dust, which can be protected from with the help of a properly fitted dust respirator. It is also best to wear rubber seals when working with cement mortars, since cement mortar is caustic and very difficult to clean off the surface of the skin once it dries. If you think that gloves interfere with your work and because of them you cannot do it accurately and accurately, then keep a bucket of clean water next to you and wash your hands in it from time to time.
Practical tips for choosing the thickness of porcelain tiles
You should not immediately buy thick porcelain stoneware slabs; the strength of the floor depends not only on this indicator, but also on compliance with masonry technology. If the master does not use a special comb to apply an even and uniform layer of glue, but “sculpts” it with a staple only in a few places on the tile, then even thick material in the gaps can crack from relatively small efforts.
Working with adhesive for porcelain tiles
It is recommended to check the integrity of the performers. This can be done in two ways: watch their work or check the already installed tiles. The first option is not always possible, but it’s never too late to check the floor. The tiled floor needs to be tapped, the sound over the entire surface of the tiles should be the same and dull. If there are places with a loud knock, then the work was done by an unscrupulous or unskilled performer; between the tiles and the base there are large air chambers not filled with glue.
Diagram of the stages of laying porcelain stoneware
When purchasing material, be sure to pay attention to the linear dimensions. The thicker the tile, the more complex the annealing technology, the higher the risk of getting defective. Take two tiles from different packages and place them facing each other. Wobbling or gaps between them are strictly unacceptable; the edges must be smooth and match perfectly. Porcelain tiles are much more difficult to level than ordinary ceramic tiles; because of this, the requirements for linearity and flatness are more stringent.
The thickness of the tile has a significant impact on the price, with all other indicators being the same. Practitioners know that properly laid porcelain tiles 7 mm thick can withstand the same forces as tiles 12 mm thick, but made with defects. And in price these materials differ significantly. Conclusion - a professional tiler can save significant money, and the strength of the flooring will meet the required parameters.
How to choose the best adhesive for laying tiles
To choose the right adhesive, you need to focus not only on cost indicators, but also on the following points:
- The type of base on which the entire range of facing work will be carried out, and its characteristic irregularities, for example, vertical or horizontal deviations, swelling. To make the surface uniform in thickness, you will have to treat different areas with different amounts of glue;
- The type of tile that determines the level of its hygroscopicity. For example, in order to properly lay porcelain stoneware with a low degree of hygroscopicity, it is better to refuse to use glue with a high water content, otherwise it will make it very difficult for the evaporation of liquid from the glue, which will lead to low reliability of bonding between the facing material and the base. As tilers say in such cases, the adhesive composition “sours” under the tile;
- The dimensions of the tiles determine the glue consumption;
- Tiling area. To cover surfaces in the kitchen or in a room whose floor is equipped with electric heating systems, it is more advisable to use glue, which, under the influence of temperature fluctuations, gives the material the unique ability to shrink or expand.
When choosing a suitable adhesive composition, you should pay attention to its quality characteristics:
1. Slip resistance. The composition, having thixotropic qualities, to one degree or another prevents slipping of the laid coating. Most compounds do not allow the tile to slide by more than 0.5 mm;
2. Opening hours. The period of time during which the layer of applied adhesive retains its properties and does not harden. The average period of open time usually does not exceed 10-15 minutes;
3. Time to adjust the composition. This is the period during which you can correct the final position of the glued facing material before the glue begins to harden;
4. Time of adhesion of tiles and base. There are often cases when it is necessary to quickly exploit the premises in which the cladding work was carried out, which means that the composition should be selected with special quick-setting parameters;
5. Tile adhesive consumption. The indicator depends on the dimensions of the tile, the condition of the base of the surface and even the width of the float tooth. The average consumption usually does not exceed 3-4 kg per 1 m².
The technology for preparing the adhesive and laying the flooring on the adhesive can be learned from the video on YouTube.
Consistency of tile adhesive
The consistency of tile adhesive is:
- liquid _ These are mixtures that are already sold ready-made. There is a saving of time and a reduction in the risk of doing something wrong, but you have to pay for convenience. Separately, we can highlight liquid nails, which are used for fastening small parts and fallen tiles;
- dry. Sold in powder form, diluted with water. It is distinguished by its low price, ease of transportation, versatility, reliability and the ability to be used on surfaces with level differences and cracks.
What types of adhesive are used for laying floor tiles
Nozzles for grinders - purpose, characteristics, tips for selection
As noted earlier, modern building materials stores offer a wide range of different adhesive mixtures for tiles, including for installing floor tiles. But there are only four main types of glue:
Cement
Cement-based tile adhesive
This is the most popular type. It is produced on the basis of cement and fractional sand with the addition of various modifying additives, which give the solution various properties - elasticity, increased strength, improve adhesion, etc.
Cement adhesive can be called universal because it is suitable for laying any type of tile on any surface.
It is most often sold in the form of a dry mixture, which is subsequently diluted with water until a homogeneous mass is obtained, and then applied to the base of the installation.
Experts say the main advantage of this glue is strength and durability, as well as an affordable price.
Epoxy
Epoxy glue
This adhesive is sold as a ready-made solution and its main area of application is cladding ceiling surfaces. For laying tiles on the floor, such adhesive is used extremely rarely - it is impractical and expensive.
Dispersive
This type of adhesive is called the ideal solution for installing vinyl tile floors.
It is also recommended for tiling plasterboard and chipboard surfaces.
Polyurethane
Polyurethane glue
This adhesive is recommended for installing tiles on surfaces that are subject to heavy loads and are prone to deformation.
This type of adhesive is highly elastic and is often used for laying floor tiles.
But it is not cheap, so it is rarely used for finishing bathrooms - mainly for more “presentable” rooms.
Preliminary preparation
At first glance, it seems that all the walls are smooth. Based on this, the average thickness of the tile adhesive is selected. But place one square in different places and try to wiggle it a little. If it lies perfectly flat everywhere, then you are lucky, or you have already leveled the surface. Most often, the tiles begin to “play,” which means that all the gaps and depressions will be filled with glue, which will significantly increase consumption.
But this is the worst option, because after gluing the tiles on the wall will lie unevenly, which will greatly worsen the impression. Therefore, we arm ourselves with any material (gypsum, Alinex, Vetonit) and begin leveling the surface. When it becomes completely smooth, let it dry, and you can get down to business.
How to lay floor tiles?
Floor tiles are laid on a thicker layer of adhesive. Installation starts from the corner and is carried out towards the door, otherwise there is a danger of breaking the masonry.
To apply the adhesive mass, a coarse-toothed spatula is used. In case of significant differences, a screed is laid on the floor surface.
The dimensions and weight of porcelain tiles are larger than those of conventional floor tiles. Therefore, the glue layer should also be about one and a half times larger.
After laying porcelain stoneware on the floor, the slabs must be leveled and the voids underneath must be removed. To do this, the product is tapped with a rubber mallet. Excess glue is removed with a spatula.
Correctly selected thickness of tile adhesive will significantly facilitate the laying and allow you to create a durable and even surface.
Humidity and moisture absorption
Two more estimates are worth making when deciding how much solution to apply. This is the humidity of the solution and the moisture absorption of the base. When laying ceramics on a wall, you should not use a semi-dry solution; moreover, the wall must be primed, if necessary several times, until the strong absorption of the surface stops.
With high absorbency, you have to increase the thickness of the glue so that the tile simply does not fall off when it dries. Pouring water will not help much, especially if the base consists of ordinary cement-sand plaster with a low cement content.
When laying ceramics on the floor, a drier solution is allowed than on the wall, but only if the moisture absorption of the floor is low. Therefore, the floor base should also be primed.
Some builders pour water excessively on the walls, on the floor, on everything around, thinking that it will be better, but no, due to excess moisture, the glue loses its properties. You need everything in moderation, as they say.
How to lay tiles on a wall?
When laying ordinary tiles, the thickness of the adhesive layer should not exceed 4-5 millimeters. For high-quality installation, corners, large cracks and other irregularities are pre-aligned. This can be done using plaster.
Laying the tiles starts from the second row from the bottom. Its exact location is determined on the basis that subsequent rows include only whole tiles. An exception is possible for the most extreme elements.
Glue is applied to the wall. You should not treat too large a surface; it is enough to apply the mixture to an area equal to 2-3 tiles. When tiling corners and hard-to-reach areas, glue is applied to the tiles, this allows the composition to be evenly distributed.
To adjust the thickness, the tiles are leveled, pressed and lightly tapped. Excess glue is removed with a spatula.
Forms of porcelain stoneware cladding
Two types of floor coverings are used - ceramic tiles and porcelain stoneware. In the manufacture of the latter, pressing and subsequent very strong heating are used, or, to be more precise, baking. This allows you to create elements that can withstand significant loads.
The standard for the production of porcelain stoneware slabs is provided not only for the process itself, but also for their shape and size. They can have a square shape, be produced in the form of a pentahedron, hexagon, or octahedron. In addition, modules may differ in parameters (side length).
Additional dependencies
It is also worth considering other factors, since the size of the tile itself is not the only one among them. For example, when laying porcelain stoneware, the layer will be larger than when using tiles. In addition, it is important to consider where the tiles are laid, on the floor or on the wall. Thus, the thickness of the adhesive layer when laying tiles on the floor will be several millimeters greater than when working with wall cladding.
In addition, the base itself also affects the thickness of the tile adhesive. If the base is made according to the level, without any defects, then the thickness will remain unchanged. If they have any bulges, pits or other defects, then the thickness in some cases will need to be reduced, and in some places increased. Although, if there are defects, high-quality masonry is out of the question, so it would be advisable to perform leveling in order to save effort, time and financial costs, since the cost of glue is somewhat more expensive than mixtures for leveling.
The surface of the material also becomes an important factor. In some cases, porcelain tiles may have distortions, i.e. convexity or convexity in its surface. In such a situation, it is necessary to provide the same layer (no more than 10 mm) at the extreme points, and adjust the central one to the edges.
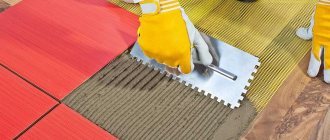
Rules for applying the solution
Most often, purchased powder adhesives are used in repairs.
In order for them to acquire their properties, the mixture must be diluted with water according to the instructions before use. In this case, you should not immediately add the entire volume of liquid; it is recommended to knead a thicker mixture first, and then dilute it as necessary. After this, you should leave the solution to infuse for about 10-15 minutes so that all components bond well with each other and form a high-quality adhesive mass. To distribute the adhesive mixture over the surface as efficiently as possible, use a notched trowel. The number of the tool indicates the size of its teeth; the larger the tile, the larger they should be. It is recommended to apply the adhesive directly to the walls or floor. If you need to remove unevenness, then you can additionally lubricate the tile itself. A small spatula is used as an auxiliary tool.
To ensure even distribution of tile adhesive, it is recommended to apply it using a notched trowel.
In order for the glue to better adhere to the tiles and surface, it is recommended to wet them with water and dry them in advance. Please note that porcelain tiles practically do not absorb water.
Why it is better not to level strong surface differences with a thick layer of tile adhesive
It would seem that we will kill two birds with one stone: we will level the wall and “tightly” plant the tiles with a good, thick layer of glue. But it was not there!
Any modern tile adhesive shrinks when it dries. In the place where the tile was adjacent to the wall section by the required 2-3 mm, the compression will stop, and where the deep hole was covered, the shrinkage will continue. What does this mean:
- a void will form under the tile area (it will tap);
- the material will not hold up and will crack;
- the entire layer of dried glue will come away from the wall, forming a second “wall” in front of the main one.
Only in the case of small differences is the method of leveling with glue justified. Or if you are using cement mortar. Read about the features of work in this case here.
The evenness of the walls matters
The excess is understandable. Why is it not advisable, on the contrary, to spread the glue thinner?
The answer is obvious: the tile will not stick well or will not stick at all.
Another point. Under normal household repair conditions, it is simply impossible to stir a tile adhesive solution into a container so that its surface is 100% homogeneous, like sour cream. Some particles will still dry out earlier (usually on the walls). This is fine. If you work according to technology, nothing extraordinary will happen. But if an innovative tiler decides to apply a thinner composition in order to save money, due to his own inexperience or indifference, then microscopic lumps of glue that has set before the bulk of the glue can do a disservice. They won't stick anymore. When there are many such unglued places, the tiles can also crack and fall off. The most annoying thing is if this does not happen immediately, but some time after the completion of the repair.
Something went wrong
SHOULD THE THICKNESS OF TILE ADHESIVE BE CALCULATED ACCORDING TO THE HUMIDITY OF THE ROOM?
It is humidity that is not the decisive criterion. Whether we are laying tiles in the bathroom (where, by definition, it is warm and wet) or covering a facade (which will be exposed to rain and other vagaries of the weather), the main thing is to choose the right adhesive composition: for interior or exterior work, for wet rooms or facades, etc. . P.
Bathroom tiles, if installed correctly and the right adhesive, will last for many decades.
Bathroom tiles, if installed correctly and the right adhesive, will last for many decades.
Therefore, a universal recipe: in order to lay tiles with high quality, without making mistakes, you need to strictly follow the manufacturer’s recommendations for choosing adhesive, its preparation and application, use only suitable tools with which you already have experience working with.
What adhesive is suitable for quickly laying tiles.
Yes, there are adhesives for quickly laying tiles. They are used in cases where there is a short deadline for putting the premises into operation.
This tile adhesive dries very quickly, which, on the one hand, is good for timing, but on the other hand, it requires the accuracy and speed of the tiler’s work, which makes working with it more difficult.
Examples of such adhesives: Mapei Granirapid, Ultralite S1 Quick, Elastorapid.
Conformity class C2F S1, C2FT S1, C2FTE S2 .
______________________________________________________________________________________
The table below will also be useful, which conveniently provides information using Mapei glue as an example.
Most popular brands
There are many criteria for selecting material, for example, by sales volume, by recognition among craftsmen. At the same time, in terms of physical volume, cheap mixtures are in greatest demand among large construction companies, although when asked: “Have you started using this yourself?” the answer follows - “I would take that one, even though it is more expensive.”
Local producers also influence the ratings; common mixtures in one region will be unknown in another.
To summarize, most consumers will be familiar with the following brands and types of adhesives:
Kreps
Kinds:
- "Enhanced";
- "Standard";
- "Base";
Knauf
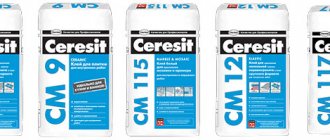
Cerezit
Video review
Sources
- https://IzPlitki.com/pered-ukladkoj/kak-razvodit-klej-dlya-plitki.html
- https://ilitkeramika.ru/kak-razvodit-plitochnyj-klej-proportsii.html
- https://FB.ru/article/402158/kak-razvesti-plitochnyiy-kley-pravilno-proportsii-i-opisanie-protsessa
- https://plitka-pol.ru/articles/klej/prigotovlenie-plitochnogo-kleya-kak-razvodit-klej-dlya-plitki.html
- https://delaypol.com/napolnaya-plitka/kak-razvodit-plitochnyj-klej.html
- https://biznesprost.com/otkryt-biznes/kak-razvodit-plitochnyj-klej.html
- https://plitkahelp.com/plitochnyj-klej/kak-razvodit-plitochnyj-klej-osnovnye-pravila
[collapse]
Laying tiles on drywall
Since the walls of the above-mentioned rooms under the tiles will be exposed to moisture, their plasterboard wall cladding should be made from moisture-resistant sheets. The peculiarity of this material is that cardboard is more water-resistant, as well as filler additives that perform hydrophobic and antifungal functions. The combination of moisture-resistant drywall with tiles makes the walls resistant to high humidity and mold formation. But, if necessary, the tiles can also be glued to other types of sheets, wall or fire-resistant. The tiles are glued to drywall using special compounds and after preparing the surfaces. Materials you will need: Laying tiles on walls is used as the main decoration of walls in rooms with high levels of humidity: kitchens, bathrooms and toilets. In other cases, other types of tiles can be used, most often gypsum, but they use slightly different compositions and technologies. The process of mixing adhesive for installing tiles
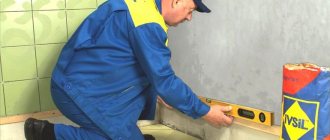
To lay the first row, you need to fix a wooden plank to the floor, which will serve as a level. This rail is set by checking the building level. When the starting strip is laid, glue is applied to the tile or directly to the drywall (both options are possible). After applying the adhesive, the tile is pressed against the wall, tapping lightly. You can check how smoothly the installation is done with a level. Quite often you can hear the question of how to glue tiles onto drywall, and what is needed for this? The wall material is very well suited for this type of finishing; the surfaces are perfectly smooth. Almost everyone who has done renovations does not ask whether it is possible to glue various types of tiles onto plasterboard surfaces, the main thing is how to do it. The technology for laying such finishing material is simple, but takes into account its nuances, which are inherent in any type of construction and repair work.
Additional information on the topic:
- Insulation of plasterboard partitions, price in estimate
- What profile is needed to level plasterboard walls?
- Is it possible to use moisture-resistant plasterboard on the ceiling in a bathroom?
- Is it possible to attach drywall to OSB without a profile?
- How to make a new wall in an apartment from plasterboard
- https://derevyannie-doma.com/materialy/tolschina-plitochnogo-kleya-steny-i-pol-keramogranita-sloy-maksimal-naya-ukladka-shpatelya-usadka-i-nanesenie.html
- https://obustroen.ru/stroymaterialy/otdelochnye-materialy/plitka/tolshhina-napolnoj-plitki-s-kleem.html
- https://kitchenremont.ru/remont/tolshchina-plitochnogo-kleya
- https://pol-exp.com/klej-dlya-napolnoj-plitki/
- https://sdelalremont.ru/kakoj-neobxodim-sloj-kleya-pri-ukladke-plitki.html
- https://fb.ru/article/323771/maksimalnaya-i-minimalnaya-tolschina-plitochnogo-kleya-pri-ukladke-plitki
- https://whitestrip.ru/tolshhina-plitochnogo-kleja-pri-ukladke-plitki-na-p01/
Correct layout of tiles of any size
There are many options for laying out tiles. It all depends on your imagination. There are the most popular options for styling patterns:
- Chess order. Tiles of two contrasting colors are used;
- Linear order. It is considered a universal option because it is suitable for any room;
- Ornament. Here it is important to make a large central part, this will make the floor prettier;
- Kaleidoscope. In this version, as many colors as your imagination requires are used.
Sources
- https://AmiPlus.ru/kuhnya/razmery-keramogranita.html
- https://GidPoKraske.ru/rabota-s-kleem/tolschina-kleya-dlya-keramogranita-na-pol.html
- https://kraskamiks.ru/klej/tolshhina-kleya-dlya-keramogranita-na-pol-sovety-i-pravila-rascheta
- https://pol-spec.ru/plitka-i-kafel/tolshhina-keramogranita-dlya-pola-primenenie-xarakteristiki-osobennosti-montazha.html
- https://str-mebel.ru/shkafy-i-komody/tolshchina-keramogranitnoj-plitki-dlya-pola.html
- https://www.uralgres.com/characteristics/tolshchina/
- https://OmShantiDom.ru/teplyj-pol/klej-dlya-keramogranita-na-teplyj.html
- https://lucheeotoplenie.ru/teplyj-pol/klej-dlya-keramogranita-na-teplyj-pol.html
[collapse]