We'll show you how to paint a ceiling with a roller without streaks - the perfect technology
There is an opinion that to get a high-quality painted ceiling you need to purchase good and expensive paint. But it doesn't always work out that way. No material is capable of providing a beautiful ceiling surface if a poor-quality tool for its application is chosen. Compliance with the technology of applying paint to the ceiling surface also plays an important role. Very often the question arises of what to use to paint the ceiling: a roller or a paint brush. After all, you want to get a flat and smooth surface.
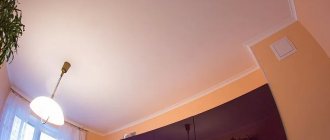
It should be borne in mind that the ceiling is the part of the room that is first noticed by those present. And it is optimal if it is flawless. How to paint a ceiling with a roller to achieve this result? Let's try to figure it out and provide some tips.
Using acrylate paint
Acrylate paint is used to create a decorative coating on the surface of walls. The advantage is that it can be used in cold climates. Acrylate paint consists of water purified from all kinds of impurities, a solvent, a special preservative that prevents the oxidation of compounds for coloring, and a concentrated pigment.
The composition also includes an acrylate dispersion, a thickener, antifreeze and a coalescent (a special substance that binds the particles of the composition). Substances that improve its properties can also be additionally added. Which paint is better to use – acrylic or acrylate? There are many building materials that have the same base.
Acrylic and acrylate differ in their binders. For the production of acrylic paints, concentrated substances without impurities are used. Acrylate paint contains vinyl, latex or styrene dispersions, which can significantly reduce the price of the material.
Tool selection
Before starting work, you need to decide whether it is better to paint the ceiling with a brush or roller.
The fact is that the result obtained is influenced by two factors:
- tool selection;
- quality of the coloring composition.
It is better not to use a brush, since it is more convenient to paint wall joints, bevels, niches and other hard-to-reach places, but for the ceiling plane it is advisable to use a different tool. It is better to paint the ceiling with water-based paint using a roller, as it will provide greater coverage of the surface in one stroke.
In specialized stores on the shelves there is a large assortment of different rollers, differing in the material from which the working surface is made.
- sheepskin;
- foam rubber;
- plush;
- reinforced wax;
- terry cloth.
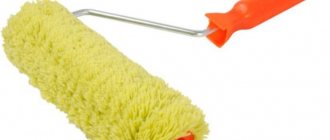
Before you paint ceilings with water-based paint with a roller, you need to choose the coating for this tool. Products using natural sheepskin are considered a high-quality option. Thanks to their use, paint consumption can be minimized, and the ceiling coating is smooth and uniform, without the presence of lumps.
Sheepskin rollers are a universal tool, since they can be used for paints on different bases - water-based, oil, acrylic. Their only drawback is their high cost. They are much more expensive than synthetic products.
A more affordable purchase would be to purchase a plush or terry roller. Their main drawback is their fragility. But since a damaged tool is inexpensive, it can be easily replaced with new products.
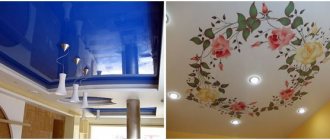
The texture of the coating applied to the ceiling depends on the length of the pile. Rollers with long bristles create a smooth, glossy surface, while tools with short bristles create a textured texture with microbubbles.
If you need to solve the problem of how to properly paint the ceiling in order to get a high-quality finish, then you should not buy foam rubber products. They are the cheapest, but when using them, the consumption of paint increases significantly, which flows from their surface and stains everything around. As a result of their use, bubbles form on a freshly painted ceiling, spoiling the texture of the coating.
The most durable ones are rollers with reinforced pile. The surface they paint is not subject to deformation as a result of exposure to synthetic fibers intertwined with metal threads. Otherwise, these rollers are called “golden thread”. Despite the fact that they are more expensive than sheepskin products, their high quality justifies the outlay.
You can also find on sale a special tool for embossing the ceiling surface, leaving different patterns. Its working part is made of leather.
Required tools and materials
For painting you will need the following:
- spatula, sandpaper, putty, masking tape;
- stepladder and good lighting equipment;
- rollers, brushes and cuvettes;
- painting tray and paint.
Tool selection
The first thing you need to do is choose a roller. When painting the ceiling, it is recommended to pay attention to fur or velor products with medium-length pile. As for the length of the roller, it is recommended to choose small models with a medium-sized handle. If you decide to work without a stepladder or some other stand, then the roller will require an extended handle.
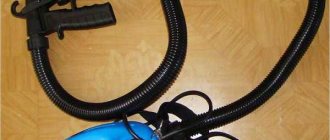
Spray guns and other sprayers are also used to paint the ceiling. It is noteworthy that most older model vacuum cleaners come with a spray gun. It is a design consisting of a cap nozzle with a hole into which a pipe is inserted. The vacuum cleaner creates pressure that forces the paint to move through the tube.
The best way to paint the ceiling is up to the painter to decide; there are no specific rules here. The main thing is that it is convenient to work.
Paint selection
The durability of cosmetic repairs depends on the correct choice of paint. Therefore, in order to paint the ceiling with your own hands, it is recommended to approach this issue responsibly. The modern market offers the following types of paint:
- Silicate. They are rarely used in residential premises because they require a mineral base. Recommended for use in garages and basements.
- Silicone. The highest quality and at the same time expensive materials.
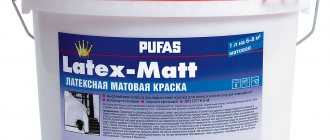
- Acrylic. The quality is slightly inferior to silicone ones, but they are also cheaper.
- Water-based. They offer good value for money. At the moment they are considered a traditional option for finishing the ceiling.
Types of paint for ceilings
The best way to paint surfaces is a personal matter for homeowners. It is only important to remember that the most expensive paint is not always the highest quality. Products from popular brands are often counterfeited, so it is better to purchase goods from official dealers.
What primer to use
A primer is necessary for better adhesion of the paint to the surface being painted. It allows you to avoid the appearance of cracks and blisters after the paint dries. If there is no primer, this can happen. You'll have to clean everything off and putty again. Because in order for painting the ceiling with water-based paint to be of high quality, the surface must be well primed.
The base of the primer should match the base paint. Acrylic water-based paint requires the same primer; silicone paint requires a silicone-based primer, etc. Moreover, it is advisable not to save: the quality of this composition determines how smoothly the water-based emulsion will lie on the ceiling.
Acrylic primer for the same water-based paint
There is an economical method of priming: the base paint is diluted with water (1 to 2) and the surfaces are painted with this mixture a couple of times. It's certainly better than nothing, but the primer gives a better grip.
Preparing for painting
In order for self-painting of the ceiling with water-based paint to be high-quality and uniform, preliminary preparation of the ceiling is necessary. Uniform coloring can only be achieved on a flat, puttied surface. Therefore, before starting work, you need to clean the ceiling from any previous coating (with the exception of water-based emulsion, which holds up very well).
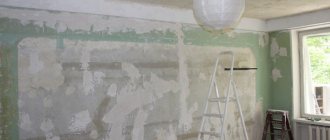
How to remove whitewash
If you have whitewash on the ceiling - chalk or lime - you need to moisten the ceiling with water and remove the coating with a spatula. They clean everything down to concrete. Even the smallest fragments must be removed. Sometimes it is very inconvenient to scrape small areas with a spatula; it is easier to do this with a wet cloth.
It is easier to remove whitewash by wetting it with water.
In any case, after removing the whitewash, the ceiling must be washed with water and detergent. After complete drying, prime and putty with gypsum or cement (preferably white) putty until smooth, which is also called “egg-like.”
How to remove old water emulsion
If the ceiling has already been painted with water-based emulsion, you won’t be able to simply remove it. The procedure depends on how the paint adheres to the ceiling. If it just changed color and you need to renew the ceiling, there are no swelling, cracks or other similar problems, you can get by with a little blood. First, remove the dust (with a cloth and water), dry it, then prime it. After the primer has dried, you can paint it. But once again we draw attention to the fact that this procedure is used only if the water-based emulsion holds well and there are no defects.
Cleaning waterproof emulsion from the ceiling is still a pleasure
If there are cracks or swellings on the surface of the water-based emulsion, it must be cleaned off. There are two ways - dry and wet. Dry means cleaning with sandpaper (manually or using an angle grinder), wet means rinsing off. This method must be used for paint that is not afraid of water. But it is very difficult to remove such paint. If water-based paint holds up well, no tricks help, but there are surface defects and putty is needed, take sandpaper with coarse grain and make the surface rough. After this you can putty. Next - according to technology: we prime and then paint.
Wash off the ceiling painted with water-based emulsion by moistening it twice with plenty of hot water. The water should be almost boiling water - about 70°C. After wetting part of the ceiling, wait 10 minutes, then wet the same area again with hot water. After about five minutes you can remove the paint with a spatula.
Article on the topic: How to properly connect the installation to the sewer?
Removing old paint is a lengthy process
You can repeat this procedure several times, gradually removing loose paint from the ceiling. Small residues can be sanded off, and then the ceiling can be washed, dried and primed. You can putty and sand over the primer, smoothing out imperfections.
How to paint a ceiling correctly: procedure
In addition to the roller, you will need to prepare the following tools:
- paint container;
- brush;
- masking tape.
The ceiling is painted in the following order:
- the ceiling surface is prepared for painting: the old finish is removed, the base is leveled, and primed;
- masking tape is glued to the walls along the perimeter of the ceiling;
- paint is poured into the tray;
- use a brush to paint corners, protruding elements, borders and other hard-to-reach places;
- dip the roller into the composition so that the dye completely covers the pile;
- excess dye is removed on the sides of the container. If you ignore this requirement, smudges will form on the painted surface;
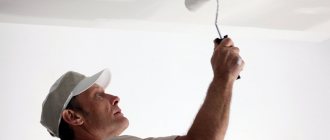
- then proceed to coloring. The roller is held at an angle relative to the head. A layer of paint is applied in one direction from the window or doorway. Leave the ceiling for 10-12 hours to allow the coating to dry before applying the next layer;
- The ceiling is covered with the second layer perpendicular to the first.
How to paint a ceiling with a roller without streaks or streaks
A common problem for beginning craftsmen is the appearance of streaks and stains when painting the ceiling surface. To prevent such negative consequences, you need to adhere to painting technology and eliminate drafts, remove all heating devices from the room. Also, do not paint the ceiling with a roller directly above your head. It is worth taking breaks and moving from one work site to another.
How to paint a ceiling with acrylic paint with a roller
The procedure for finishing the ceiling surface with acrylic involves the following steps:
Surface preparation
No matter how high-quality the roller and paint used are, the result of the work depends 30% on the preparation of the ceiling for painting. To ensure that the coating is even and uniform, the remnants of old paint and putty are completely removed, height differences of 5 cm or more are leveled using plaster.
Preparing a ceiling for roller painting involves the following steps.
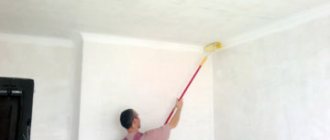
Step 1. Cleaning the surface. At this stage, all layers of the old coating are mercilessly removed down to the concrete base - paint, plaster, fungus (if any). It is most convenient to clean with a metal spatula; especially thick layers are broken through with a hammer drill.
Advice! To minimize the amount of dust and dirt, generously moisten the surface to be cleaned with water (you can use a spray bottle or simply run a wet rag over the ceiling). After half an hour or an hour, the remains of the old whitewash will get wet and easily separate from the concrete.
Preparing the ceiling for painting
Preparation is one of the most important stages of work
Even before you start painting, you will need to perform some actions on the surface to be painted. You have to perform the following manipulations:
- Clean the floor from all peeling or crumbling fragments of the old finish. This is the most important stage, after which it will be possible to move on to further actions.
- Next, you just need to clean the entire ceiling plane from dirt and dust. If there are other contaminants, they should also be removed.
- After cleaning, unevenness and other defects may form that must be repaired with plaster or putty. However, before this you need to carefully prime the entire surface of the floor.
- When the putty dries, it is leveled with a grater and the surface is again cleaned of any dust that has formed. This moment cannot be skipped, since subsequently dust particles will negatively affect the coloring result.
- Next, apply a second layer of primer, which will allow you to apply the paint more evenly and reduce its consumption.
We follow painting technology
Experienced craftsmen advise, before starting work, to roughly divide the wall into sectors, and paint the upper, right corner first. The paint is applied in several layers. The first time with vertical stripes, the second with horizontal, and then again with vertical stripes.
Important: during the painting process, do not put too much pressure on the roller. All movements must be smooth and careful. It is necessary to avoid chaotic strokes to prevent streaks from appearing on the wall.
Following the advice of experienced craftsmen, painting walls with a roller can be turned into an exciting activity with high-quality results.