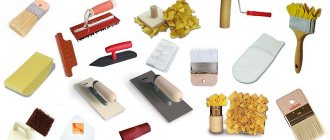
List of tools for applying liquid wallpaper
There are no special tools for liquid wallpaper, so professionals use the usual tools of plasterers and finishers:
- putty knife;
- trowel;
- roller;
- transparent grater;
- plaster (cartouche) gun.
Each of the tools has several varieties designed to perform specific production tasks.
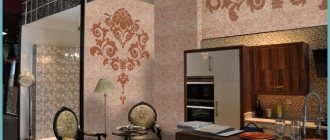
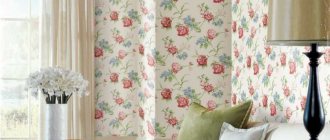
What is liquid wallpaper and its variety
Liquid wallpaper is a dry mixture consisting of:
- Glue.
- Dyes.
- Special fillers, which can be silk or cellulose.
- Decorative additives such as sparkles, marble chips and other similar materials.
- Various compounds that give the wallpaper plasticity.
- Elements that prevent the formation of mold or mildew.
In order for liquid wallpaper to be ready for use, the dry mixture must be diluted with water in the correct proportions and applied to the wall with a spatula, which is why this mixture is also called decorative plaster.
Depending on the composition of the mixture, liquid wallpaper is classified as:
- Cellulose. The basis of this composition is wood, the advantage of which is its use in unheated rooms; it can be applied to surfaces with microcracks, after priming. However, with all the advantages it is considered the most budget option.
- Textile. This liquid wallpaper is made on a silk basis, has a beautiful texture with a slight satin sheen, is very durable, and does not fade in the sun.
- Cotton. The main component is natural cotton; during the application process, a pleasant-to-touch surface is formed that well hides unevenness and all kinds of wall defects. This is an environmentally friendly material and has heat-saving properties. In terms of cost, such wallpapers are more expensive than cellulose wallpapers, but cheaper than silk coverings.
There is also a mixed type - cellulose-silk, which is in great demand due to its aesthetically attractive appearance, practical qualities and affordable price.
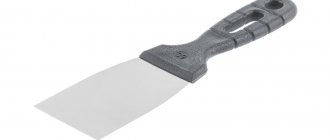
Types of spatulas and their purpose
A spatula is a plate with a pointed edge attached to a handle; it is the plasterer’s main tool. The most convenient varieties have a trapezoidal or rectangular shape. The working part is made of steel, plastic or rubber.
The corners of the spatula should not scratch the plaster, so if this happens, they are bent to the outside.
- The metal spatula is the most durable and in demand. It has sufficient rigidity, so it is used for applying and grinding mortar.
- Models made of plastic are more elastic and are designed for smoothing plaster. You can also apply liquid wallpaper with them, but only in a thin layer. However, among plastic models there are less flexible ones, made of plexiglass or thickened acrylic.
- The most elastic ones are rubber spatulas. They bend well, exactly repeating the surface topography, so they are used at the finishing stage of finishing work.
Spatulas have a wide range of applications. In addition to applying the solution, they remove the working mass from the container, dismantle the old coating, remove excess plaster, and clean the frozen solution from other tools. Their disadvantage is quite significant: skill is required to create a flat and smooth surface.
Metal spatulas
When choosing a spatula for liquid wallpaper, pay attention to the following nuances:
- A beginner needs a tool with a width of 25-30 cm. A device with a wider plate is suitable for professionals. A small (narrow) spatula will be needed for working in hard-to-reach places and applying the solution from a container to a large, main tool.
- A quality tool should not bend the edges of the spatula during operation.
- The blade must be of the same thickness along its entire length and free from defects.
- For processing adjacent surfaces, a spatula with a working plate bent at an angle of 90° is suitable. On some models, its rotation is adjustable. There are 2 types of corner spatula: for external and internal corners.
- If you need to make a relief surface on liquid wallpaper, use a shaped spatula.
Rubber spatulas
Professionals advise using a tool with a rubberized handle. It is more convenient to use: it does not slip and does not fall out of your hands.
Transparent grater
As mentioned above, the specificity of the final stage of working with liquid wallpaper contains one of the important points - high-quality smoothing over the surface to a uniform and fairly thin layer. Since they take a long time to dry, and the material is prone to swelling, it may be necessary to re-smooth it. Transparent grout works very well for this job.
In its shape it is the same rectangular trowel. The difference is that its surface is completely transparent, and the handle is solid and has no breaks. In order to grout wallpaper using grout, you need to slightly moisten the tool. To do this, you need a container with water in which the grater will fit freely. The advantage of using a transparent grater is that while doing the work, the result is completely visible. This photo shows an example of a transparent grater.
What types of trowels are there for liquid wallpaper?
A trowel for liquid wallpaper is used for applying a decorative mixture to the wall, smoothing it, and also for mixing the solution. The tool is a plate made of metal, plastic, plexiglass or acrylic. On one side, a curved handle, wooden or plastic, is attached to it.
A trowel, or trowel, is an inexpensive tool, so it is advisable to have several varieties:
- With a rectangular blade, for working on flat surfaces.
- Trapezoidal in shape to go around slopes, arches, rosettes.
- Oval and triangular, for finishing walls that have roundness and indentations.
Types of trowels for liquid wallpaper
The edges of a quality trowel should not have burrs or chips.
Trowel
Transparent trowels allow you to see how the mixture is distributed.
It is convenient to use a trowel for liquid wallpaper to efficiently level and evenly distribute the mixture over the surface. They are made in the form of a rectangle with an open handle made of stainless steel, plastic, organic glass.
The most convenient are trowels with transparent bases. All the irregularities and tears in the material are visible under them. With their help, it is easier to adjust the thickness of the application, thereby reducing material consumption.
Also, using transparent material, it is easy to apply and adjust compositions from liquid wallpaper.
Let us consider in the table the scope of application of the trowel depending on its shape:
| № | Form | Scope of application |
| 1 | Rectangular | designed for distributing the mixture on smooth and even surfaces. |
| 2 | Trapeze | used in areas that require great precision in application: near switches, sockets, door transoms, slopes, etc. |
| 3 | Oval or iron-shaped | used in hard-to-reach places: near rounded structures, recesses or bulges. |
Liquid wallpaper should be applied with light and smooth movements so as not to disturb its texture. The last movement should be circular.
Transparent grater
Silk plaster takes a long time to dry, so at the final stage you have to smooth it out and adjust the thickness of the applied layer more than once. For this, a special grater is used, which is similar to a trowel (for this reason it is sometimes called a “trowel-trowel”), but differs in the shape of the handle: you can hold it with both hands.
The grater is made of transparent material (plexiglass) in order to notice all the flaws and correct them in time.
Subtleties and nuances
The technology of applying liquid wallpaper to the wall is not complicated. However, there are some features you should know. Although outwardly liquid wallpaper looks like the same mass, it is of great importance what movements you make with a float and trowel. The fact is that during smoothing, the fibers of the material will tilt in a certain direction. If they all look in the same direction, the drawing will turn out a bit strange. Therefore, movements are always performed in different directions.
Creating corners at wall joints
When working in corners, movements should be made from the corners, not towards them. Otherwise, we will end up with a pile of material in one place, from where it will be difficult to get it out. As previously written, liquid wallpaper can be repaired, so do not throw away unused material. The leftovers are formed into a cake, which is packaged in cellophane, where it can be stored for several weeks. If the material needs to be stored for a longer period of time, it should be completely dried. Then you just need to soak it a little, if necessary.
Immediately after finishing work, it is worth ventilating the room. Liquid wallpaper will not fall off because of this, as happens with their non-woven, acrylic or paper counterparts. Ventilation promotes quick drying. By the way, during work there will probably be waste from liquid wallpaper. They are also worth saving for future repairs.
To increase the moisture resistance of liquid wallpaper, a special acrylic varnish can be used. But this is not necessary if there is no high humidity in the room where the decorative mixture was applied.
All maintenance of the finished coating comes down to simple dust removal. This can be done using a vacuum cleaner. No additional cleaning procedures are required.
You already know how to prepare liquid wallpaper, how to apply it to the wall and how to care for it. All that remains is to figure out how to remove them if necessary.
The process of removing the applied coating
Removing the entire covering from a wall is similar to the process of repairing it.
No matter how beautiful the decorative covering is, sooner or later it will get boring or become unusable. In this case, the question arises of removing it so that the wall can be finished with another material. How to remove liquid wallpaper from a wall? In the same way as is done in the case of their repair. You need to wet them so that they soften. In small areas it is more convenient to work with a paint brush. If we are talking about the entire wall, then you will need a roller with a small pile. We regularly moisten it in water and moisten the entire wall with it.
You may have to moisten the wall in parts in order to have time to remove the liquid wallpaper without fear that the rest of the coating will dry out during this time. When the liquid wallpaper softens enough, it can be peeled off with a spatula. It doesn’t matter where this process starts, but it will then have to be worked on. You just need to move the spatula with slight pressure at an angle to the wall so that the layer of decorative coating is removed.
Many people are interested in whether it is possible to glue wallpaper onto liquid wallpaper. The answer is clear - it’s impossible. It is necessary to remove the decorative coating to achieve a smooth surface.
The removed material can be left for further work in another place. The quality of the coating will no longer be the same, but nothing prevents you from removing this liquid wallpaper from the walls of your apartment, and then using it at the dacha.
Using a roller
This tool is used to apply and level liquid wallpaper if it has a uniform and thin consistency. Among its advantages is the convenience of finishing the ceiling. To apply the solution, the tool must have a sparse pile, quite hard, 3-4 mm long, otherwise the mass will stick to the fur coat and the decorative coating will be uneven. Smooth the wallpaper with a short-pile roller of any thickness.
Using a roller, a relief decorative coating is created and a design is applied. To do this, use a ribbed nozzle. This versatile tool also allows you to create panels and appliqués.
Rollers are distinguished by the length of the rotating part. To work on internal corners and surfaces with a small area, mini-models are used. For ease of use, you can purchase a telescopic handle.
Mixture consumption
The packaged mixture contains all the necessary components, so you can immediately pour it into a container and gradually fill it with warm water up to 40 degrees, stirring constantly. 1 package of liquid wallpaper weighing 1 kilogram requires 6 liters of water . However, these indicators may vary among different manufacturers, so before preparing the material you should definitely read the attached instructions. It will also be useful to read the article, liquid wallpaper at home.
A mixture of liquid wallpaper in a package
Asterisk IMPORTANT! For more convenient application to the surface, the solution must be left for 8-12 hours and thoroughly mixed again before starting work.
Can we use a spray gun?
If you have to apply liquid wallpaper to a large area of walls, the work will take longer. A high-performance plaster spray gun will come in handy in this situation. The spray bottle will not cope with the task due to the weak pressure created (it must be at least 2 atm). It is better to use a hopper pistol (also called a cartouche pistol). There are 2 types of it: for starting plaster and decorative and finishing (finishing) work.
There is another similar tool - a hopper bucket, but it is inferior to a pistol in a number of parameters:
- high cost;
- large losses of the working mixture;
- the inability to create drawings and apply textured plasters.
Applying the working mass with a gun is more difficult than with other tools. It is necessary to select nozzles and a compressor, and apply force to hold the equipment (the container holds 4-8 liters of solution). But in return, the master receives an even coating of the walls and a quick completion of the work.
How to apply liquid wallpaper yourself
For walls in new houses that have not yet undergone shrinkage, such repairs are not recommended. It is also important that all slopes and doors are already in order. The workflow consists of three stages. The first one is very important, you can’t skip it if you don’t want to redo the repair.
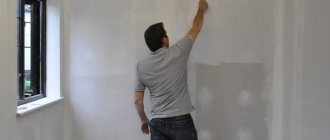
Do-it-yourself wall preparation
Most solutions dry translucent. If there is not a smooth, white background underneath, defects may show through. Therefore, the base, painted in different colors, must be leveled. The wallpaper mixture to some extent levels out the depressions and protrusions, but if they are deep, it is better to seal them first. Otherwise, the material consumption will increase and dark spots will remain after drying.
- Remove all old trim, if any.
- Coat metal parts with oil paint or anti-corrosion impregnation.
- Remove any nails that are too protruding from the surface.
- If you are gluing liquid wallpaper onto drywall, cover the seams between the sheets with paper tape or sickle tape. Pre-cut problem areas and prime them.
- Then putty the entire wall.
- After the surface has dried, prime it once or twice. This will prevent moisture from the solution from being absorbed into the base.
See how to do it correctly and what tools you use in the master class. The builders show the application technique in detail.
Pay attention to the quality of the tape and putty. You can't save money on them. If they peel off or bulge, the finish layer may crack.
- Decoration Materials
Preparing walls with your own hands for liquid wallpaper: step-by-step plan and tips
Preparation of material
Sometimes the mixture needs to be diluted in advance, 6-12 hours before applying liquid wallpaper. This is usually indicated on the packaging. Calculate in advance how much powder you will need for all square meters and dissolve with a small margin. Products can be sold in one or two packages. Be sure to read the rules on the packaging - they may differ from manufacturer to manufacturer. Here are some tips that are relevant for any composition.
- One bag cannot be divided into several parts. This upsets the balance of the components, causing problems with consistency, hardening, and color.
- The water temperature should be no higher than 35°. Hot will spoil the composition, and in cold it will dissolve slowly and poorly.
- You need to stir manually or with a mixer, if this option is specified in the instructions. The first method is preferable, since it does not damage the fibers in the composition.
- Sometimes glitter is sold separately. In this case, it is dissolved first.
Instagram @jidkie_oboi_potolki_06
Instagram @super_wallpaper
Instagram @super_wallpaper
Sequence of preparation steps
- Pour the amount of water specified by the manufacturer into the bucket, but not completely. Leave about half a liter per batch for the next step.
- Take a bag of powder and remember a little so that the lumps scatter.
- Pour it completely into the container and immediately begin kneading it like dough.
- Seal the bucket tightly.
If you need a lot of wallpaper, use a large plastic bag. You can cut it in half to increase the area. Place the first part of the dough on it, make the second and add to it. Do this as many times as necessary. Stir everything again and close tightly so that no air gets inside. Cover with tape. Visual instructions are in the video.
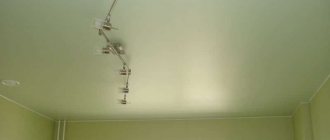
Liquid wallpaper application technology
Take the finished mixture and add a little warm water to the container with it to soften the composition. Mash again until smooth. Then start applying with a trowel or any other tool. It is better to do this from top to bottom, from the corner to the center.
An hour after finishing work, the wall is illuminated from the side and any imperfections are eliminated. You can fix them later. The prepared solution is stored for up to ten days.
The coating is often applied not only to walls and ceilings, but also to batteries. True, they must be cooled. The optimal layer thickness is 2 mm. It is desirable that it be the same over the entire area.
In the classic method of application, the spatula is not pressed hard; it is held at an angle of 5-15 degrees. The thinner the layer, the larger the angle. In this case, each subsequent stroke slightly overlaps the previous one. The movements can also be circular - this will help to get an interesting pattern and there will be fewer irregularities.
Instagram @jidkie_oboi_potolki_06
Instagram @jidkie_oboi_potolki_06
Instagram @super_wallpaper
Instagram @super_wallpaper
If the mixture is too thick, wet the trowel. At home, at average humidity and temperature, the finish dries in one or two days. During work, the room can be ventilated, but it is better not to create drafts. It is also not recommended to turn on heaters. A short video tutorial will help you better understand the operating technology.
Creating drawings
Designers value this material for its plasticity. You can make any design from the finished mass. To do this, you need to wait until the base layer dries. This will take a couple of days. Once completed, the contours of the appliqué are drawn on the wall by hand or using a stencil.
You can make it yourself or buy it. It costs differently - the price depends on the size. The template is glued to the wall with masking tape so as not to damage the coating. Small portions are distributed manually, in a thin layer up to 2-3 mm. Experienced craftsmen use a spray gun, but without skills it will be difficult to handle. Especially in large-scale drawings with a lot of detail.
If the pattern is multi-colored, then first apply one shade to all areas where it should be. Then the second, third. Leave a small gap between them. When the mass has dried, it is filled or shaded with a suitable marker.
Instagram @liudmilamazavets77
Instagram @liudmilamazavets77
What to choose?
So, which tool to choose when starting to apply liquid wallpaper with your own hands? This is a question that everyone decides for themselves. If the master has the skills of plastering and puttying, then he will most likely choose a spatula, trowel and grater.
The choice of tool also depends on the quality of the applied material. If the mixture is liquid, it is more convenient to apply it with a roller. When finishing large areas, it is advisable to use a spray gun (you can rent one), but if the material contains long fibers and large decorative elements, you will have to do the work manually.
Grater
To prevent the mixture from sticking, moisten the tool with water.
Using a grater, it is easy to eliminate coating defects discovered a few hours after applying the liquid wallpaper. They are made of various materials, but the most comfortable one is made of organic glass. It is a flat rectangle with a closed handle located in the middle.
Before grouting, the grater should be moistened in a convenient container with water so that liquid wallpaper does not stick to it.
Through the transparent material, coating defects are visible, which can be eliminated during the grouting process. We rub the protruding areas with stronger pressure than on a flat surface.
If the wallpaper is frozen and difficult to level, you can slightly wet it.
How to glue correctly: step-by-step instructions
Gluing wallpaper is not difficult, but this process includes several stages: surface preparation; the sticking itself; and final coating.
Gluing wallpaper is not difficult, but the process involves several steps.
Surface preparation
This type of wall finishing does not require a perfectly flat surface, but preparation is essential, otherwise the result will be of poor quality. Before pasting wallpaper, check the surface for:
- The surface must be durable, there should be no strong drops or potholes;
- The wall should not allow moisture to pass through easily;
- Large flaws are covered with putty, leveling them afterwards;
- Sanding should not be carried out; for good adhesion, the coating must be rough;
- The coating must be uniform;
- The white color of the surface will make it easier to stick, then a thin layer of wallpaper will be enough.
Standard steps for wall preparation:
- The first step is to remove the old coatings so that parts do not fall off over time;
- All protruding parts are removed from it, the depressions are covered;
- It is worth checking the evenness of the wall with a level, getting rid of strong unevenness if necessary;
- If the wall is covered with plasterboard, it must be completely leveled; any flaws will be visible on it;
- The wall must be coated with a deep penetration primer. It is advisable to apply it in two layers, waiting for each layer to dry completely;
- Only after the surface has dried can you start gluing wallpaper.
If there are oil stains, you need to get rid of them, otherwise the wallpaper will swell after a while.
This type of wall finishing does not require a perfectly flat surface, but preparation is essential, otherwise the result will be of poor quality.
How to apply wallpaper to a wall
There are several methods for gluing liquid wallpaper; to choose the appropriate option, it is better to consider each technology. In any case, you need to provide comfortable conditions and take care of good lighting. The first option is to use a spatula.
How to apply wallpaper with a spatula:
- The prepared and settled mixture is stirred again.
- Using a spatula, apply a small amount of mortar to the wall.
- Using also a spatula, the layer is leveled and brought to a thickness of 1-3 millimeters.
- Applying the composition in small parts, cover 1-1.5 meters, then level the resulting result with a transparent grater, first soak it in water.
When working, you should focus on the following recommendations:
- Alignment is done at eye level to ensure it is done correctly;
- The movements are kept short, always pointing the spatula in one direction.
Then the wall is left until it dries completely, which takes almost three days.
The movements are kept short, always pointing the spatula in one direction.
The second option is to use a spray bottle. This method is usually preferred by professionals due to the cost of the equipment used. But this technique reduces the consumption of funds by 2 times and spends less time:
- The solution used should have the consistency of liquid sour cream, which is poured into a spray bottle.
- The spray hole is directed towards the surface and smoothly moves in the other direction, leaving no untreated areas.
- Having covered the entire wall, it is leveled with a trowel or grater.
To avoid any uncovered areas, you can apply the mixture in two layers.
This technique reduces the consumption of funds by 2 times and less time is wasted.
Final stage
To create a water-repellent barrier, the surface can be coated with clear acrylic varnish. In addition, it will extend the life of the coating and fix the color. This coating will not stand out.
To create a water-repellent barrier, the surface can be coated with clear acrylic varnish.
DIY application technology
After 6-12 hours, check the mixture. If the mass is too thick, pour in a liter of warm water and stir. You can apply liquid wallpaper. The stages of wall finishing include directly applying the material, checking for defects, correcting defects and drying the surface.
It is allowed to apply the composition with the window slightly open, but without a draft. Sometimes liquid wallpaper comes off the walls. The reason is insufficient priming of the surface.
Step-by-step algorithm for installing liquid wallpaper:
- The optimal temperature in the room is 17-25 degrees.
- The mass can be applied horizontally, vertically, or in a herringbone pattern, depending on the desired design.
- Ideally, work best in daylight using artificial lighting.
- You need to apply the mixture from a bright corner, holding the tool at eye level at an incline of 15-30 degrees.
- To avoid joints, do not take long breaks between laying the mass.
- Liquid wallpaper should be applied in a uniform layer 2-3 mm thick.
- After each application, smooth the surface with a float.
- If the mixture sticks to the instrument, periodically moisten it with water.
- Apply liquid wallpaper carefully near the baguette, window sill and baseboards - the frozen mass is difficult to remove from surfaces.
- Spray the walls with water from a spray bottle and smooth the joints with a roller or spatula.
- The final stage (optional) is coating the walls with acrylic varnish to secure the material. The varnish should be applied in 1 or 2 layers.
Using protective varnish
To increase wear resistance and impart moisture-proof properties to the material, you can use the proprietary SILK PLASTER varnish.
Varnish for liquid wallpaper and decorative plaster Silk Plaster (5 l)
Varnish for liquid wallpaper and decorative plaster Silk Plaster (1 l)
Use branded SILK PLASTER varnish to give additional properties to liquid wallpaper:
- increased wear resistance,
- possibility of wet cleaning,
- use in rooms with high humidity (except for places with direct contact with water on the material).
ATTENTION
Do not dilute Silk Plaster fixing varnish!
How to breed at home?
The coating is available in two types. You can purchase a liquid mixture ready for use. In the second option, the dry components of the wallpaper are packaged in bags; to work, the mixture must first be soaked in water.
Instructions for preparing the mixture
All components must be used at once. You should not divide the dry mixture - due to incorrect proportions, the material may lose its properties.
Instructions for preparing the liquid mixture:
- Prepare the required amount of water (not warmer than 30).
- Shake the packets of mixture components.
- Pour all parts of the dry mixture into a container. If a shade is needed, color is added.
- Stir the mixture with your hands until it becomes fluffy and homogeneous.
- Pour in water and stir again.
- It is not advisable to use a mixer.
- Place the mixture in a bag and leave for 6-12 hours.
The most common question is how much liquid mixture should I mix for a large room? You may need two or more packages, but they must be diluted in different containers. When the liquid wallpaper is infused, they can be combined for ease of work.
How long can it be stored diluted?
The batch can be stored for several hours. If work is delayed, transfer the liquid mass to a bag without waiting for it to dry. In this form it is stored for 10-14 days.
Video
How to reuse?
Leftovers are stored for a long time, up to several years. Manufacturers allow reuse of the material provided it is properly stored.
How to preserve and reuse liquid wallpaper:
- Wait until the mixture in the container dries completely.
- Pack dried liquid wallpaper into a bag.
- When the time comes to apply the material, dilute it with water.
- Leave the mixture for several hours.
- Stir the liquid wallpaper, adding more water if necessary.
- Apply to the wall.