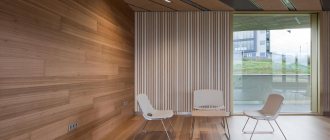
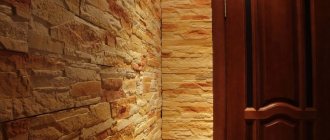
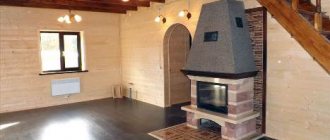
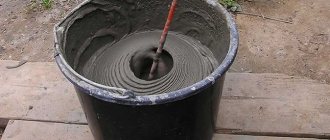
The interior decoration of a house made of gas silicate blocks has not only an aesthetic appearance. This is also the practical use of the positive qualities of aerated blocks in combination with the characteristics of finishing materials. The main task of any method of finishing walls made of aerated concrete blocks is to maintain the correct humidity and pressure in the living space, to ensure vapor permeability (the house must “breathe”). A competent selection of finishing materials to create a durable and comfortable finish will help achieve the desired result.
Special qualities of aerated concrete
Aerated concrete is a concrete-based material for creating aerated concrete (gas silicate) building blocks. It contains a porous structure, with pore cells up to 1 mm. Thanks to technologically complex manufacturing, aerated concrete blocks acquired the following qualities:
- do not burn, fire resistant;
- act as sound insulation;
- received frost resistance and thermal insulation;
- the ability to maintain a microclimate inside the building;
- inhibit the penetration of mold and mildew;
- long service life, light weight, price and easy to process.
Another property of gas silicate walls is high vapor permeability. Warm air indoors contains more water vapor than cold air outside. When cooling in the thickness of the wall, condensation is created, which provokes moisture. In dry form for blocks (D 400), this coefficient is equal to 0.23 mg/(m “h “Pa”). To reduce this parameter, the internal walls are impregnated with a primer. This is the first stage before applying cement plaster. As a result, the indicator decreases to 0.09 mg/(m “h “Pa”). It is known from experience that this needs to be done both for walls with facade insulation and without it.
Popular mistakes when covering walls with plasterboard
When finishing interior walls with plasterboard, some craftsmen make mistakes. For example, it is important to cut the profile correctly if curved structures are installed. In this case, an angle grinder is not suitable. The metal overheats when it is acted upon at high speed, and the galvanization burns out at the cutting site. This can subsequently cause metal corrosion.
Another mistake is the incorrect selection of a profile. The partition box cannot be constructed from a ceiling profile. Guides and rack elements are suitable for this. If you neglect this rule, then sound insulation, reliability and stability may suffer. It is important to install the sheet with the correct side. This is especially true for moisture-resistant material, the back side of which should not be exposed to water, otherwise fungus and mold may occur.
Materials
When choosing a material for interior wall decoration from gas silicate blocks, you need to take into account hygroscopicity and solve the following problems:
- create comfort in the living space, avoid excess humidity;
- protect the inner surface of the walls from the accumulation of dampness, reduce the impact of internal high humidity.
Interior finishing of aerated concrete involves 2 options:
- Vapor permeable.
- Vapor-tight.
In the first case, materials with a high degree of vapor permeability are used:
- perlite sand;
- gypsum;
- slaked lime;
- chalk;
- tree;
- dolomite;
- plastic.
This type of cladding is used for residential spaces with normal humidity levels. It will maintain a healthy microclimate in the rooms.
The second option involves the use of durable materials with vapor-proof properties:
- vinyl wallpapers;
- polyethylene film;
- paint (film-forming composition) and many other materials;
- tile.
Most often, plasters based on cement-sand mortars are used.
“It is important to ensure complete waterproofing of gas silicate walls not only inside. It is also necessary from the side of the foundation, facade, and roof. If the necessary requirements are not met, the blocks will become damp, which will lead to peeling of the plaster.”
This method is suitable for interior finishing of a bathhouse made of gas silicate blocks and other rooms with high humidity:
- kitchen;
- bathroom;
- bathroom;
- pool;
- non-residential premises.
Regardless of which finishing option (material) is used, compliance with construction standards is required. In the first case, do not lead to even slight fluid retention. In the second, moisture accumulates under a layer of finishing material.
Recommendations for purchasing finishing materials
It is better to avoid using a cement-sand mixture, since it has an insufficient level of vapor permeability and does not adhere well to aerated concrete. The latter characteristic is due to the large particles in the composition.
For internal walls made of aerated concrete, special-purpose plaster is ideal, the vapor permeability coefficient of which is similar to cellular concrete.
When you want to hang wallpaper in a damp room, you should choose moisture-resistant wallpaper sheets with the ability to withstand exposure to moisture. Vinyl wallpaper is very suitable for this, and can also hide minor defects, which does not require careful preparation of the walls.
Finishing methods
Using plasterboard, plastic panels, and decorative lining for finishing gas silicate blocks indoors requires a strong, reliable frame. The sheathing is made from bars (slats) and profiles. This is the basis under which are located:
- waterproofing;
- vapor barrier.
Above is the selected frame material.
Vapor-permeable paint is used for painting. It is applied to the flat surface of gas silicate walls. Plastering is not necessary here. The walls are leveled using the glue on which the blocks were installed. Seams, chips, and dents are removed using the same glue, with the addition of sawdust remaining after sawing the blocks. The protrusions are sanded with a special grater or sandpaper on a block, achieving a smooth surface, and dust is swept away with a brush. Having selected a primer compatible with the paint, the wall is primed 2 times, and paint is applied to the dry surface.
Wallpaper is glued to pre-plastered aerated concrete walls. Here they use plaster based on gypsum with the addition of slaked lime and perlite sand. Gypsum plaster is used without surface treatment with primer. It is easy to apply and does not require prior leveling of the walls with putty.
These types of cladding refer to the vapor-permeable method of interior finishing.
The second method requires cement plaster. This is a traditional mixture of water, sand, cement. It can be used to plaster not only aerated concrete blocks to reduce vapor permeability, but also foundations and external walls. To do this you need:
- Cover a clean (dust-free) inner surface with 2 layers of deep penetration primer. The second layer is applied after the first has dried (24 hours, depending on the humidity and temperature parameters).
- A layer of tile adhesive, 4 mm thick.
- To avoid cracking of the plaster, a mesh (3 mm mesh) is reinforced with fiberglass mesh. Pressing inwards.
A horizontal pattern is formed (with a notched trowel). Allow time to dry.
- Plaster is applied using dry glue (tiles are installed).
The second method of applying such plaster:
- the surface of the blocks is primed in 2-3 layers;
- Cement plaster is applied in a small layer, 3-5 mm;
- prime and apply a solution 10-20 mm thick;
- a finishing layer of 3-8 mm is applied, rubbed, leveled;
- finishing is carried out (painting, gluing vinyl wallpaper).
This is not the entire list of facing materials that can still be used to decorate the inside of walls made of gas silicate blocks. These include:
- various wallpaper models;
- siding;
- wall linoleum;
- textured types of plaster;
- liquid wallpaper.
And there are many other products that are used for these purposes.
Insulation of aerated concrete walls
With normal calculations and adherence to technology (laying with glue with a joint thickness of 1-2 mm), gas silicate walls do not need insulation. In central Russia, a sufficient block thickness of 325 mm. If the need nevertheless arises, the insulation must be vapor-permeable. And these are mineral wool and foam glass. Foam glass has excellent characteristics, but a high price. Mineral wool is cheaper. The thickness of the insulation depends on how cold it is in the house, but usually 50 mm is used as a minimum.
When finishing with lathing, it is made from a wider board or profile, taking into account the fact that the thickness of the insulation is also added to the thickness of the ventilation gap. Sometimes a counter-lattice may be needed. These are additional strips, which, depending on the circumstances, are packed along or across the first sheathing. The thermal insulation is attached to the wall with special plastic dowels with a wide mushroom-shaped cap.
Nuances of interior finishing of aerated concrete walls
When covering walls with a thin layer of plaster (honing), remember that this is not an easy process. But the resulting result will allow you to get a beautiful canvas and save money on work and materials. With this finishing method, a reinforced mesh (5 mm maximum thickness) is immediately attached to the cleaned surface. It is covered with special-purpose putty and the wall is leveled. A thin layer of plaster is applied. The thickness of the interior finishing layer should not exceed a limited frame (4-10 mm).
"Note. This type of finishing is only suitable for densely laid aerated concrete blocks. The seams between them are narrow. Otherwise, choose a different type of finish.”
After drying (at least a week), tinting is applied. The required volume of the desired color is purchased in advance. It is necessary to take it immediately with a reserve, then it is difficult to choose the required color. The completely dry surface is prepared for painting and tinted.
Plaster, applied in a thick layer, is applied in 3 stages. Each layer is applied only after the previous one has dried. Compliance with such an algorithm is the key to a high-quality result.
It is convenient to use ready-made store-bought mixtures. They are produced with the addition of all the necessary components for different working conditions. The packaging states:
- type of plaster, composition;
- weight;
- mixture consumption per square;
- places of application;
- temperature of use;
- vapor permeability coefficient;
- adhesion strength to the base;
- and other useful parameters.
This greatly simplifies the finishing process.
Tips and tricks for finishing
When finishing the interior of aerated concrete walls, it is recommended to follow some rules. One of the main stages is leveling, and if it is plaster, it is applied using the spray method. The first layer should have a thickness within 5 mm. The almost liquid solution is first poured on and then rubbed into the surface. In order to prevent cracking of the leveling layer and increase adhesion, the bottom layer is reinforced with fiberglass mesh. If dents are noticed, they can be repaired with block mortar.
Required Tools
To comfortably carry out finishing work, you must have the following basic equipment:
- Drill, screwdriver, hammer drill.
- Hacksaw, hammer.
- Preferably high level.
- A set of different spatulas, screwdrivers.
- Plumb line, tape measure, twine.
- Grinder, metal scissors.
- Sandpaper, grater, brushes, rollers.
Houses made of gas silicate blocks are considered modern, inexpensive and popular buildings. The range of materials for interior decoration is amazing with its large selection. You can choose both budget and expensive options for interior wall cladding.
Reinforced concrete floor slabs
Floor slabs are a common choice for aerated concrete houses. Reinforced concrete slabs have the following advantages and disadvantages:
- Low cost.
- Good load-bearing capacity (from 400 to 800 kg/m2).
- High speed of installation of the slabs themselves.
- Good sound insulation of the ceiling.
- Slab length up to 9 meters.
- Installation requires hiring a crane.
- It is necessary to build an armored belt around the perimeter of the walls.
Criteria for choosing a finishing method
Rough finish
When choosing a method of interior finishing of a gas-construction structure for a particular room, it is necessary to proceed primarily from its purpose and climatic parameters, as well as the possibility of changing them, budget and personal preferences or design ideas.
For those who are just starting to master this difficult skill, the video in this article shows where to start, how to choose materials and make the cladding with your own hands.
DIY plastering
A private house
Finishing an aerated concrete house inside
In your own house made of gas blocks, there are at least three types of premises:
- With a normal level of humidity (halls, bedrooms, living rooms, children's rooms, hallways). For finishing, it is better to use ordinary drywall, wood panels, paper wallpaper, water-permeable paint and vapor-permeable plaster or decorative blocks of gypsum, sand and lime.
- With a high level of humidity (kitchens, bathrooms, saunas, swimming pool, door area facing the street). It is better to use waterproof drywall, plastic panels and tiles.
- For household purposes, in which the humidity level may fluctuate (storerooms, plinths, boiler rooms). Ideally, cement-sand plaster should be used here; fire-resistant materials are suitable for combustion rooms.
Internal finishing of aerated concrete house
Office premises, public institutions
Priming office walls
The decoration of the interior walls of public premises should be based on those types of materials that ensure maximum durability of the building structure and, naturally, meet the design ideas in interior design.
It is better to line rooms located far from entrances/exits with vapor-permeable materials, while those located nearby and in contact with the street atmosphere should be lined with waterproof materials.
Office decoration
How to calculate the dimensions of a wooden floor?
In order for a house made of aerated concrete to last for many years, it is important to correctly calculate the interfloor or attic structures, because they will serve as the floor for the upper floors. The builder needs to know what maximum length and cross-section to buy beams.
Since it is very difficult to calculate the total load on the timber and the aerated concrete block, its total value is taken as 400 kg/m2. It includes the total weight of the structure, furniture and equipment.
Here is a summary table from which, taking into account the length of the span and the pitch of installing the logs, you can determine the cross-section:
| Span length, m | Installation step, cm | |
| 60 | 100 | |
| Beam cross-section, mm | ||
| 7 | 150x300 | 200x275 |
| 6,5 | 150x250 | 200x250 |
| 6 | 150x225 | 175x250 |
| 5,5 | 150x200 | 150x250 |
| 5 | 125x200 | 150x225 |
| 4,5 | 100x200 | 150x200 |
| 4 | 100x200 | 125x200 |
| 3 | 75x200 | 100x175 |
| 2,5 | 75x150 | 100x150 |
| 2 | 75x100 | 75x150 |
Let's assume that a house is being built from an aerated block with a span of 5 m, and the beams are installed in increments of 1 m. Check the table - you will need timber with a section of 150x225 mm. When making further calculations, keep in mind that the boards will extend into the aerated concrete wall by at least 15 cm. Therefore, the maximum length of the floor is set as follows: 5 + 0.15 + 0.15 = 5.3 m.
Calculate so that the cross-section of the lumber provides a deflection of no more than 1/300 of the size of the floor span. It is advisable that the length of the wooden beams does not exceed 6 m - the structure may not withstand the loads. The exact amount of lumber that needs to be prepared is calculated based on the surface area.
How to install a wooden floor in a house made of aerated concrete with your own hands?
Once the dimensions of the floors have been calculated, you can purchase all the materials necessary for installation. The interfloor structure consists of lower support beams, covered with heat and sound insulation, and counter-battens fixed on top. Experienced builders choose laminated veneer lumber, edged boards or ready-made I-beams as lumber. Metal elements can also be used.
The main feature is that the wooden floors for floors in a house made of aerated concrete will be supported by a support made of reinforced concrete reinforcing belt mounted along the entire perimeter of the building. To make it, U-blocks are taken - this is where wooden beams will be placed in the future.
Before installing interfloor structures, lumber is treated with antifungal agents. Here you can use any of the commercially available formulations. The exception is oil-based solutions. Such substances will prevent the evaporation of moisture from the wood, which will make a house made of aerated concrete less durable and reliable.
It would not be superfluous to treat the beams with substances that increase fire resistance, since wood is flammable. Modern compositions can significantly reduce the risk of fire - in the event of a fire, the floor or roof will not collapse within several hours. If an interfloor wooden floor is installed over metal beams, then the steel elements must be treated with anti-corrosion agents.
Wait until the compounds applied to individual parts of the structure dry. And when the preparatory work is completed, you can install interfloor wooden floors:
1. The ends of the beams, which will later be attached to the aerated concrete wall, are first sawed at an angle of 60°, and then wrapped in roofing material. This will prevent the bars from fraying. Leave the cut areas uncovered - the wood should “breathe”.
2. The aerated concrete block must not be allowed to come into close contact with the end of the beam - this can lead to rotting of the beam. Therefore, leave a gap in this place - at least 5 cm. Lay a thin layer of thermal insulation here - mineral wool.
3. First, the outer beams are installed. Using the same spacing, attach the intermediate wooden boards. Check how evenly the beams lie using the building level.
4. Beam floors are attached to the reinforcing belt with metal corners, plates or studs coated with an anti-corrosion compound.
5. Now you can begin installing the reel. It is made on the basis of boards or beams, which are attached to the lower parts of the beams.
6. The roll-up should be insulated. Thermal insulation layer is at least 10 cm.
7. Wooden beams for the ceiling are covered with logs on top. After this, you can begin installing the floor of the upper floor. If in the future it is planned to cover it with linoleum, laminate or parquet, then chipboard or plywood is additionally laid on the logs to level the surface.
8. The bottom of the floors with wooden load-bearing elements is sheathed with clapboard or plasterboard. You can choose other options - it all depends on the planned decorative finishing of the ceiling on the lower floor.
The basement structure is mounted using the same technology as the interfloor structure. But in this case it is important for the builder to take into account some features:
- To protect the aerated concrete block and beams (in case of high humidity on the lower floors), provide waterproofing. It fits under the insulation.
- If the rooms below are not heated (pantry or basement), provide a thicker layer of heat insulation - up to 20 cm. To protect the blocks from condensation, lay a vapor barrier on top of the insulation.
The attic floor differs from other types of structures in that at the end of the work there is no need to install a floor - it is enough to install ladders-bridges along the beams. The insulation layer in the space between the beams is 15-20 cm. Since there will be no large loads on the elements, it is realistic to do without a reinforcing belt. The exception is when the attic on the upper floors will be used as a living room.
Source: stroitel-list.ru
