Hello, this is Anton Ageev, a teacher of the course on procedural textures “Procedural Trip”. You can read more about it in the announcement. In the course, I teach how to work in Substance Painter and Designer and tell you how to create realistic procedural textures at the level of game industry professionals.
This is a tutorial on creating a procedural concrete texture in Substance Designer. Concrete is a trivial material at first glance, but its proper use will help build the style of the entire game. Like, for example, in last year's Control.
By the way, the textures for it were also made in Substance Designer
I will describe the process in detail for beginners - if you want to take the course, but are not sure whether it will suit you, try repeating all the steps in the article. You can start from scratch, in a trial version of Designer for a month, if you are not sure whether you want to immediately spend money on professional programs.
In each step I will indicate the exact values of the parameters that I used, but this does not mean that you need to repeat everything after me - experiment!
Repeat after me, create your own texture and post it in the comments below this article. The author of the work that gets the most likes will receive a prize from XYZ - any art book worth up to 2 thousand rubles.
Go!
Collecting references
We go to Artstation, Behance, Google and look for suitable images.
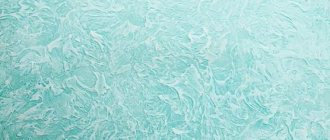
Here are three pictures that I liked
I liked the first one because of its cracks, and from the second one I took the color and pores. In the third I liked the general noise: plaster, chiaroscuro, and micro-details.
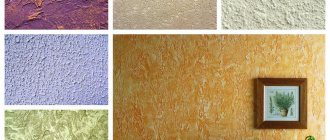
Standard lime plaster
Mineral finishing material, which is environmentally friendly and hypoallergenic, is suitable for any room and can improve the appearance of walls decorated as concrete.
Cement-lime plaster is used in numerous facilities for leveling and textured finishing of walls in houses and apartments with walls made of brick, concrete, cinder block, expanded clay concrete, and aerated concrete blocks. It has an interesting and original texture, rich gray color and medium porosity. To protect against moisture, it is coated with special hydrophobic compounds.
Lime plaster allows you to imitate the surface of concrete, as well as natural stone, maintaining texture and relief through the use of various application technologies!
Setting up the program
The Substance Designer interface looks like this:
Looks scary, but you get used to it quickly
The interface is divided into several work areas: the effects panel on the right, 3D viewport - displaying material on a 3D model, 2D viewport - shows the contents of the selected node. Below is a workspace called Graph View, in which we create material using nodes.
A node is a block of code or operation that creates or processes an image
Nodes have outgoing ports - outputs, and some also have incoming ports - inputs. Information is fed into the inputs, processed by the node, and leaves the output to the next node.
The nodes are connected in a chain of actions that leads to a result - a texture or its individual element.
For example, the Blur node takes an image as input, and outputs it more blurry:
Input left, output right
This approach to creating textures and materials is called procedural.
One of its features is a non-destructive pipeline. This means that at any stage of creating the material, you can return to any action and make changes to it and influence the result.
For example, I can return to the Blur node after half an hour of work and configure it again, adjusting the degree of blur. In Photoshop, for the same operation, you would have to roll back all the actions until the desired change.
There are more than two hundred nodes in the Designer library. They are divided into groups according to tasks.
For example, the Noises group contains procedural textures that are used to create noise. They do not have inputs, only outputs and parameters with which you can customize the appearance of these textures.
There are other groups: patterns, operations and effects.
Here's what the original diagram looks like in Graph View. I'll leave it in good quality on Google Drive so you can refer to the final version if you get confused.
In each step we will analyze a piece of the diagram
What is decorative plaster for concrete?
With the advent of new technologies in the construction industry, interesting materials appear that are intended not only to perform conventional functions. Previously, the word plaster meant a faceless mass of indefinite color, used to level the surface for final finishing.
One of the trendy coatings today is concrete plaster.
Now the meaning of the term has undergone changes and expanded to immeasurable limits:
- Decorative plaster is an independent means of decorating a room. Its variability allows you to do without the usual wallpaper, lining, tiles (ceramic and plastic), and expensive natural materials.
- The demand for technology has led to the emergence of various types with useful properties - environmental friendliness, ease of application, resistance to temperature changes, moisture, minimal susceptibility to contamination.
- New compositions are designed to imitate the usual structure, but do not require either the time or financial investments that might be required in the use of an already known building material. Decorative plaster is a simple and quick way to imitate a surface, easily removed if there is a need to change the interior design.
- A plaster mixture that, when applied, imitates a concrete surface is a collective name for various mixtures that easily change color when pigment is added, are easy to apply, with the addition of various components that enhance practicality, durability or resistance to certain destructive influences.
For your information!
Individual compounds can be washed or cleaned using simple methods.
Decorativeness is achieved not only by textural variations, but also by spectacular color combinations. Coloring pigments allow you to limit yourself to the usual cold range of concrete coatings from gray to brownish. There are also pleasant, warm, rich shades that create a good mood and visually transform the room.
New project
First of all, we create and configure a new project.
In the new project window, give a name to the future graph, set the resolution to 2048x2048 pixels, the document bit depth to 16 bits, and select PBR (Metallic\Roughness) as a template from the left list.
Thanks to templates, you can quickly create and configure special nodes - outputs. These are the points where information exits the graph, and the textures that we will create while working on the material are connected to them.
If you forgot to select the required template or accidentally deleted outputs while working, don’t worry, they can be created and configured manually.
How is decorative plaster applied to concrete?
In the design process, you will need two types of tools - main and auxiliary:
- The usual tools for work are a plastic trowel, a soft viscose sponge, a scraper and a paint brush and spatula.
- As in any other case of plastering work, one cannot do without building regulations, some measuring instruments (to prevent distortions and unevenness of the layer), and a polyurethane trowel.
- Anything will help to show individual creativity and imagination in the design of a drawing - a hard brush, a broom, stamps and structural rollers, molds and stencils.
- Instead of a plastic trowel, a metal one can be used. This circumstance is important if fractional fillers are added to the composition. They can make the prepared solution heavier and damage the fragile instrument with force. This will not happen with a metal trowel.
The required kit must include a container for preparing the solution. It should be small in size, since harvesting for future use is not recommended. The rapid setting of the solution causes changes in the finished structure and complicates application to the wall.
Height map
Our task is to competently construct a height map (Height).
Height is a black and white texture in which the brightness of a pixel specifies the height of a point in 2D space.
The darker the pixel, the deeper it is. And the brighter, the higher, on the contrary, the point relative to the plane on which the texture is located.
Thus, when working on a height map, we create a relief of the future material, but only in one dimension.
The height map takes up 80% of the work.
It also affects all other textures of the material - color, roughness, shading (AO) and so on.
Disadvantages of exclusive plaster options
Plaster has practically no disadvantages. In technological terms, some difficulties may be caused by the length of time the mixture hardens. But this indicator is not critical - it is somewhat worse from the economic side of the issue.
Creating exclusive interiors requires not only the cost of expensive raw materials, but also payment for design development and selection of individual mixture components.
Good design is far from the cheapest pleasure Source market.kz
Texture
The first element is a texture that I made based on the procedural noise of Fractal Sum Base. Its task is to add small irregularities and texture to the concrete so that the material is not perfectly smooth.
I assembled this texture from four nodes, starting with the procedural noise Fractal Sum Base.
I signed all the parameters in order to make it more convenient to focus on my result.
Next we experiment. I don't know how to make an element, so I work through several ideas until I get it right.
I'll try to explain the process of thinking in the process of creating a texture.
I started with Fractal Sum Base because I thought it looked like a uniform rock surface. But in the default state it makes too much noise.
Therefore, a Slope Blur node was added to reduce detail.
Slope Blur both blurs and distorts the texture, which led me to this result:
Here I show the result with color for clarity. We'll get to creating the color texture later.
The next step is the Blur HQ node, with which I soften the resulting texture.
The last node is Histogram Range. In it, using the Range parameter, I control the intensity of the element:
Practical recommendations
Experts recommend purchasing primer and plaster from the same manufacturer, taking into account the ratio of work speed and speed of setting of the solution. You should cover the door perimeter with masking tape so as not to stain it with decorative plaster. Considering the type of decor you want to make, you need to choose a type of composition - they are available with metal and composite fragments, large and small fractions, intended for a specific surface and universal.
When using decorative plaster in the interior, do not overdo it
Interesting experiments by folk craftsmen have shown that, using certain techniques, it is possible to imitate the laying of concrete slabs, formwork or cellular concrete. Of the classic variations, we can again recall the already mentioned dry and “wet”, fresh and rusty, with painted and unpainted convex patterns. Using certain compounds, you can block the loss of heat and get rid of the noise of neighbors.
Was this information useful to you? Share in the comments!
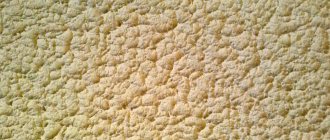
Pores
The structure of concrete is heterogeneous - in addition to cracks, there are many small holes scattered over the entire surface, which are formed due to the evaporation of water from inside the material.
I created the pores from the Dirt 1 texture procedural texture.
In order to make the pore depths more varied, I duplicated Dirt 1 and configured them differently using the Position parameter in the Histogram Scan nodes.
By adjusting this parameter, I control the brightness, so in the two options we get a different number of holes:
After that I apply a Slope Blur to both textures to simplify the shape of the pores and make them look like holes in stone:
Pores in the material
Work order
The order of work is dictated by the composition of the mixture and the intended purpose.
Work is usually carried out in the following order:
- Remove the old coating from the wall.
- The walls are being cleaned and repaired. Be sure to remove cracks. To do this, the crack is widened with a chisel, primed, and then filled with a special mixture.
- The walls are primed.
- After the primer has dried, a special solution is prepared.
- Apply the first layer with a thickness of 0.5–2 mm. After 40 minutes, treat the surface using a construction float. The movements are directed counterclockwise.
- Apply the main decorative layer.
Important!
After a day, when everything is dry, smooth out the various protrusions. They are smoothed using a construction float, which has a medium grain size.
The performer’s task is simpler the less work has to be done at the stage of preparing the surface for coating. This could be a wall from builders, with a relatively favorable background for work, secondary housing for renovation, or an industrial building in which it is planned to equip housing, an entertainment facility, or a creative workshop. In each case, the list of planned preparation work may be longer or shorter.
Cleaning walls from old coating
Cleaning the walls of old coating may mean removing dirt or completely removing all previously applied finishing. Removal of a thin layer of plaster is done by soaking. Old layers will require a hammer drill with a chisel attachment. Old paint that adheres to the surface will be more difficult to remove than paint that peels off on its own; for this, a hair dryer or a mechanical method (drill, grinder with a special attachment) is used.
Repair of wall surfaces
Repairing wall surfaces is a necessary process, which is carried out after removing the old finishing layer. On the original surface of old buildings, walls in apartments from the secondary housing stock, cracks may appear due to subsidence, age, and improper use by the previous owners. They are sealed with the same material from which the construction was carried out, protruding seams are rubbed flush with the rest of the surface.
Concrete walls can be sealed with cement-sand mortar or cement-based tile adhesive; there are special repair putties.
Before applying the decorative composition, it is necessary to carefully prepare the walls
Priming of cleaned surfaces
The primer is applied only after the walls are cleaned of dirt and the patches made have completely dried. For prevention, you can clean them again with a pipedaster, a rag or a vacuum cleaner, and only then start priming. This cannot be avoided, since a layer of priming composition serves three purposes at once:
- provides maximum adhesion;
- protects against fungus and mold (provided that a composition with antiseptic properties is used);
- tightens microcracks in the lower layer and ensures its additional safety.
To achieve a perfectly flat surface, 2-3 layers with different properties can be used. In this case, each time you need to wait for the previously applied to dry completely. To do this, you will need a roller with a foam or fur attachment, an inclined bath with a relief that allows you to squeeze out the excess solution absorbed by the device.
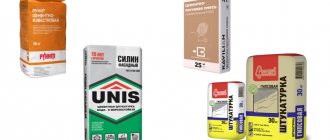
Preparation of the solution
The best option is to purchase a ready-to-use mixture in a special container, hermetically sealed. It has only two drawbacks - cost and the need to use completely after uncorking. The dry composition can be prepared as needed, but this takes precious time. Experts advise pouring the mixture into water (and not in the reverse order) and strictly following the proportions specified in the manufacturer’s instructions.
For the first, prepare a mixture of a thinner consistency, then you can make it a little thicker.
Note!
It is important to remember that it is irrational to prepare a large amount at once - if the mixture is not used immediately, the next day it will become unusable.
Applying the first adhesive layer of plaster
The solution for the first adhesive layer of plaster is prepared using a construction mixer or an electric drill with a mixing attachment. This ensures its homogeneity for applying the first adhesive layer. It should not be thinner than 0.5 mm and thicker than 2 mm. A spatula or trowel is an excellent tool for application, and a metal trowel will ensure uniform distribution and the necessary smoothness.
After 40 minutes, take a trowel and forcefully rub the surface with smooth circular movements. At a temperature range of 15 to 20 degrees, the applied thin layer dries in about 2 hours. Normally, work is carried out at a temperature not lower than +5 degrees. The lower it is, the longer the time period for drying the first preparatory layer.
Concrete plaster is applied to a flat, dry and primed surface
Application of a decorative relief layer
The application of a decorative relief layer depends on the goals set by home decorators or professional builders. The process starts from the ceiling-corner area. The movement occurs downwards and towards the opposite corner. There are variable ways to create a decorative layer:
- the impression is left with a roller or polyurethane stamp on a solution thickness of no more than 0.5 cm;
- a chaotic pattern is obtained from the use of improvised means - a broom, brush and even plastic film;
- simple roughness is the solution after using the smoother.
The thickness, texture, drying time of the second decorative layer completely depend on the imagination of the owner and his ability to work or the financial capabilities and professionalism of the craftsmen. The degree of decorativeness depends on the characteristics of the purchased composition and the choice of means for the finishing stage.
The final stage of work
For greater safety and decorativeness, water impregnation or a special varnish is used. Sometimes pigment coloring is used - recesses or protruding parts of the ornament are covered.
Glazing solutions protect against the harmful effects of ultraviolet radiation or fumes. Instead, decorative wax is used, which is useful for simulating a rough surface or stone masonry.
Procedural noises and effects
Slope Blur is controlled by a different texture. In our example, the black and white texture controls the intensity of the effect. The brighter the pixel, the stronger the Slope Blur is at that location.
Most often, other effects are controlled by procedural noise - from now on I will call them drivers.
Slope Blur for pores, driver is BnW Spots 2
The result of the effect depends on the texture driver, so don't be afraid to experiment. This will lead to results faster and teach you how to work with different effects and textures.
Features and types of material
Art concrete or architectural concrete is a collective name for a numerous and multifaceted line of products from well-known manufacturers. Hence the variability of added components, different quality, decorative trends and prices. A conditional division is made into 2 groups - microcement plaster and microconcrete with a polymer structure.
- Microconcrete is a great way to quickly and reliably design any coating, provide aesthetic visualization and unique design. Reliable adhesion to concrete, plasterboard, metal, wood and even smooth tiles, seamlessness, shockproofness and vapor resistance allow the use of cement-based microconcrete in rooms with any functionality, for finishing work outside and inside the house. There are different composition options - organic and synthetic resins, fillers, mineral pigments.
- Textured plaster with no less useful features, called microcement, is called by incompetent authors of some publications a type of microconcrete. However, it is used to create a thin decorative layer at the final stage of finishing. In this case, the admixtures provide a reliable coating with the base layer and increased moisture resistance. The use of microcement in interior decoration will help avoid the appearance of mold, unsightly stains, and swelling - a frequent consequence of excess moisture indoors or outdoors.
- There are several main types of microconcrete. Aquacement is an ideal option for the bathroom, resistant to salts and chlorine, microfino, which can even be used to plaster ceilings and furniture, microdeck and microstone.
To get a reliable and picturesque concrete-effect coating, you can take any option by carefully studying the composition and properties of the finished mixture from the manufacturer.
If the goal is to achieve a certain visual effect, stylistic compliance with the chosen design style, the selection should be made according to other criteria - texture, color, modifying additives.
Decorative plaster goes well with other finishing materials
Damage
Whole pieces of cement sometimes fall off the walls, exposing the interior of a material with a larger, more porous texture. We will now create these dark spots.
1. I create the texture of rough and porous cement, then mix it into the material using a mask made from procedural noise - BnW Spots 1.
2. I make a mask using the Histogram Scan node, increasing the texture contrast. Using Position I adjust the damage area.
3. I apply Slope Blur to the mask; as a driver I use BnW Spots 3, which is already in the graphics - it participates in the creation of pores.
4. Before mixing the texture from BnW Spots 1, I shift the texture to the side and rotate it with the Transform 2D node so that the texture pattern does not coincide with the mask pattern.
Style and design
Plaster with a concrete effect is used in the design of rooms with a modern design. It is no coincidence that it is used in popular bars and nightclubs, to which the owners want to give futurism, industrialism and detachment, minimalism and authenticity. Loft, hi-tech, modern or postmodernism - these are the main directions where it would be optimal to use decorative textures and standard gray-brown tones.
The wall covering is in harmony with glass and metal (chromed and matte, polished or deliberately dull). Creating a layer that is indistinguishable in appearance from untreated concrete is not the only way to diversify the decor. Can:
- create a unique texture using mixtures with fine additives;
- use stencils, indentation techniques;
- build combinations with metal and wood;
- finish only one wall, use a combination with other materials;
- When choosing furnishings, notice bright details (lighting, furniture, art) to expand the space, make it warm, spectacular and unique.
On a note!
Plastering can be done not only in the bathroom, toilet or combined bathroom, although this is also an excellent solution to household and design problems (creating an apron over an unaesthetic interweaving of pipes, style matching with toilets, shower stalls made of glass and chrome).
An invaluable advantage is the ability to create the effects of different concrete using purchased compositions - fresh or old, untreated and rusty, the type of wet facade finishing, drawing and painting its protruding parts.
Loft
The emergence of the loft style is associated with the conversion of industrial premises into office, residential or for certain purposes (creative workshops, vernissages, holding events). Its unique features do not allow this style direction to be confused with others. Communications, brick or concrete, space not limited by partitions, from the attributes of poor industrial housing, have turned into signs of wealth and luxury.
Using authentic materials to create the necessary visual effect is not cheap for homeowners, but a layer of plaster will help turn even the most problematic room in this sense into a fashionable one, in full accordance with the requirements of modern trends in advanced decor.
Concrete looks great in the kitchen, replacing boring tiles
Loft decorative plaster is widely used by famous designers in creating original interiors of living rooms and bedrooms; a cold palette is in demand in kitchens and functional rooms. In country mansions, you are equally likely to find a wine cellar, an attic and a guest room, the decoration of which used imitation concrete texture, a brutal mixture of metal and wood, eccentric furniture, and transparent partitions.
This is a popular and fashionable style, the apparent simplicity of which hides an abyss of taste and specificity of finishing products. Decorative plaster made from micro-concrete or micro-cement is an inexpensive and practical way out when you have limited funds for repairs.
High tech
In some sources you can find a statement that the use of textured building materials is even more typical for a high-tech interior than for a loft. Late modernism, as the source of this decorative style, is focused on monumentality, simplicity, hyperbole and manufacturability, convenience and functionality.
The main features inherent in this art direction are considered to be the use of plastic, glass and metal. But textured plaster with imitation concrete is favored by the prevalence of silver-gray tones, straight shapes and lines, and pragmatism in designing and transforming space. It fits organically into the stylistic design and will look appropriate in the overall design.
Concrete texture is most characteristic of the high-tech style
Mix
To blend, I’ll create 4 consecutive Blend nodes, connecting a different element to each one, adjusting the degree of transparency and blending type:
Cracks and damage are mixed with the rest of the material in the masks. This is an inverted version of the same mask. The mask in the cracks prevents them from crawling onto the damaged areas, as if only the top layer was cracked.
The height map is ready. It remains to create additional textures that will be needed when working with color and Roughness.
Decor and accessories
Concrete or plaster decorative elements will be an interesting addition to the interior. These can be floor or tabletop potted vases, unusual flower vases, decorative items, book holders or massive candlesticks.
Ambient Occlusion
AO is the texture of shading that occurs under diffuse lighting. The more difficult it is for light to reach the surface, the more intense the shading will be in that area. Dust and dirt accumulate in places that are difficult for light to reach.
The shading texture is used to create masks for pollution effects.
Designer has a node that generates an AO texture from a height map. We will need it later when creating color and Roughness textures.
Light marble on white cement and Light marble on gray cement
One of the lightest shades of texture that requires careful care to keep it looking neat. At the same time, you need to remember that marble actively absorbs moisture, can be damaged when exposed to any type of deicing agents, and often crumbles and erodes.
Therefore, this texture should be used in places where the physical impact on washed concrete will be gentle, or it should be understood that, for example, cladding steps made of such a material will be inferior in wear resistance to concrete with granite filler.
This is a good option for creating garden furniture, flowerpots, and wall cladding.
Grunge
In a separate graph I will mix several grunge concrete textures taken from the Substance Painter library.
To add them to the chart, find them, right-click, and select Show in Explorer from the context menu.
Substance Painter Library
The textures are located in the library folder in .sbsar format; they can be imported into the material graph by dragging the file from the folder into the Graph View window.
Texture will be needed to add details that do not affect the relief, but will be visible in the color and texture of the Roughness.
The history of printed concrete
Printed concrete began to be used in the middle of the last century in the USA. Enterprising Americans have developed a technology for maximally hardening the concrete surface and giving it special properties so that military aviation runways can last as long as possible. But the invention was quickly appreciated by urban planning contractors, and with minor improvements, they introduced the concept of decorative printed concrete for use on almost any site.
Printed concrete, otherwise called stamped concrete (concrete is produced using stamps) or press concrete, differs from ordinary concrete by decorative relief embossing applied to the surface. In this case, the pattern can repeat natural or artificial material, be it stone, wood, paving stones or cracked soil. In addition to visual appeal, printed concrete is characterized by increased wear resistance, since special materials are used in the printing process, as well as protective impregnations and varnishes for concrete.
Roughness
The microsurface texture (Roughness) is responsible for the scattering of light by the material.
Smooth surfaces reflect light rays without scattering them at the angles of their incidence on the surface. As a result, reflections on the material become clear and highlights are sharp.
Rough surfaces scatter light, causing reflections to wash out and highlights to become dull and broad.
In my Roughness chart it's done like this
A common way to start working with Roughness is to use a Curvature texture as a base. In the original Curvature, the recesses, pores and cracks are darker than the corners and planes.
However, in the Roughness texture, the darker the surface, the more glossy it is. Therefore, the first step is to invert Curvature - cracks and depressions will become matte. To do this, we use the Grayscale Invert node.
I mixed the resulting result with the grunge texture I made earlier to add more detail and depth to the Roughness.
The last node is Histogram Range. In it, using the Position parameter, I adjust the overall level of smoothness:
Advantages and disadvantages of the material
Environmental friendliness, ease of maintenance, thermal insulation properties, and reliable noise protection are not the only advantages that have made decorative plaster popular and widespread. There are other undeniable advantages - affordable cost, preservation of the original surface, long-term operation, no need for special training to carry out application work.
The only disadvantages mentioned are the need to wait for the layer to dry and expensive compounds that will have to be used if you use the texture to implement complex projects that require the use of imagination and creativity.
Plaster for concrete - a universal material for all types of premises
Color
Our concrete turns out to be simple, so I color it using one node - Gradient Map, with which I color the black and white Height Map.
- Before this I mix it with a grunge texture so that there is more detail in the color. If you only use a Height Map in a Gradient Map, the result will look flat and uninteresting.
- Before connecting the texture to the Gradient Map, I increase its contrast using Levels.
- Gradient Map. The node converts gray tones into color using a custom gradient.
Settings editor, opens by clicking on “Gradient Editor” in the node properties
Colors can be added and edited manually, or grabbed directly from a reference using the Pick Gradient tool.
Capturing a gradient always gives different results
Features of application
The minimalism of the style trends characteristic of this building material - high-tech and loft - does not provide for particularly bright shades or spectacular color combinations. A characteristic feature of the solution in these styles is the use of cool shades that expand the space in all directions. The semantic load and accentuation fall on pieces of furniture and decor. But even in the extremely limited functionality of a coating that imitates a concrete wall, there are unlimited possibilities:
- relief of the layer, achieved by adding pebbles, sand, modifiers of natural and artificial origin to the composition;
- the use of stencils, deep and shallow;
- the use of manual indentation techniques on an artificially created bulge;
- coloring the protrusions of small and large patterns with a different, harmonizing or contrasting color;
- adding a color pigment to obtain a new shade.
If you study the experience of craftsmen who did decorative plaster for concrete with their own hands, it turns out that the decorative material has much more possibilities - it is used in creating pockets, plastering old furniture, which acquires a completely new visualization. Using improvised means, the concrete texture is given a completely new sound, and the use of colored pigments is avant-garde and non-trivial.
Attention!
Loft and hi-tech are not the limit of the practical application of art concrete. To create a cohesive and mesmerizing impression, it is successfully used in art deco, modern and interiors of other styles.