Options for interior finishing of a frame house
Finishing the inside of a frame house performs two main functions - it serves as the most important element of interior design, and protects the frame walls from damage. The level of respectability of the house, the atmosphere in its premises, as well as the service life of the building depend on how high-quality finishing materials are used and how professionally they are used.
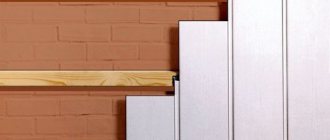
Builders call the process of applying decorative finishing materials fine finishing. It is preceded by the stage of rough finishing, that is, the application of materials that protect the machine from negative influences and give it the required degree of smoothness and adhesion (adhesion). The roughing and finishing stages must be carried out using well-selected materials.
Interior decoration of a frame house Source tiptop-house.by
Rough finish
During the rough finishing process, the enclosing walls and internal partitions are sheathed with material that can easily be coated with decorative cladding. Most often, the walls of frame houses are “sewn up” with sheets of plasterboard or OSB ( oriented strand board
). These materials have important advantages:
- Almost ideal geometry
of individual sheets or slabs, which allows for high-quality cladding of walls and ceilings; - Smooth surface
to which any finish can be applied without problems; - These materials are easy to process
and are quite flexible, so they are suitable for covering complex architectural elements - arches, bay windows, non-standard configuration projects, etc. - Drywall and OSB are economical and easy-to-use
materials.
Covering walls with plasterboard or OSB is done quickly, and at the end of the work, a minimum of construction waste remains, which is also important for the finishing stage.
Finishing a frame house with plasterboard Source bestaccessdoors.com
Drywall
Drywall and its improved version GVL ( gypsum fiber sheet
) can be used for cladding any premises. For finishing in places with high humidity, the same materials are used, but with increased moisture resistance. For maximum sound insulation, some manufacturers produce special acoustic plasterboard.
Drywall is lighter and cheaper than gypsum board. They cover ceilings and walls in ordinary living rooms. Where walls that are resistant to high temperatures and mechanical damage are needed, it is better to use GVL.
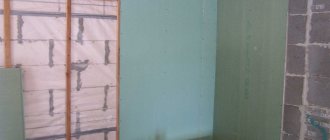
Drywall is attached to a sheathing made of wood or metal, under which a vapor barrier film is laid. When installed correctly, the entire structure is quite strong, reliable and lightweight. The slats or racks are installed with a certain pitch, which is dictated by the width of the sheet. After assembling the frame, a layer of glass wool or other insulating material is laid for additional thermal insulation. It is recommended to install drywall in a frame house with a small gap to ensure strong sealing of the seams.
Sheathing with plasterboard with insulation Source besplatka.ua
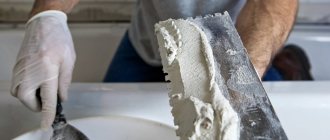
After complete installation of the sheets, it is necessary to putty the seams, screw heads and corners. The further process of preparation for finishing depends on the selected facing material. So, for example, if you decide to paint the walls or ceiling, then you need to completely putty the entire plasterboard surface. There is no need to putty the entire wall before laying the tiles; treating the joints and corners is enough. The entire surface needs to be puttied under the wallpaper, but some brands of drywall can instead simply be painted over with water-dispersion paint diluted with water.
OSB
The technology for installing particle boards is practically no different from the process of installing plasterboard sheets on a wooden frame. However, slabs weigh more than sheets, so they require more serious fastening.
The strength of OSB allows the use of this material as a floor covering. If the interior decoration of a frame house with plasterboard involves working with walls and ceilings, then OSB is suitable for walls and floors, but for ceilings the slabs are too heavy.
Moisture-resistant OSB board Source makler.md
In some cases, an OSB surface also requires putty and primer. For example, this is necessary before wallpapering. There is no point in laying tiles on top of OSB; it is better to simply cover the slabs with paint or varnish.
It is worth noting important nuances of OPS. First, this material contains an adhesive composition, which can be toxic if manufactured improperly. Therefore, you need to purchase this type of material only from trusted suppliers who sell products from well-known, trusted manufacturers. The second caveat is that OSB panels cannot be coated with water-based paints and varnishes, since in this case the finish will be deformed.
See also: Catalog of frame house projects
Finishing
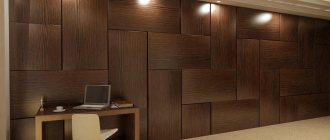
The finishing of the interior finishing of a frame house provides a wide variety of options and there are no special restrictions. A base made of plasterboard or OSB allows you to implement any design ideas. When choosing a cladding, you need to take into account the price category of a particular material, the general style of the interior, and the requirements for practicality and durability of the decorative coating.
Frame house with interior decoration Source hitas.eu
Decorative plaster
Today, plastering is the most convenient material for designers. Using plaster, you can get a surface decorated to look like stone, wood, textiles, etc. If you invite an artist, you can make a real painting of the walls or ceiling in your house. The “plaster” finishing of a frame house inside in the photo below shows a successful combination of colors and interior items.
Interior finishing with decorative plaster Source yandex.ru
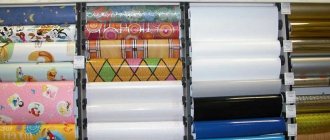
Wallpaper
Wallpapers today are also quite varied:
- Vinyl
wallpaper has become very popular lately. They are not very cheap, but they are very practical and durable. - Paper
products will not last long. But they can be used as an economical temporary option for wall decoration. - Acrylics
look great and can be used on walls in bathrooms and kitchens. - Fiberglass
wallpaper has an undeniable advantage - it is fire-resistant, which makes it suitable for finishing walls near stoves, fireplaces, and powerful heating radiators. - Non-woven
- but based on foamed non-woven fabric, they look very impressive, they can be painted. - photo wallpapers
with high-quality images are now often used in the design of children's rooms, living rooms and kitchens.
Photo wallpaper in the interior of the kitchen-dining room Source art-oboi.com.ua
Installation of drywall on the ceiling
If you are making a wooden frame, the technology is the same as for the wall.
Installation of a metal frame begins with markings. After making sure that the drawings are level, we attach UD profiles to the ceiling. To ensure the accuracy of the geometry, we stretch the threads - we will use them to adjust the height of the frame. We fasten the hangers and install the supporting profiles.
Here we need to add: suspended ceilings can be either solid or two-level. The latter are mounted differently: first, the drawing is laid out and fixed on the ceiling itself, and then duplicated at the desired height, fixing a stand of suspensions. The entire structure is covered with plasterboard.
If the height is more than 12 cm, spring hangers will be needed.
When the frame is ready, we repeat the already familiar steps of screwing in the gypsum board. The principles are similar to covering the interior walls of a frame house with plasterboard.
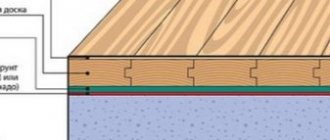
Floor
Floor finishing also consists of two stages - roughing and finishing. Rough finishing can be done using:
- plywood;
- OSB boards;
- veneer board;
- concrete screed;
- wooden board.
All options except concrete screed are laid directly on the frame joists. The concrete screed is poured onto a plywood base. Wooden boards can serve as the front finish for the floor. A decorative coating is applied to the remaining materials. It is worth noting that in most cases the floor is insulated before finishing. On top of the rough finish, you can install a “warm floor” system, which has become very popular recently. Lay the flooring on top, choosing it to your liking. It could be:
- linoleum;
- parquet board;
- vinyl flooring;
- laminate;
- ceramics or other material.
What are the benefits of drywall and gypsum plasterboard?
The finishing of a frame house generally involves the use of plasterboard, sometimes gypsum plasterboard. And that's why:
- Finishing doesn't cost too much.
- Installation of sheets is simple and does not require great skills and ultra-expensive tools.
- Drywall and gypsum plasterboard accelerate the transformation of the environment inside a frame house. Their surfaces themselves are smooth and do not require much time to prepare for finishing the interior.
Moisture-resistant drywall and gypsum plasterboard are most often chosen. This is true when finishing a loggia or bathroom. Where the humidity level is average, ordinary drywall and gypsum plasterboard are used. According to fire safety standards, fire-resistant gypsum plasterboard and plasterboard are used to decorate areas around fireplaces, stoves and kitchens.
Plasterboard is recommended for the ceiling, but it is better to make the floors from gypsum plasterboard. Walls work well from both materials. GVL is recommended for use where increased resistance to fire (kitchen) and shock loads are required, for example, on loggias.
Sequence of work
Finishing should begin only after the installation of communication lines has been completed. First, all pipes and wires must take their place, and only after that the walls, floor and ceiling are sewn up and covered with finishing materials.
It is recommended to carry out finishing work sequentially in each room. If you start decorating all rooms at the same time, this will lead to the fact that the house will turn into a dump of construction waste, there will be nowhere to put tools and materials, and already decorated surfaces may be damaged by workers.
The room that is furthest away from the entrance is finished first. Workers move from room to room closer to the entrance area, and finish the work by tiling the surfaces in the hallway. This rule will help protect rooms that are ready to move in from construction dirt and accidental damage.
Rough finishing begins with the arrangement of the floor, then the walls and ceiling are sheathed. Finishing is done from top to bottom - the ceiling is decorated first, then the walls, then the floor. The exception is repairs using suspended ceilings. The suspended ceiling fabric should be installed last.
Tools and materials for work
You should immediately decide how the drywall will be attached. If the frame house is already sheathed from the inside with OSB boards and the evenness of the walls is not satisfactory, and communications are laid in the frame, the sheets can be attached directly to the sheathing.
If the frame is not sheathed on the inside at all, drywall is used as an internal sheathing element, after first checking the evenness of the installation of the supporting structure. If the walls need to be leveled, you will have to make a frame for drywall - metal or wood.
To work with drywall you will need:
- Drywall knife.
- Materials for the frame - metal profiles (wall CD or ceiling CW) and guides (for walls UD or ceiling UW) or wooden beams 4x7 cm.
- A wood saw for cutting bars or metal scissors when working with a profile.
- Screwdriver.
- Edge plane for chamfering the edges of sheets.
- Self-tapping screws for drywall and profiles.
- Tile adhesive - if the drywall is attached directly to the internal OSB cladding.
- Putty.
- Serpyanka - for reinforcing seams.
Internal frame of a house without finishing
Plasterboard wall covering
The work must begin with the installation of a film-type vapor barrier membrane. Such material can be single- or multi-layer and differ in its properties and cost. Fastening is done with a stapler.
It is recommended to stuff wooden planks up to 4 mm thick on top, which will create an air gap between the membrane and the gypsum board or gypsum board. This is if the frame is wooden. Drywall is taken with a thickness of 12.5 mm. A less thick one is suitable for the ceiling.
Sheathing is done by placing sheets vertically or horizontally. It is important that the sheets meet with uncut edges. It is recommended to leave a gap between the bottom of the sheet and the floor from 15 to 35 mm.
You need to cut drywall with a special knife. First, an incision is made on the front side. Then break it, turn it over and cut it completely on the other side.
Fasten to the timber not only with screws. It is better to use a screwdriver rather than a screwdriver. The use of nails with flat heads is allowed. Fasteners start from the center to the edges of the sheet. The joints should not touch the door frame.
The recommended step for screwing screws into the ceiling is 20 cm. Screw them in in pairs: on adjacent sheets, the distance between them is at least 5 cm in length.
Installation is completed with putty, primer and finishing. Seams usually require three layers of putty. Each stage is accompanied by priming followed by drying. Paint, tiles or wallpaper are used as finishing.
Why drywall
- inexpensive;
- does not require special preparation of the base surface;
- has good breathability;
- is friendly with any adhesive compositions;
- can be used for installation of false walls and partitions;
- subject to any finishing treatment.
Of course, there are no ideal products – even Apple is no exception here – but the balance is clearly in favor of the pros, please note:
- afraid of direct contact with water;
- easily subject to deformation due to mechanical stress;
- It is very difficult to mount hanging furniture and some accessories with significant weight.
Perhaps one thing is clear - there are no worthy alternatives to drywall and are not expected. Therefore, the ability to attach this material to the wall is one of the basic skills of a home craftsman, which, without a doubt, you can become.