Published: 06/11/2019 23:04
One of the most important stages in the process of building swimming pools is finishing work. Finishing should be carried out by professionals who have the necessary experience and equipment. Moreover, it is advisable to trust the finishing work to specialists from companies that provide turnkey pool construction services. An example of such a company is VanBus. Our specialists will carry out all the necessary finishing work not only efficiently, but also quickly.
What characteristics should the material meet?
- Moisture resistance. Products with moisture resistance of 1% are considered the most effective. They do not leak and are designed for a long service life.
- Resistance to chemical reagents. The water in the pool is always cleaned using chemicals, so the decorative coating must easily withstand this.
- Resistant to mold and microorganisms. The heated liquid that fills the bowl of an artificial reservoir at the dacha is an excellent environment for the proliferation of microbes. The cladding material must be dense, but various pests will not be able to settle in it.
- Long-term operation. No one wants to regularly change the coating, especially since this is a rather expensive and labor-intensive process. Therefore, it is worth selecting only those materials that are designed for a long service life.
What to pay attention to
The tiles used to finish the pool must meet a number of requirements. First, pay attention to its appearance. The tiles should look aesthetically pleasing, the shades should be selected taking into account their harmonious combination; defective tile fragments with cracks should not be used for finishing at all.
If you are satisfied with the external characteristics of the tile, check out its practical parameters. The second requirement is minimum water absorption properties.
Ceramic or tiled pool tiles should not absorb moisture, otherwise they will not be able to stay on the walls for a long time, and the insulating properties of this material will be minimized.
Advice: the structure of the facing material should not contain pores or voids, otherwise contact with water will lead to its erosion, and foreign microorganisms will multiply inside and on the surface of the tile.
The third criterion is the strength of the material: the tile must withstand the load of a large volume of water. Unfortunately, not all tiles offered by modern manufacturers can cope with constant pressure, and the use of cheap facing materials will even more so not allow you to achieve the desired effect.
Make sure that the selected tile has anti-slip properties. Moreover, both inside the pool itself and at its surface, these properties must be preserved. Anti-slip floor tiles for pools most often have a special coating or relief.
By the way, today you can buy tiles with different types of surface: matte and glossy, smooth and rough, with and without a relief pattern.
Advice. When choosing textures, take into account the need to periodically clean the tiles from dirt: a smoother surface is easier to clean.
Another important requirement: you need to select a suitable adhesive for the selected tile . In stores you will find special adhesive for pool tiles: for example, IVSIL AQUA, UNIS and Pobedit Pool. Consult with specialists which type of glue is best to use in your case.
How to properly arrange a swimming pool in a private home: photos with examples of finished swimming pools, design ideas and decoration.
The features of finishing and tiling a pool with mosaics are described in this article.
Finishing the pool with film
This is a special PVC coating, which is also called “liner”. Available in various shades, the front part is treated with acrylic for shine. The thickness of one layer does not exceed 1.5 mm, which will not affect the size of the pool bowl.
Advantages and disadvantages of the material
Among the advantages it is worth noting:
- The service life of many types of polyvinyl chloride reaches 20 years.
- Not afraid of direct sunlight and ultraviolet radiation.
- Can be repaired during use. During installation, an allowance is given that hides the subsidence of the tank.
- The coating is easy to maintain and does not require the use of specialized tools.
This type of pool wall finishing also has a number of unpleasant disadvantages:
- The material can be damaged by various sharp objects and then the film will have to be changed.
- PVC liner, like all plastics, is afraid of chlorine.
- Limited selection of colors.
Film installation stages
- The walls of the bowl are cleaned and then plastered.
- Special fastening strips are installed along the edges. They can be replaced with corners.
- The walls are lined with geotextile fabric, which prevents the formation of condensation.
- The liner is attached to the fasteners. The joints are treated with an industrial hair dryer.
- The resulting seams are covered with liquid-based plastic.
How to lay it?
Most often, tiles are sold in sets, which consist of:
- Background - it is the basis of the finish and is intended for the bottom and walls of the pool bowl.
- Decorative is, as a rule, panels, friezes or tiles with a pattern.
- Shaped - used for finishing steps, corners, sides, gutters for water drainage, etc.
The use of shaped tiles helps to avoid overuse of background finishing material and significantly reduces costs.
Features of laying tiles
The tile must not only be durable and moisture resistant.
It must have certain dimensions and rounded edges, and when laying it, the following features must be taken into account:
- Do not tile the pool bowl with large tiles. size is 12.5x24.5 centimeters . For rectangular bowls, the allowed size is 15x15 centimeters, and for complex shapes, the width and length of the tiles should not exceed 10 centimeters.
- The joints between the tiles must be larger than is customary for conventional masonry. This measure will help avoid premature cracking under the influence of water pressure.
- It is not recommended to make a mosaic pool outdoors, as due to changes in air temperature outside, the tile chips may begin to fall off the base.
- Covering the bowl should begin no earlier than 28 days after applying waterproofing and plaster.
- Laying should be done starting from the walls of the bowl. The rows must be laid out horizontally using a building level.
- It is recommended to lay out tile or mosaic panels starting from the center of the picture.
- There is no need to line the bottom of the bowl in rows. Laying with triangles will look more harmonious and attractive.
- To ensure that the tile seams are equally even, it is recommended to use special crosses.
- After the installation process is completed and the glue has completely dried, the seams must be sealed with a moisture-resistant fugue. Thanks to this grout, the seams are sealed, and the masonry takes on a more aesthetic appearance. For grouting work in the pool, you can choose a white, contrasting color with the tiles or to match the lining.
Photos of our contractors' pools:
- 4 months agoby hammamelit.pool#swimming pool#swimming pool at home#swimming pool#swimming pools#swimming pool at home#pool for children#swimming pool at home#swimming poolmoscow#construction#construction#pump#tilesforpool#pools#countercurrent#frame pools#heated pool#pool construction
- 4 months agoby hammamelit.pool#swimming pool#swimming pool at home#swimming pool#swimming pools#swimming pool at home#pool for children#swimming pool at home#swimming poolmoscow#construction#construction#pump#tilesforpool#pools#countercurrent#frame pools#heated pool#pool construction
- 4 months agoby hammamelit.pool#swimming pool#swimming pool at home#swimming pool#swimming pools#swimming pool at home#pool for children#swimming pool at home#swimming poolmoscow#construction#construction#pump#tilesforpool#pools#countercurrent#frame pools#heated pool#pool construction
- 4 months agoby hammamelit.pool#swimming pool#swimming pool at home#swimming pool#swimming pools#swimming pool at home#pool for children#swimming pool at home#swimming poolmoscow#construction#construction#pump#tilesforpool#pools#countercurrent#frame pools#heated pool#pool construction
- 4 months agoby hammamelit.pool#swimming pool#swimming pool at home#swimming pool#swimming pools#swimming pool at home#pool for children#swimming pool at home#swimming poolmoscow#construction#construction#pump#tilesforpool#pools#countercurrent#frame pools#heated pool#pool construction
Pool finishing with mosaic
This design consists of layers and slabs to which small squares of glass or ceramics are attached. Models are produced with a variety of patterns, in different shades and styling options.
Advantages of this cladding
- Beautiful, original design.
- Mosaic finishing forms and acts as additional waterproofing.
- You can use it to create a variety of paintings.
- Mosaic does not react in any way to household chemicals.
- Does not require complicated care.
- Suitable for arranging structures of unusual shape.
Stages of finishing a pool bowl with mosaics
- The walls of the tank are cleaned of construction dust and covered with plaster.
- A waterproofing coating is installed, which can be various materials - both liquid and plastic, roll.
- Special beacons are placed that specify the exact direction and installation methods. Apply tile adhesive that is resistant to moisture.
- Fasten the tiles by lightly tapping them with a spatula.
- The seams are then grouted with a special grout.
Plastering the walls and bottom of the pool
After the construction of the brickwork, as well as after removing the formwork from the monolithic concrete walls, the entire inner surface of the pool bowl will be covered with many shallow depressions, sinks, bumps and other irregularities. Before applying the final finishing coat, it must be made absolutely flat , since otherwise, such an interior finish of the pool bowl will not last very long.
The photo shows a plastered concrete pool bowl.
To level the walls of the pools, a special cement-based plaster mortar is used, which, after hardening, is absolutely not afraid of frost, and can remain under water for an unlimited time. In addition to sand and cement, it contains plasticizers and hydrophobic polymer additives. Plaster for swimming pools is sold in the form of a dry construction mixture, and is prepared on site, immediately before work is carried out.
- Before starting rough finishing, the pool bowl must be completely cleared of construction debris, sand and street dust. If there are deposits of concrete mortar on the surface, remnants of old waterproofing or decorative coating, they must be removed using a chisel, wire brush or sandblasting machine;
- After this, you need to carefully remove all dust from the walls and bottom of the pool, and then apply one of the waterproofing materials presented above over the entire area. When using penetrating compounds, they must be applied in two or even three layers ;
To attach the reinforcing mesh, use self-tapping screws with wide washers.
- In order for the plaster solution to hold tighter and not crack during use, a metal reinforcing mesh must be secured to all side walls and to the bottom of the pool . To fasten the mesh, use 6x40 mm plastic dowels and 3.5x32 mm galvanized screws;
- You need to prepare the plaster mixture in such a quantity that you can produce at a time for no more than 30-40 minutes.
- The plaster mortar, in addition to leveling the surface, acts as an additional waterproofing layer, so during the preparation process, I recommend mixing hydrophobic additives, for example, “Penetrat” or “Aquatron”;
Plastic pipes can be used as temporary beacons for plastering curved walls.
- To apply and level the plaster, it is convenient to use a wide metal spatula. In this case , you need to ensure that the thickness of the layer is the same everywhere, and that the reinforcing mesh does not protrude above the surface of the solution anywhere ;
- Surface leveling should be done in small local areas. The size of each such area will depend on how much mortar you can apply at one time, before it begins to set;
- After the plaster mortar has set, it must be carefully rubbed over the entire area with a wooden or plastic trowel. This will help to completely level and further compact the top layer of plaster .
To obtain a high-quality, uniform surface, the plaster must be thoroughly rubbed.
To ensure that the interior tiling of the pool does not fall off or collapse 2-3 years after installation, you should choose a metal mesh with an anti-corrosion coating to reinforce the plaster layer. Fiberglass reinforcing mesh is considered a more reliable and durable option, but it costs significantly more than metal mesh.
Option 1: finishing with ceramic tiles
For those who are interested in what and how to finish an outdoor pool, I can say that it is best to use mineral finishing materials for these purposes, for example, natural stone, porcelain tiles, as well as porcelain or glass facing tiles. The choice of finishing materials largely depends on the own tastes and personal preferences of the pool owners.
At the same time, the latter finishing option is considered the most preferable, since glass and porcelain tiles are characterized by high performance, high durability, good resistance to frost and significant temperature changes, as well as a very low degree of water absorption.
An example of porcelain tile cladding.
I want to say right away that ordinary glazed tiles are not suitable for these purposes for several reasons.:
- It has a porous structure, so it absorbs water strongly. In the cold season, the water in the pores will freeze, which will gradually lead to cracking and destruction of such a coating;
- In addition to water, dirt will accumulate in the pores and pathogenic bacteria will develop, which can cause algae in the water and infect the bathing person with an intestinal infection;
- In a filled pool, under the influence of water pressure, the walls and bottom may bend and deform slightly. Ceramic tiles are very fragile, so as a result of such deformation, they may not withstand and crack into pieces.
The diagram shows the finishing of the pool with facing tiles.
Taking into account these factors, to install tiles in the pool you need to use a special tile adhesive and a special grout for the joints. They must have antibacterial properties and also withstand plastic deformation, high pressure and constant exposure to water.
When decorating a pool, you should keep in mind that facing tiles are not only for beauty. Together with tile adhesive and grout for joints, it acts as an additional layer of waterproofing, so during its installation you must strictly follow the technology:
- After the leveling plaster solution has dried and completely hardened, the entire surface of the pool bowl must be cleaned of dust and treated with two layers of aqueous, polymer-based penetrating primer;
Technological operations when laying tiles on a horizontal surface.
- Installation of facing tiles should begin from the floor, from the farthest end of the pool. To do this, you need to draw a center line on the bottom and lay the tiles evenly, from the middle to the side walls ;
- The installation technology is no different from installing conventional flooring. Apply an even layer of glue to a small area of the floor, and then remove the excess with a notched trowel;
- The first tile must be placed on one side against the center line, and the other side against the end wall of the pool. After this, press it evenly to the bottom and set it strictly horizontally in level;
- The next tile is laid in exactly the same way, only on the other side of the center line . Thus, you need to lay all the tiles on the bottom, leaving uniform gaps of 1.5-2.0 mm wide between them. For this I recommend using plastic crosses;
Grouting joints between tiles.
- The next day, when the glue on the bottom has completely hardened, you need to dilute the grout mixture and carefully, without gaps, fill and rub all the joints between the tiles;
- After this, you can begin installing the tiles on the walls. In order not to damage or stain the finished floor covering during work, I advise you to cover the bottom of the pool with thick cardboard;
- Laying tiles on the walls should be done in exactly the same way, only you should start from the bottom far corner of the pool bowl. After installing each vertical row, it must be checked for level ;
- Regular glass and porcelain tiles have a glossy surface, making them very slippery . For the safety of bathing people, the cladding of steps and the exterior around the outdoor pool should be made using special corrugated tiles.
For finishing curved surfaces, it is best to use mosaics.
If your pool has a round or irregular geometric shape, I recommend looking at a mosaic of small porcelain or glass tiles. Each individual tile of this mosaic is fixed on a small square of fiberglass mesh for ease of installation. Mosaic squares can be easily bent in an arc, cut to the desired size, or folded at any angle. Therefore, finishing with such a mosaic is good for cladding polygonal, faceted or curved surfaces of complex configuration.
Option 2: finishing with polymer film
As a cheaper alternative to porcelain facing tiles, reinforced polymer film is often used for the interior decoration of swimming pool bowls. It is a very durable and absolutely airtight coating with a thickness of about 1.5 mm, which covers the bottom and walls of the pool on top of the leveling plaster mortar.
Reinforced polymer film is resistant to sudden temperature changes and exposure to solar ultraviolet radiation, resists frost and prolonged dynamic loads well, while being an environmentally friendly material, it does not contribute to the development of pathogenic bacteria.
Samples of polymer reinforced films.
Despite the fact that finishing a pool with PVC film is much faster than tiling with porcelain tiles, for high-quality installation of a polymer coating in a pool bowl, you need to have certain knowledge and practical skills.
Next, I will briefly talk about the main features of this work:
- A thin polymer film is easy to damage , so care should be taken during the work, and before installation, the pool bowl must be thoroughly sanded and then cleaned of the smallest particles of debris and dust;
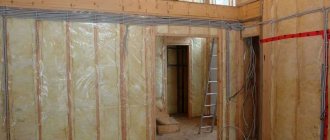
- To avoid accidental punctures and damage to the film while swimming in the pool, an intermediate layer of geotextile 5-8 mm thick must be laid underneath the entire area of the bottom and side walls;
The diagram shows the order of laying the polymer film.
- Geotextile is a non-woven fabric made of chaotically intertwined polymer fibers, between which there is an air layer;
- To prevent mold from forming in the intermediate layer of geotextile due to excess moisture, before laying it, the surface must be treated with two layers of penetrating primer with antiseptic and antifungal additives;
The cutting can be done directly at the bottom of the pool.
- The panels of polymer film must be cut to the required size and welded together in a stream of hot air, using a special nozzle for a hair dryer;
- Ultimately, the bottom and side walls should be completely covered with a polymer film, and its edges should be folded up onto the sides of the pool. Outside, around the entire perimeter, you need to leave a small supply of film about 500 mm wide ;
First you need to mount the panels on the walls, and only then lay them on the bottom.
- The internal polymer coating does not need to be glued anywhere or with anything to the surface of the concrete bowl . After filling the pool, it will settle down on its own and press against the bottom and side walls under the influence of the water’s own weight;
- The pool should be filled gradually, in several stages . In this case, you need to ensure that during the filling process, the film does not stretch too much or tear;
- From the outside, the film will need to be secured to the protruding sides of the pool around the entire perimeter. To do this, it must be pressed against the concrete sides with metal strips 40-50 mm wide, made of stainless steel or galvanized steel sheet with a thickness of at least 2 mm.
- Decoration and finishing around the pool is carried out only after it is completely filled with water , and the polymer coating takes its normal position and takes on the natural shape of the bowl.
The wooden trim of the side will help hide all communications and fastening points of the polymer film.
According to the stated technical characteristics, polymer coatings for swimming pools can be used both indoors and outdoors, however, I do not recommend using these materials for finishing outdoor swimming pools. The fact is that the estimated service life of such a film indoors is at least 20 years, and when used outdoors it is reduced to 7 years.
Pool tiling
Several types of material are used to decorate the walls of bowls:
- Porcelain products;
- Glass;
- Ceramic models.
All of them are processed at elevated temperatures, which prevents their premature destruction and allows them to withstand loads.
The advantages of this design
- Not afraid of chemicals.
- Easy to clean and does not require special maintenance.
- Abrasion resistant.
- Designed for long service life.
- A large selection of shades and patterns, it is possible to create beautiful paintings.
The only drawback is that if it breaks, the fragment falls out very quickly and the entire surface has to be replaced.
Stages of tiling a pool
- The walls of the bowl are leveled, sharp protrusions are removed.
- A waterproofing layer is installed.
- Guides are placed along which the layout is carried out.
- The tiles are attached to a special adhesive.
- The seams are sealed with waterproof grout.
Where to order pool installation
Turnkey construction of swimming pools can be ordered from us.
- We will tell you which material is appropriate in your case.
- We will deliver it to the work site.
- We will coordinate the finishing stages with you.
- We will carry out installation work in 1-3 days. Depending on the scale, of course.
- We will provide instructions on how to use the pool and recommend cleaning products in each specific case.
With us you don’t have to look for information about the arrangement of swimming pools. We will do all the work ourselves.
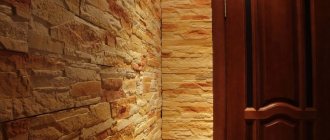
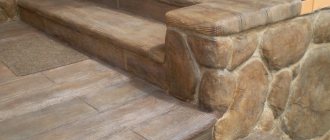
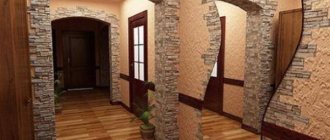
Finishing the pool with stone
Only durable rocks that are resistant to various types of impacts are used. The most popular are marble and granite, but rubble and sandstone can also be used. Fungus and mold do not form on them, they are not afraid of direct sunlight. Designed for a long service life and do not lose their attractiveness for many years.
But they all require complex and specific maintenance, since they are destroyed over time when exposed to aggressive chemical compounds.
Features of material laying
The stone is installed in the same way as regular ceramic tiles. It only uses epoxy glue with good adhesion properties.
- The walls are leveled and plastered.
- Covered with a layer of waterproofing.
- Beacons are mounted on them for even laying.
- Each tile is installed with an adhesive.
- The seams are treated with grout.
Tips for choosing
The basic requirements for pool tiles have been listed above. One has only to add that when choosing a facing material, it is best to choose mosaic glass tiles or porcelain tiles . And it’s better to put the other options aside, since they do not guarantee the quality that you will get when using glass and porcelain tiles. Additionally, it is worth paying attention to the design and care of the facing material during operation.
Exterior design. Today, there are many different designs of ceramic tiles, which may well meet all the necessary criteria and at the same time have an attractive appearance.
Ease of maintenance. Roughness and relief in the design of the tiles can seriously complicate the process of caring for the pool.
This is interesting: Cleaning the pool: how to keep the pool clean
Pool lining with polypropylene
Plastic sheets are used for finishing not so often, although they have good moisture resistance. The material is available in a greater number of shades, which allows you to design the bowls to your liking. It is not afraid of fungus and mold, which do not form on it and do not penetrate its structure.
But this type of finishing extremely does not like temperature changes and cannot remain without water, so it is installed only in indoor pools. When dry, it quickly deforms and warps.
Tile adhesive for swimming pools
The safety and durability of the coating can be ensured only under one condition - you need to choose the appropriate adhesive. Pool tile adhesive must be waterproof and flexible. It is better if it contains latex . frost resistance is added to the listed properties . The best option is considered to be an adhesive composition that has an adhesive ability of at least 1 megapascal, and during installation - at least 2.5.
Decorating a pool at your dacha with paint
Advantages of coverage
- The surface does not slip and is comfortable to walk on.
- It tolerates temperature changes well and does not crack.
- It is firmly absorbed into the walls and does not wash off.
- Does not require complex maintenance.
- It is resistant to any impact.
Among the disadvantages, it is only worth noting the need for regular updates. In outdoor bowls, repairs will have to be carried out every year with the onset of the summer season.
How to do this finishing?
One of the most difficult installation methods, since it requires strict adherence to all the rules, otherwise not only the paint layer will crack, but the reservoir itself will become unusable.
- When decorating a pool at the dacha, the walls and floor are cleaned of dust.
- A special acid composition is applied to the surface, which is then thoroughly washed off.
- Then it is degreased and puttied. All cracks and existing irregularities are sealed.
- A primer is applied to the walls. She is allowed to dry.
- Then they begin the painting process. The composition is applied in one thick layer.
There are many ideas on how to decorate a swimming pool in your home or country house. Everyone can choose the most suitable and attractive option for themselves. Installing the vast majority of coatings does not require special skills, only the desire and desire to do everything correctly, beautifully and for a long time.
Which bowls need decoration?
As a rule, outdoor pools installed permanently are finished. There is no point in doing the work if everything will have to be dismantled in 3-4 months.
Most often, prefabricated or frame pools are designed, installed on the surface or buried in the ground.
The main area to be decorated is the outer perimeter and the area near the bowl, but finishing the inside of the bowl is also done to improve the appearance and protect the materials from damage or fading due to exposure to sunlight.
The most common finishing materials
The most popular finishing materials are:
- PVC film.
- Tiles: ceramic, porcelain, glass.
- Mosaic.
| Material | Price per square meter |
| Tile | from 750 rub. |
| PVC film | from 450 rub. |
| Mosaic | from 800 rub. |
The most cost-effective option is to finish the concrete pool bowl with PVC film. Its advantages:
- You can quickly tighten it without resorting to the services of specialists.
- Increases the tightness of the bowl.
- Keeps you warm.
- You only need a special welding machine.
- Variety of colors and shades.
PVC film also comes with a ribbed surface, which is best used when covering the bottom or steps of a pool. PVC film can be metallic, wood-like, blue or azure, like a sea wave. Therefore, the main thing is that the appearance of the pool satisfies your needs and harmoniously combines with the recreation area of the site. Many people choose blue tones, this is justified, since the outer surface gives the water more blueness and transparency. Even if the water in the water supply is not very clear (and this happens in dachas), then blue-blue, azure colors are a salvation for the pool, so that it does not seem dirty or just a pond with swamp water.
Advantages of tiles:
- Easy to apply - just stick to a flat plastered surface.
- A huge selection of materials: ceramics, porcelain, art glass, mosaic.
- Wide variety of designs and colors.
- Good sealing of the pool.
IMPORTANT! If your pool has a complex shape, then a mosaic made of small porcelain or glass tiles is best for finishing. For ease of installation, each individual tile of such a mosaic is fixed on a small square of fiberglass mesh. These squares can be easily bent, cut to size, or folded at any angle.
I would like to highlight one of the shortcomings. Only a master can lay tiles professionally, so in order not to relay them after a year, use the services of specialists. If you decide to lay it yourself, then arm yourself with a level, ruler, rectangle and measure every cm so that there are no distortions and large distances between the tiles.
When choosing tiles, pay attention to:
- Ribbed back surface - it will stick better to the walls and bottom of the bowl.
- High percentage of water absorption.
- Use expensive glue to seal the cracks.
- For long-term use, use titanium grout.
Mosaic finishing is found in city pools, in public pools at tourist centers and in holiday homes. This is a labor-intensive process that requires special skills and knowledge. But if you work hard, the mosaic finish will delight you:
- Durability.
- Environmentally friendly
- Beauty.
- Durability.
- Reliable operation.
IMPORTANT! Natural or glass mosaics have different thicknesses, the minimum of which is 0.5 cm. However, mosaics with this thickness should not be used to decorate the floor surface or on the bottom of the pool, since they are not able to withstand the weight of water in the tank.
Among the main disadvantages, one can highlight the considerable financial costs for the material itself and for specialists. Also, many people do not like mosaics because they seem to be bureaucratic, that is, they are strongly associated with sanatoriums, children's institutions and even hospitals. Also, laying a mosaic around the perimeter of the entire pool is difficult and time-consuming. If you already want to swim in a new pool, then it’s easier to glue a hydrofilm, which will be acceptable in color and will not require much time for finishing work.
Swimming pool design in a country house building
If the pool is located directly in the house, then designers, as a rule, try to decorate it in the same style that prevails in the rest of the house. So, for example, in a house decorated in a classic style, a room with a swimming pool is also usually an example of a classic. In this case, the walls can be painted with waterproof paint, sheathed with cork panels, tiled, or prefer acrylic plaster.
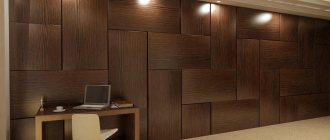
If the interior of the house is made in country style, then an excellent solution would be to cover the walls with wood or stone cladding.
Having chosen the art deco style, you should focus on tiles and mosaic panels. Decorating pools in ethnic styles is popular.
Asian style pool design
An economical option is plastic panels for walls and ceilings. If you want to create a pool in a modern style , you should make one wall completely glass (frame with double-glazed windows), and for the remaining walls give preference, for example, to metal-look mosaics or paint the walls with waterproof paint with a metallic effect. By the way, many experts recommend glazing one of the walls in any case - the room with a swimming pool will be lighter, and heat loss will also be reduced due to multi-chamber double-glazed windows.