Among the huge variety of mixtures for leveling surfaces, Rotband compositions from the well-known are very popular.
If you are making repairs yourself for the first time, you will have to first study the technical characteristics of these products and the question of how long Rotband takes to dry. This information will help you correctly plan the sequence of work and complete the finishing as early as possible.
In our article you will find all the necessary information that will allow you to avoid mistakes when working with leveling compounds.
In what cases are Rotband leveling compounds used?
These products are presented in the form of dry mixtures for leveling horizontal and vertical surfaces. Their main component is gypsum, which is characterized by good plasticity and ease of work.
Using plaster, you can level bases whose curvature exceeds 7 cm. For subsequent finishing, the resulting surface is puttied with compounds of the same name. Knowing exactly how long it takes for Rotband to dry, you will be able to complete the work in strict compliance with the technology and begin subsequent work at the right time.
Venetian
Venetian plaster is a building mixture that has been in great demand for a long time. These products contain components such as precious stones crushed into dust, a dye and a binder. The last ingredient is acrylic.
The main advantages of the presented product include:
- high vapor permeability;
- hardness;
- durability.
It becomes clear whether decorative plaster can be applied to drywall.
Thanks to Venetian plaster, it is possible to protect the surface from fungus and mold. In addition, such a surface does not lose its color when exposed to the sun’s rays and has no odor. The plaster must be applied in a layer 3-5 mm thick. It will take 1-3 days for the material to dry.
Variety of leveling mixtures
Surfaces with large defects require a thick layer of plaster. For this purpose, use the universal dry mixture “Rotband”, which is intended for application to concrete, brick, cement and plastered surfaces. The material is applied in a layer of 5 to 50 mm. Its optimal thickness is selected depending on the degree of curvature of the wall.
Before installing the plaster, please note that the thickness of the composition greatly influences how long it takes for Rotband to dry. When applying a minimum amount of the mixture, you can begin subsequent work within a few hours, but a thick layer requires more time.
To smooth the surface and level the plaster under the wallpaper, use Knauf putty. The manufacturer offers us 2 types of products:
- dry mixture;
- pasty composition.
The first type is intended for finishing gypsum, concrete, cement and plastered surfaces. The second type is used for the same purposes, but can also be used for sealing joints of drywall sheets.
If we compare how long it takes for Rotband putty and plaster compositions to dry, finishing coatings require much less time: the next day the surfaces are completely ready for work. However, if there is high humidity in the room, this process may take a long time.
Ready-made vinyl putty “ROTBAND PASTA PROFI” is supplied in polypropylene containers of 18 and 5 kg. This paste-like putty has a density of 1.65 kg/l and is intended for finishing surface leveling and is also suitable for texturing.
Its color is white, but tinting is also allowed. The putty is frost-resistant and can withstand at least 5 cycles of complete freezing and thawing without loss of performance, which is very important for a country like Russia.
It is noteworthy that “ROTBAND PASTA PROFI”, in comparison with the already well-known construction market putty “ROTBAND PASTA”, is a completely new product. Main differences: increased adhesion; does not drain from the spatula; the filler fraction has decreased; not afraid of freezing; a denser surface after drying has a beneficial effect on painting; The shelf life has been increased from 9 to 12 months.
As it was, it is capable of withstanding at least 5 freeze-thaw cycles without losing its properties. You just need to let it defrost naturally at room temperature.
After defrosting, the mixture may separate into 2 components: a transparent liquid on top, a thick white mass at the bottom. There is no need to drain the clear liquid. Before work, you will need to thoroughly mix the paste with a mixer at low speed.
The binding component of “ROTBAND PASTA PROFI” is high-quality vinyl, which directly affects the adhesion and frost resistance of the putty. Dolomite with an average grain size of 40 microns (0.04 mm) is used as filler. Mica serves to bind and prevent surface cracking. Attapulgite gives the putty additional viscosity and at the same time plasticity.
Texturing with ROTBAND PASTA PROFI allows you to significantly save on the difference with the cost of decorative plasters. Using a trowel you can achieve more complex textures. To impart strength to the texture, the surface must be treated with a strengthening compound (glaze varnish, primer).
"ROTBAND PASTA PROFI" is ideal for finishing leveling the surface manually. The consistency is thick, but the putty is very flexible. It is easy to apply with a spatula and does not rub up when smoothed repeatedly.
The consistency of the putty is perfectly balanced - its mass does not flow from the tool. The applied layer can be smoothed many times without the appearance of “combs”. The material can be applied in a layer of 0.08 mm, which allows for economical consumption.
The putty can also be applied by machine, which means a high-quality finish can be done much faster. The speed of application in this way increases up to 8 times compared to manual finishing.
“ROTBAND PASTA PROFI” can be diluted with water, and each finisher, if necessary, will be able to achieve the putty consistency he needs. It should be diluted no more than 30 ml per 1 kg. When diluting, it is important to remember that a large amount of water can lead to excessive shrinkage of the surface and reduced adhesion.
Although the putty is white in its original state, it can be tinted so that the treated surface takes on any color you desire.
And finally, one more advantage. Dried putty can be easily sanded, so this process will not be labor-intensive. In addition, this putty can also be sanded wet, and the finishing can be done literally “without noise and dust”, that is, you can live quietly in the next room - comfortably and without harm to your health.
So, the choice for finishers is obvious - ROTBAND PASTA PROFI has only advantages. However, there is still one drawback: the calmness when using it borders on serenity. But isn't this what we all ultimately strive for?
Average drying time for Knauf compounds
It is impossible to give an unambiguous answer to the question of how long it takes for Rotband plaster to dry on walls. It all depends on the conditions in which the composition is applied, on the room temperature and humidity level. Experts say that the optimal conditions for proper setting of the compositions are a temperature of 18 to 22 degrees and a humidity of 8%. In this case, the composition will dry out 2-5 mm in depth per day.
The manufacturer of gypsum plaster talks about the following properties of Knauf products:
- the initial drying time of the layer (up to 8 mm) is about 60 minutes;
- final strength gain - after 7 days;
- operating temperature - range +5...+30 °C.
During the cold season, moisture does not escape from the walls very well, and therefore the start of work on applying putty should be postponed for another couple of days.
Material calculation
It is important to understand how many meters of surface you need to process if you want to save your budget and not overpay for material that will then simply be stored in your garage. It is for this purpose that the consumption of gypsum plaster should be calculated.
For correct calculation, it is necessary first of all to take into account the thickness of the required application layer. To find out, craftsmen usually take measurements of irregularities along the entire length and width of the wall surface using special control point indicators. After summing up the resulting sum of deviations, they divide the sum of all points from which measurements were taken, thereby obtaining the average thickness of the required plaster. The number of counter-points plays a significant role; the more, the better the result. As a rule, the manufacturer indicates the required consumption of dry gypsum plaster per 1 sq.m. taking into account one layer of 10 mm, so what follows is nothing complicated, just mathematics. On Rotband bags it is always written what the dry mixture consumption will be per sq.m. - this will be approximately 8.5 kg, then you only need to multiply this value by the total surface area and the average thickness of the required layer. For example, to process a surface of 20 square meters, taking into account the obtained values at counter points: 1.7 cm, 6 cm, 1 cm, we calculate:
| formula | Answer | |
| Wed. application thickness, cm | 0.6 (min. wall height) + 6 + 1 = 7.6 | 2,5 |
| Consumption of gypsum plaster Rotband Knauf per 1 sq. m., kg | 8,5 * 2,5 = 19,5 | 19.5 |
| Volume per wall, kg | 20 * 19,5 = 396 | 396 |
| How many bags of dry mix are needed, pieces | 396 / 30 = 14,5 | 15 |
| Price of one bag 30 kg, rub. | 355-380 | |
| How much does Rotband gypsum plaster cost in total, rub? | 355 * 15 = 4705 | 4705-4915 |
Installation of beacons
Apply the prepared Rotband solution to the treated base approximately every 30 centimeters, followed by pressing in the indicator profiles, and then make sure that they are all in the same plane. The distance between profiles should be no more than 30 cm.
Installation of protective corners
The already mixed solution of Rotband Knauf gypsum plaster must be spread on the inside of the profile, also in long increments of 30 centimeters.
Important! The installation of the profiles must take place in the same plane as the beacon profiles.
How to work with Rotband compositions: required tools and materials
If you decide to level the walls yourself, you need to know not only how long it takes for Rotband to dry, but also what tools you will need to apply the composition correctly. This list includes:
- building level;
- plumb line;
- roulette;
- trowel of suitable length;
- rule;
- metal beacons;
- sandpaper;
- bucket for mixing the solution.
The Rotband plaster itself is safe, but during the work it is still necessary to use gloves, safety glasses and a respirator. This is due to the fact that you will have to sand the surface and smooth out any uneven surfaces.
Structuring the surface
Professionals know about this, but you may not have heard yet that the applied Rotband gypsum plaster does not have to be left in the perfectly uniform and smooth form in which you applied it. Many people like to give the applied mass various shapes and even designs!
All you need to do for this is to roll a handy textured roller over the mass that has not yet completely hardened, or use a creative approach and draw a wide variety of designs using the tools available to you.
Preparation of working solution
Knowledge of how long it takes for Rotband plaster to dry will also be useful in the process of mixing the composition for work. Since the mixture sets quickly enough, it does not need to be prepared in large quantities. Dilute as much dry powder as you can use within 30 minutes. After this time, the plaster will begin to set and it will be quite difficult to apply it to the walls.
To prepare the mixture, use 3 parts water and 2 parts dry mixture. First, pour water into the bucket, then gradually add the powder and begin kneading the composition using a construction mixer.
Note! The colder the water, the longer the plaster hardens.
Gypsum plaster Rotband. Application
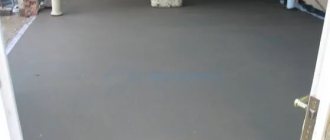
Approximately 25 minutes after the solution has assumed a homogeneous mass, it should begin to be applied to the surfaces to be treated; the layer thickness should be from five to fifty millimeters. As for the application process, for the ceiling, you should apply gypsum plaster with a special plaster falcon, moving towards yourself. For walls, it is also necessary to spread the plaster with a “falcon” up/down or using a trowel. After this, you should level out the entire applied mass using zigzag movements.
In the case when it is necessary to apply a large layer of plaster, you should first apply the first layer of the permissible thickness and only when it is completely dry, continue applying the next one until you get the thickness you need. As a rule, this is not required for ceilings; a maximum of one layer of gypsum plaster is enough.
Preparing the base
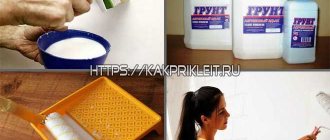
Before applying the plaster, carry out a number of preparatory work. Namely:
- Treat surfaces with primer.
- Remove any remaining old finish from them. If there are metal elements on the wall, treat them with an anti-corrosion compound.
- If you are working on walls made of brick or gas silicate blocks, carry out two primer treatments, as these materials strongly absorb moisture. For concrete bases, a single application of the composition is sufficient.
- After this, you can begin installing beacons. Most often they are attached every 0.8-1.2 meters.
Draw lines on the wall for beacons. Make patches of cement mortar on them and fix the metal strips. Apply a second layer of fixing compound on top of the beacons.
Thus, install beacons on all walls that require alignment. The next day you can start applying plaster.
Plaster application process
During the work, professional craftsmen use a rule, but if there is none, you can use a light and even board and a wide metal ruler. If you need to lay a large layer of plaster, first apply the composition to the walls using a regular trowel. Then apply the mixture to the rule and distribute the composition along the wall, applying the tool to the edges of the beacons. This way you will get a perfectly smooth and even surface.
When working with cement compositions, the rule moves only from bottom to top. Gypsum varieties allow the master to work in different directions. However, do not forget how long it takes “Rotband” to dry. You will have no more than 30 minutes to correct errors.
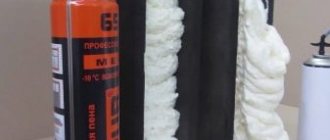
If you need to cover external corners with plaster, use metal corner profiles to improve the quality of work. They simply need to be fixed at the junction of two planes and covered with a working composition. As a result, you will get a properly shaped surface that will be protected from premature wear.
The difference between Rotband and Goldband
Although Goldband is so widely available on the market, questions often arise about the difference between the two blends. Rotband contains adhesive components that provide reliable adhesion to the base. They are absent in Goldband. Therefore, in the designation of the Rotband mixture in German there is the word Haft (Haftputz) - adhesion (adhesive plaster), and Goldband is referred to only as Fertigputz - ready-made plaster mixture. Thus, Rotband is intended for application to both rough and smooth surfaces (for example, when plastering a ceiling). Goldband is used to level only rough surfaces that initially provide greater adhesion - brick, itong (a type of gas silicate), foam concrete blocks.
All data is provided without any guarantees or warranties.
Finishing work
Knowing how long it takes for Rotband to dry on the wall, you can start working with putty on time. If the above time has elapsed and wet spots are visible on the surface, postpone further processing until the composition has completely dried.
Many craftsmen try to reduce the drying time of plaster by heating the air in the room. Experts do not recommend resorting to such methods, as this completely disrupts the technology and reduces the quality of work.
Once the plaster is dry, coat it with putty. Apply an even layer over the entire surface, and after it dries, sand the wall with sandpaper. Next, you need to wait a day and you can perform subsequent finishing.
How to speed up the drying process of the finish?
Very often, beginners begin to putty the surface even before the previous material has completely dried. Such haste leads to irreparable consequences. To avoid such mistakes, you need to correctly calculate the drying time, which is influenced by the following factors:
Sometimes there are situations in which it is really necessary to speed up the drying of the plaster mixture. Of course, it’s better not to disrupt this process, but if you really need it, you can use these tricks:
- if possible, reschedule plastering work for the warmer months;
- the room should be heated with “dry” heat (electric heaters are perfect for this, but use this option with caution to avoid cracks in the walls);
- use a plaster mixture that contains gypsum (this material has a “porous” structure that allows air to pass through well and naturally speeds up the drying process);
- provide a good exchange of fresh air.