The choice of materials for insulation and their features
Polyurethane foam
Using polyurethane foam can create a moisture-resistant barrier with excellent insulating properties.
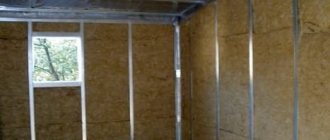
The problem with using it is the way it is applied. Initially it is a foamed liquid that quickly hardens. In order for it to form a flat surface and sufficient thickness, you will have to use formwork and fill the required space with foam in parts. It will not work to use frames, as when insulating external walls or ceilings. In this case, frame elements made of wood or metal profiles will become bridges of cold and dampness. When the entire surface of the insulating layer has been formed, a hydro- and vapor barrier should be installed. For this, polyethylene film is used, which is attached to adjacent walls, floors and ceilings using slats and gluing with sealant or mastic. Due to the low density and strength of polyurethane foam, it will not withstand subsequent plastering and finishing cladding. This will require the construction of an additional plasterboard wall, which should be mounted on a frame with fastenings only to adjacent walls, ceiling and floor.
In this option, the dew point will be either at the junction of the wall and polyurethane foam, or in the thickness of the insulation itself. Due to the lack of air access and virtually no vapor permeability of the material, condensation will not form there.
Double wall made of different materials
The second option could be a double wall using underfloor heating elements as a thermal barrier. In this case, heating elements are mounted on the surface of the external wall. It is worth turning on the heating only in the most severe frosts in order to warm up the inner surface of the wall and shift the dew point to its middle.
To enable normal finishing of the room, a second wall is constructed using plasterboard or a half-brick wall. In this case, the insulation is mounted on the false wall from the side of the opening between it and the external wall. Although this option will save you in severe frosts and prevent destruction and the formation of dampness in the wall, it will, however, require huge costs for electricity. After all, it is not the volume of air in the room that will actually be heated, but the street.
Expanded polystyrene, EPPS (penoplex)
If you nevertheless decide to insulate with expanded polystyrene, which does not meet the required characteristics for internal insulation of walls not intended for this, special attention should be paid to its installation. Due to the fact that the material is even, smooth sheets of fairly dense material of standard size 100x100 or 100x50, joints will form in any case
It will not be possible to get rid of this completely, so the solution is to fit the sheets together as tightly as possible, and apply a layer of sealant to the ends of adjacent sheets.
As is usual with polystyrene foam, the solution is applied in the form of individual cakes. This option immediately disappears when insulating from the inside. After all, as a result, air chambers are formed in which condensation will accumulate. Sooner or later, water will find loopholes and cracks to escape into the room, ruin the appearance of the finish and lead to the development of fungus. The only option would be to apply the adhesive evenly over the entire sheet and tightly adhere to the wall over the entire area of the sheet. Before applying the solution, you should use a special needle roller, which perforates the surface of the material, and the solution will ultimately hold it better. This is especially true for the option with penoplex. This method of fastening will also require preliminary leveling of the wall. In this case, ordinary cement-sand mortar will not work. It is best to use mixtures that form a moisture-proof layer, such as those used for finishing bathrooms. You also cannot use the usual anchors for foam plastic, because in the places where they are installed, leaky transitions are formed to the entire layer of insulation. If mesh reinforcement and plastering over polystyrene foam are subsequently used, it is better to strengthen the structure with the help of “T”-shaped profiles that are inserted between sheets of foam plastic and strengthened from above and below to the ceiling and floor.
Stages of home insulation
In each specific case, the technology of work will differ depending on the base wall material and the finishing decorative coating chosen by the homeowner. The easiest way is to plaster insulate the walls from the outside with penoplex or equip a ventilated façade of the house.
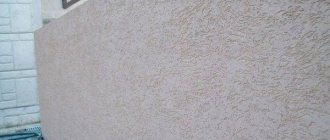
Plaster insulation system
Plaster insulation of a house from the outside with penoplex can be done with block, brick and wooden walls, and simple or figured plaster can be used as a decorative coating. The advantage of this technology is its simplicity, as well as the ability to give the building an attractive appearance.
Plaster insulation of the walls of a house involves the following work:
- Surface preparation.
- Installation of the starting bar.
- Insulation fastening.
- Trimming corner foam boards.
- Strengthening internal and external corners of openings.
- Installation of reinforcing mesh.
- Finishing.
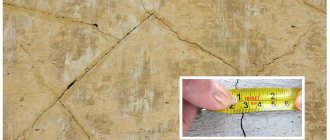
Due attention should be paid to the correct preparation of the walls of the house for insulation, since the durability of the insulator used largely depends on this. If the facade of the house is plastered, it is necessary to determine where the plaster is peeling off and repair problem areas. The wall is treated with primer, which increases adhesion and strengthens the base.
The starting strip is secured with dowels approximately 2 centimeters below the calculated horizontal line of the junction of the wall and the foundation. The horizontality of the starting strip installed around the entire perimeter of the house must be checked with a building level.
Next, they begin to prepare the glue, which must be diluted in water in full accordance with the instructions for it. You can also use foam adhesive, which is applied directly from a can or using a spray gun.
The slabs are glued staggered around the perimeter of the building. The next row must be started offset to prevent the four slabs from meeting at one corner. The seams between the plates must be sealed with sealant or foam.
After the glue has dried, it is necessary to additionally secure the slabs with dowels with plastic disc-type heads. It is not recommended to use ordinary metal dowels for such work, as this leads to the formation of cold bridges. The hole for the dowels is drilled with a hammer drill, after which the fasteners are screwed in using a screwdriver, firmly fixing the foam sheets to the walls of the house.
All corners, openings and problem areas should be additionally reinforced with strips of mesh, for which zinc corners or special glue for plastic are used.
When is internal thermal insulation relevant?
There are several cases in which internal insulation of walls in an apartment is allowed:
- the city government prohibits changing the façade of the building;
- behind one of the walls of the apartment there is an elevator shaft or other room without heating;
- There is an expansion joint behind the wall.
All other reasons in favor of organizing the insulation of the apartment from the inside have no arguments. It is better to perform external thermal insulation, even if the facade design has to be changed or transferred to a new coating.
Nevertheless, if a decision has been made to carry out internal insulation, it is necessary to take the choice of materials and the execution of work very seriously. Before you begin, you must ensure:
- as dry a surface as possible;
- installation of vapor and waterproofing membranes;
- the presence of a heat insulator without gaps and joints;
- the presence of moisture-resistant insulation.
Taking into account the requirements described above, the ideal option is to erect a second wall in the room, which will fit tightly into the base surface and have a small gap where the insulation will be located, acting as a buffer. However, with such insulation of the walls from the inside of the apartment, the living space will be significantly reduced.
Is it necessary to lay a layer of vapor and waterproofing under the penoplex from the inside?
The need to install vapor and waterproofing is very significant, since the correct sequence of laying the layers of the wall “pie” will directly affect the microclimate maintained in the room, the preservation of heat and dryness in the house. This is especially important when using penoplex foam as insulation, which is impenetrable to water and steam. If insulation with this material is carried out only in the interior of the room, the need for vapor barrier will also depend on the material of the walls.
When installing penoplex, a sheathing will be installed on the frame, which will entail the inevitable installation of layers of insulation from water and steam. This can be penofol or a regular vapor barrier membrane.
It is important to know which side the vapor barrier material should be installed; this is usually indicated on its packaging. Fastening to the beams is carried out with a construction stapler with an overlap of 10-15 centimeters and mandatory insulation of the joints with tape.
Selection of materials
To solve the issue of steam condensation in the wall correctly, you need to take into account such characteristics of materials as vapor permeability. As the name implies, it expresses the ability of a material to pass steam through itself. Unit of measurement – mg/m*h*Pa
The reader should know an important construction rule: in the direction from the inside to the outside, the vapor permeability of materials should increase
Now let's see how different materials behave during internal insulation.
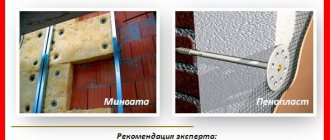
Mineral wool
This is an effective heat insulator (thermal conductivity coefficient is 0.042 W/m*C), which does not rot, does not burn, and is absolutely natural (with the exception of varieties in which phenol-formaldehyde plays the role of a binder).
However, this material is not suitable for internal insulation, since it has high vapor permeability - from 0.3 to 0.5 mg/m*h*Pa.
By installing it in front of brick or concrete (in the direction of steam movement), whose vapor permeability is 0.11 and 0.03 mg/m*h*Pa, respectively, we will violate the rule about increasing vapor permeability. Consequently, the influx of steam into a multilayer wall structure will be more intense (through mineral wool) than its outflow (through brick).
What will come of this can be clearly seen in the so-called. thermal calculators presented on many sites. In such a calculator, you can simulate the structure of a wall and the program will calculate and show how the temperatures are distributed inside it (the dew point will also be displayed), where and in what quantities condensation forms.
When modeling a living room wall, you should set the temperature to 20 - 22 degrees and humidity to 55%. Under these conditions, the dew point temperature will be 10.7 degrees. The thickness of the insulation should be selected from the condition of the required thermal resistance of the enclosing structure = 3.15.
For a brick wall 630 mm thick (R = 0.63/0.47 = 1.34, where 0.47 is the thermal conductivity coefficient of the brick) a layer of mineral wool 76 mm thick (R = 0.076/0.042 = 1.81, which is in total with “brick” 1.34 will give the required 3.15).
Having calculated this design for various values of outside temperature, you can see the following:
- At outside temperatures below -18 - -20 degrees, the main material of the wall freezes through.
- At the same temperatures, the dew point is located in the middle of the insulation or at its border with the brick. Accordingly, the resulting condensate will turn into ice, destroying the base material from the inside and tearing off the insulation from it (if it was glued).
- At temperatures from 0 to +11 degrees, the dew point will be inside the base material, which will therefore be abundantly saturated with moisture. A wet wall retains heat less well, and when it freezes, water will cause cracks to appear in it.
Another important consequence of the formation of condensation at the brick-thermal insulator interface is the development of mold, which destroys building materials.
If the mineral wool in the heat engineering calculator is placed behind the brick, that is, outside, the picture will be more favorable: the dew point will be behind the brick wall in the thickness of the insulation, and condensation will be released in very small quantities.
The lack of internal insulation associated with the release of condensate can be eliminated by installing a vapor barrier in front of the mineral wool. But the whole point is that in domestic construction, ventilation is designed taking into account the partial removal of steam through the walls. If you seal the walls with a vapor barrier, you will have to take measures to increase ventilation.
This will lead to an increase in heat loss, as a result of which it will be necessary to increase the thickness of the thermal insulation from 70 to 100 mm. With external insulation, the wall remains vapor permeable.
Expanded polystyrene
However, it is dangerous to use it for insulation of residential buildings, especially multi-storey ones, since it burns well and at the same time emits a large amount of toxic smoke.
Therefore, this material is not recommended for use.
Polyurethane foam
Similar to expanded polystyrene, this material is a type of foamed plastic. Therefore, it also has low vapor permeability, but can be sprayed in the form of foam, forming a seamless coating.
Do-it-yourself penoplex installation
To carry out proper installation of polystyrene foam boards on the ceiling surface, you will need to prepare a certain list of consumables and tools. In addition, the insulated surface must also be prepared. This will allow you to install the thermal insulation layer quickly, without downtime.
You will need:
- building level;
- construction or stationery knife;
- hammer;
- perforator;
- ladder or stepladder.
List of materials required for DIY installation:
- deep penetration primer with an antifungal component;
- dry adhesive composition compatible with polystyrene foam;
- foam for installation;
- fastening tools (so-called mushrooms).
Insulation of the ceiling base from the attic side
This method consists of the following sequence of actions:
- Cleaning the surface to be insulated from residues of various types of contaminants.
- Applying an adhesive mixture to the surface and laying insulation elements on the attic flooring.
- During the procedure, care must be taken to ensure that no serious gaps are formed;
- When the glue has completely set, it is necessary to seal the existing gaps between the insulator plates. This is done using polyurethane foam.
- After 24 hours, you need to trim off all excess foam for installation. If the attic space will be used for residential purposes, planks or other floor coverings are laid.
Insulation of the ceiling on the residential side
There are often objective circumstances according to which it is not possible to install insulation from the attic area. This happens in apartment buildings where upstairs neighbors live, or in buildings where there is no attic at all. In this case, all insulation work will be carried out from the side of the home, and the procedure will become somewhat more complicated.
The work algorithm looks like this:
- All debris must be removed from the surface to be insulated and visible gaps and cracks must be filled with putty;
- then apply a primer and a mixture that prevents the development of fungus;
- insulation boards are treated with an adhesive solution and then fixed to the surface;
- using a hammer drill, holes for the “fungi” are drilled on the surface of the glued slabs;
- the dowels must be driven into the holes made for them, so the plates will be securely fastened;
- places where joints do not fit tightly and all gaps are carefully foamed;
- after the polyurethane foam has hardened, remove its excess with a knife and begin to secure the reinforced mesh, which will be held in place by the adhesive solution;
- the surface treated with glue and reinforced with mesh must be cleaned and primed, after which a fine finish can be applied;
- The final stage of work consists of decorating the insulated area (you can use paint or any decorative coating).
It is not difficult to conclude that carrying out work inside to insulate a room is a much more labor-intensive and costly process. Because of this, the popularity of this procedure is low, and it is used only in situations where it is impossible to insulate the home from the outside.
Insulation of the attic ceiling
If the attic space is used as a residential attic, the question of insulating it using penoplex will be relevant. Its high qualities of thermal insulation and absorption of extraneous sounds will make staying in the attic more comfortable and suitable for living. But it is worth considering that the material will have to be secured differently in this area.
Independent work will consist of the following stages:
- Prepare the surface for attaching fragments of insulating material to it. The procedure is standard and described above.
- Assembling the sheathing frame and securing the polystyrene foam boards to it.
- Treat all joints with installation foam that has a minimum expansion rate.
- OSB, chipboard or plank flooring is fixed on top of the thermal insulator.
Tools and materials:
- Penoplex slabs - insulation for interior decoration,
- Deep penetration primer to strengthen the base,
- Dowels for foam plastic, as additional fasteners,
- Adhesive for foam plastic - foam or dry mixture,
- Reinforced mesh - for strengthening before decorative finishing,
- Cement-based plaster - used before finishing work,
- Maklovitsa brush - used when applying primer, you can also use a roller,
- Perforated corner to give clarity to corner bends (internal or external),
- Notched trowel for applying and spreading glue,
- Plaster spatula 300 – 400mm wide,
- Decorative finishing.
Advantages and disadvantages of insulating walls with penoplex from the inside
- This protection option is much cheaper than external thermal insulation, because there is no need to hire industrial climbers. You can do the installation work yourself.
- Penoplex weighs little; additional strength calculations for the building are not required.
- It does not absorb moisture and does not allow it to pass to the plaster, where condensation may occur.
- The material has a low thermal conductivity coefficient, which allows the use of thin sheets. Due to this, the usable area of the room is reduced slightly.
- The product is made from chemically inert components that are not subject to rotting. Wall repairs may not be carried out for decades.
- The density of the material is very high and can reach 35 kg/m3. It resists mechanical stress well.
- It is highly environmentally friendly and does not affect human health indoors.
- If installed incorrectly, condensation may appear on the plaster.
- Wet spots occur where the insulator comes into contact with the surface. Humidity reduces the thermal conductivity of the partition and causes its destruction.
- The heat-accumulating properties of the wall are reduced, and the temperature in the room changes quickly.
- The house is left without protection from the cold wind.
- Losses of living space can reach 5%. This is especially noticeable in small rooms.
- The insulation melts at high temperatures, but does not burn.
- Mice and other rodents love to live in the panels.
Technology of work execution
Experts recommend performing actions in the following order:
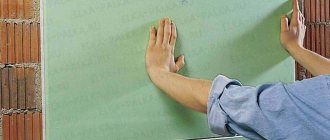
- Surface preparation. At this stage, it is necessary to remove the old decorative covering (wallpaper or other facing materials) from the wall. After removal, the surface is cleaned of dust and dirt and checked for unevenness. If depressions or cracks are found, they must be sealed with putty. Surfaces on which condensation has formed over time are often affected by fungus or mold. To eliminate the problem, the walls are treated with special antiseptic compounds. Next, a primer is applied to the wall. After it dries, you can proceed to the next stage.
- A special waterproofing film is attached to the wall. Penoplex does not absorb moisture, so this step can be skipped. This is an optional condition, but it is better to be safe.
- The slabs are cut to the required sizes. For this you will need: a ruler, a square, a knife.
- Prepare an adhesive solution, which is selected in accordance with the recommendations of the heat insulator manufacturer. Mix according to the instructions on the package.
Applying glue to the slab - The glue is applied to the slabs and to the wall. It is first recommended to attach the thermal insulation elements to the wall to check the geometry, after which they are glued.
- Next, additional fastening is provided with plastic dowels. This step can be skipped, but it will provide greater reliability.
- Check the tightness of the connection in the areas of window and door openings. Fill the seams between the slabs with sealant. If problem areas with large distances are found, you can use polyurethane foam for filling.
- Vapor barrier. Just like waterproofing, it is not necessary for penoplex, but it will help avoid unexpected troubles.
After this, the interior decoration of the premises begins. There are several options here. You can apply plaster over the penoplex layer. Drywall is used as a more reliable protection. For wall fencing, a thickness of 12.5 mm in one layer will be sufficient. Next, the drywall can be plastered or wallpapered.
The method of insulation from the room side is somewhat similar to the wet facade technology. Proper thermal insulation with penoplex will provide comfortable living conditions and reduce heat losses of the building.
Advantages and disadvantages of ceiling insulation with penoplex
There are a number of specific advantages that penoplex and a ceiling insulated with this heat insulator can boast:
- Thanks to its unique porous structure, the material has low water absorption and vapor permeability.
- Available in the form of L-shaped plates, which greatly facilitates installation on ceilings.
- The special surface roughness ensures a high-quality connection with the finishing material.
- Penoplex is considered a completely environmentally friendly insulation material.
- Features a long service life.
- Resistant to damage by fungal and mold microorganisms.
- Penoplex is famous for its ease of installation, because it can be easily cut and cut with any sharp knife.
- It is absolutely immune to air humidity, and therefore work with it can be carried out in any weather.
- The material remains unchanged in shape and size up to a temperature of 80-100 degrees.
- The slabs are easily glued simply to the ceiling if the thermal insulation is carried out from the inside of the building.
The main disadvantage of this material is related to its properties during the combustion process. Like its analogue, polystyrene foam, it is capable of releasing caustic and even toxic combustion products, which have a suffocating effect. On the other hand, if the heat insulator is securely closed on each side, this danger is practically reduced to a minimum.
What should I use to glue penoplex?
When choosing a particular adhesive for fastening, it is necessary to take into account the composition and chemical properties of the heat-insulating product.
The most effective adhesives are:
- Atlas Stopter K-20. This material has a high level of quality, so it is very often used for gluing slabs. The adhesive composition is used to restore facades. The product is also used for reinforcement. Has a high level of resistance to low temperatures and humidity. Significantly saves money.
Atlas Stopter K-20
Main article: how and with what to paint polystyrene foam?
- Atlas Plus. It is a universal adhesive. The main distinctive features of this product are elasticity, as well as excellent adhesion (adhesion to the surface). You can use glue on a wet surface.
- Mineral glue. You can find quite a lot of similar compositions on the construction market; among others, “Sarmat” stands out, which has a reasonable price.
- Polyurethane adhesive composition "Titan". The mixture does an excellent job of installing polystyrene foam boards. The composition has a fairly high price on the market.
Titanium
*
- Compositions intended for waterproofing. A popular product is one that is widely used among builders and installation workers. One such material is bitumen mastic.
- Glue "Moment". This is a composite composition. Also often used for working with foam boards.
When choosing an adhesive, it is necessary to take into account that it should not contain some components in its composition. Such components include benzene, formaldehyde, formaldehyde, diesel fuel, and solvents.
When purchasing an adhesive composition, you need to take into account the stock. The base is not always smooth, so the consumption of the product becomes significantly greater. Choose a high-quality product to ensure excellent fastening of the plates to each other.
Fastening methods
Surfaces made of different materials can be insulated in different ways. The process of covering a building includes several steps:
- surface preparation;
- insulation fastening;
- finishing.
In order to perform high-quality thermal insulation, penoplex should be installed correctly. First, the starting bar is screwed strictly horizontally. The bottom row of insulation is laid on it.
It is recommended to install a factory additional element (perforated, metal). You need to buy a strip that matches the width of the insulation and the required number of corners.
Before installing penoplex, a horizontal level is drawn along the walls of the building. The starting bar is screwed to the line. It holds the insulation and maintains the “geometry” of the installation.
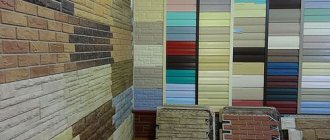
Types of penoplex
According to technical characteristics and scope of application, penoplex is classified:
- penoplex “C” (wall). Application: insulation of basement floors, walls, partitions;
- penoplex "F" (foundation). Application: insulation of foundations, ground floors, basements;
- penoplex “K” (roof). Application: roofing of any structure;
- penoplex with the designation “Comfort”. Application: private buildings, loggias.
- penoplex 45. Density from 35 to 47 kg/m³. Application: insulation of industrial buildings, runways, railways and highways.
In addition, based on application indicators, you can decide on the purchase of one or another type of panel.
Useful tips
Most homeowners turn to external rather than internal wall insulation with penoplex. This is explained by the fact that the second option hides the usable area of the room.
When decorating floors after insulation, they often turn to grouting. For this it is better to use sandpaper. You can proceed to this stage after the reinforcing layer has completely dried. Despite the strength of penoplex, you should be careful when working with it, since this material can still be damaged or broken.
Select high-quality and most effective glue for penoplex. A special adhesive foam is ideal for laying this insulation: it firmly and tightly attaches the material to the base and holds it quite reliably. Make sure that the thickness of the penoplex for wall insulation is at least 5 cm. Ensure that the insulation is securely and tightly attached to the base. Use both nails and glue.
When installing insulation, you cannot do without a profile, especially when it comes to installing a frame structure. It is advisable to purchase a bubble or laser tool, which is both easier and more convenient to use.
To make the external insulation of a house more effective and complete, it is recommended to insulate the foundation in advance (the basement can also be insulated along with it). In this case, all the work is done quite simply: first you need to dig out the foundation, clean it of any dirt, and then glue the foam sheets. After this, the base can be buried.
When installing penoplex on the facade of a building, you must ensure that the panels overlap each other by about 10 cm. This way you can avoid the formation of cracks.
Extruded polystyrene foam is a strong and durable material, but it does not tolerate contact with the following substances:
- gasoline, diesel fuel, kerosene;
- acetone and other ketone solvents;
- formaldehyde and formaldehyde;
- benzene, xylene, toluene;
- various esters;
- polyesters;
- coal tar;
- oil paints.
It is most convenient to apply glue to materials using a notched trowel. In this case, it is advisable to make the adhesive layer no more than 10 mm.
Facade penoplex glued to the ceilings needs to be bandaged vertical seams. This technology is very similar to laying bricks.
If you are going to plaster a wall insulated with penoplex, then you should first apply a base composition with a reinforcing mesh. The density of the latter must be at least 145 g/m2. Make sure that the size of the overlap is about 10 cm. Next, you need to lay a leveling plaster layer (its thickness should be at least 5 mm). Only then should the thermal insulation material be covered with decorative finishing.
If you are sheathing a house with penoplex in 2 layers, then first glue the starting layer, and on top of it place the next layer with a slight offset. Before this, it is worth treating the slabs with a roller.
Before installing insulation, old coverings should be removed only if they have noticeable damage or crumbling areas. If the previous finish does not have any defects or complaints, then penoplex can be placed on it.
Penoplex can be installed on a variety of substrates. It can be safely used for a private/country house or city apartment. In addition, you can easily install this insulation not only on walls, but also on the roof/ceilings.
Experts advise not to rush to insulate the house until it shrinks completely. Otherwise, the layer of plaster will become cracked and may begin to crumble. To carry out thermal insulation work, it is necessary to select only high-quality materials and tools.
Leveling the bases for laying penoplex can be done with plasterboard. However, the presence of this material will reduce the additional space in the room. Owners of city apartments with uneven floors often turn to such solutions.
If you decide to lay penoplex on a wall made of foam concrete, then it will come in handy to install a vapor barrier material. These components are not needed only if we are talking about bases whose structure is not porous.
Preparatory work
Before laying penoplex, it is necessary to properly prepare the base. This stage of work cannot be neglected, otherwise the insulation will not adhere well to the walls. Let's take a closer look at how to properly prepare floors for the installation of this thermal insulation coating.
6 photos
First, you need to stock up on all the necessary tools and equipment before proceeding directly to the preparation and installation of penoplex on the “wet” facade. To carry out all work you will need the following items and materials:
- high-quality adhesive mixture;
- special adhesive primer;
- corners;
- deep penetration primer mixture;
- reinforced mesh (it is advisable to stock up on a fiberglass product);
- dye;
- plaster.
If you plan to install penoplex on a suspended base, then you will need the following tools and materials:
- wooden slats (metal profiles are possible);
- brackets;
- vapor barrier film;
- glue foam;
- antifungal impregnation designed specifically for wood processing;
- decorative finishing material (this can be lining, vinyl siding, block house and other coverings).
If you have stocked up on all the necessary materials and tools, then you can proceed directly to laying the insulation on the walls. First, let's look at how this work is done with a wet facade.
- Remove from the walls all foreign parts and elements that may interfere with further cladding and finishing.
- Now you need to form the most reliable and strong base for the insulation. For example, if you suddenly notice that there are pieces of plaster mixture falling off on the walls, then they definitely need to be removed.
- Then you should walk along the facade with a damp cloth. It is acceptable to use a vacuum cleaner to help remove excess dust from the floors.
- Next, the bases need to be thoroughly primed with a special deep penetration façade primer. This work can be carried out conveniently using a roller or brush. Apply primer in a thin layer when preparing. After the first layer has dried, proceed to applying the second.
When designing a curtain wall, preparation for laying insulation occurs as follows:
- remove all dirt and dust from the base;
- treat the walls with special impregnation;
- insulate the roof gaps by filling them with suitable thermal insulation materials.
Penoplex can be used to sheathe not only the façade bases, but also the interior of the home. To do this you will need the following materials:
- high-quality penoplex (it is advisable to buy material with improved characteristics);
- glue;
- primer;
- plaster.
In this case, it is also necessary to prepare the walls for laying insulation. To do this you need to do the following:
- remove any old finishing from the floors, be it wallpaper or paintwork;
- make sure the walls are even: they should be smooth, without drops or potholes (if any are present, they should be removed using plaster and primer);
- if there are protruding parts on the ceilings, then they need to be thoroughly cleaned;
- After this, it is recommended to prime the walls twice so that the penoplex adheres to them better. After completing all of the above steps, you can glue the insulation.