Why paint foam?
Foam-based products are used for both interior and exterior finishing and insulation work. It is used for heat and sound insulation of interior floors, partitions and walls, and in addition, many parts for decorating the interior of premises are produced from it. Often in the process of finishing work there is a need to paint polystyrene foam for one reason or another.
The first thing you need to think about is why paint polystyrene foam at all ? This operation is performed in two cases:
- Firstly, to create the effect of visual completeness and a holistic, harmonious interior, which consists of a combination of finishing elements, both among themselves and with the style of the room. It is unlikely that there will be connoisseurs of an interior in which white material with a bubble texture would be present as decor. Most, as a last resort, will prefer another type of finishing material that would fit more harmoniously into the decoration, please the eye and be combined with the surrounding environment. But polystyrene foam has too significant advantages over other finishing materials, especially in terms of price and ease of installation, that, as a rule, it is more rational to cover it with a paint coating than to look for a replacement in the form of another material.
- Secondly, a significant reason for painting is undoubtedly the need to protect it from the destructive effects of an aggressive external environment. For example, from exposure to bad weather in the form of precipitation, temperature changes, stormy winds and, ultimately, banal physical deformation of the material. All these factors seriously reduce the lifespan of foam products. As a rule, an unprotected foam coating very quickly, literally in one season, loses its original appearance.
Thus, applying paint and varnish to polystyrene material can be considered a logical continuation of finishing and decoration work.
How to insulate a house with foam plastic
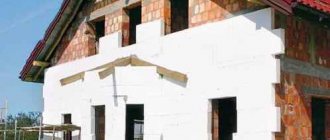
Insulating a house with polystyrene foam is one of the inexpensive and simple ways to preserve heat. This method does not take very much time, but still, when installing foam plastic, you need to take into account some nuances. The quality of insulation and durability of foam plastic can depend on proper surface preparation, choice of material and installation.
Necessary materials
First of all, a material such as polystyrene is purchased. Used together with it:
- Primer.
- Tile adhesive.
- Plaster.
- Reinforced corners.
- Fastening elements (dowels).
For frame insulation of the floor and ceiling, you will additionally need metal or wooden profiles, as well as chipboard sheets.
Tools
For proper and high-quality fastening of polystyrene foam to walls and ceilings, you need to acquire a drill. It is advisable to have drills of different sizes for it. A building level will help you take all measurements exactly and accurately. To mix the solution, you need a small container, and to apply it, you need a spatula. A construction knife will be used to cut the foam.
Which is better: polystyrene foam or mineral wool?
When choosing insulation, you should always carefully study the characteristics of a particular material. After all, its quality and durability depend on this.
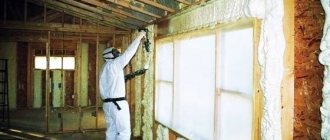
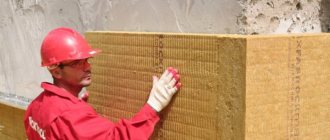
Mineral wool is also great for keeping your home warm. With its help you can insulate any building. It is produced not only in slabs, but also in rolls and is quite convenient for installation. However, this material is more susceptible to moisture. The cost of such material also repels many buyers. Therefore, for high-quality and inexpensive home insulation, you can completely use polystyrene foam.
Foam thickness for insulation
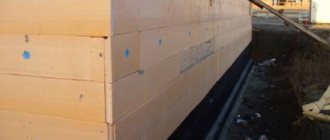
When choosing foam parameters, you should not settle on low-quality material with low performance characteristics. For example, a foam density of 15 kg/m³ is only suitable for insulating the internal walls of a building. And for cladding the outside of the house, it is better to buy a more durable one with a density of 25 kg/m³. But to strengthen the slopes of windows and doors, as well as building foundations, it is better to use a density of 35 kg/m³. Due to such a high indicator, it is possible to use thinner sheets.
The thickness of the foam is selected according to the following principle: if the house needs to be well insulated and protected from strong winds, then it is better to buy material with a thickness of about 15 cm. But if the building is located in a warmer climatic zone, then you can purchase the most common one, which has a thickness of 7 cm, because this the view will be cheaper.
But you can’t overdo it when choosing foam characteristics. After all, very thick sheets can lead to technological problems. In some cases, when it is necessary to bypass pipes, it is impossible to use thick sheets. Therefore, it would be advisable to purchase foam plastic 5 cm thick with a density of 35 kg/m 3 than to use 10 cm with a density of 25 kg/m 3. These 2 types are comparable in price and functional characteristics.
But on average, to insulate a house with polystyrene foam, you can follow these rules:
- The basement, building basement, door slopes should be insulated with a material 5 cm thick and a density of 35 kg/m 3 .
- It is better to sheathe external and internal walls with a thickness of 7 cm and a density of 25 kg/m3.
- To protect the ceiling and attic from cold and wind, a thickness of 5-7 cm and a density of 15 kg/m 3 is suitable.
The main thing is to purchase high-quality material that has been stored in a dry room. The foam should not be wet or yellow. It should be without any damage.
How to cover a house with foam plastic
To cover a house with polystyrene foam, you first need to purchase the required amount of insulation. To do this, the total area of the external walls of the building is calculated, door and window openings are taken away and a margin of 10-15% is added. After all, the material may be damaged or the cut pieces may not fit. You should try to make as few seams as possible.
After purchasing the necessary materials and preparing the basic tools, you can begin plating. To carry out the work correctly, you need to follow technology.
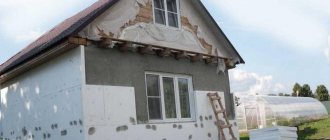
How to insulate a house with foam plastic from the outside. Step-by-step instruction
The technology for insulating walls from the outside is as follows:
- Preparing the walls.
- Primer.
- Installation of insulation.
- Puttying.
- Surface finishing.
Preparing the walls begins with cleaning the surface of the old coating, if any. Brick or concrete walls are thoroughly cleaned of loose plaster, debris and dirt. There should be no falling pieces of wall left on the wall. When the wall is not damaged, you can begin priming.
The surface priming stage is carried out for better adhesion of the insulation to the wall. To do this, purchase a deep penetration primer from the store and apply it to the wall with a brush. This process also gets rid of unwanted dust particles, resulting in a smoother wall.
After such work, you can begin gluing the insulation. The most optimal material for this is tile adhesive. It is convenient because it is very quickly diluted with water to the desired consistency and allows the insulation to be firmly glued.
The diluted glue is applied to the wall with a brush. Apply a thin layer, then apply the prepared foam sheet for a few seconds.
Despite the fact that the foam will be covered with finishing material on top, it must be laid as evenly as possible. You need to ensure that there is a small gap between the slabs, as when laying tiles.
Puttying is carried out after installing all sheets. This stage consists of sealing the seams. It is allowed to use tile adhesive, which was used to install the foam, for these purposes. You can take a special putty mixture. But under no circumstances should it be sealed with gypsum mixture. Otherwise, cold bridges may form, which will lead to useless installation of insulation.
After sealing the seams, the wall must be treated with starting and finishing putty. This is necessary to ensure that the surface is perfectly flat.
It is very important to use reinforced corners at the corners of the building that sit on the putty. They will strengthen the insulation and increase resistance to any mechanical stress.
Insulation of floor and ceiling
In addition to insulating the walls from the outside, you can use the method of thermal insulation from the roof and from the basement. This will further protect the house from heat loss.
The most optimal way to insulate the floor is to install polystyrene foam on the basement side. To do this, the basement ceiling is cleaned, treated with a mixture to seal unevenness, primed and insulated with foam plastic. After this, the seams are sealed, a layer of putty and any finishing material are applied.
If it is not possible to install the slabs from the basement side, you can attach them indoors. For this:
- Waterproofing is laid on the wooden floor, blocks are stuffed, between which foam plastic and waterproofing are laid, and chipboard sheets are stuffed on top.
- A primer is applied to the concrete base, bars are mounted, sheets are attached, covered with waterproofing, then with chipboard sheets.
It should be borne in mind that before insulating the floor, it must be carefully inspected for cracks, mold and mildew. You definitely need to get rid of this, otherwise the problem will develop under the insulation.
Ceiling insulation is carried out using the same technology: preparation, priming, fastening profiles, polystyrene foam, sealing seams, puttying. The insulation can be attached to the installed frame using dowels.
Advice from professionals
To properly insulate your home, you can listen to the advice of professionals:
- It is better to start insulation from the roof, then move on to the outer walls and foundation.
- It is necessary to choose a material of suitable thickness and density so that there are no problems with its installation.
- For a more durable installation of the foam, you can use umbrella dowels, which allow you to more securely hold the foam.
You can study common mistakes when insulating a facade in the video. Expert advice is provided on how to choose the right material and how to carry out insulation.
The process of insulating a house with polystyrene foam is quite simple. The material for work is lightweight, which allows it to be glued to the surface without installing slats. But you still need to adhere to technology to ensure the highest quality result.
What to paint
Construction foam is deservedly considered one of the most versatile materials. It is used for insulation, cladding and as a material for the manufacture of most decorative elements.
At the same time, due to its low cost, products made from it have an affordable price:
- Ceiling tiles based on polystyrene foam are an excellent choice as a finishing material for the ceiling, providing an aesthetic appearance and not requiring major investments. It is not afraid of water, so it can be installed in rooms with high humidity, such as a kitchen or bathroom, but unprotected foam itself is very fragile and can be easily damaged even by accident with bare hands. In addition, under the influence of direct sunlight, such tiles will certainly fade and acquire a yellowish tint.
- Also, foam panels are one of the most popular and widespread options for organizing thermal insulation of the walls of residential buildings. As a rule, they cover the outer parts of the house, its facade, which, unlike the premises inside the building, is constantly exposed to the negative influence of nature in the form of frost, ultraviolet radiation, and precipitation. Therefore, such a coating, which has a relatively fragile structure, requires not only careful handling during installation, but protection in the form of a paint coating for the period of operation.
- Today, very often for interior decoration, skirting boards are used for the ceiling, made on the basis of foam plastic. When purchasing, the color of such a decorative element is usually white. But often it is not the most suitable for a particular interior, and almost always the uncoated material is not very practical. Therefore, in some cases there is a need to change its shade to something other than white. In addition, sometimes the surface of such a plinth has defects, which can be especially visible after installation, when the light in the room is on. In this case, painting is the only alternative to redoing all the finishing work and replacing the baseboard. It will not only mask imperfections, but also add strength to decorative elements. One of the features of the plinth that is conducive to painting it is that during its installation, joints are formed between its different parts, which have to be primed with putty, and in order to hide all traces at the final stage, the plinth is covered with paint along the entire perimeter. Sometimes the need for painting arises suddenly, some time after installation, for example, after a roof leak, when stains appear on the white decor that cannot be cleaned. Then either buy and replace decorative elements, or paint everything and forget.
Styrofoam wall plaster
Scheme of styrofoam plastering.
- plastic reinforcing mesh;
- tile adhesive;
- trowel;
- flat spatula;
- sanding block (sandpaper).
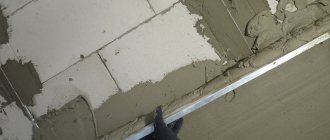
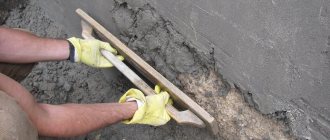
Plastering foam walls begins with strengthening the reinforcing mesh. To make it easier to work, it is cut in advance. Tile adhesive is used for putty; it will strengthen the brittle surface of the foam.
If you use ordinary plaster, it will absorb excess moisture, creating a cold atmosphere around itself, which will negate all the work.
First, a layer of glue is applied to the foam plastic of such a thickness that it is not too thick, but at the same time holds the reinforcement well. The mesh is secured on top with nails, then rubbed into the plaster with a trowel and left until the glue dries completely. Then they go over the surface with a sanding block or sandpaper, smoothing out all the irregularities.
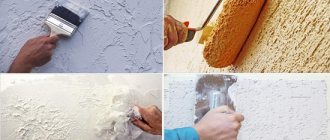
There is another way to secure the reinforcement. The mesh is fixed at the stage of installing dowels with wide heads, while tile adhesive is applied only in places, after which the entire surface of the foam walls is plastered. After drying the starting layer, apply a finishing layer of plaster, leave the work to dry, then remove any unevenness with an abrasive stone. All that remains is to prime the surface with a façade primer, apply decorative plaster and paint. Covering a house with polystyrene foam is not so difficult if you follow the technology and follow the advice of experts.
One of the popular insulation materials in our country is polystyrene foam. This material is well suited for saving heat indoors, while protecting the building outside from the negative effects of the environment.
Therefore, the natural question remains, how to properly cover a house with foam plastic in order to get an excellent result? Let's talk about this in more detail.
Paint requirements
Despite the huge variety of types of polystyrene-based foam, there is a problem of its compatibility with paints and varnishes. The fact is that this material is susceptible to the negative effects of organic solvents, precisely those that are part of most paints and varnishes. Thus, in order to coat a foam product with paint and give its surface a beautiful structure, without harm to the material itself, you need to know the features of its compatibility with different coloring compositions.
Expanded polystyrene is resistant to most substances; it can be coated with mixtures of bitumen, lime solutions with water, and also painted with compositions that have a water-dispersion base. But compounds included in the class of organic solvents, for example, ethyl acetate, toluene or the well-known acetone, present in many types of paints, cause a change in the properties of this material, leading to its softening, shrinkage and ultimately dissolution.
Types and brands
In addition to the usual polystyrene foam type EPS, there is also an extruded variation , designated as EPS.
It is obtained in a similar way, but is mixed in an extruder , followed by pressing and foaming through the head.
Thanks to this processing, it turns out to be more rigid and resistant to mechanical damage at a similar density (from 10 to 35 kilograms per cubic meter), however it is somewhat more expensive.
Experts recommend using this insulation on the walls of apartment buildings in regions with strong winds. In other cases, traditional façade PPS is sufficient.
Extruded foam is rarely used as insulation, but its advantage is strength. But due to the high styrene residue, it is considered toxic and unsafe in terms of fire.
Visually, it is distinguished by the absence of foam balls, like PPS. It is produced in slabs with a density of 10 to 20 kilograms per cubic meter, but it has a high moisture absorption coefficient .
Main brands produced:
- PSB-15. Its thermal conductivity is only 0.043 W/m. A cubic meter of this weighs up to 15 kilograms. Suitable for internal sound insulation and for installation in balcony structures. Thickness according to GOST – 10, 20 and 50 millimeters.
- PSB-25. Thermal conductivity at the level of 0.041 W/m. Density – from 15.1 to 25 kg/m3. The best option for insulating one-story houses and non-residential premises. Thickness according to GOST – 20, 30, 40, 50 millimeters.
- PSB-35. Thermal conductivity – 0.039 W/m. Density – from 25 to 35 kg/m3. It is used to insulate the first floor of multi-storey buildings, the basement, and floors (combined with underfloor heating). Thickness – 50 and 100 millimeters.
You may be interested in learning about modern materials for insulating the exterior walls of a house. Read in this article.
The higher the density, the better the thermal insulation and rigidity of the finished structure. But at the same time, a large load is created on the load-bearing wall or facade. And you need to take into account that only standardized sizes of insulation slabs are indicated.
Manufacturers undertake the production of thermal insulation of any size . That is, it is quite possible to order polystyrene foam type PSB-10 with a thickness of 5 millimeters.
Painting foam
In most cases, paints based on water emulsion and acrylic suspension are used for painting foam plastic. The choice of one type of paint or another depends on the location of the foam materials: inside or outside the building.
Inside the building
Inside the building, water-based paints and varnishes are almost always used. They are characterized by low cost, about 25-40 rubles per liter, but are unable to withstand moisture and heavy dust, which determined their specific use only for indoor spaces.
When applying such paint to the interior decorative elements of a room, the optimal viscosity of the paint is ensured, allowing you to hide the pores in the material under a uniform layer of coating. Before painting ceiling tiles, moldings, baseboards and rosette decorations, it is recommended to wipe them from cobwebs and dust with a dry cloth.
Painting is usually done with a brush and roller. However, in the case of painting decorative elements with a thin and intricate relief, not a brush is used, but a spray gun, which allows you to quickly apply a uniform layer of coloring pigment to the material. To avoid paint getting on the wallpaper, it is best to paint the moldings and foam cornices before installing them.
Outside the building
On the outside, acrylic-based solutions are used, which are highly resistant to the influence of aggressive external environments, but they are much more expensive - from 50 to 50 rubles and are not durable. That is, they need to be updated from time to time.
For the use of paints as a coating for polystyrene foam boards that provide thermal insulation for the external walls of a house, the characteristics of increased elasticity, resistance to precipitation and contrasting temperature changes are very important.
This composition is first diluted with water or a primer, due to which it acquires increased elasticity. Thorough mixing is required until a homogeneous consistency without lumps is required.
Another protective coating option for polystyrene materials is a thin layer of putty, after drying, which can be painted with any paint containing acid.
Polystyrene foam (expanded polystyrene) is the most common insulation material, which is widely used both for insulating walls and for insulating pipelines. Most often, polystyrene foam is used to insulate the facade of a house. There are several reasons for this: low cost, excellent thermal insulation characteristics and simple installation.
Technology of facade insulation with foam plastic (expanded polystyrene)
Advantages of polystyrene foam for insulation:
- zero hygroscopicity (no need to use vapor barrier films);
- durability (if there is a good finish);
- resistance to biological activity;
- stability of geometry under the influence of external conditions.
Disadvantages include: flammability, toxicity when burning.
In general terms, many have an idea of how a wall is insulated from the outside with rigid insulation, but we need to dwell in more detail on how to insulate a facade with foam plastic correctly. Knowing the specifics of installing thermal insulation material will help you do the work yourself and supervise hired specialists.
Insulation instructions: wall preparation
Sheathing a house with foam plastic is carried out in several stages. Before starting work, the walls are leveled. Depressions and protrusions are undesirable. If the façade is not level, the soft material may break. The optimal solution for preparing walls is to apply plaster to them. The size of the protrusions and depressions should not be more than 2 cm.
If the surface is flat, then it is necessary to inspect the texture of the wall; it must be rough to ensure adhesion to the glue. If the facade is painted with paint that has zero vapor permeability, then the layer must be cleaned and then covered with a primer.
If you decide to cover your house with polystyrene foam yourself, then at the preparation stage you need to run your hand along the facade. If there is a chalky mark left on the palm, then the surface must be primed. When, upon contact with a wall, its material crumbles, albeit slightly, the base should be cleaned with a brush and coated with a primer.
Regardless of the condition of the wall, this composition must be applied. It is better if the mixture has good penetration. This will strengthen the material, which is especially important if it is necessary to adhere the glue to the wall.
Technology of facade insulation with foam plastic
- selection and calculation of materials;
- wall surface preparation;
- installation of a base profile;
- installation of foam plastic (slopes and walls);
- seam sealing;
- façade reinforcement and plastering;
- Finishing work.
The procedure (scheme) for insulating the facade is shown in the photo.
Scheme of facade insulation with foam plastic (expanded polystyrene)
The installation technology will be identical for polystyrene foam, polystyrene foam and penoplex.
Example House Facade Decor
In this example of the design of the facade of a country house, the under-roof cornice consists of two separate elements, forming a massive filling.
Decorating the corner of the house
The corners of the house are decorated with rusticated chamfered stones. The rustics at the corner do not join each other, but are mounted each on its own side.
Window decor, slope
The second floor windows are framed with 12 cm wide molding along the wall. The top of the window is complemented by a profile with an angular trim, as well as a keystone. On the first floor windows, in addition to the molding, a decorative window sill profile is used.
Decorative division
In this case, a double interfloor division of the facade was used. One strip goes along the line of the window sills of the second floor, and the other along the floor slab of the first and second floors. This technique helps to significantly reduce the visual height of the building. Decorative frames with a thin façade profile are used between the dividing strips.
Basement design
The plinth element is located with the thin part up to smooth out the difference in thickness of the plinth and the main wall.
Wall finishing materials
The main wall decoration is bark beetle or decorative plaster. The finishing coating of the walls is applied after the installation of decorative stucco. This helps to further isolate the joint where the decorative elements are glued to the wall. The basement part is decorated with marble or granite.
The procedure for insulating a house with your own hands
The main difficulty of insulating a house with your own hands is the initial selection of necessary materials and preparation of the walls. But, if you follow the proposed algorithm, even a beginner can cover a home with polystyrene foam.
So, you need to start by preparing the walls. This stage includes cleaning from the dusty layer (using a soft cord brush is allowed) and treating with a primer. It is not necessary to level out all existing unevenness, but it is advisable to remove large cracks and potholes at least with adhesive cement.
Setting up a profile
Next, you can begin attaching the starting profile. Its type must necessarily correspond to the thickness of the foam (example: UW-50, UW-100, UW-70). The profiles provide perforation for standard self-tapping screws. The use of self-tapping flea screws without visible heads is permitted.
are advised to make preliminary markings before fastening the profile . It is not necessary to draw a drawing on the walls - it is quite enough to simply pull the rope and level it using a building level.
Why is a profile needed? This is an additional support for the outer polystyrene foam sheets. An indent of 3-5 millimeters is made between the slats of metal profiles to level out their expansion when heated.
Slopes
Slopes additionally protect the room from leakage of warm air through window openings. Window finishing is carried out immediately after installing the frame, after waiting for the polyurethane foam packed into the cracks to dry.
The optimal offset for slopes is 3 centimeters. Experts do not recommend immediately aligning the foam with the bend under the opening. It is better to add an extra 1-2 centimeters and in the future carefully align it with the main finish.
As for external window sills, they should protrude beyond the thermal insulation by 3-4 centimeters.
If the distance is smaller, water will fall on the thermal insulation (this will increase the heat transfer coefficient).
The process looks like this:
- The remaining gaps around the perimeter of the frame are eliminated with cement (it is better to use adhesive cement).
- At the site of future slopes, a primer is applied , possibly in several layers for better adhesion of materials.
- Then an adhesive solution is prepared. As a rule, 250 milliliters of water are added per 1 kilogram of dry base. The glue should be thick, like sour cream.
- Next, the adhesive base is applied to the foam itself and pressed along the slope . Do not forget about adding 1-2 centimeters above the level of the opening.
- After the main gluing of the slopes, the joints are treated with glue . After drying, the product is additionally coated with the base using a roller.
- Next you need to glue the fiberglass mesh . Perforated corners are placed on internal and external joints.
- The mesh is primed on top. Before doing this, it is better to cover the glass with masking tape.
Installation of slabs
The technology for installing thermal insulation is practically no different from installing slopes, but slabs are already used here. They are located vertically, stacked in a checkerboard pattern - this will reduce heat loss through the resulting seams.
The first line of insulation is installed along the guide profile . Before applying glue to the foam, each of the slabs can be processed with a toothed shaft. The adhesive base is applied with a regular spatula, without excess (acceptable thickness - up to 2 millimeters).
To provide additional structural rigidity, the use of mushroom dowels is allowed . The optimal layout for their installation is 100 by 50 centimeters (horizontally and vertically, respectively).
