Hello readers of my blog! Today we will talk about how to plaster walls with cement mortar with your own hands. It would seem that the matter is not tricky, but when you are faced with this problem, you have to think about how to do it correctly, what preparation to do, what materials to choose. Thus, I decided that this article would be useful to someone, and I am devoting my efforts to this subject. In it, I will answer a number of questions that will arise immediately before How to plaster walls with cement mortar with your own hands, and some even after that. This topic is quite broad, because before work, thorough preparation is necessary, but how to do this? And this is a separate topic. You can learn about all this in great detail in the article below. How to plaster walls with cement mortar with your own hands
Plastering is a process that improves the quality of the treated coating and increases consumer properties accordingly. Thanks to today's material, you will learn how to mix mortar for plastering walls with your own hands.
All proportions are given separately from the cooking technology. We will also consider a list of ready-made mixtures suitable for people without experience in such matters. Please share your feedback in the comments.
Ready-made mixtures for preparing mortar for plastering walls
For those who don’t want to bother, we advise you to purchase a ready-made composition. The manufacturer indicates on the packaging its recommendations for diluting the solution. You won't have any difficulties.
No. 1. "Knauf Diamant"
Price – 340 rubles.
Decorative plaster, which is a colored mixture based on cement. The filler is quartz sand. The advantages include excellent water-repellent characteristics, as well as immunity to temperature changes and ultraviolet radiation.
It is used both for the facade and for finishing walls inside the house. The proportions are such that for 25 kg. the mixture is supposed to be 7.5 liters.
water. The prepared solution must be used within 2 hours maximum. Packaging in 25 kg bags.
№2. «UNIS»
Price – 280 rubles.
An excellent option for finishing a room inside or outside. Among the advantages, we highlight the absence of shrinkage, resistance to moisture, pressure and temperature changes. The composition is distributed over the walls in a layer of 3 cm, and there is no need for reinforcement.
You can make your own mortar for plastering walls, but it makes sense to purchase this mixture. The breeding proportions are as follows: per 10 kg. composition is supposed to be 1.6-2 liters.
water. The solution must be used up within 2 hours. Packaging is carried out in 25 kg bags.
No. 3. "Prospectors"
Price – 190 rubles. Cheap composition for further dilution of the solution. It is made on the basis of cement, the final coating is strong.
After distribution, the mixture does not shrink and there is no risk of cracks. As for the proportions, for 10 kg. dry composition accounts for 2.6-2.8 liters.
water. After mixing, the solution must be used within 1.5-2 hours. Packaged in 25 kg bags.
No. 4. " Weber Vetonit "
Price – 360 rubles.
Premium composition, cement plaster. Among the obvious advantages, it is worth highlighting the absence of shrinkage, the strength of the final coating, ease of application, resistance to moisture and temperature changes, as well as the plasticity and quality of the product. When breeding, you should be guided by the proportions: per 10 kg. dry composition accounts for 2.5 liters. water. The solution must be applied within 3 hours, it will dry for 2-6 days.
No. 5. "Osnovit Flywell T-24"
Price – 240 rubles. If you need a cement-based solution for plastering walls, there is no point in making it yourself.
Consider this option. Pros: ease of application, resistance to moisture, frost and temperature changes. Proportions: for 10 kg.
dry mixture accounts for 3-4 liters. water. On the shelves of construction supermarkets you will find them distributed in 25 kg bags.
Self-preparation of the solution - proportions
If you don’t have the funds to purchase a special mixture, you can make it yourself. We will present the proportions for lime and cement mortars, and below we will consider the mixing technology.
No. 1. Mortar
Before you make a lime mortar that is ideal for plaster, study the proportions:
No. 2. Cement mortar
Since you can prepare a mortar for plastering walls from cement and sand, we present the ratio. The finished composition is distributed over the walls in three layers, each of them having its own proportions:
Self-preparation technology
Now that we’ve figured out the ratio, let’s study the technology for mixing lime and cement mortars.
No. 1. Mortar
1. The composition is prepared long before the intended plastering of the walls. Take care of this 2-4 weeks in advance. If lime is properly slaked, it will be stored for a long time without loss of quality.
2. Do-it-yourself mortar for plastering walls is made after preparing the appropriate utensils. You have studied the proportions, now take a non-rusty metal container; plastic containers are not used.
Quicklime is considered a toxic component, so make sure you have a mask and gloves in advance. Take care of your mucous membranes and skin to avoid burns.
3. Pour lump lime into a basin (1 part), pour in cool water (2 parts).
Mix the contents with a stick or shovel. This will speed up the hydration process. The duration of extinguishing can take up to half an hour.
Everything will depend on the composition of the lime. As soon as the steam release decreases, stir everything again. Repeat several times.
4. When the reaction is completely complete, stir the grounds one last time.
Cover the container and leave for 12-14 days. Over the allotted time, the mass will become plastic. In addition, all lumps will disappear.
5. If you are going to carry out work on a large scale, you will have to dig a pit of at least 1 m.
in depth. Lime is poured into the hole. Next, you need to water it with water from a hose.
As soon as the chemical reaction stops, an impressive layer of sand is poured in (in accordance with the proportions above). The pit must be covered with a wooden shield. After 2-4 weeks, the composition can be used for its intended purpose.
The solution for plastering walls is quite simple to make. It is enough to mix all the components with your own hands and wait the specified period. If you follow the proportions, you will end up with an elastic dough.
Cement mortar
To finish the facade or walls in a room, you can use cement mortar. The plaster will be applied in 3 layers. Let's look at everything in order.
Layer No. 1 – spray
1. Before preparing the cement mortar, you should know that the first layer will be a little liquid. This is necessary for plastering walls using this technology.
The layer thickness should not exceed 4 mm. You will need 25 kg. cement grade M500.
2. Prepare a container of sufficient size and pour 6 buckets of sand into it (bucket volume 10 liters). Don't forget to sift it first. After this, add cement and mix everything thoroughly with a shovel.
3. Next, 15 liters are poured. water.
Mix the ingredients vigorously. If necessary, break up any lumps. As a result, you should get a homogeneous mass.
4. Finally, pour in another 10 liters. water and stir the grounds thoroughly. Next you can apply plaster.
Layer No. 2 – ground
1.If you have made a cement mortar for plastering the walls and sprayed it yourself, proceed to the next step. Keep in mind that the second layer is distributed immediately after the first one has set. The cement mortar must not be allowed to harden completely.
2. When preparing the primer layer, observe all proportions.
When applied, its thickness should not be more than 15 mm. When performing work, there is no need to use mesh for reinforcement. The second layer should be made of a mixture with a structure like stiff dough.
3. Pour 25 kg into a container.
cement, keep in mind that you need to add 15 ml to each bucket. liquid soap. Next, add 5 buckets of sand (sift in advance).
There will be enough water in quantities of up to 20 liters. Mix all ingredients in the same order as described. Apply.
Layer No. 3 – covering
1.To make the final layer, you need to purchase the finest sand. In addition, it must be as clean as possible. The thickness of the final layer should not be more than 3 mm.
2. It is recommended to add lime paste to the final layer. As a result, the surface is much easier to rub, and it does not shrink.
3. If you use a concrete mixer, the mixing process is slightly different from manual mixing.
Pour about 17 liters into the device’s container. water (total 25 liters required). After this, fill the bag of cement.
4. The mixture is kneaded for about 3 minutes. Next add 100 kg.
sand and add the remaining water. Mix the ingredients for about 5 more minutes. If you decide to add lime paste, it must be mixed together with cement in an amount of 55 liters.
It is easy to understand that preparing a solution for plastering walls is quite simple.
If you need large volumes, it is better to use a concrete mixer. In other cases, you can handle the task yourself. Don't forget to respect all proportions.
Plastering walls with cement mortar
Apartment renovation includes a whole range of work aimed at leveling the surfaces of walls and ceilings. It is no secret that most Soviet-built buildings do not have perfectly straight walls.
In order to eliminate this defect, the installation of plasterboard panels or lining can be used, however, these methods are associated with the appearance of voids in the walls, as well as a significant reduction in the usable area of the rooms.
To avoid such shortcomings, you can use plaster. This is the oldest and at the same time the most popular method of leveling walls. In turn, of all possible materials for plastering, cement mortar has been the most widely used for many years.
This is not surprising if you take into account the following advantages:
Strength.
A high-quality mortar applied to the wall in compliance with all technological features of the plastering process can last for many years. The mortar is easy to manufacture and apply. If you have certain qualities, such as accuracy and attentiveness, as well as a clear knowledge of the sequence of actions, anyone can cope with this. Low cost. Today, cement mortar is perhaps the cheapest material for plastering walls.
Despite such wonderful advantages, it is possible to perform high-quality plastering of walls with your own hands in the absence of relevant experience only by showing maximum diligence and first familiarizing yourself with the peculiarities of carrying out such work.
The procedure for plastering walls with cement mortar includes four main stages:
Preparing the walls
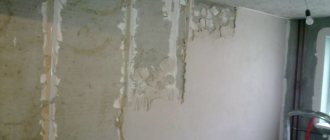
The first stage of preparing a wall for plastering, which follows immediately after removing furniture from the room, is to remove a layer of old plaster or paint. This is a rather labor-intensive process for which a hammer drill or a hammer with a chisel is used.
To increase the efficiency of removing old paint (the most problematic type of coating in this regard), they resort to the use of special grinding machines. For home repairs, it may be worth renting such a tool for a short period of time.
If, during the process of removing a layer of old plaster, significant cracks or recesses were discovered in the wall, they must be repaired using a small amount of cement mortar and a special reinforcing mesh.
If the wall being treated is not monolithic, but is made of bricks or blocks, then all its seams must be deepened for better fastening of the plaster. Shallow notches are applied to the concrete wall using a hammer drill or chisel for this purpose.
The next stage of preparatory work is to apply a primer to the walls using a paint brush.
Depending on the material from which the wall is made, the process of preparing it for plastering may differ slightly. In general, to ensure reliable adhesion of the cement mortar to the wall surface, it is necessary to use a plaster mesh or tile adhesive applied with a notched trowel.
If you use glue, then after applying it you need to wait at least a day. This is done to give the glue a chance to dry. It should be noted that this method is not suitable for plastering large area walls.
Preliminary work for walls made of foam block, cinder block or shell rock can simply consist of generously wetting them with water.
However, the use of reinforcing mesh can significantly increase the strength of the plaster, prevent it from cracking during the drying process and significantly increase its service life.
If there is no factory-made mesh, homemade plaster reinforcement is sometimes used. To do this, using quick installation, aluminum wire is fixed to the walls.
The mesh used in plastering work is an elastic metal product that is attached close to the wall using dowels driven into it in advance.
In this case, the attachment points should be placed at a distance of 30 to 40 cm from each other in a checkerboard pattern. When purchasing reinforcing mesh for plaster, it is preferable to choose those types that have an anti-corrosion coating. Otherwise, you will have to cover such a product yourself with a layer of primer or paint.
After making sure that the installed mesh is firmly attached to the wall, you can begin installing guide beacons, which are usually used as a perforated corner of varying thickness (depending on the thickness of the plaster layer).
Guide beacons can be attached to the wall in one of the following ways:
Using screws. This fastening method is somewhat more labor-intensive; as a rule, it is used if it is necessary to eliminate significant level differences in the plane of the wall. In order to secure the screw, wooden strips protruding from the wall are hammered into pre-drilled holes with a hammer drill.
After this, marks are applied to them corresponding to the required level. The patches are cut according to these marks, and then a beacon is mounted on them. In order to prevent the corner from bending when applying plaster, you need to place a certain amount of cement mixture in advance in the openings between adjacent fastening points.
To properly secure each beacon by level, you can use guides made of fishing line or thin rope.
First, using a plumb line, the correct position of two threads, fixed vertically at different ends of the wall, is set. After this, focusing on them, using a level, pull the horizontal threads. This system greatly simplifies the process of installing beacons.
Preparatory work
Professional builders believe that good quality plaster can only be achieved if a third of the allotted time for leveling walls is spent on preparatory work. Conventionally, they can be divided into several stages:
- I - cleaning the walls of everything unnecessary, including old finishes;
- II - surface repair;
- III - elimination of various types of pollution;
- IV - ensuring good adhesion of the plaster to the wall;
- V - display of beacons.
In addition, some experts include the preparation of a solution as preparatory work.
Stage I: cleaning the walls. Work to prepare for applying plaster begins with the removal of lamps, sockets, switches, and various fasteners from the walls. At the same time, we must not forget about the insulation of exposed electrical wires. This operation is required even during a power outage.
After this, the old finish is removed. The nuances of the technology are outlined in the material “How to prepare walls for plaster?”, which details how to remove old wallpaper, paint, ceramic tiles, and loose plaster.
Stage II: surface repair. The walls, after removing the finishing and plaster, are carefully inspected. In a reinforced concrete wall, all defects: microcracks, chips, peelings are repaired with repair mortar. A little more difficult with brickwork. Here you may encounter a continuous crack formed during the shrinkage of the house, loose bricks and damaged masonry seams.
Through cracks are reinforced with a metal rod, medium-sized cracks are reinforced with self-tapping screws. After this, they are treated with a primer or cement laitance, and then sealed with CPR. Loose bricks are removed from the masonry. The masonry mortar is knocked off from the sides and top. The removed brick is reinserted onto the mounting foam (possible, but not advisable) or onto the cement mortar.
Repair of a masonry joint comes down to deepening it by 20-25 mm, priming and sealing with DSP or polymer compounds. In wooden houses, repair work is reduced to caulking the roof gaps, if such work has not been performed previously.
Stage III: cleaning the walls from dirt. The plaster solution does not adhere to soot, paint, or oil marks. They absolutely need to be removed. Regular dust and dirt are wiped off with a wire brush.
Oily clay or a 3% solution of hydrochloric acid will help remove traces of oil on concrete and brick. There is an ax or plane on the tree. The cleaning process is described in more detail in the work “How to prepare walls for plaster?”
Stage IV: ensuring traction. The durability of plaster primarily depends on the strength of adhesion to the wall material. It can be made of concrete, brick, aerated concrete, wood. And each of them has different adhesion to the CPR, which requires some technological operations to achieve a good level of adhesion.
Concrete. This type of material does not hold cement mortars well. The solution was found in attaching a metal mesh to the wall. With the advent of new types of building materials, plasterers began to use a different technology:
- Using a puncher or a chisel with a hammer, notches about 5 mm deep and 5-10 cm long are made on the surface of the walls. Moreover, the more there are, the stronger the plaster will hold;
- The concrete surface is primed with a deep penetration primer twice.
Brick. Notches are also made on it. But manually, using a trojan, a cog or a chisel with a hammer. Masonry joints are deepened by 10 mm. To be on the safe side, the brick can be primed.
Aerated concrete. There are several ways to achieve good adhesion on an aerated concrete wall:
- use a chainsaw to cut indentations that will hold the plaster;
- apply 2 layers of penetrating primer;
- glue the plaster fiberglass mesh.
Which option is better and how to do the work correctly, you can see in the article “How to plaster walls made of aerated concrete.”
Important: if the wall was built from several materials, you cannot do without a plaster mesh.
Tree. The most difficult thing is with wooden walls. The cement mortar does not stick to them at all. The solution to the problem is to attach fiberglass mesh to the tree or fill it with shingles. The technology is described in detail in the work “Plastering wooden walls inside a house with your own hands.”
Stage V: installation of beacons. It is possible to obtain an ideal plane of plaster vertically and horizontally only with the help of beacons. Therefore, the technological operation of installing them must be approached responsibly, having previously studied all the intricacies of the process, described in detail in the material “How to install beacons on a wall for plaster?” The topic is large, so we will limit ourselves to listing the operations:
- the wall is hung;
- the plane of the plaster is determined;
- a solution of cement and sand is prepared;
- metal profiles are cut to size according to length;
- piles of DSP are applied to the wall;
- beacons are installed.
Preparation of cement mortar
After completing the preparatory work, you can begin preparing the cement-sand mortar for plastering the walls. The percentage of its components depends primarily on the brand of cement.
As a rule, when preparing a mortar for plaster, M400 cement is used, mixed with sand in a ratio of 1:4. Before adding sand to the solution, it must be sifted through a fine mesh.
To prepare the solution, it is preferable to use a concrete mixer, since this will not only speed up the completion of such work, but will also significantly improve its quality.
If there is no concrete mixer, which happens very often when doing renovations in an apartment with your own hands, you can prepare the solution manually, using any suitable container.
The cement-sand mixture should resemble dough in consistency. In this case, it will adhere well to the surface of the wall when thrown, and at the same time will not slide off it under the influence of its own weight. However, it should be remembered that you cannot apply more than 1 cm of plaster at a time.
What brands of cement and mixtures to buy
If there is a large volume of plastering work, it is cheaper to buy cement of different brands:
- M50 - has low strength, minimal shrinkage, and good ductility of the solution. Such qualities are ideal for the finishing layer of plaster - grout;
- M100 - used for plastering indoor walls;
- M150 is a universal brand of Portland cement. Can be used for both external and internal work;
- M250 - main purpose: plastering facades.
For small volumes of work, on the contrary, it is more effective to use the M400 or M500 brands. From them you can prepare a solution of the desired consistency, strength and ductility. Here it is necessary to take into account that these types of cement are more expensive, but there will be practically no residue, unlike the option of purchasing cement with a lower level of strength.
Attention: for beginners in the plastering business, we especially note that the M300 cement brand is not suitable for preparing plaster mortar.
When purchasing bags of ready-mixed mixture, brand M100 is used for leveling load-bearing walls, M50 - for internal walls and partitions, M25 - for finishing the plaster layer (grout).
Calculation of mixture consumption
The consumption of cement and sand for plastering a wall depends on many factors:
- the amount of vertical deviation of the plane - the larger the blockage, the more plaster will have to be laid for leveling;
Important: if the blockage is more than 5 cm, it is cheaper and easier to level the wall with “dry” plaster (sheets of plasterboard).
- mandatory requirement to bring internal angles to 90o. If the corners can be left obtuse and sharp, less cement and sand will be required;
- quality of cement - decreases as the shelf life increases. Naturally, more of such a binder is needed for the same volume of solution;
- type of walls. A different volume of plaster is needed for a leveling layer of equal thickness for wood, foam blocks, gas silicate blocks, concrete, and brick. The highest consumption for wooden walls is 1.5-2 times higher than the same figure for plastering brickwork, and approximately 2.7-3 times higher for concrete.
Plasterers use several methods for calculating the need for binders and fillers. The most accurate results are obtained after installing the beacons.
Key points are marked on the wall at regular intervals in height and length. The more there are, the more accurate the measurement result. After this, in each marked place, the distance from the surface of the wall to the upper edge of the lighthouse, or more correctly, to the plane that the lighthouses form, is measured. The measurement results are summed up and then divided by the number of measurements. This is how the average height difference between the wall and the beacons is found. 0.6 mm is added to the result obtained - this is approximately the thickness of the plaster that will cover the beacons.
The next step is the area of plaster. To do this, windows and doors are subtracted from the wall area. The result obtained is multiplied by the thickness of the plaster layer. The result is the amount of solution in m3. In accordance with SNiP, 1 m3 of plaster mortar should contain 240 kg of M400 cement.
Then it’s simpler: multiply the cubic capacity of the solution by 240 and divide by 25 (the weight of the bag in kg). The final figure shows how many bags of cement need to be purchased. The amount of sand is tied to the volume of cement. When making calculations, their ratio should be taken into account. So, for spraying, 2 parts of sand for Portland cement M400 are required, soil - 3, covering 1-2, grout - 1.
It’s easier with ready-made mixtures. There, the bags must indicate the consumption rate of the mixture in kg (sometimes indicated in l) per 1 m2 with a plaster layer of 10 mm. In this case, the total volume of the solution (wall area multiplied by the average thickness of the plaster) is divided by 100 and multiplied by the consumption rate. The result obtained is divided by the weight (volume) of the package.
Application of the solution
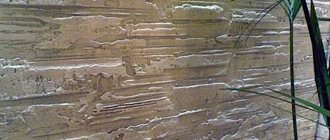
When the solution is thoroughly mixed, you can begin applying it to the wall. This is done by throwing the mixture using a trowel or a special ladle.
It is possible to achieve high efficiency in such work only by acquiring appropriate experience through repeated repetitions. However, to achieve a good result, it is enough to follow a few simple rules:
Sometimes, to apply the solution to the wall, a technology is used that involves dividing the layer of plaster into three parts.
For the first of them, a more liquid solution is prepared, which is applied to the wall in a thin layer by spraying. After it hardens, a second layer of solution is applied, the consistency of which resembles dough. The third, final layer, for the manufacture of which carefully sifted sand is used, is used to finish grouting the wall surface.
Applying plaster in difficult and hard-to-reach places
Such places are wall corners, pipes running along the walls, and the like. All difficult places should be plastered last, after the main plaster has dried.
Apply the solution to the corners of the walls in the same way as to the main surface. On the rule, we cut off the corner and rub in the solution, pressing the rule closely to the first beacon. Apply the solution under the pipes with a spatula or trowel, and rub it in with the same or a thin lath.
A few tips at the end:
- choose only high-quality tools and materials,
- always clean tools when not working,
- while working, wet the walls and tools with water,
- Make sure that the room is not too hot, otherwise the plaster should be periodically moistened with water from a spray bottle, then it will not dry out too quickly and cracks will not form on it.
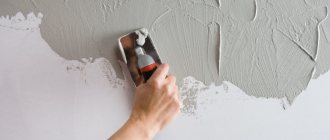
Grout
This is the final stage of plastering work using a cement-sand mixture.
You can start grouting when the layer of applied plaster has dried a little. In order to determine its readiness, you need to lightly press on the wall surface with your finger. If no trace remains, then you can start grouting.
The tool used when performing this type of work is a floor polisher or a grout board.
Grouting is done by performing circular movements of the tool along the surface of the wall. To prevent the cement-sand mortar from sticking to the board, it is necessary to constantly wet its surface with water. As a result, you can achieve a uniform and smooth outer layer of plaster.
After completion of work, you should thoroughly wash all tools used. The same applies to a concrete mixer; after each preparation of the solution, you need to pour a bucket of water into it and let it work for a while.
If you strictly follow all the described steps, then plastering walls with cement mortar, done by yourself, will not be such a difficult process. With some effort, you can get a smooth and durable surface of the walls in the premises.
How to prepare a solution for plastering walls
Every person wants his house or apartment to be cozy and made with high quality, so that it will serve for many years. Therefore, it is not in vain that people strive to get a good result for the money invested.
Plastering walls plays an important role in the decoration of a home, being a very important component of both repair and construction in general and a preparatory stage for the final finishing of not only interior work, but also exterior work.
Materials and tools
To perform plastering work you need to buy:
- Portland cement or ready-mix in bags;
- sand: quarry sand for spraying and soil, river sand for covering and grouting;
- propylene or fiberglass fiber - prevents shrinkage and cracking of the plaster layer;
- factory-made plasticizers or PVA glue - accelerates the hydration process, liquid soap - slows it down;
- primer for a specific type of wall, for example, “Betonokontakt” (concrete), Ceresit CT 16 (brick), Tikkurila Otex AP (wood);
- plastering metal mesh with a plaster layer thickness of more than 3 cm.
In addition, materials for constructing beacons are purchased:
- T-shaped profiles 6 mm high;
- clips or “Kremmer” clamps – attach the profile to the screws;
- self-tapping dowel.
The following tools and equipment will be needed at different stages of work:
For preparatory work:
- hammer;
- chisel;
- metal brush;
- bush hammer (troyanka, cog);
- brushes and roller for applying primer;
- primer tray - needed when using a roller.
Beacon installations:
- stepladder or portable platform (horses);
- a hammer drill or electric drill for drilling holes for dowels;
- grinder or hacksaw;
- a screwdriver with a cross bit or a Phillips screwdriver;
- plumb line;
- level or laser level;
- square;
- ruler;
- marker;
- cord.
Plastering works:
- concrete mixer (can be rented for 2 days for about 600 rubles);
- hammer drill with mixer;
- ladle;
- falcon;
- trowel;
- grater;
- grater;
- fry;
- ironer;
- spatulas.
Attention: if novice plasterers do not know what tools we are talking about, we advise you to look at the work “How to properly plaster a brick wall?”
Binders
Time passes and today a considerable selection of solutions for plastering work is offered. In order to find the composition that is right for you, either as a customer or as a contractor, we suggest that you familiarize yourself with the types of plaster mixtures.
Every builder who keeps pace with the times and strives to develop comprehensively to improve the result knows that any solution must include two important components - a filler and a binder.
The filler for plastering walls is traditional and well-known - sand. It is a mandatory element added to the mortar, which foreshadows cracks and gives strength to the plaster. But the binding components depend on the work being performed and they can be: lime, clay, cement, building gypsum.
Mortar with the addition of cement is often used for external work, because it is the outside of the building that is most exposed to atmospheric influences (rain, snow, wind, heat); for interior work, the use of such a solution will be effective for plastering the walls of the bathroom and kitchen.
Solutions that include such a component as lime are intended for finishing rooms that are not exposed to moisture. It is the plaster lime mixture that is one of the universal ones for interior work.
Clay mortar is more suitable for dry climates, but is also used for interior wall decoration in rooms with acceptable moisture levels.
Gypsum plaster essences are very often used for finishing work on ceilings and in rooms where a constant microclimate is maintained.
The most labor-intensive process is plastering the house, which will require quality.
Firstly, all materials used for preparing the above solutions must be sifted through a so-called construction sieve. Secondly, you need to take into account that there are plaster mixtures with high and normal fat content, as well as thin solutions. Thirdly, a good mixture should be of uniform thickness.
Skinny plaster tends to generate dust and does not adhere well to the surface of the walls, and wallpaper and paint do not stick to it. If we talk about greasy plaster, then it tends to spread, which allows moisture to get into the cracks and further destruction.
Determining this is not difficult; you just need to take a paddle to mix the components of the solution and mix, determining the behavior of the prepared mixture:
Solutions that are used for plastering external facades, walls and ceilings are usually divided into simple and complex. Single-component ones include:
There are general recommendations for creating all formulations, and they are as follows:
How to properly plaster concrete walls
Concrete walls are practical and durable, but they are extremely rarely even, which makes finishing work difficult. In order for wallpaper and any other coating to adhere well to the surface, it must be prepared. The best solution to the problem of uneven walls is plaster. Before you figure out how to plaster concrete walls, it’s worth saying a few words about the advantages of this leveling method.
Liquid plaster has the following advantages:
- protects against moisture;
- allows the walls to “breathe”;
- using this material you can create different textures (concrete plaster in the interior is popular today);
- has good noise and heat insulation properties.
Before you begin processing the base, you need to decide on the composition of the plaster.
How to prepare cement mortar for plaster
The most used and high-quality mixtures are those that consist of 1 part cement, to which 2-4 parts sand are added. Further:
The resulting solution should be used within an hour, as then it loses its strength characteristics.
Preparation of lime mortar is a more intensive process, which, first of all, includes slaking lime: pour lime with water in a 2:1 ratio into a container with a volume 3 times the mass of the element used. Allow the slaked mixture to settle for 24 hours.
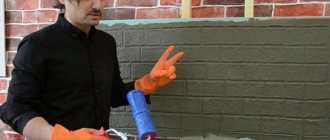
Do not neglect safety measures, use a respirator, gloves, thick clothing, and goggles.
Add sand to the prepared lime mortar; the recommended ratio is 1:3. To achieve the desired consistency, add water in small volumes; for better mixing results, you can use a drill with special attachments for plaster mixtures. The finished plaster should resemble a viscous, thick dough.
Lime can be used with cement, gypsum, and clay.
cement-lime mortar (ratio 1:10) is popular in buildings with temperature changes and in wet areas. Cement gives strength to the prepared mixture; for preparation you need to use a container 10-20 cm deep; lime-gypsum mixture (5:1) is more durable, but tends to harden quickly, within 10 minutes.
It is most often used for decorative or repair work, when the surface is fully prepared for application. Here the consistency should correspond to liquid sour cream, which will facilitate convenient use; lime-clay plaster is often prepared from equal parts of lime and clay dough, to which 5 times more sand is added.
Clay mortar in its pure form is a thing of the past, because it is not strong enough; it is known that it was previously mixed with straw and sawdust.
How to prepare cement-lime mortar for plaster
The preference in choosing plaster compositions for professional builders comes down to cement-lime mixtures, especially when finishing brick walls. And all because they have high ductility and can be used both for plastering work and for the above-mentioned laying of blocks and the same bricks.
To prepare cement-lime compositions, the following are necessary: cement, slaked lime, sand and, of course, water. And also the following tools: a bucket, a construction sieve, a convenient mixing container, a shovel and trowel, a construction mixer.
And so, let's proceed directly to preparation:
This preparation technique is used for both masonry and plaster mixtures. The only difference is in the number of elements used.
Modern technologies
No matter how much human labor is valued, nowadays the people of our planet are accustomed to and prefer modern technologies. Development has not passed over the construction sector either. Speaking about plaster, it would be a sin not to mention its currently widespread form - mechanized.
Machine plastering of walls is a high-quality and fast method of plastering, in which a ready-made mixture is used, but it must be dry, since in a filled hopper the pump dilutes it with water automatically.
Next, the composition enters a special chamber, which is called a mixing chamber, where it is finally mixed and only then supplied to the surface to be treated using hoses.
You can immediately highlight the priorities of such plaster:
The only drawback that exists in mechanized plaster is the heaviness of the “machine” itself.
Plastering walls with your own hands using lime mortar
During construction or renovation work, you always have to face the need to finish walls with plaster. This process cannot be called creative, so most people don’t like it.
At the same time, correctly and accurately applied plaster guarantees a problem-free finishing of the walls. But how to do everything yourself and without flaws? The video of plastering walls with your own hands using cement mortar is intended to teach you how to do this.
Proportions for preparing cement mixtures for plastering walls
If the main component of the solution is sand, and the binder is cement, then such plaster is called cement-sand plaster. This composition is convenient for leveling both internal and external walls. Just be aware that sand does not like moisture.
For this reason, this type of plaster is not recommended for use in areas of excessive moisture. You can prepare a mortar for brickwork in a ratio of 1:5 for plastering walls with your own hands. A video of mixing a cement-sand mixture will help with this.
Dry plaster mixture is added to water and mixed using a construction mixer
Today, few people prepare their own plaster mixtures from individual ingredients. Ready-made dry formulations are available for sale, which simply need to be diluted with water according to the instructions and mixed thoroughly. Mixing can be done with a drill with an attachment.
How to plaster walls with your own hands for a beginner
Sooner or later, any householder is faced with the problem of plastering walls. Whether it’s an old apartment that hasn’t seen a major renovation for a long time, or a large one, or a newly built country house. In any case, before gluing wallpaper or laying tiles, it is necessary to perform preliminary surface preparation.
Plastering work is a very labor-intensive process and requires the use of special knowledge. Of course, it is better to seek help from professionals, but this can cost you a pretty penny. But what to do if you don’t have that very penny? You can learn this. Below in a detailed guide we will tell you about the stages of the work, how to prepare the surface and how to finish.
Mortar for plastering walls, proportions: video instructions
When preparing your own plaster mixture, you need to take into account the brand of cement. The higher it is, the more sand will be required. Better adhesion will be ensured by PVA glue, which can be added to the solution.
Tools that you may need to independently plaster walls with cement mortar
Plastering walls with your own hands with cement mortar necessarily includes preparatory work.
If this is a new construction, and there are walls made of ordinary ordinary bricks, then there is no great need to prepare them for applying the plaster mixture. You just need to cut down the protruding bricks with an ax, if any. This will help you avoid applying too thick a layer unnecessarily.
The cement mortar is first spread onto the wall using a trowel, then the mixture is evenly distributed using the following rule:
If the wall is made of facing bricks, then you need to drive nails between the rows and tie everything together with aluminum wire.
It would be even better to secure the plaster mesh. The wall itself must be primed and tile adhesive applied to it using a notched trowel. Only after this can the mixture be applied.
Concrete and foam concrete blocks also require preliminary priming and application of glue. A special plaster mesh will help make high-quality plaster on such walls. Otherwise, the plaster mixture will bounce off them.
Wooden walls are much more difficult to plaster. To do this, you definitely need to attach a sheathing of slats or a ready-made mesh sold in stores to them. You should also prime it.
For plastering walls, a rule of 1.5 - 2 meters in length is used
In the case of repair work, before preparatory work, it is necessary to completely dismantle the old coating to the very base. If parts of the old plaster remain on the walls, the quality of the new work cannot be guaranteed. Do-it-yourself wall plastering presented in any video always begins with preparatory work, the quality of which determines the success of the entire repair.
Walls that are too dry do not allow the mixture to stick. Therefore, before plastering, it is necessary to wet the bricks well.
The nuances of plastering outside
The step-by-step technique for plastering walls from the inside and from the street side is the same. The nuances lie in the preparatory work and the choice of the type of solution.
- For the facade, it is better to prepare a cement-lime mortar for plastering the walls. It is stronger and better able to withstand moisture. Therefore, more durable.
- The walls must be covered with plastic or metal plaster mesh.
- Before covering, the corners of the walls and the slopes of doors with windows are closed with a special reinforcing corner.
- Before the final operations, the plaster primer is treated twice with a deep penetration primer.
- Each layer of plaster cannot be thicker than 15 mm.
Finally. The conditions for applying plaster yourself do not contain problems. It’s easy to find out what components and how many of them are needed in the solution, to understand how each layer is laid. A little more difficult in the final stages. But even here, a little training in inconspicuous areas allows you to complete the work with good quality.
Source
Algorithm for plastering walls
As in any construction process, plastering walls has its own specific rules and sequence of actions. To apply plaster to a prepared brick wall, you must:
Attach the plaster mesh to the wall using dowels driven in in a checkerboard pattern.
The mesh must have an anti-corrosion coating. Otherwise, traces of rust will appear on the wall before the plaster has completely dried. The dowels are connected to each other with Z-shaped patterns using knitting wire.
Plastering a wall using reinforcing stacks
Guiding beacons are installed. A smooth surface can only be created by plastering the walls along beacons with your own hands.
Wooden slats can be used as beacons, but professionals use perforated slats, sold in stores. Beacons are installed strictly according to level.
Scheme of optimal placement of wall beacons
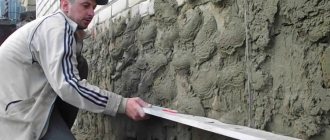
The process of applying the mixture is the longest and most labor-intensive. The mortar is thrown onto the wall using a trowel or ladle, whichever is convenient for you. Throwing movements must be made from bottom to top.
It is necessary to fill all the space between two adjacent beacons. Then, using a special rule, we level the applied mixture. In this case, the ends of the tool should slide from bottom to top along the surface of the profiles.
One of the difficult processes in plastering walls with your own hands is the design of internal corners. To make the task easier, you can use a homemade corner level from a building profile
During this movement, the rule must be moved sharply to the right and left. This allows the solution to be evenly distributed over the wall, compacting it. The result is a smooth wall.
Having completed the first segment, we move on to the next. We repeat all movements again. In the video of plastering walls using beacons with your own hands, you can see in detail what movements are made by the rule.
An example of attaching a construction beacon to a wall
When the walls dry out a little, they need to be rubbed down. For this purpose, a floor or grout board is used.
These tools move across the surface in a circular motion. The process continues until the surface becomes smooth. If the plaster has dried out too much before grouting, it can be moistened.
Grouting of dried plaster is done using a polisher
To obtain a smooth surface without cracks, it is necessary to strictly control the drying process. Firstly, high indoor temperatures are unacceptable.
Secondly, the walls need to be periodically moistened with water. Thirdly, you should always immediately repair any cracks that appear. Correct drying control guarantees high quality plaster.
The solution does not stick to the tool soaked in water, which makes plastering work easier.
During all work, the tool must be moistened with water. This will prevent the solution from sticking, which will allow you to carefully and competently plaster the surface.
When the plastered walls are dry, you can start puttingtying them.
Although the procedure for applying plaster to walls is labor-intensive and unpleasant, the quality of its execution should not be in doubt. Unevenness on the walls will not allow you to create a beautiful finish or will force you to take additional leveling measures, which will entail additional costs.
Well, now it's time to finish the article. All the material I wanted to share has been reviewed. I hope it will be useful to you, and you will use it if you need to plaster walls with cement mortar. Improve your own practical skills and gain new knowledge, as they say: “It’s never too late to learn!” That's all, thank you for your attention, successful and easy repair!
Grid installation
The mesh is needed to give strength and elasticity to the plaster layer. It prevents the appearance of cracks that occur during the drying period of the layer and during shrinkage of the structure, and increases the resistance of the surface from mechanical influences. The most popular mesh is with a cell size of 2.0x2.0 cm.
A correctly installed plaster mesh must have an anti-corrosion coating. To attach the plaster reinforcing mesh, special metal dowels are driven into the wall with a pitch of 0.3-0.4 m between each other in a checkerboard pattern. After this, using metal scissors, a piece of mesh of the required size is cut.
Installation begins from bottom to top. We put the reinforcing mesh on the installed dowels. Then we wrap each dowel with knitting wire on top. The pattern of the wound wire should resemble the letter Z.
It is also possible to use pieces of beacons. This is done as follows: the prepared plaster mesh is straightened along the wall by one or two people, and the other begins shooting, using dowel-nails together with pieces of beacons.
The joining of two pieces of mesh must be done with an overlap of 15 cm on each side. This ensures the integrity of the structure and its resistance to mechanical damage.