Types of plaster mixtures, features of their preparation
The plaster solution consists of three components:
- filler that ensures the strength of the coating (cleaned, washed sand);
- a binder that imparts plasticity to the mass (cement, clay, lime, gypsum);
- water that does not contain salts.
Note: the choice of binder component is made taking into account the location of the work, its purpose, and the characteristics of the base that will be covered with the solution.
Clay-based plaster compositions
Clay mixtures have been used for leveling walls for a long time. This natural raw material has:
- affordable price;
- environmental friendliness;
- thermal conductivity;
- the ability to regulate the microclimate in the room during changes in humidity, to adsorb harmful substances from the air;
- leveling properties (clay mortar for plastering walls eliminates differences in thickness of 5-7 cm);
- elasticity, which makes it possible to apply it even to heated surfaces.
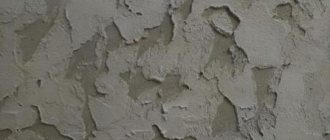
The disadvantage of clay is that it requires lengthy preparatory work (soaking, cleaning), application skills, absorbs moisture, takes a long time to dry, and is short-lived.
Using clay paste you can create different textures
The preparation of plaster solutions, the main component of which is clay, is carried out in the following sequence:
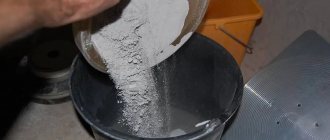
- Alumina is cleaned of contaminants (stones, roots, fragments of branches) and soaked in water for a day, stirring occasionally.
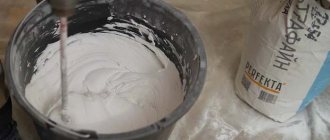
- The mass is kneaded and rubbed through a sieve to ensure uniformity. The resulting raw material should have a creamy consistency.
- Clay is gradually mixed with sand. The proportion depends on the fat content of the material. The standard ratio is 1:3 (1 part clay to 3 parts sand). The resulting mixture must have plasticity - not spread or tear when applied. Having achieved the desired consistency, the mixture can be applied to the walls.
This is interesting: since the clay-sand mortar has high thermal conductivity, it is used for finishing walls. The filler (straw, sawdust) will improve the heat-saving qualities of the mixture.
How to thin plaster from clay if it has hardened? You can return the mixture to working condition by diluting it with water and stirring. Alumina quickly absorbs liquid and retains it for a long time, so this solution retains its plasticity for a long time.
Clay paste is used for finishing walls made of brick, stone, wood, adobe
The following can also be added to the clay plaster composition for interior work:
- cement;
- slaked lime;
- gypsum.
Cement gives the mixture strength. It is mixed with clay in a ratio of 0.2:1, followed by the addition of 3 shares of sand. It is very important to observe the frequency of introduction of components. If you dilute clay paste with sand and then add cement, mixing the resulting solution will be problematic even in a concrete mixer.
Please note: it is preferable to use clay-cement mixture for plastering wooden surfaces. The components in it are mixed in a ratio of 1:0.2.
To increase the plasticity of clay plaster, it is supplemented with lime. It is a moderately strong, slightly hardening material. Add 3 parts of sand to the lime-clay dough, prepared in a ratio of 1:0.5.
The addition of building gypsum will speed up the setting of clay plaster. This material is obtained by crushing and firing gypsum stone. It is used separately or as an additive to speed up the setting of construction pastes. The combination of gypsum and clay creates a durable coating that dries quickly. Already 1 hour after applying the rough layer, you can continue finishing work. This will significantly speed up the repair process.
The mixture is prepared from 1 part clay and 0.25 parts gypsum. After mixing the paste, add sand (2-4 parts). The setting time of this plaster is several minutes, complete hardening takes about half an hour.
Note: clay-lime-cement paste is also used for plastering the exterior of buildings.
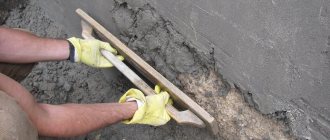
A solution for plastering walls containing clay is used to level surfaces and increase their thickness. It is applied to shingles made of thin wooden slats, which act as reinforcement. The mixture is thrown onto the wall, gradually filling the voids, and then the surface is leveled using a damp wooden trowel.
Plastering with clay mixture on shingles
Lime mortar for plastering walls
Before the advent of ready-made plaster compositions, limestone mixture was used everywhere. Its main advantages were high mechanical strength and low cost, resistance to fungi. But the material also has a number of disadvantages:
- is wet, so it attaches well only to surfaces that absorb water (brick);
- sets slowly (it should be applied in doses);
- short shelf life. The longer the mixture sits, the lower its plasticity.
As the lime coating dries, it becomes lighter in color.
The sequence of preparing lime mortar for plaster depends on the form in which the raw materials are available. If it is quicklime, you need to prepare it - pour dry lime into a metal container (less than half the volume) and fill it with cold water. A chemical reaction will occur, during which the mixture will heat up and increase in volume. Next, it must be closed and left for 2 weeks.
Advice: when slaking lime, you should use protective clothing, gloves, and goggles.
The lime mortar for plaster should contain:
- slaked dough ground through a sieve (1 share);
- fine-grained sifted sand (3 shares).
Recommendation: to ensure that the resulting solution is homogeneous, it can be passed through a sieve. Water is used to dilute the mixture.
The lime mixture is applied to the walls in the following sequence:
- The surfaces are sprayed with a sand-cement-lime composition prepared in a ratio of 2:1:1/5.
- Using a trowel, apply the main layer of plaster. Smooth it with a grater and remove the residue using the rule.
- The surface is sprayed again and the finishing layer is rubbed with a float to make it smooth and uniform.
Lime mortar for plastering walls can be applied manually or by machine.
Lime-gypsum mixture
To make the lime mortar set faster, gypsum is added to it. This composition hardens in 10 minutes, so it requires quick application. For the same reason, it should not be diluted in large portions.
One of the recipes for mixing gypsum-lime mortar for plaster:
- Dilute the standard lime dough, divide it in half.
- Add 1 share of gypsum to ½ of the mixture and mix thoroughly.
- Pour the remaining dough into the resulting solution.
The lime-gypsum mixture has good adhesion and dries quickly on any surface.
Mortar obtained by mixing lime and cement
This paste has increased strength. It can be used to treat walls, even if they have not yet completely dried. Cement-lime plaster is rarely used for finishing premises in new buildings due to its high cost, but it will be appropriate for routine or complex repairs.
The mass has high plasticity and even after drying it resists the formation of cracks. It adheres well to other surfaces (concrete, brick, wood, gas and foam concrete). The mixture can be used in rooms with high humidity, as it is resistant to fungus.
How to make a mortar for lime-type plaster walls? You will need the same amount of lime and cement, as well as sand. The last ingredient is used 2-5 times more than the previous two, depending on the desired strength of the solution.
First, bulk materials (sand and cement) are mixed, and the lime paste is prepared separately. It is diluted with water to a liquid state. The milk obtained from lime is poured into the cement-sand mixture. The resulting solution is adjusted to the required consistency.
Concrete-gypsum mixture provides durable wall covering
Cement plaster
Cement mortar for plaster is used to treat the internal and external walls of buildings and the basement. Traditionally, it is prepared with the addition of sand, proportionality from 1:2.5 to 1:6 (depending on the desired qualities of the solution). This mass has average characteristics in terms of plasticity and ease of application.
The choice of brand of solution for wall treatment is carried out taking into account:
- characteristics of the coating (internal/external, grout, waterproof, heat-saving);
- purpose of the mixture (for spraying walls, rough or covering layer).
| Brand of solution | Consistency | Purpose | Recipe |
| M50 | light | Not used for rough plaster, but exclusively for grouting. | Cement grade 400 + sand (1:6.3) |
| M100 | medium density | For treating walls from inside the building. | The optimal proportion of mortar for plastering walls is 1 (cement): 5 (sand) |
| M150 | dense | For treating damp/damp interior walls, basement elements, facades. | Cement + sand (1:3) |
Tip: to give the plaster mixture strength and water resistance, liquid detergents are added to it. They are dissolved in water (proportion 30-50 ml/5 l).
How to prepare cement mortar for plastering work? To do this, take cement and sand in the required proportion and mix them dry. Then all this is sifted and diluted with water until the plaster of the required consistency is obtained.
Cement mortar for walls must be used within an hour, otherwise it will harden.
After preparing the cement mortar for plaster, begin its application. Treatment of walls with the mixture is carried out in the following sequence:
- Surface preparation - dismantling old coating, paint, wallpaper, tiles, sealing cracks. If the work will be carried out in a new building, it is enough to clean the walls from dust with a brush.
- Padding. It will avoid further delamination of the mortar and improve the adhesion of the plaster composition to the wall. You can purchase a ready-made primer or make it from cement, sand and water.
- Installation of beacons. For this purpose, metal profiles of 6 or 10 mm are used. They are installed from the corner in increments of 1.5 m at a distance of 15-20 mm from the wall. To fix the elements, a gypsum mixture is used, which dries quickly. The evenness of the installation of the beacons is checked with a level and a long rod.
- Plastering walls with cement mortar. It is carried out 4-5 hours after installing beacons on a damp wall. First, the mixture is thrown onto the surface so that it protrudes above the guides by 2-3 mm. Without allowing the solution to dry, it is leveled, stretching it from the bottom up. The thickness of this layer should not exceed 30 mm.
- Removing beacons. When the mixture has partially hardened, the slats should be carefully removed and the voids filled with mortar and leveled using a spatula.
- Covering. It is carried out over a wet rough layer. If the coating is dry, it must be moistened with water using a brush.
- Grout. Apply circular movements over the dried covering layer with a plastic or wooden grater, lightly pressing on the surface. At the same time, the remaining mortar is removed and the wall is leveled. To obtain a perfectly smooth surface, grouting is repeated using a trowel lined with felt.
Note: if all the stages of plastering the walls with your own hands were completed correctly and the first layer was applied efficiently, then the surface under the tiles does not need to be leveled with finishing putty.
Scheme for plastering walls according to beacons
Purpose of the components of the plaster mortar
As we already know, the plaster mixture consists of many different components. Each of which is important and performs its own functions. An excess or deficiency of one of the components of the solution will lead to a loss of quality. That is why it is important to know the purpose and functions of the components of the mixture.
Binder in plaster mortar
If the plaster solution contains only one binder, the composition is called simple. If there are two or more binders - complex. Not all binders get along with each other. For example, gypsum and cement are chemically unfriendly to each other. Therefore, they are used separately or with other binders.
All binders, except polymers, are mineral substances, which is why plasters have the same name. Gypsum, cements and lime are pre-treated thermally, as a result they lose water and are able to react to its presence. When combined with water, these substances form saturated solutions and create crystals.
Liquid in plaster
The solution usually contains more water than is required for crystal formation. Liquid is also needed to give the mixture mobility (workability). In this case, excess moisture can be harmful (the strength of the solution decreases). It is for this reason that the ratio of water and other components must be observed.
Fillers
The production of binders, in addition to clay, requires a lot of costs, so they are much more expensive than fillers such as sand or sawdust. In addition, a solution containing only binders cracks when hardening. Therefore, to reduce the amount of binders (the cost of the solution), as well as to reduce cracking, fillers are introduced into the composition.
Fillers also give solutions a certain structure, for example, coarse sand is used for “bark beetle”; for other decorative mixtures, artificial or natural fibers and shell fragments are used as fillers.
It is better to purchase decorative mixtures ready-made. Their composition was developed and tested in practice by specialists.
Rough (leveling) plaster more often than other components has to be prepared on site. The consumption of leveling plaster mixture is higher, and the cost of a mixture prepared by yourself is lower.
Special additives for plaster mortars
To provide the plaster solution with the desired properties, modifying additives (universal and narrowly targeted) are used. Additives affect the binder (cement), enhancing or neutralizing its individual properties.
In solutions, additives perform the following functions:
- accelerate/slow down the process of crystal formation (setting), for example, for gypsum, the retarder is bone glue, milk, PVA;
- increase frost resistance (ferric chloride and other salts);
- improve plasticity (serve for some retention of water in the solution, prevent the process of delamination of the mixture), for example, liquid glass;
- increase the strength of the mixture (for example, reinforcing fibers (fiber) or additional binders).
Additional components for plasters
To improve the quality of the solutions used or give them certain properties, the following is added to them:
- quartz sand with fractionation up to 6 mm. It is included in the composition of plaster to improve its decorative effect and increase resistance to acids;
- marble flour, crumbs with fractionation up to 4 mm. It improves the appearance of the coating and makes it more durable;
- barite sand. Its presence in the plaster mixture helps prevent radio frequency waves from entering the room. This is important for medical institutions, industrial facilities, residential buildings located in radioactive zones;
- metal shavings. It increases the strength of the coating. But, since the metal is susceptible to corrosion, it is rarely used;
- mica. This mineral is added to plaster mortars to create additional protection against UV waves.
Please note: the finishing mixture should contain no more than 10% additional components.
Range of additives for plaster mixtures
Why does one solution have different proportions?
Leveling plasters consist of several layers that have different functions:
- the spray is intended to create a strong connection between the base material and the overlying, main leveling layer;
- the covering is designed to give the main leveling coating the required evenness, and sometimes smoothness (the required surface quality for gluing wallpaper, applying paint);
- primer – the main leveling material, applied in one or more layers.
Since the functions are different, the solutions differ in their proportions and components. For example, for covering you need a finer filler, since the degree of roughness of the finish depends on the size of the grains. For spraying, the mixture is made thinner than for soil. Confusing the compositions for different layers is a violation of the finishing manufacturing technology.
The period from the moment of mixing the plaster mass to the beginning of its setting is called the life span. At this time, the plaster solution is mobile and can be applied, giving the mixture the desired shape. The lifespan depends on the types of components and composition. For example, gypsum has a short lifespan. To increase or shorten this period, additives are added to the mixture - hardening accelerators or retarders.
In addition to these additives, to give the plaster mixture the necessary qualities, antifreeze (for plastering walls in winter), antifungal and other additives are introduced. Any additives require a fairly precise dosage, since they have their own chemical formula. Their excess can significantly deteriorate the properties of the finished coating.
Compliance with the ratio of plaster components is important. Therefore, when mixing a mixture of individual components or diluting ready-made dry formulations, follow the recommended proportions. This is the only way you will create a plaster stone with the desired qualities.
Criteria for assessing the quality of the solution
What solution is needed for plastering walls? In order for it to meet the necessary criteria, it is prepared using a certain technology:
- all dry ingredients are sifted to get rid of large particles;
- the rough plaster is filtered through a 3 mm sieve, the finishing plaster through a 1.5 mm sieve;
- mixtures for plastering walls should have normal fat content. If it is low, it will worsen the strength of the coating; if it is high, it will provoke the appearance of cracks;
- the solution must be of such a consistency that it holds its shape, does not spread over the walls, or breaks during application and distribution;
- the mixture for rough finishing of walls should be denser than for finishing;
- preparation of plaster mortar with additives is carried out only when necessary.
Important: the quality of the finishing composition depends not only on its components and proportions, but also on compliance with the sequence of their addition.
Important steps in preparing the solution
What affects the strength and hardening time of plaster
The strength of the future plaster layer is reflected in the brand of the resulting mortar. It determines the compression force that the coating can withstand 28 days after application. The following factors influence strength:
- sand to cement ratio;
- type and quantity of additives;
- water-cement ratio (thick ones are stronger than thinner ones);
- hardening conditions;
- drying time.
The proportions of cement and sand have virtually no effect on the drying time of the plaster. The base material is of greater importance: a 1 cm layer on drywall dries in 8-9 hours, wooden surfaces dry approximately 1-2 hours faster than concrete ones.
Use of ready-made leveling compounds
You can mix the plaster mixture yourself or buy it ready-made. The latter is manufactured using technology and supplied dry or liquid. Dry formulations are mixtures of bulk components mixed in certain proportions. They are intended for pre-treatment of walls before further finishing.
The composition of the mixture for plastering walls can be different. It depends on its intended purpose and the quality of surface leveling.
| Dry mixes | Changes (wall irregularities) | Nature of use of the premises |
| Simple | up to 3 mm | Utility rooms, basements |
| Improved | up to 2 mm | Public buildings |
| High quality | up to 1 mm | Living rooms |
Note: there are also specialized dry building mixtures for leveling walls. They provide additional protection for surfaces and have heat-insulating, sound-absorbing, and water-repellent qualities.
Dry leveling mixtures are presented in a large assortment
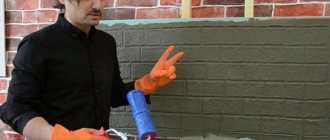
Liquid plaster for walls is a homogeneous plastic mass. It does not need to be diluted with water, but can be immediately applied to the surface. Such solutions are supplied in plastic/metal buckets. Before applying, just open them and mix with a mixer.
Advice: in order for the liquid plaster composition to better adhere to the surface, the wall must first be coated with a primer.
Ready-made finishing compositions can be leveling and structural
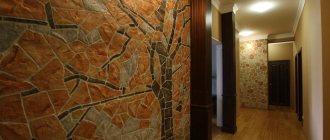
The composition of the solution for plastering walls, presented in finished form, may be different. It depends on the desired effect. There are standard mixtures that provide a smooth surface, and decorative ones that create a certain texture.
Please note: ready-made liquid plaster solutions are more expensive than dry mixtures, but when applied they are consumed less (2-3 times).
A variety of textures created using decorative plasters
Specifics of plaster compositions
Since buildings need to be plastered outside and inside, where the finishing is exposed to different conditions for a long time, the compositions of plastering solutions are also specific. Facade surfaces are subjected to more severe mechanical stress, are watered by rain, hit by hail, endure frost and heat, and are scorched by direct sunlight. Therefore, solutions for external conditions should be more resistant to all these “troubles”.
There are mixtures for facades, interior work and universal ones. The latter can be equally used for outdoor and indoor decoration.
All basic data on the proportions of plaster solutions for exterior and interior decoration are contained in the table from the standard.
spray and soil during external and internal plastering
The following figure shows the proportions of the covering.
covering - proportions
Composition of mortar for plastering external walls
Mortars for external walls differ in their base. Gypsum and lime compounds are not used for exterior finishing. An exception is plastering of closed loggias and balconies, where there is protection from water ingress. Therefore, the main binder for facade compositions is cement. Cement-lime (popular) and cement-polymer (more expensive) compositions are also used.
Clay is not afraid of frost and sunlight. But clay plaster must be protected from erosion. For facades in regions with a dry climate, if water does not directly fall on the plaster, plastering with lime-clay and lime-gypsum mixtures is used.
Increased mechanical loads (impact and abrasion) require increased strength of the plaster coating. Therefore, high grade cements are used (not lower than M500). In areas with high vibration loads (for example, near railway tracks), it is better to use cement-polymer mixtures.
As for outdoor mortars for plastering walls, the proportions of the compositions used in temperate climates are as follows:
- cement (with plasticizer) – 1: 6;
- cement-lime (lime as a plasticizer) – 1: 1: 6;
- dry masonry cement mixture (already contains plasticizers) – 1:5.
For harsh climates:
- cement (with independent addition of plasticizer) – 1: 4;
- cement-lime (see above) – 1: 0.5: 4;
- cement-masonry mixture – 1:3.
Composition of plaster for interior work
As for materials for indoor work, mixtures on any basis are suitable. The proportions are shown above. It should be taken into account that plasters have different vapor permeability, which means that for bedrooms, children’s rooms, and living rooms it is better to use those that “breathe” better.
It is advisable not to use gypsum and lime mixtures without special protection for bathrooms, toilets and wet basements.
For interior work, gypsum mixtures are most often used for leveling. Composition: 6 parts gypsum + 2 water + 0.2 PVA.
Classification of mixtures and solutions
Materials for plastering work are divided:
By composition. They are made of lime, clay, cement, gypsum and glue. Sometimes these varieties are mixed, and the result is plaster: cement-lime, lime-gypsum, clay-gypsum, clay-lime, clay-cement.
The clay mortars used to lay the stoves are now almost never used.
Further processing as necessary. They can be ordinary (i.e. leveling) and decorative, which do not require additional finishing.
You can find out more about decorative putty in the article: “Types and properties of putty mixtures.”
When ready. There are solutions and there are mixtures. Many consider these terms to be synonymous, but the solutions are made “from” to “to” independently. Whereas mixtures are a finished product, as they say, “just add water.” Undoubtedly, the advantage is on the side of mixtures - in this case, factory production is of higher quality than artisanal production.
Additives to plaster mortars
The addition of coarse quartz sand gives the plaster a special decorative effect. This sand also increases the acid resistance of the plaster. Metal shavings and dust, when added to the plaster solution, increase its impact resistance after hardening.
The addition of expanded polystyrene chips gives the plaster heat-retaining properties.
==========================
Thank you for your like! It costs you nothing, but it inspires us to come up with new interesting articles!
Preparing concrete walls for plastering
The process of preparing interior concrete walls for plastering consists of the following steps:
- The old coating in the form of fragile plaster, whitewash, paint is removed (in which cases it is possible to apply plaster over old paint, we recommend reading here);
- Defects in concrete walls are determined. If there are nodules, they are cut down using a hammer and chisel. Massive chips and deep cavities are sealed with cement-sand mortar in a ratio of 1:3; if necessary, steel mesh is used for reinforcement;
- On smooth walls, notches are made using a hammer and chisel, the maximum notch spacing is 10 cm;
- If it is necessary to install hidden wiring, grooves are made for the wires;
- The concrete surface is cleaned. A brush and water are used to remove dust and dirt. The wall can be treated using compressed air or a strong jet of water, which will significantly speed up the cleaning process;
- A primer is applied to the wall surface.
Notches on a concrete wall
We'll talk more about the types of primers for concrete walls below.
Priming concrete walls before plastering
Priming of concrete walls is necessary for the following purposes:
- Reducing the absorption of water from the solution into the concrete base;
- Protecting a concrete wall from the formation of fungus and mold;
- Increasing the strength of the protective (surface) layer of concrete;
- Dust removal from the concrete surface. The primer binds dust particles and makes the base clean;
- Improving the adhesion of plaster mortar to a concrete base.
Applying primer to a concrete wall
Next, we will look at how to prime concrete walls before plastering:
- For smooth concrete surfaces, concrete contact primers are ideal. After application, the composition fills the pores in the concrete, and a rough layer with high adhesion is formed on the surface, facilitating good adhesion to future plaster. We recommend compositions from the following manufacturers: Feidel Betokontakt, Knauf Betokontakt, Prospector Beton-Kontakt.
- Old concrete surfaces can be strengthened using a deep penetration primer designed specifically for impregnating weak substrates. Such soil impregnates the top layer of concrete, thereby strengthening it and giving it the necessary strength. Among the manufacturers we recommend: Prospectors “Deep Penetration”, AquaNova “Nova”, Acrylic Optimist “Deep Penetration”.
Primer Prospectors "Deep Penetration"
To prepare porous concrete surfaces (aerated concrete, foam concrete), primers are needed that reduce the absorbency of the base, thereby preventing uneven setting of the solution. The following primers are perfect: Knauf Mittelgrund, Knauf Rotband Grund (for gypsum plasters), Ceresit ST 17, Toiler TR10.
When applying primer to the substrate, be sure to follow the manufacturer's instructions. As a rule, the primer must be shaken before application, and the application process itself must be carried out in several layers.
Installation of beacons and reinforcing mesh
If the old wall has differences of more than 10 mm, then it is necessary to install beacons before applying plaster. Beacons are needed for even application of plaster with an equal layer of thickness. It is better to use metal profiles as beacons.
Lighthouses on a concrete wall
If the thickness of the planned plaster is more than 20 mm, then it is necessary to additionally install a reinforcing mesh. The mesh is fastened to the wall using dowel nails.
Next, you need to prepare the solution in accordance with the manufacturer's instructions. To avoid the formation of lumps, add water to the dry mixture, and not vice versa.