What is rough plaster?
Upon completion of the construction of houses, apartments, cottages or any residential premises, rough plastering is required. And it doesn’t matter whether this structure will be built from brick, aerated concrete or concrete panels. Even if the wall surface is smooth, plastering work is still carried out. This makes the base suitable for further decorative finishing. It is more practical to make rough plaster based on a cement mixture. But you can also use gypsum building and cement-lime mortars.
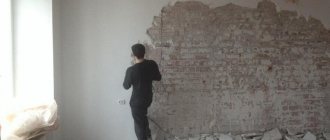
Rough plastering of walls is one of the long and difficult stages of repair. Therefore, during the process of its implementation, you should be patient and listen to the recommendations of professionals.
You should apply the rough plaster correctly so that upon completion you will have a smooth wall surface both horizontally and vertically. This is especially important if the cladding is done with tiles.
If the plaster is made with a defect, then over time the finish will simply begin to crumble, which will lead to additional costs of money and time.
Gypsum plaster
Gypsum, unlike cement plaster, is only suitable for the interior walls of a house. Gypsum is suitable for both thin and thick layers; some mixtures even out distortions up to 70 mm. Without reinforcement, the recommended layer of gypsum plaster is 15 mm. Gypsum is a plastic and warm material, easy to work with, resistant to cracking, it does not shrink and can be applied to any surface, even curved ones. The finished gypsum wall does not need to be puttied. In addition, gypsum plaster creates a special favorable microclimate in the room, absorbing excess moisture from too heavy air and releasing this moisture when the air becomes too dry. A kind of natural conditioner! True, in order for the walls to “breathe”, the finishing coating must be vapor-permeable.
Types of solutions
So, you should pay attention that before starting repair work you need to decide which mixture is suitable for a given room. If the renovation will take place in the bathroom under tiles, the rough plaster of the walls should consist of cement. You should consider in detail what materials are needed for this work. The plastering solution contains the following components:
- binder - cement, lime or gypsum;
- water;
- river sand, although quarry sand can also be used.
Cement mortars are mainly used when rough finishing of walls is carried out. Plastering can also be done with gypsum mixtures.
In recent years, gypsum mortar has begun to be used more often in this process than cement mortar. This happened due to the properties of gypsum that it possesses:
- It is lightweight and has excellent adhesion (tenacity to the surface).
- The original appearance is retained after drying.
- There is no need for reinforcing mesh if the concrete base is smooth.
- Gypsum material is very plastic, which allows it to be easily applied to the wall.
- It is unlikely that cracks will appear after drying.
- Good sound and heat insulating properties.
The mortar, which is made on a cement base, is not so elastic and is susceptible to large temperature changes. However, it is more durable and resistant to adverse conditions in wet rooms. Cement mixtures are also used for exterior work.
What solutions are used?
Before you start making arrangements when repairing walls in the house and directly in the bathroom with your own hands, you should decide on the type of plaster and what materials will be required for rough finishing.
The plastering mixture contains the following components:
- binder - gypsum, cement or lime;
- water;
- river sand.
The most commonly used mixtures are cement or gypsum based.
Recently, gypsum plaster has surpassed cement mixtures in popularity due to its many advantages:
- relatively light weight and high adhesion;
- maintaining the original appearance after drying;
- no need to use reinforcing mesh when processing smooth concrete bases;
- ease of application to wall surfaces due to high plasticity;
- absence of cracks during and after drying;
- good sound and heat insulating properties.
Plaster containing cement is less durable and is susceptible to temperature changes.
Types of wall finishes
There are two types of wall finishes. You should consider them in more detail:
- Chernovaya. This type of finishing involves working with plaster if the building is built from brick, putty walls, reinforced concrete, the cladding is made of plasterboard or OSB. The purpose of rough plaster is to guarantee a high-quality foundation for further work with decorative finishing.
- Finishing. One of the techniques is finishing plastering the walls. Rough work at this stage allows you to add special touches to the interior design.
Thanks to this method, the base takes on the desired appearance. After completion of the finishing work, the premises are ready and can be put into operation.
Types of rough work
Primary finishing in a new building is intended to prepare all structural elements and surfaces for further repairs. It includes the following types of work:
- Construction of interior partitions.
- Leveling and finishing walls and ceilings, as well as floors.
- Installation of water supply system and plumbing equipment.
- Installation of electrical wiring.
Recommended reading: Tips for designing a bathroom combined with a toilet
The apartment was handed over after rough finishing, interior partitions and electrical wiring are present
Rough wall finishing
An apartment in a new building may not have interior partitions, so you can choose the appropriate layout yourself. To build walls, you can use brick, cinder block, plasterboard, foam concrete or aerated concrete blocks. After construction, the wall needs to be plastered. Stages of wall finishing:
- Basic plaster. To do this, a high-quality composition is applied to them, following the correct technology. If the apartment already has interior partitions, then plastering the walls is not necessary.
- Leveling the walls, which is done with finishing putty. This layer is necessary to ensure that the surface becomes smooth and suitable for further decoration.
Rough ceiling finish
The most problematic part of the rough finishing of a room is the ceiling. Floor slabs can be laid with large differences (up to 5-8 cm). Ceiling finishing involves the following steps:
- Sealing joints between slabs. It is customary to simply plaster the tile joints, but this option is the simplest. Modern technologies provide for preliminary foaming of the seam. Next, it is plastered using a wide serpyanka reinforcing the seam.
- Ceiling leveling. This procedure is necessary for large differences between the plates. Leveling is performed with an elastic composition based on gypsum. Painting mesh is used as a reinforcing layer. In order for the plaster to adhere tightly, the ceiling is pre-treated with a primer.
After rough finishing, the ceiling is sanded, electrical wires are routed out for lighting
. To give the ceiling an ideal smooth texture, it is carefully sanded. If you are planning to install suspended or suspended ceilings, then this finishing option does not require preliminary preparation.
Rough floor finishing
To create an intermediate level between the slabs and the finishing coating (linoleum, laminate), a floor screed is needed. It levels the horizontal level and corrects existing defects (potholes, cracks). The screed can be made of concrete or a more modern material - a self-leveling self-leveling mixture. Drying of the layer lasts for 10 days.
Recommended reading: Master for an Hour
During the finishing work of screed installation, you can install a heated floor system. If the screed in a new building is provided by the developer, the heated floor can be installed in an additional leveling layer.
Heating system and water supply
All utilities have already been installed. All that remains to be done when the apartment is finished is to install the plumbing and faucets. During the installation process, it may be necessary to lengthen the pipes of the water supply system or modernize the heating elements.
After rough finishing, the apartment is rented with a separate heating system and, usually, with the cheapest heating radiators
Attention! New apartments with rough plumbing may not have water meters. You can choose the installation location yourself, complying with regulatory requirements
Windows and doors
The rough finishing of the apartment includes the installation of doors and windows. In modern new buildings, plastic windows are installed. The project may also include insulation and glazing of balconies and loggias. The type of doors depends on the choice of the developer. Some new apartments do not have interior doors.
Apartments in new buildings are rented with doors, usually relatively cheap metal doors with one lock
Wiring
Installation of electrical wiring during rough finishing can be done in two ways:
- Electrical wires are brought into the room and insulated. Further installation is left to the discretion of the buyer.
- Full electrical wiring is carried out, with outlets for sockets, switches and lighting fixtures. It is done before plastering the walls, enclosing the wires in cable channels. Special documentation is issued for the finished electrical wiring, indicating the exact location of the entire system.
Interesting! The electricity meter can be located both in the apartment and on the site in the entrance.
Tool
Before rough plastering the walls, prepare the necessary construction equipment. It must be collected in advance. This will reduce the time spent searching for it if necessary.
Required tools for plastering walls:
- crosshead screwdriver;
- perforator;
- rules;
- steel ironed;
- plumb line;
- building level;
- metal scissors;
- putty knife;
- poplar (wide brush);
- beacons for plaster;
- hammer;
- dowels;
- grater;
- plaster spatula;
- container for mixing the solution.
Preparation stage
When repairs are carried out in an already used premises, such a procedure requires more preparation time, financial costs and effort.
When renovations are carried out throughout the apartment, this is a fairly large volume. Rough plastering of walls, regardless of what material is chosen for this, is a sequence of certain preparatory work. Let's look at them:
- Initially, you should remove the old layer of plaster if it does not adhere well. This is checked by tapping the wall with a hammer, and if an empty sound is detected, it is imperative to knock down the finish.
- Then remove dust and dirt. This is done using a popcorn and water. After drying, be sure to treat the surface with a primer. This will significantly increase adhesion.
- Next, a notch is applied to the concrete wall, the length of which should be 1.5 cm, depth 0.3 cm. Usually 250 of them are applied per square meter.
- If the wall has a wooden base, then a chain-link mesh is stuffed onto it, which is fixed to the planks.
- For a brick wall, in order to increase adhesion to the base, you need to deepen the seams between the blocks.
When they begin to make rough plaster on the walls, the base must be wetted. To do this, you can use a brush, but it is most convenient to use a garden sprayer (spray).
And it is very important that the walls are impregnated with primer before starting work. This will significantly increase adhesion. If the base is brick or aerated concrete, a deep penetration primer should be used.
It is important to consider: if the wall is brick, then before starting the plastering process it is necessary to remove the old layer, because this material is weak. It can't handle a new rough finish. Especially if this is a bathroom, where tiles will then be laid on top.
Features of rough wall finishing
Rough wall finishing begins with plastering work. The walls, cleaned of old coatings and dirt, are impregnated twice with a primer solution and the “beacons” necessary to obtain smooth surfaces are installed. Cracks, joints of walls made of heterogeneous materials and excessively smooth surfaces that do not provide reliable adhesion are covered with a plastic mesh.
Waterproofing is provided in wet rooms. The plaster mortar is applied manually using a trowel or plaster ladle and leveled along the beacons using a rule.
The use of plastering stations that mechanize the process increases productivity.
Depending on the type of room: dry or wet, plaster solutions based on gypsum or cement are used. The former dry faster and allow thick layers to be applied. The second ones are stronger. They have increased moisture resistance, but require more time to dry each layer.
The plastered walls are allowed to dry, after which they are covered with two layers of primer for putty.
Important! Professionals recommend not skimping on primer and using it before each new operation:
- plastering;
- putty;
- applying the finishing coat.
The wall, which has dried after priming, is puttied with starting and, finally, finishing putty.
Preparation of the solution
When the base has been prepared, you can proceed directly to the rough plaster of the wall. Finishing requires the preparation of a solution. It should include:
- cement;
- water;
- sand.
The last of these ingredients must be sifted through a large mesh. This is a necessary, mandatory procedure. If the sand contains clay or any debris, it is removed by sifting. You should also pay attention to the brand of cement. The proportions of the mixture depend on it.
If the cement is M400, then, as a rule, cement and sand are diluted 1:4. With M500 the proportion is already 1:5. If the cement has been in storage for a long time, more is added when mixing. But the shelf life according to GOST is 3-4 months.
Then the components are mixed in a container, where water is added and mixed well until an elastic mass is obtained. The solution is checked for quality of preparation during operation. Therefore, you should initially apply a small layer to the base and make sure that the resulting consistency does not spread or slide.
Recommendations should be followed when preparing the solution, otherwise failure to comply may result in the following:
- if the composition contains too much cement, cracks may occur;
- if there is excess sand, this can lead to crumbling of the plaster.
If you don’t want to bother with mixing cement and sand, you can purchase ready-made mortars packaged in bags at hardware stores.
They just need to be mixed with plain water. A huge range of similar products is presented here: gypsum, cement-sand compositions, cement with lime. Any type can be chosen for rough plastering of walls.
The prepared mixture, whether purchased or made yourself, needs to be left for about five minutes. During this time, it undergoes a ripening process.
Turnkey renovation of a new building with or without materials
When buying a home in a new building, the question immediately arises: where to start renovating an apartment in a new building? This depends on the degree of suitability of the apartment for occupancy. As mentioned above, it can be free-plan, with pre-finishing or final finishing. Depending on this, construction organizations offer to perform one of the types of apartment repairs in a new building, the price of which is determined by the list of works:
- economy;
- base;
- full.
When choosing a construction company for a turnkey apartment renovation, you should pay attention to independent customer reviews
The Economy package includes the following types of work:
- electrical wiring;
- installation of partitions;
- floor screed;
- leveling and budget finishing of the surface of walls and ceilings;
- linoleum flooring;
- installation of skirting boards;
- door installation;
- installation of plumbing fixtures on ready-made communications.
The cost of renovating an apartment in a new building will cost an average of 3,000 rubles/m². This price does not include the cost of materials. You can purchase them yourself, or you can also order them from the contractor, who usually offers materials at reasonable prices and of good quality. In this case, the price of turnkey repairs in a new building will include the cost and delivery of materials. It should also be borne in mind that the larger the area in the apartment, the cheaper the cost of repair per square meter will be. Thus, renovation of a one-room apartment in a new building will cost an average of 155 thousand rubles, a two-room apartment - 210 thousand rubles, a three-room apartment - 250 thousand rubles.
Having decided to do major repairs yourself, you need to take into account the additional costs of purchasing or renting special equipment
The “Basic” package consists of the same list of works, to which is added:
- installation of communications for plumbing fixtures;
- installation of a suspended ceiling;
- tiling the bathroom and toilet;
- installation of lighting fixtures.
The price of renovating an apartment from scratch in a new building will cost an average of 6,000 rubles/m², excluding the cost of materials. Basic repairs can include replacement of windows and installation of a loggia for an additional fee. Thus, a set of works in a one-room apartment will cost an average of 210 thousand rubles. Renovating a two-room apartment in a new building will cost 300 thousand rubles, a three-room apartment – 370 thousand rubles.
A complete renovation involves a set of measures that can transform a bare space into a cozy residential apartment. The following activities are added to the work performed for the basic package:
- creating a design project for an apartment;
- finishing the ceiling and walls with high-quality materials;
- laminate flooring;
- installation of utilities and plumbing of any type and complexity.
The cost of a turnkey overhaul depends on many factors, including the cost of materials and the layout of the premises.
A major renovation of a new building apartment will cost 8,000-10,000 rubles/m², excluding the cost of materials. If the cost of the work does not include a certain type of installation, it can be arranged additionally for a fee.
The price of repairs in a new building with materials will depend not only on the type, scope of work and area of the room. The cost of specific building materials is also taken into account here. Thus, the price of repairs in a new building with materials from the budget range will average 6,000 rubles/m². Work using more expensive materials will cost about 12,000 rubles/m². The cost of renovating a turnkey luxury apartment in a new building will cost at least 20,000 rubles/m².
Many organizations specialize in the development and implementation of exclusive design using high-quality finishing materials. The price of renovation with materials for an apartment in a new building of this level will cost no less than 30,000 rubles/m².
To save money, you can entrust the laying of basic communications and rough finishing in a new building to a team of professionals, and do cosmetic repairs yourself
Carrying out repairs in a new building without finishing requires certain knowledge and skills. The desire to save money can lead to additional costs. To get a good result in a fairly short time, it is better to entrust this matter to professionals and order a turnkey renovation of a new building with materials, the price of which will depend on the personal preferences and financial capabilities of the customer.
https://youtube.com/watch?v=ygC2buvnjkE
Application technology
There is nothing complicated about the application technology.
It consists of several stages, which are divided by time.
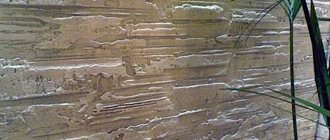
- Spray. To carry out this work, the solution needs to be made more watery. For a brick base, it is recommended to apply the first layer up to 4 mm, and for a wooden base it is applied to one centimeter. Apply the mixture evenly using a trowel. You can also apply the first layer by hand. But this method is considered less effective and longer. When applying the mixture, the trowel is brought closer to the wall. The solution is rubbed over the base with slow movements.
- Padding. With this method of application, the mass of the solution looks like dough. The work is carried out after the spray has dried. The plaster is poured onto the base. Using rules or a wide spatula, it is leveled from bottom to top. This removes excess solution. Over time, when the work is completed, the defects should be smoothed out with a trowel.
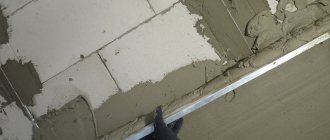
- Covering. Work continues only after the previous layer has completely dried. The solution should be diluted to the consistency of sour cream. The covering is made 2-5 mm thick. It is better to use a lighthouse for this job. Rough plastering of walls will be easier with it. Moreover, this stage is intended to eliminate mistakes after priming.
For high-quality work, the solution should be applied to a damp base. Then the grouting stage is performed. You should wait until it dries.
Plastering walls
When renovating a bathroom, you need to take into account that only cement mortar should be used for rough plastering of the walls. There is a peculiarity here. Since this room has high humidity, gypsum solutions are strictly prohibited.
For rooms in which such conditions are observed, it is best to use mixtures with sanitizing properties. These solutions already contain special plasticizers and additives that resist a humid environment. Sanitizing plaster has certain advantages:
- has an excellent waterproofing effect;
- prevents the appearance of efflorescence;
- it has high vapor permeability;
- completely environmentally friendly, does not contain any toxic additives;
- low pricing policy, as for such a product.
The process and technology are similar to the work in other rooms. So in the bathroom all the same steps as mentioned above apply.
Recommendations from professionals
To ensure high-quality plastering of walls in an apartment with a rough finish, you need to follow the recommendations of specialists.
You should consider some nuances that will help speed up the production process and make the worker’s work easier when renovating apartments and houses:
- It is recommended to work with mixtures at above-zero temperatures, and to perform similar actions from 5 to 30 ºС and humidity that does not exceed 60%. Although it is worth noting that there are mixtures on sale that are allowed to work at -5 ºС.
- At the end of each stage of work, you should wash the tool that was involved in the process and clean it of construction mixtures and additives.
- When rough plastering is performed, the surface of the base should be watered.
- You should also read the instructions from the manufacturer of the material used to perform the work.
- Typically, the arrangement of a room begins with the ceilings.
- You should also wait until the applied layer dries completely. It can be easily checked by pressing with your finger. If no trace remains, it means that the layer of plaster is completely dry.
A short list of materials for rough finishing of a house and apartment
The list of draft or general construction materials usually includes the following items:
- Expanded clay (expanded clay gravel)
- Cement-sand mixture or self-leveling floor (manufactured by Perfekta, Unis, Vetonit or analogues)
- Reinforcement mesh
- Beacon strip 6-10 mm
- Foam concrete block (foam block)
- Tongue and tongue block
- Sand concrete M-300 (manufactured by Perfekta, Rusean or analogues)
- Alabaster
- Primer "Deep-penetrating"
- Tile adhesive (manufactured by Unis, Perfekta, Atlas or analogues)
- Waterproofing (Gidroizol)
- Drywall (including moisture resistant) (manufactured by KNAUF, Volma or analogues)
- Metal profile (manufactured by KNAUF and analogues)
- Concrete contact (on concrete before plastering)
- Plaster mixture (KNAUF-Rotband, UNIS-Teplon, PERFEKTA)
- Putty (made by Sheetrock, Vetonit, UNIS, PERFEKTA or PVA based)
- Painting mesh
- Wallpaper adhesive (for paper, vinyl, non-woven, paintable and glass wallpaper)
- Insulation (manufactured by ROCWELL, Penoplex, ISOVER, USRA or analogues)
- Junction boxes
- Electrical (power) copper cables of required sections from 1.5 to 10 (VVG, NYM)
- Socket boxes
- Corrugated hoses
- Metal-plastic or polypropylene pipes
- Sewer pipes
- Glue “liquid nails” (manufactured by Makrofix, Titebond or analogues)
- Polyurethane foam (manufactured by MAKROFLEX or analogues)
- Silicone sealant
- TV (shielded), Internet (shielded category 5) and TF cables (2-4 wires)
- Electrical terminal blocks
- Dowel-nails, self-tapping screws
- Polyethylene film
- Consumables (roller, brush, tray, spatula, drill, bit, sandpaper, crepe, diamond disc, crosses for tiles, etc.) and much more...
A more detailed list and volumes of draft materials can be found in the example of a contract for repair and construction work
In the process of renovating an apartment or cottage, only the highest quality and proven materials are used, which are provided with a multi-year guarantee and which have all the necessary documents:
- Certificate of conformity "RosTest"
- Fire safety certificate
- Sanitary and epidemiological report
- Radiation certificate