Repair work requires a lot of time and effort to ensure the beautiful appearance of the room. Finishers use special materials to make the interior look perfect, cozy and attractive. One of the serious and important stages of work is priming. It is known that they start it when there is no wallpaper, putty or plaster on the walls. Let's figure out how to apply the primer correctly so that at the end of the job the room looks perfect and beautiful.
Why do you need a primer?
The primer consists of water and mineral solvents. The primer covers the wall with a special film. First of all, the primer improves adhesion; it also smoothes out minor irregularities and strengthens loose walls. The primer acts as an antiseptic for walls, which is very important for rooms with high humidity.
When applying wallpaper to a treated wall, less glue is consumed. It is also important to prime the walls before plastering. The paint applies more evenly to the prepared surface and its color does not change.
The type of primer is chosen based on the functions assigned to the material.
When can painting and gluing be done?
After applying the composition, the walls and ceiling must dry completely. During this period, all repair work must be suspended to ensure the surface remains clean. Drying time depends on the type of base, humidity and room temperature, sometimes it takes 4 hours, and sometimes the whole day. If the place where the product is applied no longer sticks to your hands, it’s time to finish it with facing materials.
A primer is necessary for high-quality repairs and durability of the result. Neglecting this procedure will lead to surface defects and imperfections, which will become visible to the naked eye after final finishing. In addition to the ideal appearance, the walls and ceiling will strengthen their strength characteristics and mold will not appear on them.
Types of primers
Soil mixtures are divided into several categories.
By composition:
- · Epoxy;
- · Shellac;
- · Latex;
- · Water-dispersed;
- · Alkyd;
- · Acrylic.
By function:
- · Anti-corrosion;
- · Deep penetration;
- · Adhesive;
- · Universal.
On the primer packaging, the manufacturer always indicates for which surfaces it is used and the primer consumption per wall per 1 m2. Universal primers are suitable for all surfaces, including iron and wood, but their effectiveness is average.
How often should walls be primed?
The surface of the wall to be plastered is pre-treated with primer. The number of layers depends on both the classification of the mortar and the wall material.
The main functions of the soil mixture are:
- savings in the consumption of finishing materials;
- protecting the wall from the growth of fungi and mold, metal corrosion;
- elimination of surface defects;
- ensuring high-quality finishing coating;
- Elimination of strong paint odor.
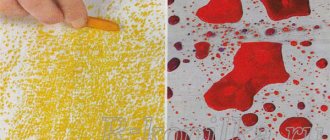
If there is no information about what material was used to build the wall, a little testing is carried out. The primer is applied to a small area. After half an hour, you need to touch the wall with your hand. If it is completely dry, this indicates significant absorption. In this case, you need to prime in at least two layers.
Frequency of impregnation of different materials
The clay surface absorbs moisture well. To process it, you will need a deep-penetrating primer. It will fill all the voids and strengthen such a wall. It must be applied in three layers, and each layer must dry well before applying the next.
Before finishing concrete structures, a quartz primer should be used. Concrete is a weakly absorbent material, so one layer is sufficient.
It is better to treat brick premises with a deep penetration compound in two layers, each of which must be dried.
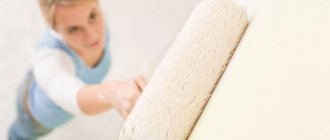
On low-absorbency surfaces, it is recommended to use a roller. It smoothes out the liquid, saving its consumption. Apply the mixture to materials with good absorption with a wide brush. It rubs the primer into the surface, turning porous structures into monoliths. In the future, this will be clearly reflected in the finishing.
Which primer is suitable for different surfaces?
The type of primer is chosen based on the material of the walls and the coating that is planned to be applied over them.
For fragile, crumbling walls, a deep penetration primer is used. It holds the wall together and prevents it from crumbling. A film forms on top of the wall, which repels water but allows steam to pass through.
For walls in the bathroom and kitchen, it is better to use a primer with an antifungal effect.
The composition of the primer solution for walls to be painted must match the composition of the paint. For example, if you purchased acrylic paint to decorate the walls, the primer underneath should also be acrylic-based.
To pre-treat the walls with primer on which the wallpaper will be glued, use a universal primer. If the walls are strong, it is enough to simply improve the adhesion between them and the wallpaper. In this case, there is no point in spending money on a more expensive soil mixture.
General provisions
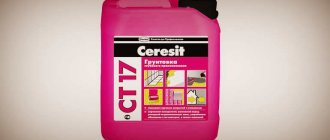
Sample canister with primer
Repair without primer is money down the drain. Many people mistakenly assume, on the contrary, that the cost of a primer solution is unnecessary. But practice shows the opposite.
If the surface is not properly treated before finishing, then you will face many problems, both during work and after its completion. And the cost of restoration will significantly exceed the cost of the mixture in question.
This happens for the following reasons:
- Poor adhesion. Paint, glue and plaster have very mediocre adhesion to many building materials. The primer equalizes all surfaces in this regard, creating a polymer base with a high adhesive index under the applied cladding.
- High moisture absorption . Porosity facilitates the rapid penetration of liquids into the structure of most surfaces. And this means an increase in the consumption of solutions used for finishing work and the hydrophobicity of the material itself in the future. The polymers of the primer mixture reliably block the pores, making it impossible to move through them.
Now, having convinced ourselves of the necessity of the process, let's figure out how to prime the walls.
Application of primer
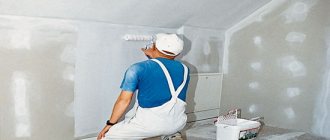
The primer is applied to the wall in the same way as paint. Before application, the wall is cleaned of dirt and dust, and a protective film or paper is laid on the floor so that the solution does not stain the floor.
To work you will need:
- · Brush;
- · Roller on telescopic handle;
- · Tray for solution;
- · Stepladder.
The primer begins to be applied from below. The primer strips are applied overlapping so that there are no dry spots left between the strips.
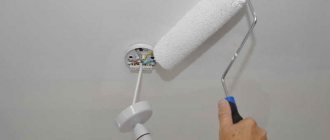
It is most convenient to apply the primer with a roller with a long handle, and in the corners with a brush.
The primer must be applied in two layers. The next layer is applied only after the first one has completely dried. How long it takes for the primer to dry on the walls is indicated on the packaging. Depending on the type of solution and room temperature, this can take from 4 to 12 hours. Paint or wallpaper should be applied only 24 hours after applying the second coat of primer.
Types of primer mixtures
To create a primer, the main component and auxiliary substances are used - the classification and use of the primer depends on the proportions of the composition:
- Acrylic is the most popular type, the base of which consists of acrylic polymer. It is well suited for home use. Brick, concrete, wood and cement surfaces are processed with this building material. It is indispensable for covering walls before applying emulsion and enamel paints. It does not irritate the mucous membranes of the respiratory tract, so the primer is considered one of the most harmless. Additional advantages include the speed of drying of the applied composition - after two hours the next layer is applied or painted.
- To treat walls with a brick, plaster and concrete base, mineral compounds containing cement or limestone inclusions are used. The factory packaging of this material indicates the surface that can be processed.
- Quartz - containing suspended sand, which clogs any micropores and increases the adhesion coefficient of materials.
- Alkyd - suitable for working with smooth surfaces - metal, glass, ceramics or sanded wood. Since the base is alkyd resin, working with drywall and concrete is contraindicated. Complete drying time is from 12 to 15 hours.
The main types of primers are listed above, but in retail outlets you can find compositions for specific work.
They are divided according to their purpose:
- Adhesive - increasing adhesion between solid and liquid components, for example, between the solid surface of a wall and a liquid layer of paint or glue.
- Strengthening – used to increase the strength of the working surface.
How to dilute the primer
Primer consumption
The price of a wall primer largely depends on its consumption. The consumption of the material depends on its composition. The average is indicated on the packaging. The averages are:
- · Deep penetrating primer – 160 – 180 g/sq.m.;
- · Water-dispersed composition - 120 g/sq.m.;
- · Acrylic primer – 130 – 150 g/sq.m.
Consumption is calculated as the wall area multiplied by the average. If the room has many corners or niches, add another 10-15%. If the primer will be applied in two layers, multiply the resulting figure by two.
TOP 7 manufacturers
The quality of preparation of the primer mixture largely depends on the manufacturing company. Products are produced under well-known trademarks, the composition of which fully corresponds to the declared parameters. TOP positions are traditionally occupied by primer mixtures produced under the following trademarks:
- "Bolars." The domestic manufacturer offers dry construction mixtures produced using high-tech equipment. To ensure the declared characteristics, it provides quality control at all stages of production. The finished primer fully complies with the requirements of safety standards. The company offers compositions for glass, grout joints, and unglazed tiles. The result is a shiny coating that is highly resistant to moisture. The price of 10 kg starts from 330 rubles. For a container of 1 kg you will have to pay at least 76 rubles;
- "Knauf". The company offers high-quality products for processing wood and porous surfaces. The catalog presents products for processing various substrates. The cost of 10 liters starts from 250 rubles, depending on the characteristics;
- Vetonit. The manufacturing company provides a guarantee for all products. Primers have good penetrating ability. Provides high adhesion characteristics of the base. Increases the biological and water resistance of the base. For a container of 10 kg you will have to pay at least 1000 rubles;
- "Lakra." In terms of their characteristics, alkyd mixtures are similar to products from German manufacturers. Used to prepare the base for subsequent finishing. The company also offers a black primer mixture for metal surfaces that improves the adhesive properties of the substrate and protects it from moisture. Deep penetration primers are in demand. For a container with a volume of 10 liters you will have to pay at least 800 rubles;
- "Tikkurila". Traditionally occupies a leading position in the market. The catalog contains compositions for various bases. If the compositions are for priming wood, MDF, chipboard, fiberboard, plastic, metal, glass, tiles. The cost of a 0.9 liter container starts at 174 rubles;
- Dulux. The British manufacturer's primer is designed specifically for treating walls exposed to high humidity. Allows application at low temperatures and high humidity levels. This composition prevents wood from rotting and prevents metal corrosion. The price of a 2.5 liter container starts at 400 rubles;
- "Tex." Primer mixtures are of high quality. Allows to form a high-quality coating. They do not create problems during the application process. Mainly aimed at amateurs. Professionals most often opt for other trademarks. For a container with a volume of 0.9 liters you will have to pay 49 rubles.
Instructions for applying primer
Preliminary priming occurs in several stages:
- 1. The walls are cleaned of remnants of the previous coating and dust;
- 2. If the wall is uneven, it is first leveled using putty and plaster;
- 3. The plaster is allowed to dry completely within 24 hours;
- 4. The primer is applied first in the corners with a brush, then with a roller on large areas of the walls.
Useful tips
If the color of the walls is too dark, before applying primer, plaster them with a thin layer of white plaster. Then the concrete will not show through the wallpaper and finishing plaster.
To save money, you can buy not a ready-made primer mixture, but a powder that needs to be diluted with water. Preparing the solution will require additional time, but if we are talking about renovating a large room, powder mixtures greatly save the budget.
Always pay attention to the primer consumption indicated on the package. In pursuit of profit, you can buy cheap soil in a large bucket, which is only enough for half the room.
Before covering plasterboard walls with wallpaper, you need to cover the wall with primer in one layer, apply a thin layer of plaster, and apply another layer of primer. This is necessary so that in the future you can remove the wallpaper without damaging the drywall.
In order for the primer to adhere well to the wall, the room must be from +5 to +30 degrees with a relative humidity of no more than 75%.
Photos of the process of priming walls often depict not priming, but painting the walls. This misleads home craftsmen. Never replace primer with dispersion or water-based paint. It has completely different properties.
Alkyd primer cannot be used for drywall.
Never dilute the prepared primer solution with water.
It is not for nothing that the manufacturer indicates the drying time of the soil. This time is needed for the aqueous part of the solution to evaporate, and the dispersed parts remain on the wall. If time is not maintained, the finish will hold up even worse than on a wall without primer.
The primer allows you to make the walls more durable, and the decorative coating durable and beautiful. Priming the walls will not take much time if you choose a suitable solution, calculate its consumption in advance and follow our application recommendations.
How many times do you need to prime the walls?
An important question that always worries people who want to save their money is how many layers are needed to obtain proper processing. To do this, it is worth looking at the absorbency of the wall being treated.
First, apply the first layer to a small area and then wait for the material to dry completely.
If after 30 minutes the wall has its original appearance, it means that to obtain high-quality treatment, it needs several layers of primer mixture. Typically, walls that have been plastered with chalk and gypsum putties need a large number of layers of soil.
The primer is best diluted in a small bucket
Photo of wall primer
0