Hello readers of my blog! Today we will talk about how to properly putty walls with your own hands. It would seem that the matter is not tricky, but when you are faced with this problem, you have to think about how to do it correctly, what preparation to do, what materials to choose. Thus, I decided that this article would be useful to someone, and I am devoting my efforts to this subject. In it I will answer a number of questions that will arise immediately before you properly putty the walls with your own hands, and some even after that. This topic is quite broad, because before work, thorough preparation is necessary, but how to do this? And this is a separate topic. You can learn about all this in great detail in the article below.
How to putty walls with your own hands
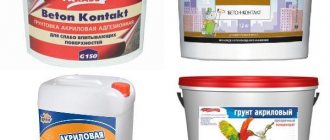
1. Gypsum putty is attractive at an inexpensive price, can be easily leveled, and does not shrink.
It has good heat and sound insulation, which is a significant advantage for apartments. In addition, this coating is fireproof. Bundex Tempo putty is used to level any surfaces and fill joints between gypsum board and gypsum fiber board sheets, without the use of reinforcing mesh in dry rooms.
2. Cement putties have excellent moisture resistance. Putties Bundex Layer and Bundex Finish are used for leveling surfaces of concrete and cement plasters in dry and wet rooms and facades of buildings and plinths.
3. Polymer putties. Important advantages include: excellent moisture resistance, do not shrink at all.
Using polymer putty, high quality treated wall surfaces are obtained. The price of such putty is slightly higher than cement putty.
DIY wall putty
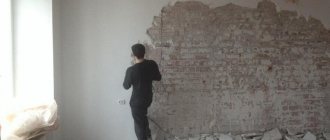
The opinion that do-it-yourself puttying of walls is a rather complicated process for the average person who is not involved in construction or repairs can in some way be called erroneous.
In fact, if you want to try yourself in this matter, then you will probably succeed in the best possible way - the main thing is to know all the necessary subtleties and understand the basic principle of applying putty.
Do-it-yourself wall putty: preliminary leveling
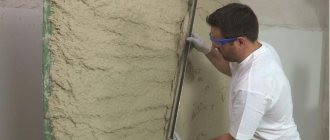
The most important principle of puttying any surface is gradualism - you cannot take and eliminate all the unevenness of the walls or ceiling with one layer. With this approach to business, you can only ruin everything or waste money and time. The essence of leveling the surface with putty comes down to gradually filling first large and then smaller holes with a special gypsum solution.
To begin solving the question of how to level walls with putty, you need to start with large irregularities, to eliminate which a starting putty mixture is used. What is its advantage? It has a large grain size and allows you to apply it in a layer of up to 1 cm - and there is practically no chance that it will crack.
To apply the starting putty, you can use two tools - a spatula, which will be practical when the size of the distortions does not exceed its width, and also a plaster rule, which allows you to correct large distortions. Ideally, when applying starting putty to walls, it is better to use the rule - besides the fact that with its help you can level a fairly decent area of the wall with almost one movement, it also allows you to easily form internal corners.
To make it easier to solve the question of how to apply putty on a wall, it is better to start with a wide spatula, which is used to apply the putty and pre-level it.
After a significant part of the wall is covered with the required layer of starting mixture, it is leveled according to the rule. Don't forget to moisten with water.
After such preliminary leveling, the putty should be allowed to dry thoroughly - at least 12 hours. An indicator of incomplete drying of the putty mixture are wet spots. If they are not there, then you can proceed to the finishing putty of the walls.
Putty stages
The technology for plastering walls for painting begins with preparing the base, and for this you need to perform the following procedure:
- remove old wallpaper or paint;
- tap the plaster on the wall;
- if voids are detected, it is necessary to knock down such detected areas;
- clean the walls from dust;
- prime.
Next, puttying walls for painting with your own hands should include the following steps:
- applying starting putty to level the layer;
- finishing with finishing putty;
- padding.
If you plan to work with a universal composition, then it must also be applied in two stages.
Puttying concrete walls for painting requires the following rules:
- preparing a starting putty solution, if you have chosen dry material;
- filling of holes, small cracks;
- applying a leveling layer;
- 24 hours are given for surfaces to dry;
- priming and drying again for several hours;
- adjusting lighting using a large flashlight or other light source;
- preparing the finishing solution and applying it to eliminate remaining defects;
- after it has dried, it is necessary to treat the surface with fine-grained sandpaper for final sanding;
- cleaning walls from dust formed after sanding;
- applying the final coat of primer.
Wall putty technology
Painting walls after puttying using this technology will be a pleasure, since your walls will become perfectly smooth, without unevenness or scratches. In addition, by following these rules, you will not have to make repairs in the next ten years, and if you want to refresh the interior, you will only need to paint the walls a different color.
The technology of continuous puttying of walls for high-quality painting is practically no different from preparing surfaces for conventional paint. The difference is that to perform these works it is necessary to use polymer materials of high quality, and also after each layer of putty it is necessary to grind.
How to apply putty: finishing layer
Finishing putty on the walls will be much easier if the starting layer has been applied well. In this case, you will have to go over the surface, as they say, in a thin layer (thin layer) and fill the remaining small holes. The finishing putty must be applied in different directions.
This approach to the matter will immediately reveal all possible distortions - if protruding strips of mortar remain on the surface of the wall, then this is a sure sign of unevenness in this place. Don’t try to eliminate them at once - it won’t work anyway. Ideal putty on concrete or plasterboard walls can only be achieved by methodically and consistently applying two or even three layers of mortar.
Now let's understand such concepts as puttying walls under wallpaper for painting. Naturally, all the differences lie in the quality of the resulting surface.
Puttying walls for painting requires a more careful approach and, of course, high quality surfaces. If wallpaper allows scratches and even slight curvature of the surface, then you need an ideal wall for painting, since the paint will reveal even the most minor flaws in your work. That is why the final stage of leveling walls for painting is to strip the putty.
It is carried out after the walls have completely dried.
For these purposes, two tools are used - an electric vibration grinder or a hand block. With the help of power tools, work is completed faster and better. A special abrasive mesh of a certain grain size is installed on both the block and the grinding machine (grain number 150 is suitable for painting).
This mesh leaves virtually no scratches and at the same time gets the job done quite quickly. It should be understood that the larger the grain size of the abrasive mesh, the finer the processing. If we are talking about puttying walls under wallpaper, then a grid with number 100 or even 80 is quite suitable.
Preparing the base for putty for further painting
Beginners underestimate the importance of preparatory work. Wall putty for painting may peel off over time.
The basis of a beautiful room design is preparing the surface before finishing. Walls made of brick, concrete or blocks are first treated with plaster. It serves as a rough finish. Nowadays plasterboard is used for walls. It occurs quite often.
If the surfaces are freshly plastered, it is necessary to scrape the entire base with a spatula to remove mortar particles and debris. It is better to use a tool with a wide blade. Then you should sweep the surface with a soft brush and apply a deep penetration primer. It creates good adhesion between the putty and the plaster, and also prevents strong draw-out of moisture. Such work does not take much effort and time.
It is advisable to wait some time before putting putty on recently plastered surfaces. It is recommended to leave the walls for a week, and if possible, postpone finishing for a month. Then the plaster solution will be strong enough, defects will become visible. It is necessary to eliminate all depressions, cracks and irregularities before puttingtying the walls.
If the plaster is old, preparing the base becomes more difficult.
This requires:
- carefully inspect the coating, because it may peel off or crumble, and the old layer may be completely removed;
- widen the cracks and clean them well;
- repair all existing defects with fresh plaster;
- To eliminate small errors, use a putty compound.
At the end, you should remove the remnants of the previous paint, lime and fallen putty, and carefully scrape them off. It is necessary to sweep away dust and debris, and treat the walls with a primer.
The uniformity of application of the putty solution depends on the quality of surface preparation. After this treatment, you can paint the walls in the desired color. The service life of the coating will increase.
Wall primer and its importance in the puttying process
The importance of primer in the puttying process is difficult to overestimate.
Probably, many of you have encountered such a problem as peeling putty during the process of dismantling old wallpaper, or worse - the appearance of bumps under the wallpaper. All this is precisely a consequence of ignoring the priming of the walls before putting them on. Applying a primer allows you to rid walls of dust, dirt and improve their ability to bond with putty - in professional slang this process is called increasing adhesion.
You need to primer always and everywhere when it comes to applying wet solutions or adhesives.
One thing should be understood - the walls are primed before applying the starting layer and in case you cleaned the putty.
In general, if we are talking about putty for painting, then after treating the walls with an abrasive mesh, they also need to be primed. As a rule, a standard deep penetration primer such as Ceresit CT17 is used for these purposes, but in some cases an antifungal primer and even a “Betonokontakt” primer can be used. The latter is used to increase the adhesion of walls painted with oil or nitro paint; the only condition for its use is that the old paint does not peel off.
Wall putty: how to properly prepare the necessary solution
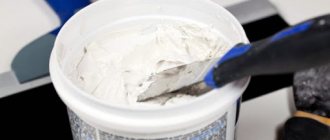
A very important point regarding high-quality wall putty is the preparation of a gypsum solution - even the smallest lumps and random debris can turn the process of wall putty into a complete torture. To prepare putty, you need to follow three basic rules.
Cleanliness – not only the container for the finished putty should be clean, but also the mixer with which the mixing process is carried out.
You can forget about manually preparing putty, unless, of course, we are talking about a tiny amount of it. Correct proportions. You will have to determine them for yourself experimentally.
I will only say one thing: for walls with a large curvature it is better to use a thicker solution, and for minor leveling - a rare one (resembling thick sour cream, and not cream in which a spoon can stand). How to properly putty walls with your own hands
Kneading time. The putty is prepared for a long time and in several stages - first, the dry mixture is poured into the water and initial mixing is carried out. The goal is to get the entire mixture wet.
After this, the putty should be left alone for about five minutes (it should swell). After the specified time, the final kneading is carried out - it takes the same five minutes, only with short breaks. Stir for a minute, rest for a minute, stir again, and so on until you get a homogeneous mixture without lumps.
Now you know how to putty walls with your own hands.
And to conclude this topic, I would like to draw your attention to the fact that over time the putty hardens and becomes very thick. It can be diluted with water or re-mixed only if it is used to roughly seal large potholes or cracks. The fact is that after repeated stirring, lumps appear in the putty, leaving all kinds of patterns on the walls.
DIY wall putty
The old coating is removed and removed: wallpaper, paint, etc. Using a small spatula and a small amount of putty, all surface defects, such as cracks, holes from fasteners, bumps and depressions, are carefully eliminated. After the materials have dried, the surface is sealed and leveled using a trowel with an abrasive mesh attached to it.
The walls are then brushed and wiped with a damp cloth to remove any accumulated dust. After this, you can prime the surface using a spray gun or roller. The surface is dried for the time indicated on the primer packaging.
Preparation of putty (if it is not purchased ready-made).
The putty is prepared in accordance with the instructions on the packaging, observing the specified holding time.
Attention! You cannot add water or dry mixture to a ready-made composition. The consistency of the finished putty is determined by the manufacturer, and changing the proportions of the components can disrupt it, which will affect the final result.
The required amount of putty depends on the area of the surface to be treated. Approximate material consumption is indicated on the packaging.
It is convenient to apply the putty with a small spatula on a large one along its edge - so that it can be applied to the wall in one pass. The passage is carried out with a sweeping cross-shaped movement of the spatula with medium pressure until the mixture is removed from the spatula. The smaller the angle of inclination of the spatula, the thicker the layer.
At an inclination angle of about 30°, the layer thickness will be approximately 3 mm. Large influxes are removed. To apply putty in corners, it is convenient to use a corner spatula.
The applied layer of leveling material is dried under natural conditions, without allowing air flows (for example, from open windows or fans), for the time specified by the manufacturer. Sagging and unevenness are removed using a grater with an abrasive mesh attached to it. The flatness is checked by the rule, the bumps are polished, and the holes are marked with a marker and later (during finishing processing) leveled.
The surface is leveled again until the required evenness is achieved.
Before painting, an additional finishing layer of finely dispersed gypsum putty is applied. After drying, it is processed with a grater with an abrasive mesh. Before painting or wallpapering, use a fine-grain mesh No. 100–120.
How to properly putty a wall with your own hands
High-quality preparation of walls for various finishing works consists of obtaining a flat, smooth surface. To do this, you need to properly perform priming and puttying.
Puttying is not a difficult task. The main thing here is to follow the procedure and be able to handle construction tools correctly. We will look at how to properly putty walls yourself without resorting to the help of specialists in this article.
To putty the walls yourself, prepare a minimum set of tools. What tools can you not do without?
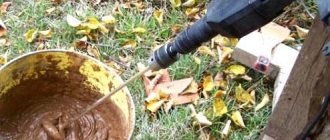
1. A drill equipped with a special attachment – a mixer. As a rule, putty is sold in the form of a dry mixture.
Water is added to this mixture in a certain proportion. Only with a special mixer can you mix the putty mixture perfectly. The output should be a homogeneous putty without lumps.
2. Set of spatulas. Be sure to choose a spatula of different sizes.
In your work you will have to use both large spatulas (40-50 cm) and very small ones. After all, in problem, hard-to-reach places, it will not be possible to properly putty the wall with a large spatula. This is exactly what small spatulas are used for.
3. Rollers and brushes for priming walls.
It is not advisable to skip the priming step. After priming, the wall is covered with a thin film. This not only further increases its strength, but also ensures excellent adhesion of the treated wall to any facing materials (adhesion).
4.Rule. It will be needed in case of uneven walls when you have to apply putty in a thick layer. To level thick layers of putty, it is convenient to use a long metal rule.
5. Alcohol or laser level. Often the wall surface is very uneven. Before starting the initial puttying, test beacons are installed using an alcohol or laser level to check.
6.Sandpaper. If you want to get a beautiful surface that is pleasant to look at, use fine sandpaper for rubbing.
For example, grouting with 240-grit sandpaper will allow you to get the perfect result. Use the finest sandpaper only when performing finishing putty. And at the stage of the initial initial putty, it is correct to rub the wall with coarse coarse sandpaper.
7.Manual skinner. Sanding will become much more convenient if you use a manual sander. This is a tool with special clamps on the handle for securing the skin.
8.And, of course, you can’t do without a container in which the putty is mixed.
How to properly putty walls with finishing putty with your own hands: step-by-step instructions, video
Today we will tell you in detail how to properly putty the walls with finishing putty with your own hands.
This request is very common among those who decide to make quality repairs on their own.
It should be understood that a successful result depends on how the surface is prepared, and you cannot do without putty. It is important to follow the step-by-step instructions and use the tools correctly.
In order for the putty process to show perfect smoothness, a finishing putty is required. Concrete walls or other surfaces can be properly prepared for the application of subsequent decorative coatings.
What tool will you need?
Do-it-yourself finishing putty on walls requires a certain number of tools. So what you need:
- Apparatus for mixing the solution. You can use a drill with an attachment. The dry mixture is mixed with water. To know how to dilute finishing putty for walls, you should read the manufacturer’s recommendations. You should get a homogeneous plastic mass without lumps; Several spatulas. The required set should include both large and small tools, thanks to which the putty will be successfully applied even in hard-to-reach places; Brushes, rollers. Surface priming is also a step that should not be skipped. Extra strength and good grip never hurt anyone; Recipe. This is necessary when leveling large wall errors in order to distribute a thick layer of mass; Level A. Indispensable for leveling uneven walls. After setting the levels, control measurements should be taken; Sanding plate. A perfectly smooth surface requires careful grouting. Coarse-grained sandpaper is used for initial work, and fine-grained sandpaper is used for finishing work; Holder for attaching sandpaper. Makes work easier for both beginners and more experienced craftsmen; Container for preparing putty.
Material selection
Which putty is better for finishing walls? Based on its composition, putty can be divided into: gypsum, acrylic, cement. Let's pay attention to take into account the positive and negative sides.
Composition of plaster. It has an affordable price, good recommendations during the work process, and no shrinkage. The cement included in the composition shows excellent resistance to moisture, but significant shrinkage appears over time. Polymer products. They have many advantages: they are resistant to moisture and do not shrink. The treated walls are of high quality. An excellent option to consider for those who are busy with the question: how to level walls with finishing putty, and are looking for quality materials. The only drawback is the cost of the putty.
There is also a division based on fate.
Starting mixtures. They are distinguished by their strength, extraordinary adhesion, and coarse grain size. They are suitable for correcting uneven walls. Decorative. Recommended for use to obtain a perfectly smooth surface while correcting minor unevenness. Endurance is also quite high, the workflow does not cause problems. Universal. The product combines leveling and decorative properties. Their cost is slightly higher, despite the fact that they are inferior to the above coatings. Recommended for use to eliminate minor problems with walls.
On the modern market you can buy both dry mixtures and those already completely ready for use. The dry product is more attractive due to its cost and the possibility of longer storage.
The finished material is, of course, more convenient to use. You don't have to knead it, which makes the process faster and cleaner. However, such putty can cause significant shrinkage.
Calculation of the required material
Beginners are often interested in the question: how to calculate the finishing putty on the walls? The task, the essence of which is to determine how much material will be used per 1 m2, is not easy even for a professional. There are many factors to consider that will influence the final figure, and there are no generally accepted indicators. Therefore, in any work there is an error, only then the numbers will be more realistic.
The cost will depend on and vary according to what work has previously been done. If we are talking about finishing putty, then if there is a base layer, its amount will decrease and be approximately 1-2 mm. Thus, the material consumption will be about 2 kg per 1 m2.
Also remember that consumption will be higher regardless of the initial calculation. The material will remain on the spatula on the sides of the used container. Since the solution needs to be mixed in small portions, and it hardens very quickly, this means that the putty will last longer.
Putty is often applied in two layers. The first layer can reach 8 mm, and the second - no more than 3 mm. If even after such correction of the walls the defects are still visible, it means the work was done poorly. A thick layer of the product will lead to various types of defects.
Preparing the wall for putty
So, if you don’t know how to properly putty walls with finishing putty, you need to master the steps of the entire process. First of all, you should assess the condition of the wall. It must be clean, that is, without visible traces of grease, paint, old plaster, etc. Do not start work if the surface has been exposed to low temperatures for a long time.
Before finishing with putty, it is necessary to prime the walls. This will ensure not only good adhesion, but also resistance to moisture. Carefully distribute the composition with a roller. You can limit yourself to one layer.
Starting putty
Finishing plaster on walls for painting and any other type of coating requires perfect evenness. You should start by applying the starting composition. This is a rough material that is successfully used to smooth out wall bends, cracks and holes.
Before plastering the walls with finishing putty, use a painting mesh to improve the quality of the work. First, the composition is evenly distributed over it, and then it is completely puttied. This method has proven successful. The surface is smoother and more durable. And the greater the degree of roughness of the strips, the more reliable the material.
Putty using beacons
Another type of work that is performed before plastering the walls is finishing plaster. This one uses the same theme, but uses beacons.
A lighthouse is considered to be a railing made of wood or plaster. It is mounted vertically and the degree of evenness is checked with a building level. After attaching them to the plaster, you can proceed to further work.
The same principle can be used for horizontal leveling, which requires the use of a spirit level.
If all recommendations are followed, the surface will be smooth and can be checked with a spirit level.
Due to the cost, which is higher than that of the starting putty, this method is rarely used, since there is practically no visual difference between them.
Finishing putty
Having completed one of the preliminary stages of wall leveling that you have chosen, you can begin plastering the walls with finishing putty.
At the first stage, the question may arise: what do putties do for finishing walls? For this purpose, special mixtures are used that will give the surface model smoothness without cracks and pores.
For those who are interested in whether it is possible to level the walls with finishing putty, we would like to note that you need to start work with the thinnest layer. If the initial alignment was poor, it can no longer be repaired. Therefore, try to focus on leveling the walls, and only then start finishing work.
Finishing putty for wallpaper, as well as its use for other materials, is a prerequisite for a flawless wall.
We remove cracks
Remove with plaster mixture. You can use santegip. It takes longer to dry, but good plasticity during operation allows you to achieve good results.
Experienced professionals recommend first removing any loose particles and roughening up the crack by digging a little wider and deeper. Then you need to go through the primer, and only then putty.
Putty application process
Finishing walls with finishing putty or any other putty requires proper preparation of the mixture. Do it:
- Fill the container with water; Fill with putty; Mix first with a spatula, then use a drill with a mixing attachment; If necessary, add water.
The putty is considered ready when the mass has sufficient plasticity and will not flow off the spatula. This situation can be corrected by adding dry material.
Be careful not to allow any lumps to form as this will indicate the need to add water and mix more thoroughly.
After each use of the solution, wash the container and only then mix fresh material. If you ignore this advice, don't be surprised that the solution will harden faster because you are not removing the main catalyst - the old particles.
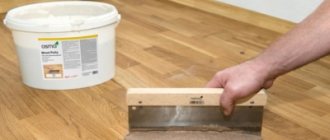
Using a wide spatula, gradually spread the starter over the surface. Each new movement must be overlapped to avoid unevenness.
It is recommended to mix in portions, as this will prevent the mass from drying out and forming lumps. Don't worry about possible streaks, they will be removed with the finishing coat.
To create even corners, use a special spatula, having previously distributed a moderate layer of putty over the entire height.
After the starting putty has completely dried, you can proceed to finishing work. For this you will need 2 spatulas. Apply the solution with a small tool and apply the putty evenly with a large putty knife. Pay attention to the layer thickness, which should not be more than 2 mm.
Do-it-yourself finishing of walls with putty for wallpapering or painting should not begin without thoroughly drying all previously applied layers. Those who don’t know how long it takes for finishing putty to dry on walls should definitely know that it takes about 12 hours to prepare for the beginning and the first finishing layer.
Now comes the time for finishing work - sanding with sandpaper.
We recommend priming each new layer of putty.
Preparing the surface for painting and wallpaper
Now think about how to putty the finishing walls with wallpaper putty, or how to putty the finishing walls with paint putty.
This process requires several levels of alignment. For thin wallpaper, a minimum of three is required. This will allow you to paste the wallpaper without the appearance of unsightly flaws.
Preparation for painting requires more careful measures, because even the smallest irregularities, roughness, etc. are visible through this decorative coating.
How to putty the walls? The procedure for applying putty comes down to several steps:
- Leveling material is applied layer by layer; Allow time to dry; To eliminate minor errors, use finishing putty; Sand with sandpaper to obtain a perfectly smooth surface.
Now you know how to putty walls with finishing putty for painting or wallpaper. The process is clear and simple, but only if the described recommendations are followed. Don't be afraid to experiment, try to work in small areas and remember that you will get better each time.
How to properly putty walls with finishing putty with your own hands: video
Which putty is better to putty on walls and how to choose it
Classification of putties by composition: gypsum, polymer (acrylic) and cement.
Let's consider their disadvantages and advantages.
1. Gypsum putties are attractive at an inexpensive price, are easy to level, and do not shrink. The only drawback is poor resistance to moisture. Only this limits the scope of their use.
2. Cement putties have excellent moisture resistance, but have a significant drawback - a high degree of shrinkage.
3. And finally, polymer putties.
Undoubted advantages: excellent moisture resistance, do not shrink at all. Using polymer putty, high quality treated wall surfaces are obtained. The only drawback is the high price.
According to their purpose, putties can be divided into starting (leveling), decorative (finishing) and universal.
1. Characteristics of leveling (starting) mixtures: high strength, excellent adhesion, large grain size. Recommended: for leveling walls after applying plaster. Application thickness: 3 -20 mm.
2. For high-quality decorative finishing, it is advisable to apply finishing putties to the surface to be treated.
With their help, you can get a perfectly smooth, even surface, hiding small flaws. The strength of the finishing putty is less than the starting putty, its processing is not difficult. Apply in a small layer up to 4 mm.
3.Universal putties combine the properties of decorative and leveling mixtures. They cost more, although their properties are slightly inferior to finishing and starting coatings. We recommend using it when treating walls without large flaws.
The modern market offers dry and ready-to-use putties. The low cost of dry putty and the possibility of its long-term storage are attractive.
Ready-made putties are convenient to use. You don't have to use a mixer to prepare a homogeneous putty mixture.
This saves time and virtually eliminates dust. But ready-made putties are much more expensive than dry ones. Please note: such putties shrink greatly.
If a layer less than 2 mm thick is applied, ready-made putties cannot be used. They also do not boast a long shelf life. It is significantly less than dry construction mixtures.
Dry in bags and ready to use in a bucket of putty.
Expert advice: how to choose the right putty
In living rooms, studies, offices and other rooms with a normal level of humidity, budget gypsum putty is suitable. The bathroom is plastered with cement mixtures, and a little less often with acrylic mixtures. For finishing the facade, the most wear-resistant mixtures are selected.
Before painting, the walls are finished with polymer or gypsum putty. Drywall is treated with materials for dry rooms.
Sometimes both types of putty, starting and finishing, can be replaced with a universal one that combines their characteristics in terms of the size of inclusions and the characteristics of the binder. There are specialized mixtures for individual places. For example, only for joints, large cracks, etc.
The most popular options are polymer and gypsum plaster. Consumers like them for their ease of use and compatibility with almost all types of rough coating.
Preparing the wall surface for putty
The main thing is to make sure that the surface of the walls is absolutely clean. Be sure to remove stains of grease, paint or soot.
Of course, there should be no falling layers of plaster, residues of scale, wax or parts of the formwork. Don’t even start puttingty on frozen ceilings and walls. This is strictly not recommended.
Before applying putty, coat the walls with a primer. This will ensure good adhesion (connection) of the putty solution to the walls.
Prime the surface using a special roller. Try to apply the primer solution evenly, avoiding gaps. One layer is enough.
There are the following types of putty: finishing, lighthouse, starting. Let's look at the properties and scope of application in detail.
Starting surface putty
Putty is performed using coarse starting material.
It's not difficult to find. When purchased, it is called “starting putty.” To remove large differences in walls, to hide grooves and holes, this putty is convenient to use.
The thickness of a layer of such putty applied at a time can reach 1.5 cm. Allow the previous layers to dry completely. Only then proceed to applying the next layer of putty.
In order to obtain the highest possible quality of putty surfaces, a special painting mesh is installed on the wall, and the putty is distributed evenly over the entire surface. In this case, the walls are completely covered with putty.
The advantage of this technology is that when using a painting mesh, the putty fits perfectly onto the surface of the walls. And the surface itself becomes stronger and smoother. Moreover, the coarser the painting mesh, the smoother the treated wall surface.
Starting wall putty.
Lighthouse wall putty
The materials are no different from the starting putty.
The only difference is that beacons are used. A lighthouse is a wooden, plaster or metal strip, which is set strictly vertically, checking the verticality with a level. The beacons are attached to the walls using some kind of gypsum mixture; it dries quickly, after which you can proceed directly to puttying.
The same applies to alignment along horizontal lines. In this case, a rule will come in handy for leveling the putty layer. By following these recommendations, after starting work, a flat surface is obtained.
To ensure the quality of the work, you can check it with a level. This type of finishing is used quite rarely.
Reason: its cost is significantly higher than the starting putty, although visually they are almost the same.
What spatulas are needed for puttying walls and leveling corners?
How to putty plasterboard walls and ceilings for painting?
Spatulas are used in many types of construction and finishing work, and each requires its own tool. They differ in size and shape. The table shows the main types of spatulas indicating their purpose.
| Spatula type | Work performed | Type and features of the tool |
| Painter |
|
|
| Facade | The spatula is used to perform facade work and interior decoration as an auxiliary tool. |
|
| Angular | The tool is used for puttying external and internal corners. | It is a metal plate bent at a right angle and equipped with a handle. |
spatulas
Final wall putty
After completing the starting or lighthouse putty, proceed to the finishing putty. It is done with finishing putty mixtures. It is this putty that gives the wall surfaces perfect smoothness.
The smallest cracks or pores are eliminated. It is important that the finishing putty completely coincides in plane with the previously prepared surface, so it must be applied in a very small layer. If the starting or final putty is done poorly, you will not be able to correct the situation with the finishing putty.
Therefore, first try to make the surfaces of the walls perfectly smooth. Only then proceed with the finishing putty. Its main goal is a beautiful smooth wall surface.
The finishing putty is carried out under special lighting, this allows you to see the smallest irregularities. Photo – vipconstruction.kiev.ua
Puttying cracks in walls
To hide cracks in the walls, we recommend using gypsum mixtures for putty. The material santegypsum is much more elastic in work, but hardens much longer. Advice from competent specialists: at first it is recommended to slightly widen the crack, slightly increase its depth and thickness.
To increase the roughness, you can scratch it with a knife or other sharp object along its entire length. Then carefully treat it with a primer. Only after this should you begin to putty.
How to apply putty on walls
1. If you use dry putty, you need to properly prepare the putty mixture.
Cooking sequence:
Please note: the readiness of the putty should be determined by consistency. It should become elastic and stick slightly to the spatula. If the putty mixture flows, it means it is runny.
Add dry mixture little by little to correct the situation. If there are clumps in the putty, it means the putty is too dry. Add water little by little, stirring thoroughly to achieve perfect homogeneity.
2.Apply starting putty. It is convenient to use a large spatula. Apply the putty in medium portions, spreading evenly over the surface.
Hold the spatula at an angle of about 30 degrees. The putty is applied diagonally in one motion. Recommendation: to avoid transitions and bumps, each subsequent layer should be applied overlapping.
Attention: when making the starting layer, mix the putty in small portions.
This will avoid the appearance of dried-out dry particles, which will reduce the quality of work. Don't be too alarmed by unsightly stripes from the spatula. The stripes are perfectly hidden with finishing putty.
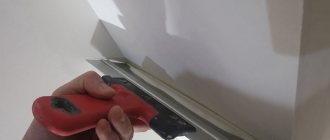
3. To process smooth corners, we recommend using a corner spatula.
Working technology: first, using a small spatula, apply a small layer of putty along the entire height of the corner or slope. Then carefully level the surface with an angle spatula. The putty layer should dry well within 24 hours.
To putty corners you will need a special corner spatula.
4.Once the starting putty has completely dried, proceed to the finishing putty. A large and a small spatula are used for work.
Using a small spatula, apply putty in small portions onto a large spatula. Then apply the putty mixture evenly to the surface. The layer thickness is about 1.5 - 2 mm.
5.Before you putty on a wall for painting or wallpaper, wait until the previous layers have completely dried.
The starting and first layers of finishing putty must be completely dry. This approximately takes about 12 hours. Then you can apply the finishing putty.
6.After complete drying, proceed to final sanding with sandpaper.
Attention: before applying each next layer of putty, it is advisable to treat the previous one with a primer.
Technology for applying putty to various surfaces for different finishes
The product is applied differently depending on:
- wall material;
- cladding option;
- presence of joints.
They often work with drywall. Processing problems may arise due to seams and fasteners. They are coated separately and then together with the rest of the surface. The seams are treated twice during the first application of the putty mixture. The putty for painting should be dense and even. Dyeing is used in the case of fiberglass. It will be difficult to do without puttying, because the relief of the canvas 2, 3 and even 4 four layers of paint will not be able to hide. Under the wallpaper, the walls are puttied to a perfectly smooth coating. Theoretically, you can get by with one layer of universal material, but the main thing is that the surface is ideal. To work with corners, appropriately shaped spatulas and sloped corners are used. Internal ones are processed using a serpyanka and a type of corner spatula - its handle is attached to perpendicular planes on the other side.
Rules for puttingtying drywall
Sheets of this material are usually attached to a metal frame using self-tapping screws. All fasteners are hidden, but first run over them with a spatula to check how much they are recessed into the sheets. If the tool falters somewhere, then the fasteners need to be tightened with a screwdriver. It would not hurt to treat the surface of the drywall with a primer. After the primer solution has dried, each fastening element is putty separately. Places should be remembered so that after filling the entire wall, sand them carefully, and in a separate order - the next step is to apply the mixture to the entire surface of the drywall.
There are rules for processing seams. They start by applying 1 layer along the entire seam. A sickle is applied to the fresh mixture and pressed with a spatula. Then the place is covered with a second layer. It is then dried and polished.
Technique for plastering walls for painting
For treatment before painting, polymer, cement or gypsum putty is usually used. The best option is polymer. The wall is covered with 2 layers. The second, finishing, is made as uniform, dense and durable as possible. When working, use wide and narrow spatulas. The tool is held at an angle of 20 to 30 degrees. First, the starting coating is leveled with an adhesive jointer. The finishing layer is sanded using sandpaper or a jointer with a mesh setting of P80 or P120.
All subsequent layers are applied only when the previous one has dried. When drying the coating, do not allow it to be exposed to hot streams from heating devices, a fan heater or a hair dryer. The surface is also protected from direct sunlight. Putty for painting work should not be diluted in large portions. In addition, it won't hurt to practice on a test surface.
Puttying walls for wallpapering
In the case of a flat wall, the mixture is applied first in the corners and then distributed over the entire wall. This is done twice, after which the coating is primed. Using the starting putty, all cracks, micro-holes and cavities on the wall are removed, and bulges are hidden. Its thickness is selected within 3-5 mm. The finishing composition makes the coating smooth. Mixtures with the smallest fraction sizes are used, because the roughness under the wallpaper looks very bad. The thickness of the top layer of wallpaper putty is ideally 1.5-2 mm.
For work you will need a grater to smooth the surface. Moreover, it is better that it has several coating options: from an abrasive mesh to genuine leather or sandpaper. To apply the first layer of putty, you can use a roller and at the same time help yourself with a spatula. For priming, use a medium-width brush.
Features of applying putty to internal and external corners
As for external corners, first the slope corner is cut along the length of the corner. Then they apply it to the outer edge of the wall and see if there is deformation of the coating, and if so, how pronounced it is. With a relatively flat surface in the corners, this manipulation is carried out already on the finishing putty. On uneven edges, putty is applied with light throws, increasing the amount of material in places of deformation. Subsequently, the tool is applied and pressed into the putty, and the evenness is checked with a building level. The corner is coated with putty. Finally, the outer edge is sanded.
Internal ones are processed differently. Use serpyanka with a width of 50 mm: lay it as evenly as possible, without the slightest distortion. Then a starting layer of putty is applied. When it dries, check the evenness of the coating with a level. Then the finishing layer is applied.
In order for the corners to maintain their integrity and not crack, the room must be maintained at the same temperature for at least a day!
Puttying fiberglass
First, apply the primer and wait 1 to 6 hours until it dries. Along each joint of the canvas, 2-3 layers of putty are then applied, allocating no more than 1 mm of material to each. The last layer is formed from finishing plaster. The surface is then checked for cracks, crevices and protrusions. Eliminate the smallest flaws. Use fine-grained sandpaper, and ideally a silicon mesh for sanding. Then paint is applied to the fiberglass coated with putty. Therefore, a primer is used a second time. The fiberglass is checked for readiness with a flashlight: the light will show any imperfections that remain. Puttying helps save paint consumption, because fiberglass absorbs it very actively. It is theoretically possible to do without putty, but even under several layers of paint the texture of the canvas will be visible, and 4-5 layers will take a lot of time. The pores of fiberglass are poorly painted over.
How to putty walls for painting and wallpaper
The walls are first leveled using several layers of putty.
If the wallpaper is thick, it is advisable to apply putty in two layers. When using thin wallpaper, we recommend applying three leveling layers of putty.
This will allow you to paste the wallpaper on a flat surface without wrinkles or bubbles.
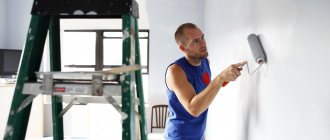
Painting walls requires more careful preparation. The paint does not hide even the slightest unevenness. Therefore, to level the walls, it is necessary to use finishing putty.
Well, now it's time to finish the article. All the material I wanted to share has been reviewed. I hope it will be useful to you, and you will use it if necessary, how to properly putty walls. Improve your own practical skills and gain new knowledge, as they say: “It’s never too late to learn!” That's all, thank you for your attention, successful and easy repair!
Why are walls puttyed?
Putty is applied to horizontal and often also to vertical surfaces so that the coating is uniform and free of depressions and protrusions. This is how cosmetic leveling is done, which cannot be achieved, for example, with plaster. The wall will be perfectly smooth and without roughness after sanding, which begins after putty. Such manipulations are performed, among other things, for the subsequent application of decorative plaster, painting, wallpapering, non-woven or single-layer. Usually apply 2 layers of putty and 1 primer. It is not necessary to putty the walls under textured wallpaper, but in the case of tiles the situations are different. Sometimes this cannot be done, under other circumstances it is possible, and sometimes there is a need for at least putty. The walls must be leveled before finishing with a glossy finish, as it highlights minor imperfections.