If you have started a renovation, then most likely you already know what you want to see in the final result. However, have you ever thought that by making repairs, you can save money on some construction stages? With all this, the quality of work will not suffer much. For example, with regard to wall decoration, for many it is important that they be plastered exactly to the level. Of course, it's great if you have the opportunity to invest in renovations. The task is especially simplified if you install drywall on the walls, then their verticality will not be in doubt. But this is not always possible. How to balance the desire to do things smoothly and economically?
If we are talking about plaster, then most people know the method by which beacons are first attached to the wall and the finishing is monitored using them. In this article we will tell you how to carry out such work.
How to level plastered walls with your own hands: step-by-step instructions, video
Today we will tell you how to level plastered walls with your own hands .
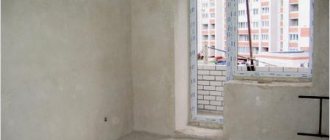
In most cases, those who are faced with repair work find a high-quality foundation extremely rarely. It doesn’t matter whether it’s an old house or a new building. The walls have a large number of defects and irregularities. It is impossible to attach any decorative material to such a “canvas”. The walls can be leveled with plasterboard or dry building mixtures. Sheet material will be useful for those who do not know how to level old plastered walls or how to level poorly plastered walls. The resulting finished area can later be puttyed and wallpaper can be glued onto it. However, this base is not suitable for tiles, since the surface is too slippery.
The most optimal method for leveling walls is the use of dry mixtures such as plasters and putties. As a result of finishing, a suitable base is obtained for any material and even painting.
Cement based plaster
Plaster for leveling walls, made on a cement basis, has its positive properties and disadvantages.
pros
- Acceptable price of the product.
- Long operational period.
- Possibility of choosing the required proportions and preparing them.
- Working with cement mixture does not require special knowledge or lengthy training.
- When lime is added to a solution, it becomes more plastic and acquires antibacterial properties.
Minuses
- It is not recommended to apply a thick layer: it may come off the surface.
- Working with cement blanks requires a lot of physical effort.
- Practically not friendly with concrete: poor adhesion.
- Drying one layer requires a large amount of working time.
Dry plaster: leveling the walls with plasterboard
Not everyone has the patience to level the plaster, in several layers, and then wait until it dries. It is faster to work with sheet material - gypsum board sheets (GCR). This technology is also called dry plaster, because there are a minimum of “wet” processes in it, and the result is no worse: if all the nuances are observed, the wall turns out to be perfectly flat.
But this technology has disadvantages. The first is that you can hang something heavy either on embedded bars laid ahead of time, or use special fasteners that will be held in place by the main wall, and not the finishing. So take this into account. The second drawback: such plaster eats up space. This is with the classic technology - installing gypsum boards on a frame. A simplified frameless design takes up much less space.
Drywall on frame
You can level any wall in this way. First, the frame is assembled. It is exposed in one plane and serves as the basis for attaching drywall. It is assembled according to certain rules:
- The guide profile is set and secured according to the level on the floor and ceiling.
- On the fixed profiles, the installation locations of vertical profiles are marked every 60 cm. Vertical lines are drawn through them.
- Mounting curtains are installed on these lines.
This is what hangers look like that are mounted on the wall
The principle of installing a frame for leveling a wall with plasterboard
The assembled frame begins to be sheathed with gypsum boards
The joints are glued and puttied
At this point, the leveling of the walls is completed and it is ready for either wallpapering or plaster. As you can see, everything is much faster.
Gypsum plasterboard with glue
Everything is even simpler here. Since a sheet of drywall is initially flat (if it has not been stored standing up and is not bent), it can be used without any foundation.
Apply diluted glue to the walls (on brick, concrete) or gypsum plaster (on relatively flat ones). They throw small “bloopers” at him. The volume is chosen depending on how concave or convex the walls are in a given place.
Glue or putty is applied
Then they take a sheet of drywall, lean it against the wall, use a level to level it in the plane, pushing it in if necessary, using pressure or a fist (do not break it).
Checking the plane with a level, level it
After placing the sheet straight, coat the edges with putty and apply glue to the next piece. This is how you assemble the wall. To make this type of plaster stick better, after the glue or putty has dried (24 hours or more), screw the drywall to the main wall (with self-tapping screws or dowels, depending on the type).
Everything is as simple as shelling pears, except that it is very easy to mess up. Everything is done with a minimum of emphasis, and getting changes with this method is really a piece of cake. However, if you need to quickly level the wall, you can try to do this.
Rules for preparing the solution
Gypsum plaster is stirred with a construction mixer or a drill with an attachment.
The process of preparing the solution is quite simple:
- Take a deep container and fill it with clean water. The amount of liquid is determined at the rate of 500-700 ml per 1 kg of dry gypsum powder.
- Pour the plaster mixture into the container and mix the mixture with a construction mixer or a drill with a special attachment. If you do not have such devices, try to thoroughly mix the ingredients by hand.
- Leave the plaster for 5 minutes until it becomes homogeneous, and then mix well again.
The finished solution can be applied to walls. It will retain its properties for the next half hour, after which it will begin to harden. It is unacceptable to dilute it with water or add any foreign components to the mixture .
How to plaster a doorway?
Before plastering door jambs, you should familiarize yourself with a number of rules:
- To prepare the doorway, use polyurethane foam, not insulation.
- Maintain the correct installation of the canvas - parallel to the floor, this will allow you to get an even slope.
- To prevent chipping on the outer corners, cover the edging with a reinforcing strip and cover it with mortar.
Working with door slopes consists of several stages:
- First, uneven areas are filled with putty.
- Smooth angles are introduced by securing an aluminum profile and mesh. The mixture is applied to them with a small spatula.
- After the initial plastering, time must pass for the materials to dry.
Read about how to plaster window and door slopes here.
Walls
The concept of “finishing work” includes a list of related operations from painting walls to laying tiles. All of them are carried out only on a carefully leveled wall surface.
Modern methods of leveling walls are divided into two groups. Depending on the technology and materials, a distinction is made between dry (using plasterboard structures) and wet (correction of the surface with a building mixture) methods, each of which has its own characteristics. In order to choose the most suitable method, it is necessary to measure the unevenness with a laser level, a plumb line or a regular level. Potholes and depressions ranging within five millimeters can also be eliminated using putty. Irregularities of about 3-5 centimeters? Then you should purchase a building mixture. Differences of more than 5 centimeters are best leveled using drywall.
Content:
- How to level walls with plaster?
- Installation of beacons
- Plaster application technology
- How to level walls with putty?
- How to level walls with rotband?
- Frame method of leveling walls with plasterboard
How to level walls with plaster?
Immediately before leveling the walls, it is necessary to carry out a number of preparatory work:
- dismantle outdated finishing materials;
- evaluate the surface that needs to be plastered.
The wall should not crumble or delaminate. Often, when working on old plaster, after the first layer has completely dried, defects are discovered that were previously invisible.
The key to success is compliance with three conditions:
- thorough surface preparation;
- correct choice of building mixture;
- presence of accurate beacons.
To level the brickwork, it is recommended to use a cement mixture. The cost of this plaster mixture is relatively low. It is possible to apply a fairly thick layer of material, which is important when finishing brick walls. It should be noted that when applying a layer of more than 2 centimeters, it is necessary to use a plaster mesh to reinforce the composition.
To plaster a smooth concrete wall, you will need gypsum-based wall leveling mixtures. Quartz microparticles included in the material make the wall a little rough. But first, be sure to prime the surface. Reinforcement is performed with a polymer mesh with a cell size of 5×5 mm.
Many people are interested in what mortar to use to level concrete walls. To plaster concrete with a rough surface, gypsum or cement compositions are used. A primer is also required, but without adding quartz.
When processing foam concrete surfaces, predominantly gypsum mixtures are used. Preliminary deep penetration primer is required.
Tongue-and-groove slabs, which are used for the construction of partitions, should be plastered with a gypsum mixture over a regular primer.
The next step after assessing the surface and preparing it for applying the plaster mixture will be the location of the beacons.
Installation of beacons
In construction, beacons are usually called a kind of guides for controlling the leveling of a surface using liquid mixtures. As beacons for plaster, a perforated profile is used, the width of which depends on the volume of the mixture applied. For beginners, it is better to use purchased beacons, the beauty of which is that they do not need to be removed after work and to mask the recesses left after removal.
Beacons are installed on vertical strips of quick-hardening mortar or mixture that will be used for plastering. The distance between the beacons is determined taking into account the size of the rule (it should rest on the edges of two beacons and not slide off).
Plaster application technology
In the gap between the beacons, with a trowel and the “falcon”, a “target” is thrown - an excess amount of the mixture. A falcon is a tool with a handle that vaguely resembles a trowel, but with a base size significantly larger than the base of the trowel. Specialists use a trowel to scoop up the mixture from the “falcon” and dump it between the lighthouses. The use of this tool can significantly increase labor productivity, because there is no need to return to the container with the solution every time. This means that the time spent on leveling is also reduced.
Then, as a rule, the solution is evenly distributed from bottom to top. In order to immediately apply a thicker layer of plaster, make a rough outline without leveling it. After the rough layer has dried, they begin to apply the finishing mark. The finishing mark is also leveled using the rule.
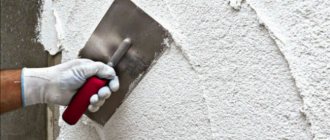
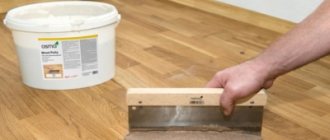
How to level walls with putty?
The surface is also primed before leveling with putty. Puttying the surface with your own hands is not a difficult task. It should be taken into account that this method is not always suitable, since it is possible to level the walls for painting with putty only with small differences in “heights”. In other cases, putty will be the final stage of a multi-step process.
To carry out puttying, you will need wide and narrow spatulas, as well as a cuvette with a flat bottom. The consistency of the mixture should be such that the cone formed by stirring with a stick retains its shape. Over time, the putty thickens, so it should be periodically diluted with water or primer. The mixture of the required consistency holds well in a vertical position without slipping off the spatula.
Properly prepared putty is placed in a cuvette and covered so that it does not dry out. A small amount of the mixture is applied to the wall surface using a spatula in strokes. Next, using measured horizontal and vertical movements, level the applied putty to a thickness of one or two millimeters, holding the spatula at an angle. It should be noted that the greater the angle of inclination of the spatula to the surface, the smaller the thickness of the mixture layer remaining on the surface will be. For convenience, the spatula blade is fixed with the other hand.
After the mixture “sets,” it must be lightly washed using a primer. This is done in order to remove sagging and various irregularities. The first layer, after complete drying (at least 24 hours after washing), is treated with sandpaper to smooth out roughness. If necessary, you can apply a second layer, but before that you need to prime the previously putty surface. Applying a second coat without primer may result in cracking as moisture is absorbed into the previously applied filler. After a day, the surface is sanded again with sandpaper wound on a board or small block.
How to level walls with rotband?
Rotband starting putty is a gypsum mixture manufactured by Knauf, a well-known brand in the construction industry. Used for interior work. Sometimes Rotband putty is called plaster. This mixture should not be used for finishing facades, since Rotband contains gypsum, which is susceptible to the harmful effects of the environment. The characteristics of this material far exceed those of conventional putty. It is much more flexible and dries more slowly, so it is extremely convenient to use. These benefits make leveling to a final finish with Rotband much faster. The work is carried out in several stages, as with the use of conventional putty, but both the starting and finishing finishing are carried out with one mixture.
It is better to mix the putty using a construction mixer. This way it will turn out without dry lumps. When leveling significant unevenness, a special putty mesh is used. The application technique with beacons can also be performed with a rotband.
Frame method of leveling walls with plasterboard
How can you level walls with large potholes? Drywall is suitable for these purposes. Correcting unevenness with plasterboard is the most effective and low-budget option of all. It is carried out using frame or frameless methods.
When installing using the frame method, a frame is first created, onto which sheets of drywall are attached. The frame is constructed from timber or metal profiles of two types - guide and rack. A frame made of timber is not so durable (subject to the influence of microorganisms, moisture, and prone to deformation). It is also much more difficult to install. Therefore, builders often use a metal profile as a base.
First you need to build a frame. To do this, you need to screw the guide profiles parallel to each other to the ceiling. Then, every 40-60 cm, we install guides taking into account the width of the drywall sheet (120 cm). At this stage, if necessary, the walls are insulated with mineral wool or polystyrene foam.
After assembling the frame, they begin to fasten the plasterboard sheets to the metal profile. This is done using self-tapping screws made of oxidized metal. Installation of plasterboard sheets is carried out in increments of 40-60 cm (depending on the distance between the guide profiles). The screw head is slightly “hidden” in the sheet.
The frameless method is slightly different. In this case, the sheets are glued directly to the surface that needs finishing. A significant drawback of the frameless method is that it is not possible to level walls with serious defects using this method.
There are other ways to level walls with your own hands. For example, plywood or plastic panels. The technology is similar to leveling with plasterboard, but instead of profiles, wooden blocks are used to fasten plywood or plastic panels. This method is quite economical, so it is used in finishing country houses, garages, bathrooms, etc. It also allows you to hide communications.
To make your walls smooth, carefully assess their condition and determine which method will be most appropriate. Smooth walls are the first step towards finishing materials that will truly decorate your interior.
Three-layer plastering technique: thickness of each layer
Standard wall plastering technology includes three main stages. Each of them has its own characteristics and requires a different layer thickness:
- Spray. Apply directly to the building base by hand or using a plaster ladle. The permissible size of the layer is 2-3 cm. After application, the mixture is distributed over the surface, but not too thoroughly, which will enhance the adhesion of subsequent layers.
- Priming. The main layer, the size of which depends on the spray already completed and can be 0.7-5 cm. The soil is carefully leveled with a rule or other convenient tools.
- Cover. A finishing layer intended for final leveling of walls. Its thickness does not exceed 5 mm, and a solution of a rather liquid consistency is used.
Knowing the criteria on which the thickness of the plaster layer depends is a prerequisite for the master. Compliance with the requirements will help to complete the work efficiently, economically and with the most effective results.
Leveling a plaster wall with your own hands: how to carry out the work correctly
When applying two or more layers, do not forget to moisten the previous layers with water after they have dried. The first two layers, if three-layer plastering is intended, are usually not leveled, leaving them rough. And the third layer is brought to perfection.
Is it possible to level plastered walls with plaster?
Yes, if the walls are uneven. It is better to level a plaster wall using gypsum-based plaster.
What to do
If the unevenness is more than 3 cm, then you can cut off the bumps with an angle grinder. It is recommended to cover the depressions with putty.
What materials are best for leveling?
Plaster with gypsum can be applied in a fairly thick layer, but it will still be durable. Because of this, using a similar composition, it is possible to make walls with large defects smooth.
Possible deviations
According to SNiP, when plastering is carried out, minor deviations in the thickness of the layer may appear. The fact is that in practice, perfect compliance with all norms and recommendations is not always possible. Here are the permissible errors for applying conventional rough solutions:
- 15 mm on the entire wall along a vertical plane;
- 3 mm per square meter of area;
- the depth of remaining irregularities is less than 5 mm;
- permissible number of flaws - 3 pcs./4 sq. m.
For high-quality plaster, a deviation in the vertical plane of no more than 5 mm for the entire wall and 1 mm for each square meter is allowed. The possible depth of unevenness is less than 2 mm, while the number of flaws is up to two for every 4 square meters.
Selection of plaster
Before starting work, we need to decide what kind of plaster we will use.
Plaster compositions are divided into:
- Ordinary plaster . It is used for both external and internal work, using cement, clay, gypsum mortars and mixed types of mortars;
- Cement-sand mixtures (gypsum) . The mixture requires the use of additional additives and plasticizers. The gypsum mixture is considered more environmentally friendly and is recommended for use when performing rough finishing of residential premises.
Based on the quality of the material, plaster is divided into:
- Simple plaster;
- Improved plaster;
- High quality decorative.
When plastering walls, there are two possible leveling technologies:
- Under the rule;
- Under the lighthouse.
The first technology ( as a rule ) is applicable if it is important to create a flat and smooth surface with minimal material costs (for example, in a garage or utility room).
It is not advisable to level a wall to one level with a large difference in area, since it will not be possible to save money, and the evenness of the walls will leave something to be desired.
Leveling the walls using the second technology ( under the lighthouse ) allows you to get a more even surface of the walls, and is better suited if other materials will be applied to the walls (decorative plaster, wallpaper, etc.). That is why this method is most often used in finishing houses and apartments.
In addition to plastering walls, other methods are also common, for example, the method of covering walls with plasterboard sheets. However, the plastering method has a number of noticeable advantages over drywall:
- The mixture for leveling the walls will not take up as much space as covering it with gypsum plasterboard sheets;
- Plaster does not require the installation of additional structures;
- When plastering, you get a monolithic structure without seams and joints (without which drywall cannot do);
- Even when applying gypsum plaster in a thick layer, it will not become covered with cracks;
- The plaster mixture is not harmful to health because it is a natural material.
True, plastering has its disadvantages:
- Working with plaster will take longer than when installing plasterboard structures;
- The site must have a water supply. Plastering work cannot be done without water;
- Plastering walls is a messy process that requires mixing to be done directly at the crew's workplace.
So, we’ve sorted out the selection of material and basic concepts. We move on to the next stage - preparing the walls.
Preparing the surface for leveling
First we prepare the base. The process includes removing old wallpaper, paint residues, stains and old plaster. To remove the old layer, you can use a hammer, a wide chisel, a spatula and a hammer drill with a chisel to remove protrusions.
You need to work carefully so as not to damage the wiring. Then you need to measure the walls. For horizontal measurements you will need a cord or a building level. Checking the wall vertically is done using a plumb line. Experts recommend performing the subsequent process if the maximum differences do not exceed 30 mm.
The next preparatory stage is the primer. Its choice depends on the chosen plaster. It is strongly recommended that you read the instructions for using the primer. Priming the walls before plastering improves the adhesion of materials of different structures. Application can be carried out using sprayers, or treat the surface with a brush or roller. Since it absorbs quickly, it is recommended to treat the surface twice.
Next, supporting elements are placed in one plane: beacons. You can use wood, but moisture can lead to it, and then you won’t get a flat surface. As beacons, a solution or ready-made T-shaped metal elements, which are sold in hardware stores, are used.
Useful tips from the experts
The production experience of master finishers allows us to give beginners some advice on how to properly organize the work process.
Tip 1
A drill is the first tool when carrying out repairs. Therefore, if you decide to do something yourself, take care of purchasing it. Choose a tool with a power of 700-900 W. With its small dimensions and weight, such a drill is sufficient to perform most of the work encountered in the “do-it-yourself” practice.
Tip 2
When independently preparing plaster compositions containing sand, it must be sifted!
Tip 3
You can avoid rusting the heads of self-tapping screws in drywall by lubricating them with 88 series or “second” glue.