Liquid wallpaper: structure and composition
This covering contains dyed fibers consisting of polyester, cellulose and cotton. Colored fibers give the original effect of the fabric covering. The coating contains decorative elements (marble chips, glitter and mother-of-pearl), this will give any room a new style and unusual shades.
liquid wallpaper may include components (mica, wood chips, dry algae, threads)
Acrylic and latex paints help add color to the composition. To achieve interesting and intricate effects, decorative “glitters” are added to the composition. Usually these are mother-of-pearl sparkles of various sizes, mica scraps, colored threads, and other components of natural and artificial materials.
In fact, it is impossible to buy liquid wallpaper ready-made. In the same Leroy Merlin or MaxiDom, liquid wallpaper is sold in a completely dry state. According to the instructions for use, you just need to add water to the dry composition. Semi-liquid wallpaper resembles a thick viscous curd mass, which is what is applied to the walls or ceiling.
Wallpaper consists of cellulose and cotton fiber. It is better to bring the dry mixture to liquid form using water in a special tray. The appearance of liquid wallpaper after drying resembles a cross between traditional wallpaper and decorative plaster. It takes 24 hours to dry completely. The coating is environmentally friendly with good heat and sound insulation.
The decorated surface acquires a single, seamless coating. Plasticity and the ability to use application techniques with different thicknesses help correct minor surface preparation flaws. Defects such as gouges or small cracks completely disappear. In addition, the same plasticity serves as a tool in creating the formation of a bas-relief pattern.
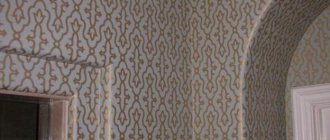
What they look like on the wall
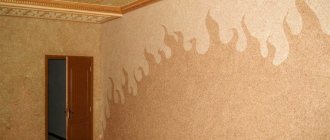
If we talk about appearance, liquid wallpaper is something between plaster and paper wallpaper. From the store you bring the dry composition, to which you add a certain amount of water according to the instructions. The resulting semi-liquid mass is applied to the walls or ceiling. The coating is seamless due to the plasticity of the material; when applied, minor surface defects are corrected - notches, cracks, etc. Due to the same plasticity, it is not too difficult to form a drawing, even a picture.
Liquid wallpaper can be used to apply even complex patterns to walls... or paintings
So liquid wallpaper looks different on the wall. Another difference is the different composition. If it is silk-based liquid wallpaper, the surface has a characteristic matte sheen. This composition is also called “liquid silk”. The cellulose and cotton variation is matte; even in the same shade and with the same decorative additives, the wall looks different.
And there are also mixed compositions - cellulose-silk or cotton-silk, in which there is a certain degree of shine, but not so pronounced. In general, it’s hard to say what liquid wallpaper looks like on a wall. If you like decorative plaster, you should also like this finishing option.
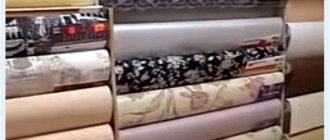
Packaging of liquid wallpaper
The mixtures are sold in transparent sealed bags. Dry wallpaper can look like sawdust. They contain a special viscous wallpaper material, which is pre-impregnated with a special adhesive solution.
The mixture must be diluted with warm water and applied evenly to the wall surface. Special paints are required for tinting the wallpaper. The result is a monolithic surface without seams.
Various types of liquid wallpaper imitate silk, embossed paper or dense foam due to the fine fibers in the mixture.
Types of liquid wallpaper
How the liquid wallpaper appears on the wall will depend on the application technique. The drawing, as a rule, turns out individual, it looks different and is difficult to repeat. Repetition is complicated by various additives of uncertain consistency. For example, liquid wallpaper based on silk acquires a pronounced shine character.
Craftsmen call a variation of this finish “liquid silk.” The use of cellulose and cotton fibers gives the surface a soft, matte velvet structure. Because of this, with the same additions of different decor, the wall looks different.
There are mixed, formed into various models with different methods of application and achieving the best artistic and plastic effect - cellulose-silk and cotton-silk compositions. They also have a component of shine, but not a pronounced one. In a word, it is difficult to describe in words what liquid wallpaper looks like on a wall. There is an opinion that fans of finishing walls with decorative plaster will always like the “liquid wallpaper” option.
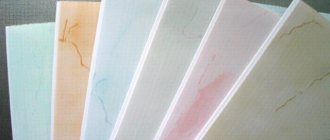
As mentioned above, liquid wallpaper differs in the composition of natural fibers. Let's clarify which fibers are more common than others:
1. Silk. This wallpaper contains silk fiber, which is the highest quality coating. These wallpapers have a long service life, they do not fade in the sun, and the price is more expensive. 2. Cellulose coatings are attractive due to their low price, but outwardly they do not look as impressive as silk ones, and the quality is much lower. 3. Silk-cellulose mixtures from different fibers, average in quality, price and beauty.
What is liquid wallpaper made of?
No matter what the skeptics say, liquid wallpaper is much more natural than usual. They are based on silk, cellulose and natural dyes.
In the composition of decorative and expensive species you can see a small content of mineral chips. Today we can separately highlight popular options:
- Cotton - contain a large amount of cotton fibers.
- Silk.
- Cellulose.
- Silk-cellulose.
The second option is the most expensive, since this material has high strength and is practically durable. The most popular is the latter, since it costs the least, but is no different in terms of wear resistance.
Cotton ones can be removed, soaked, mixed with glue and re-covered the wall; this option is more universal.
Composition of liquid wallpaper made with your own hands
Essentially liquid wallpaper is a crushed mixture of cellulose and glue .
To get this velvety, soft and pleasant-to-touch decorative coating, you will need ordinary waste paper or cardboard and KSM, PVA or bustilate glue.
even old newspapers can be used as a paper base , but printing ink can introduce undesirable shades into the composition.
To increase adhesion (bonding of the mass), in addition to glue, you can add a little gypsum to the mixture.
The most expensive compositions also include
linen, cotton or silk fibers . In our case, they can easily be replaced with ordinary finely chopped cotton wool or purchased artificial or synthetic yarn at any store that sells textiles.
Theoretically , even old fabrics can be used , but they must be very finely shredded. You can also add mother-of-pearl, glitter, mica, quartz or marble dust or chips, etc. to the mixture for liquid wallpaper. The finer their fractions, the smoother the transitions will be.
Advantages and disadvantages
Advantages of liquid wallpaper:
- level the walls;
- the structure of the wallpaper makes it possible to make cracks invisible;
- applied without joints;
- a very important plus is the flight of your imagination, you decide what design and decor to create;
- repel dust;
- The service life is unlimited, they are not susceptible to sunlight, and they retain their original structure and color for many years.
Disadvantages of using liquid wallpaper:
- high price;
- dry for more than a day;
- do not tolerate high humidity and water.
Briefly about liquid wallpaper
In fact, this material is a type of decorative plaster. Liquid wallpaper uses cellulose fibers, which are obtained as a by-product of the wood processing industry, as well as silk fibers. To give liquid wallpaper an aesthetic appearance, various dyes and decorative fillers, such as glitter or granules, are added to them. For fastening, we use the well-known KMS glue, which is already commonly used for gluing ordinary roll wallpaper. It’s actually because of their composition that they got their name. However, in terms of the method of application and the result obtained, this finishing material is still close to decorative plasters. It must be applied using a trowel, a special grater or spatula in the same way as putty or plaster. By the way, this determines the huge range of possible ways to use liquid wallpaper and their undoubted advantage over conventional roll wallpaper.
The main advantage of liquid wallpaper is the ability to apply it to surfaces of any shape, even very complex ones. You can combine them and make applications from them on the walls of your apartment or house. The result is a layer that is as close as possible to very high-quality wallpaper. That is, the surface is warm to the touch and soft.
The main disadvantage is their high cost. You should not immediately believe such encouraging speeches from advertising banners that one package will be enough for 5-6 square meters, and especially since they can be applied to all kinds of surfaces without careful preparation. This is wrong. Still, to get a good result, and it’s really worth it and can’t be compared with regular wallpaper, you have to carefully prepare the walls and carefully carry out the process of applying liquid wallpaper.
Which to choose: cotton or silk
Silk, which is used as the main raw material, is artificial. However, it will not lose its properties, the coating will look rich and beautiful.
However, if the owner of the premises is a fan of environmentally friendly solutions, then it is better to choose cotton ones. It is worth considering that the second option is less economical in consumption.
Silk wallpapers also have increased durability and are much cheaper. Otherwise, both materials do not differ from each other in touch, sound insulation and heat retention.
Speaking of application, there are no differences here either, the main thing is to stick to the technique.
Both options do not saturate the room with an unpleasant odor when evaporating, but glue can do this, so it is advisable to wear a protective mask.
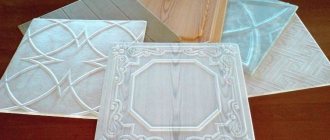
How to make a drawing using a template and sketch
With drawing skills, you can create more complex paintings using multiple colors. To do this, make a sketch on the glass, project it onto the wall using a lamp, and trace the resulting outline.
Step-by-step execution of work
Before transferring the template to the surface, perform the following steps:
- dilute the required amount of composition;
- we prepare the wall, but do not apply the background;
- we reflect the drawing using the chosen method, marking the colors on individual elements;
- using a spatula, apply a layer 3 mm thick, without going beyond the contour and without connecting the borders of the colors;
- level the relief with a damp grater;
- dry each layer (you can speed up the process with a hairdryer);
- close the boundaries between different shades and apply the main background.
Defects (a layer of the wrong shade, going beyond the outline) can be eliminated with a damp cloth or spatula.
Mixture consumption
The packaged mixture contains all the necessary components, so you can immediately pour it into a container and gradually fill it with warm water up to 40 degrees, stirring constantly. 1 package of liquid wallpaper weighing 1 kilogram requires 6 liters of water. However, these indicators may vary among different manufacturers, so before preparing the material you should definitely read the attached instructions. It will also be useful to read the article, liquid wallpaper at home.
IMPORTANT! For more convenient application to the surface, the solution must be left for 8-12 hours and thoroughly mixed again before starting work.
How to apply it correctly?
Let's look at the methods of diluting and applying popular versions of dry wallpaper from the Silk plaster and Bioplast brands.
Silk plaster
- Dilute the dry mixture with water at room temperature. Each collection will have its own proportions indicated on the packaging (a few examples will be given below).
- Mix with your hands until a homogeneous mixture forms.
- Let the prepared solution sit for about 12 hours.
- Proceed to the stage of applying the material to the wall.
| Volume of water per 1 packet of dry mixture, based on the wallpaper collection | |
| Collection | Required volume of water |
| Fort | 2.5 l |
| North | 4.5 l |
| Prestige | 6 l |
| Relief | 7 l |
| Recoat 1 | 7.5 l |
Bioplast
- Pour the dry mixture into the previously prepared liquid. You will need 5-6 liters of water per 1 kg of dry composition.
- Mix the mixture by hand and leave it to swell for 10-12 hours.
- Proceed to applying it to the wall.
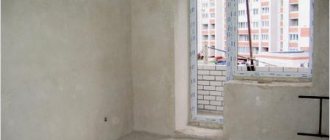
Which walls can liquid wallpaper be applied to?
Liquid wallpaper can be applied to almost any surface. For example, for a similar coating, if the walls were previously treated with the same composition. The only thing you need to do is clean the surface of dirt. Wooden, concrete and plasterboard walls are a little more demanding to prepare.
Liquid wallpaper can be applied to almost any surface.
Liquid wallpaper application technology
Preparing the walls
First of all, you need to remove the remnants of old finishing materials, that is, wallpaper or paint, from the walls.
- If nail heads are visible on the surface, they should be treated with water-based paint.
- In an old apartment, you should resort to treatment with FG solution and then painting with water-based emulsion, so that yellow spots will not appear on the surface over time.
- If the walls are finished with plasterboard, then it is completely puttied.
- Since the wood surface absorbs moisture, it must be protected with oil paint and further application of water-based emulsion.
Preparing the mixture
You need to select a small container, pour warm water into it, and then add the dry mixture in small portions. A drill mixer is suitable for mixing. Liquid wallpaper should resemble very thick sour cream in its consistency. All lumps should be removed. This solution is then left to infuse for 20 minutes and then stirred again.
To make the composition truly homogeneous, you must immediately mix the required amount of liquid wallpaper. This is because the wall needs to be covered in one go.
Preparing walls for liquid wallpaper with your own hands - work order
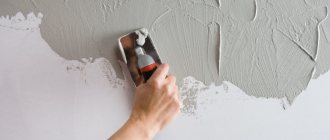
Everything needs to be done in stages. It is the observance of consistency and correctness of actions that will help you fully enjoy the interior for many years. It all starts with leveling the surface. However, this initial stage can be skipped if the depth of the pits does not exceed three millimeters. Leveling refers to puttying with gypsum compounds.
For priming, it is important to choose the appropriate composition. For example, there is a special product for wooden surfaces. Primer mixtures are divided into acrylic, quartz and deep penetrating. To ensure that the primer applies evenly, rollers are used instead of brushes.
To ensure that the primer applies evenly, rollers are used instead of brushes.
Concrete surface
Preparing walls for liquid wallpaper with a concrete base begins with careful putty. The thing is that concrete absorbs moisture well, so the result will not be positive. After drying, the walls are thoroughly cleaned and a primer is applied to them in several layers.
Concrete walls must be leveled with putty, which contains gypsum. After all layers of the primer have completely dried, a water-based composition is applied to the surface. It is needed to give a white tint.
When PVA glue is added to water-based paint, the adhesion of the following composition to the surface increases.
Concrete walls must be leveled with putty, which contains gypsum.
Brick surface
If the brick surface has uneven surfaces, it is first plastered, then puttied, several layers of primer are applied, and then similar actions are carried out as with a concrete base. Brick, like concrete, absorbs moisture well. At the same time, it has large roughness.
Brick, like concrete, absorbs moisture well.
Plasterboard surface
Walls and partitions made of plasterboard undergo no less demanding stages of preparation. The moisture capacity of the material is increased. Here you will need complete puttying and priming of the entire surface.
Drywall is secured using self-tapping screws. Their caps need to be slightly “sunk” into the surface and, preferably, painted over with white oil-based paint. The appearance of rust spots after applying liquid wallpaper is due to the use of conventional metal screws for attaching drywall sheets. It is better to use galvanized material for these purposes, which does not oxidize even over time.
Here you will need complete puttying and priming of the entire surface.
Wooden surface
In modern buildings, walls made of wood and chipboard plywood are very rare, but the presence of such surfaces is also no exception. Most often, structural elements are made from these materials.
Wood absorbs moisture well. After covering wood with a liquid coloring composition, the result does not meet expectations. In addition, moisture has a detrimental effect on the foundation itself. The tree becomes deformed, swells and cracks over time. Moreover, the thinner the wooden surface, the faster the deformation occurs.
Before any type of finishing work and more, it is important to ensure the reliability and strength of wooden structures.
Initially, the surface made of chipboard or MDF does not have a completely smooth surface structure, so you will need a special putty designed for processing wood. In addition, it will prevent further penetration of wood resins into the liquid wallpaper.
Oil paint will create a barrier between the topcoat and the base. If you intend to treat a large area of a wooden surface, then it is more advisable to first cover it with several layers of primer, then with a water-based composition with the addition of PVA, and only then apply liquid wallpaper.
Oil paint will create a barrier between the topcoat and the base.
Plywood and elements made of chipboard, MDF
The most common type of decorative structures in modern homes are elements made of plywood and chipboard. Their main disadvantage is increased absorbency, which creates additional difficulties when applying solutions.
To preserve the material and perform finishing work, you should cover the plywood or chipboard with a layer of oil paint. This treatment option will create a kind of barrier that prevents the penetration of moisture.
Oil paint must be sanded. otherwise the liquid wallpaper will simply slide off it
Old walls
How to prepare old walls for liquid wallpaper? The previous coating must be removed from the surface. It is important not to leave a single area unattended. Previously, finishing using bright, rich colors was especially popular.
As in previous cases, exfoliated areas should be removed if possible. Then apply a thick layer of gypsum mixture. An alternative is to treat the surface with water-based facade paint, which is diluted with PVA glue at the rate of three parts paint and one part glue.
If in the case of concrete and brick surfaces you can use a water-based emulsion, then in this case this move will not work and over time, yellowness will “leak through” it. The walls, as a rule, were painted on a plaster layer, so it is important to check problem areas with a peeling plaster layer by tapping. These areas are characterized by a dull sound.
It is important not to leave a single area unattended.
To treat previously painted surfaces, it is better to use a primer based on quartz sand, which will improve the adhesion of the components. It is better to do the work with a brush rather than a roller. If the walls were painted with glossy or oil-based paint, then sandpaper, which needs to be passed over the entire area, will help to give them roughness.
It is extremely necessary to evaluate the color of the previous coating and the color of the applied liquid wallpaper. If the old coating was light, the topcoat will be light and bright. If the initial painting had dark shades, then the color of the liquid wallpaper after drying will become faded and dark.
If the walls were painted with glossy or oil-based paint, then sandpaper will help to roughen them.
What preparation needs to be done for plastered walls?
If the walls in the room are plastered, they must be puttied with a gypsum mixture. This will not only add hydrophobicity to them, but will also give them a uniform white color.
After the putty has dried, the surface does not need to be sanded - for high-quality gluing of liquid wallpaper, the wall must be rough. But applying primer in two layers is a mandatory procedure. Putty itself cannot reduce the absorption of walls, but primer can cope with this. When the surface has dried, you can apply liquid wallpaper.
What can liquid wallpaper be glued to?
Concrete
Gluing onto a bare concrete base is impossible for several reasons:
- the wallpaper mixture will slide off smooth concrete;
- the dark base will be visible through thin trellises;
- A concrete wall absorbs moisture well, so the finishing material will not have time to adhere well to the surface.
The concrete must be made light and rough. “Betonokontakt” will give roughness to the base.
To dim the color, the surface is puttied with gypsum mortar, and then painted with water-based paint mixed with PVA in a 2:1 ratio.
A simpler option is to prime the concrete wall twice with a white primer mixed with quartz sand. The first layer of primer clogs the pores, the second makes the surface rough. The paint creates a light background.
Brick
Brick for gluing liquid wallpaper is prepared in the same way as concrete, with the only difference that in the brickwork you must initially seal the masonry joints. Gypsum plaster is suitable for sealing. After applying the mixture, the surface is primed and painted. You can also use "Betonokontakt".
Drywall
Conventional plasterboards are destroyed by moisture, so they cannot be glued directly to them. Moisture from the facing material will first soak the cardboard, then penetrate into the core of the gypsum board and make it brittle.
Gluing directly onto moisture-resistant drywall is possible, but keep in mind that their own color will show through the thin wallpaper layer.
Wallpaper can be used more than once, but if it was applied directly to a plasterboard sheet, when you try to remove the coating from the base, the paper shell of the latter will definitely be damaged.
The gypsum board is attached to the sheathing with metal screws. Under the wallpaper, the screw heads will quickly begin to rust, and the rust will eventually make its way to the finishing surface.
To avoid negative consequences, the plasterboard base needs to be prepared:
- the screws need to be screwed in one additional turn, and the top should be painted with white oil paint;
- the base is primed with a regular colorless or white primer of shallow penetration;
- the base is puttied with gypsum mortar;
- when the putty dries, the base is painted with white acrylic water-based emulsion mixed with PVA in a ratio of 3:1. Instead of dye, you can apply a second layer of putty, but after drying, its surface must be primed again.
Plywood
If you cover clean plywood, it may swell, ripple, or split into pieces. To prevent this from happening, the base is impregnated with waterproof varnish, which creates a barrier between the liquid and the wood material, without interfering with the reliable adhesion of the cladding to the wall. Then the surface is primed and painted.
Wood, OSB, MDF, chipboard
All wood-based materials absorb moisture well, so you must first create a moisture-proof film on the surface of the wood. Wood, MDF, chipboard or OSB boards must be coated with white oil paint. When the paint dries, the base is rubbed with sandpaper. Instead of using oil, you can prime the base twice and coat it with a water-based emulsion mixed with PVA.
If the chipboard sheets are not treated, they are coated with alkyd paint. Varnished surfaces are sanded with sandpaper or other abrasive material to create good adhesion.
Plaster
Wallpaper can be pasted on plastered walls, but the surface must first be restored. First, the lagging areas of the plaster are cleaned, the resulting potholes are sealed, the walls are cleaned of dust, dirt, and degreased. The plaster is primed twice. A layer of PVA or water-based emulsion mixed with glue is applied to the dry, primed walls.
Whitewashed wall
It is imperative to remove whitewash from the walls.
Due to the porous structure, whitewash will not be able to maintain the finish for a long time and, if not immediately, then over time it will fall off along with the wallpaper. The whitewash is removed and the wall is prepared as follows:
- The wall is treated with water. Use a wet sponge, rag or spray bottle.
- When the whitewash swells from water, it can be scraped off with a spatula.
- The cleaned base is washed with soapy water.
- The dried wall is primed.
- Any defects on the base are repaired with putty.
- The surface is re-primed.
Dye
Liquid wallpaper can be glued to any type of paint. Before gluing, you need to prepare the base:
- areas with loose paint are cleaned;
- the base is roughened by sanding;
- damaged areas are puttied;
- the surface is treated with a primer.
How to remove whitewash and paint
Most likely, the whitewash and paint that previously decorated the room will have to be removed. If this is not done, the appearance of the new wallpaper may suffer:
- It is better to clean surfaces containing whitewash. The lime mortar may turn yellow, then the stains will certainly appear on the liquid wallpaper and spoil the appearance of the finish. Wash off the whitewash with warm soapy water using a sponge or rag. Coatings are then applied.
- If the ceiling and walls were painted with water-based paint, it is not necessary to wash it off. Only when the color of the base is too different from the shade of the wallpaper is the surface repainted in a more suitable tone. Otherwise, the substrate will appear unattractively through the liquid wallpaper.
- Acrylic and latex dyes are easy to remove; harmless removers are sold for them. Paint that is not contrasting with the new coating does not need to be removed. Acrylic or latex can strengthen the base; in some cases, they are specially applied to the walls before installing liquid wallpaper.
- Cleaning oil paint is much more difficult, but this should only be done if the coating is weak, with bubbles and cracks. You will also have to remove paint that is too dark - it is very difficult to paint over it even with several layers of white. To remove oil-based paint, several methods are used: scraped off by hand or with a grinder, heated with an iron or a hair dryer, and washed off with chemicals. All methods are dangerous and harmful to health, so you need to act carefully.
Consumption and price
Today you can find liquid wallpaper on sale from manufacturers such as Bayramix, Silk Plaster, Senideco, Silkcoat. The price differs depending on the cost of the filler, as well as the region of sale. In any case, the price of liquid wallpaper is less than the price of any decorative plaster. So, one package will cost at least 450 rubles. The cost of the most expensive materials reaches 2-2.5 thousand rubles. At the same time, you can find different packaging of liquid wallpaper on sale.
As a rule, one package is enough for 4-6 m², provided that the layer thickness is 1-5 mm. You can independently calculate the consumption of liquid wallpaper, taking into account the coverage area and the required layer thickness. In any case, it is recommended to take finishing material with a reserve so that you can replace the damaged area.
Application technique
The first thing you should start with is how to apply liquid wallpaper to paint with your own hands.
If the residual layer is thin, it is better to use a spray bottle. There are several reasons:
- It will significantly speed up and facilitate the process.
- If the walls are uneven or have a defect, it will help to carefully hide them.
The following tools are also used as an alternative:
- trowel;
- spatula - standard from 18 cm;
- grater - plastic.
You can purchase a special grater for liquid wallpaper; it differs in price and the presence of a narrower blade. Their main feature is a transparent body, which helps you monitor how the fibers lie.
Using any of the selected tools, the layer is applied no more than 1.5-2 cm. Wallpaper is applied to the wall according to the principle of heels - that is, to one section made, I add the next one. There is no difference as to where to start work.
If you use a grater, it should be held on the wall at an incline of 15 degrees. To avoid leaving grooves (the material dries quickly and sticks), it is better to wet the tool and remove excess material from it.
One of the easiest ways to apply is to apply circular motions towards yourself. It is advisable not to cover a large area.
Method 1. Spatula
If you are a beginner in this field, you should choose a spatula as your main tool. Instructions for applying the mixture using a spatula are presented below:
- It is necessary to prepare the mixture correctly. Dry material must be diluted with warm water in a ratio of 6 liters of water per 1 kg of dry mixture.
- Leave the mixture for 12 hours, during which time you should prepare the walls for work. Remove the remnants of old wallpaper, cover the cracks with putty.
- Stir the finished mixture so that it can be evenly placed on the surface.
- Use a spatula to take a small amount of the mixture and apply it to the wall. It is necessary to cover the wall in small squares with a side of about 1 meter. After applying the mixture, level it using a transparent grater, the layer thickness should be no more than 2-3 mm.
- The applied mixture should be securely fixed to the wall and dry.
The spatula must be held at an angle, movements must be smooth so that there are no tears
Method 2. Spray bottle
This application method allows you to cover the walls with a uniform thin layer up to 2 mm thick, which helps save money on the purchase of material. A step-by-step application plan is presented below:
- Place the mixture prepared in advance in a spray bottle; the liquid wallpaper should resemble sour cream in consistency.
- After filling the container, point the spray bottle at the wall, moving it smoothly, apply the composition to the surface of the wall.
- Cover the wall evenly, paying special attention to hard-to-reach areas.
- Carefully inspect all sections of the wall; there should be no empty spaces left on it. After applying the composition, level it using a smooth grater or trowel, after wetting the tool with water.
Method 3. Trowel
The principle of using a trowel is practically no different from a spatula. Dilution, preparation and application completely repeat the steps described above.
- Use a trowel to take the prepared mixture and apply it to the wall.
- Using a trowel, cover a small area of approximately 1 square meter. Gradually apply the entire composition to the surface.
- After this, level all areas of the coating using a trowel; the layer thickness should not exceed 2-3 mm.
- The diluted mixture should dry out; to do this, leave it for about 3 days.
To work with liquid wallpaper, choose transparent trowels; when applying, hold them at an angle
Method 4. Hopper
This device is similar in principle to a spray gun, so the basic procedure will be the same as in the algorithm of actions presented above:
- The pre-prepared mixture must be poured into the hopper bucket or into a bag (depending on the design). Close the bag tightly before starting work.
- After this, you should point the tool at the wall and apply the solution evenly, smoothly moving the hopper along the wall.
- Pay attention to difficult areas; the mixture must be evenly distributed over the entire surface of the walls.
- In the final stage, level the solution over the entire surface using a grater or trowel. After this, the mixture should dry, usually this takes about 2-3 days.
Hopper
Method 5. Roller
Using a roller you can adjust the degree of application of the material to the surface.
It is recommended to use a thin-haired roller to prevent the solution from sticking to it. Periodically during work, it is recommended to moisten the roller with a small amount of water.
If desired, you can use decorative rollers to create patterns on the walls. After completing the work, you should level the mixture over the entire surface of the wall using a grater, and then leave it to dry for 2-3 days.
How to properly dilute liquid wallpaper?
It is not enough to just buy liquid wallpaper - the mixture must also be properly prepared for application to the surface.
Before diluting the liquid wallpaper, shake the bag vigorously to mix the mixture well and improve the finely dispersed structure of the liquid wallpaper (so that there are no small lumps and the mixture is easily mixed).
p>
For one package of wallpaper, a mixing container with a volume of 7-8 liters is suitable. Usually choose a container with a depth of 20-30 cm to make it easier to wash and mix the solution in it.
For the solution, use only clean water at a temperature of 20-30 °C. Temperature does not affect the quality of the finished solution, but it is more convenient to mix liquid wallpaper with just such warm water. You can stir either one package or several at once, but in this case it will be much more difficult to achieve sufficient homogeneity of the mass. The second option is relevant only when liquid wallpaper can have different shades and it is necessary to achieve the same color.
How to properly dilute liquid wallpaper to achieve the desired consistency? To do this, pour the entire mixture from the bag into a container and then add about 5 liters of warm water. As water is poured in, you need to constantly stir the solution, achieving homogeneity of the mass. The mixture is always prepared by hand, no mixer or other equipment is used. If it is difficult to mix one package yourself, you can try mixing the solution in small portions.
The consistency of the ready-to-use solution should resemble thick cream. The approximate consumption of material is 5-6 liters per package of the mixture.
Is it possible and how to apply them to the ceiling?
Quite often, according to the designer’s idea, part of the ceiling is covered with liquid wallpaper. Therefore, performers often wonder how to apply liquid wallpaper to the ceiling? There's nothing new here. It is necessary to strictly follow the technology of pasting walls with liquid wallpaper.
How to glue corners correctly
When gluing corners, all movements with tools must be performed not towards them, but away from them. Everything else is standard.
Sticking
And now let's move on to how to apply liquid wallpaper. Take the finished mixture and add slightly heated water to the container with it to soften it. Knead again until the mixture is homogeneous. Then start applying with a trowel or other tool, and ideally this should be done from top to bottom, from the corners to the center. After 1 hour of finishing the work, the wall needs to be illuminated from the side and all flaws removed.
You can fix them later. The prepared solution is stored for up to 10 days. The coating is often applied not just to the ceiling and walls, but also to radiators. True, they need to cool down. The best layer thickness is 0.2 cm, and ideally it should be the same over the entire surface. In the classic application method, they try not to press the spatula too hard, but also hold it at an angle of 4-16 degrees. The thinner the layer is needed, the larger the angle will be.
In this case, each new stroke will slightly overlap the old one. You can also do everything in a circular motion, which will help you get an unusual pattern and there will be fewer uneven spots on the wall. If the mixture is too thick, you should wet the iron. Typically, finishing an apartment costs 1-2 days. When carrying out work, the room can be ventilated, but it is better not to create drafts. We also do not recommend turning on heating devices.
Work technology
The technique of applying a liquid coating to paint and other surfaces is quite simple. But this only applies to professionals. Using the developed instructions, you can easily achieve the desired result. Of course, such guidance will not be enough for an inexperienced person. Therefore, when decorating a room, it is recommended to follow some professional advice.
Ideal for any room
Preparation
The work begins with preparing the surface for further finishing with a liquid composition. Many experts believe that there is no need to thoroughly clean the old coating. High-quality wallpaper adheres well to different surfaces. This is important in order to create a strong and durable coating. The smoother the wall, the easier it is to finish. It is recommended to take into account the following nuances:
- When finishing, the evenness of the panel is of great importance. Small defects are easily hidden under the wallpaper. But, as for large depressions, they cannot be masked even with a thick layer. Therefore, such slab defects are eliminated in advance. This can be done using putty.
- It is important to allow the composition to dry completely before applying.
- Durability of the coating. If there are places where the old plaster is damaged or does not hold securely, then it must be removed. The finish on top of it will not adhere securely and will eventually fall off along with the base. The entire surface must be inspected for such defects.
- Removing old finishes. To carry out quality repairs, it is necessary to carefully prepare the surface. To do this, it is important to completely remove the old coating. If the walls were previously painted with oil paint, the shade may show through the liquid wallpaper. To remove whitewash, it must be washed off with water.
- Padding. The primer ensures reliable adhesion of liquid wallpaper to the wall. Priming is carried out in several layers. Between applications you need to wait a few hours. The ideal solution would be to treat the wall with white water-based paint. This will be a suitable option for a new coating.
You also need to remove fasteners, nails and other metal objects from the wall that can cause rust stains to form during the application of the liquid composition.
Before applying wallpaper, remove the old coating and fasteners from the walls.
Preparation for application
You need to be very careful when preparing to apply liquid wallpaper. Immediately knead the portion that will be used. As a result of repeated mixing, the solution will be completely different, which makes it difficult to create a uniform application. When performing this work, pay attention to the composition of the mixture. There are mixtures on the market that are ready to use. Simply dilute them with water. There are also solutions, for the preparation of which you will need different compositions, sold separately.
Before soaking components, consider the following expert advice:
- Shake the mixture thoroughly, which will dissolve any lumps that have formed during long-term storage;
- the mixture is added to warm water, since otherwise lumps will form and the mixture will not dissolve completely;
- diluting the mixture manually will prevent damage to decorative elements and ensure high-quality dissolution of the composition;
- the composition must be prepared in advance, since after dissolution it must infuse for at least 8 hours;
- When preparing the mixture, take into account that about 250 g of dry mixture is used per 1 m2.
To prevent repairs from entailing additional costs, the mixture must be prepared in sufficient quantities. Any excess solution that is not used immediately will likely have to be thrown away.
Suitable for processing complex structures
How to apply correctly
Many people wonder how to soak and how to properly apply liquid wallpaper at home. As for the second, the best option would be to use a spatula. If such a tool is not available on the farm, then other plastic devices are used. The solution is applied in a small amount to the wall, after which it is distributed over the wall.
At the same time, you should know how to work with it:
- First, a solution of the required thickness is applied to the wall. After this, it is smoothed out with smooth movements directed in different directions.
- If necessary, application can be directed in opposite directions. This will allow you to create an original texture and beautiful design.
- Any pattern can be applied to a fresh coating. The design solution should be optimally combined with the future interior of the room. Various ideas are used for decoration.
Important! The peculiarity is that liquid wallpaper is not afraid of drafts - and this greatly simplifies the preparation and implementation of repair work. Ventilation, on the contrary, speeds up the drying of the solution, which can significantly speed up repairs in the house.
The mixture is applied according to a similar scheme as putty.
Storage
The dry mixture must be stored in a sealed plastic bag. It is placed in a dark and dry place. If during the work it was removed from the original packaging, then it must be placed in polyethylene and hermetically sealed. It is not recommended to store the material in a damp and cold place, as this will damage it.
The diluted liquid composition can be stored for several days. However, there is no guarantee that after a couple of days it will not become a lump. Reuse of such a solution is unacceptable. To avoid such a problem, it is necessary to thoroughly dry the composition and place it in an airtight container.
Further work with the remaining solution is carried out in the following sequence:
- Spread polyethylene, sheet metal or glass on the floor. Apply wallpaper. The thinner the layer, the better. The thickness of the plaster should not exceed 3 cm.
- Leave the material in this form for a day. This time is enough for all the moisture to evaporate.
- Pack the dried solution in a dry bag. The original packaging is also suitable for further storage.
- Tie the bag tightly and put it in a dry place.
If necessary, the material can be reused. When kneading, the proportions are observed and some nuances are taken into account.
Store the material in sealed packaging
Tips for installation in hard-to-reach places
When decorating walls with their own hands, people often encounter problems applying material in hard-to-reach places. Most often, difficulties arise when applying wallpaper under the ceiling, near radiators, in corner parts or on walls located under a slope. Before applying material in these areas, we recommend using the installation tips below.
Behind the battery
When applying the composition, the batteries will interfere greatly, so for convenience you should remove them, if possible. If the batteries cannot be removed, you can apply the material behind them with a small spatula or brush, however, modern wallpaper models allow you to apply the material on top of the battery, which greatly simplifies the process.
On the pipes
If you want to apply the material to the pipes, you should turn them off and wait until they cool down. Instructions for coating pipes are presented below:
- To coat the pipes, you can use a spatula; a small amount of the mixture should be carefully applied to the pipe evenly over the entire diameter.
- The thickness of the layer should not exceed 2 mm; after applying the material, it should be smoothed along the entire length of the pipe using a trowel.
- The finished coating must be left to dry for 2-3 days.
On the arch
To finish the arch you will need a special rounded spatula or roller. It will not be possible to apply the mixture with a trowel due to the rectangular shape of the tool. It is recommended to first coat the arched vault, moving gradually downwards. Finally, finish the corners.
On the slopes
- When applying the material to slopes, the walls should be prepared using putty, and the material should be applied strictly at eye level to track the slope.
- In this case, it is also necessary to prepare plastic film in advance to close the door. This will prevent the composition from getting on the door.
- Using a roller, carefully apply the material along the slope.
- Then the material should dry; to speed up the process, you can open the windows and doors in the house.
In corners: outer and inner parts
For this purpose, several spatulas are used simultaneously, which allows you to create an angle of the required size. If you need to create even corners in the room, you should purchase a corner spatula in advance; you can use it to apply the mixture in the corners of the room. The operating principle is no different from using classic spatulas.
Basic rules of work
Before you begin finishing work, you need to familiarize yourself with the basic rules:
- A spatula is used to apply the liquid composition. The work is carried out in the same way as with applying plaster. The difference is that the wallpaper is applied in a loose layer. There is no need to press the layer, as is done when working with plaster. The movements should not be strong. Otherwise, the finished work will not look aesthetically pleasing.
- The thickness of the applied layer should not exceed 2 mm. During the work process, the main thing is to apply the composition evenly. If there are irregularities and cracks on the surface, the consumption will increase. Therefore, it is important to carry out all the preparatory work in advance to level the surface and hide the defect.
- The spatula should be held at a slight angle. This will allow you to apply an even layer of the desired thickness. If the coating is thin, the finished result will be fragile. If applied thickly, you may encounter the problem of excessive consumption. It is important to follow the patterns. They must create a single composition to ensure the aesthetics of the interior.
- The room in which the renovation is taking place must be sufficiently lit. For this, experts recommend using additional portable lamps, as well as spotlights.
- The liquid coating is applied in one go. It is unacceptable to carry out work gradually. In this case, it is almost impossible to achieve a perfectly smooth and even surface.
Step-by-step instructions for beginners will help you understand exactly how to properly apply the composition with your own hands.
Liquid wallpaper allows you to create an original design
For those who are faced with solving such a problem for the first time, you need to familiarize yourself with how to glue liquid wallpaper?
How to reuse?
Leftovers are stored for a long time, up to several years. Manufacturers allow reuse of the material provided it is properly stored.
How to preserve and reuse liquid wallpaper:
- Wait until the mixture in the container dries completely.
- Pack dried liquid wallpaper into a bag.
- When the time comes to apply the material, dilute it with water.
- Leave the mixture for several hours.
- Stir the liquid wallpaper, adding more water if necessary.
- Apply to the wall.
Tools for work
The coating looks stylish and is easy to apply to prepared walls. Manufacturers provide a 10-year durability guarantee; coated surfaces can be restored, painted, or repainted.
The process of decorating a surface with liquid wallpaper is reminiscent of plastering.
To apply liquid wallpaper with your own hands you will need:
- Trowel. A plastic one with a wide canvas will do. The application process is simple, but if you are afraid and have never held a trowel in your hands before, entrust it to professional builders who will do it efficiently and in the shortest possible time;
- Putty knife;
- A spray bottle is necessary to wet the surface for a more uniform application of the mixture;
- Roller for leveling the mixture;
- Spray gun. When diluting the dry mixture or using a ready-made one, a liquidish substance is obtained that can be applied to the walls using a spray gun;
- Container for stirring the mixture. Liquid wallpaper is sold ready-made - all that remains is to use it in a convenient way. In dry form, liquid wallpaper requires pre-soaking and kneading with your hands.
How to properly remove liquid wallpaper from a wall?
If you are tired of the material or need to repair any defect, you need to know how to remove liquid wallpaper from the wall without damaging adjacent areas.
To remove the required area of liquid wallpaper, it is generously moistened with water using a spray bottle. To do this, use only clean water so that no stains from various solvents and detergents remain in adjacent areas. After the surface becomes soft, the liquid wallpaper is carefully scraped off with a sharp spatula into a previously prepared container. Typically, such work is carried out if it is necessary to replace electrical wiring.
After removing the liquid wallpaper, the clean and dried surface is treated with a colorless primer or enamel. When the primer dries well, the edges of the repaired area are also generously moistened with clean water using a spray bottle.
Liquid wallpaper that has been removed with a spatula is not thrown away, but reused. To do this, warm water is added to them, stirred to the desired consistency (heavy cream) and applied to the primed base in the same way as it was originally done.
You should try to rub all existing edges with the new coating so that this area does not stand out in any way after drying. It is in this case that the surface of the walls or ceiling will be uniform and uniform.
Now you know how to apply and remove liquid wallpaper - it's time to put your knowledge into practice.
How to remove it yourself?
There are several types of removing wallpaper from the surface, but the simplest and most cost-effective option is to use water.
This short video will show you how to remove liquid wallpaper from a surface.
In this case you will need: warm water, a brush, a scraper or a metal spatula .
Dip the brush in water and brush it over the wall section several times. After 7-10 minutes, the material will be saturated with moisture and soften . After this, you need to carefully remove the layer using a spatula. If the process causes difficulties, then it is necessary to soak the liquid wallpaper with water again.
Artistic paintings with liquid wallpaper
In this case, you apply the image to the wall yourself, carefully drawing out all the details of the future picture from liquid wallpaper with a pencil. The execution steps here are the same as when working with a template. You should start by applying the color that is most in the drawing. Next, fill in the adjacent areas and, after the decorative canvas has dried, close the voids between the borders and apply the main background.
The main color of the design (background) is applied last.