Comfort in an apartment is important for any person. It allows you to relax after a busy day at work, forget about everyday worries for a while and simply have a pleasant leisure time. Creating a pleasing home environment begins with well-groomed walls. Wallpaper is still the most preferred cladding option. Many people know how to glue them. But only specialists know how to properly prepare a room for their application. In this article we will reveal all the secrets of the technological process of treating walls before decorating them with wallpaper.
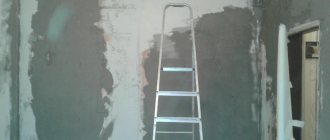
What an ideal wall should look like
In Soviet times, when changing decorative coverings, it was often practiced to apply new wallpaper directly onto old ones or onto newspapers. Thick wall layers can be found in many “aged” houses and apartments. Modern society rejects the “it will do” principle, offering instead a rational approach and verified calculations. Competent and beautiful decoration of the room with new canvases depends on the condition of the walls. The quality of the base and the scope of repair work can only be determined by first removing the previous coating. Experienced craftsmen put forward the following requirements for surfaces for wallpapering:
- The base must be clean and free:
- from previous paintings, paint and other possible coatings;
- from screws, nails, etc.;
- from fungal infections is a very important factor that greatly influences not only the appearance of the home, but also the health of its owners.
- Without cracks and numerous pores, which will contribute to reliable adhesion of the material to the surface.
- The base must be level and smooth. The assumption that a new trellis will hide all defects is completely wrong.
- The wall must be well dried. Otherwise, wallpaper glue, which contains water, will not be able to firmly attach the canvas to the wall. Increasing the temperature in the room will generally lead to peeling of the trellises.
- The same color of the base is of great importance when choosing thin wallpaper in light colors, otherwise the difference in color schemes will be noticeable even after repairs.
Taking into account the above criteria for preparing the surface for gluing, you will create a solid, high-quality foundation and the most comfortable conditions for further work.
Padding
Priming is used for better adhesion of wallpaper to the wall. The thing is that the glue tends to dry out quickly, and the primer forms a film that prevents moisture from being drawn out of the glue. This is especially true if the walls are made of fiberboard or plywood. With this treatment, the glue will retain its basic properties for more time. Therefore, the priming stage is mandatory, and under no circumstances should it be skipped, otherwise the wallpaper may peel off from the wall at any time, and the repair will need to be redone. It also provides additional protection against mold and other harmful bacteria.
The following types can be used:
- universal deep penetration;
- acrylic, suitable for almost any surface and dries in just five hours;
- antifungal, will provide additional protection against mold and fungi. recommended for use in rooms where it is too damp;
- homemade. Also a good option, and recently quite often used. To make it, you need to mix wallpaper glue with water.
After the wall is primed, you can proceed to wallpapering.
Why treat walls?
Many people don’t understand why the easy process of wallpapering needs to be complicated by carefully preparing the walls. In addition, this is a very time- and money-consuming, as well as a “dirty” event. The answer is simple. Wall cladding is needed in order to:
- the new decorative coating looked aesthetically pleasing;
- the trellises held firmly;
- protect against mold;
- glue without problems.
Housing, both in the secondary and in the new building, needs similar repair work, the only difference is in their quantity. Apartments on the primary market often already have a fine finish; in this case, you won’t have to bother with preparing the walls for long. Homes with history will require a lot more effort. In this case, the step-by-step preparation of surfaces for wallpaper must be strictly observed. Each stage has its own purpose. Finishing specialists do not recommend skipping any stage, as this will affect the final result.
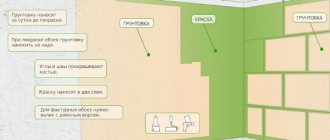
Proper processing of walls before applying a new paper layer goes through 3 main stages:
- cleaning;
- alignment;
- primer.
Below is a step-by-step sequence of actions.
Step-by-step preparation of surfaces for wallpaper
The process of preparing surfaces for wallpapering is a rather lengthy and tedious procedure that requires not only the application of effort, but also some additional costs. Therefore, some home-grown craftsmen, trying to save time, effort and money, consider it optional. However, in order for the wallpaper to have good adhesion to the wall, look aesthetically pleasing, adhere reliably to the surface and last a long time, it is impossible to do without preparatory work.
Wall preparation consists of the following steps:
- Cleaning surfaces from old coatings.
- Cleaning the walls from biological lesions and carrying out “treatment”.
- Repairing detected cracks and chips.
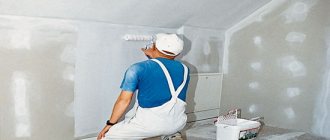
- Priming of surfaces, which will strengthen the structure of the wall material.
- Leveling surfaces with plaster or putty only, depending on the original base.
- Sanding leveled walls.
- Primer treatment to increase the adhesive properties of materials.
Plastering work is necessary in cases where surfaces have serious deformations. In some cases, an alternative to the “wet” technique for leveling walls can be the use of plasterboard (“dry plaster”) for this purpose, which is glued directly to the wall.
Cleaning surfaces from old coatings
The first step is to clean the walls from old coatings - paint, wallpaper, whitewash and others. Be sure to remove any nails or dowels found.
- Old wallpaper is the easiest to remove, although in some cases this process may take longer if it was glued with high-quality glue.
Various methods are used to remove used canvases.
Sometimes the process of removing old wallpaper turns into a very tedious and lengthy procedure.
— The first method, which is most often used by home craftsmen, is to try to pick up a sheet of paper with a spatula and carefully remove it from the wall, being careful not to tear it. Sometimes the canvases are easily completely separated from the surface, and there are no special problems with cleaning.
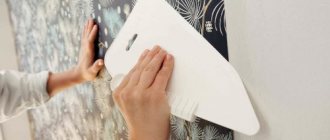
— Another option is to generously moisten the paper sheets with warm water using a brush, roller or spray. Water is applied to the surface several times, as it should completely saturate the paper and soften the glue. In this case, the soaked wallpaper has to be cleaned off with a spatula using some effort.
Removing the top layer of vinyl wallpaper.
— Vinyl multilayer wallpaper has to be removed in two stages: first, the top decorative layer of the canvas is removed, and then the paper backing, which, as a rule, is securely attached to the wall, is peeled off. It is also well moistened and removed with a spatula.
Prices for antifungal agent for walls
antifungal agent for walls
Removing wallpaper using a steamer.
- In addition, wallpaper can be removed using steam. Some craftsmen use a steam iron for this purpose; professional finishers often purchase a special steamer to facilitate large-scale work.
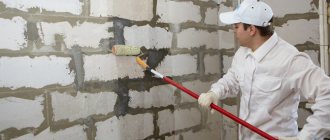
- If you plan to paste over a previously painted wall, then getting rid of the paint layer will be somewhat more difficult. Surfaces can also be cleaned using several methods.
Cleaning a wall of paint using an electric drill with an abrasive attachment
- The mechanical method involves removing a layer of paint using an electric drill. To do this, an iron brush or an abrasive attachment is installed in its cartridge.
— The thermomechanical method consists of two stages: heating the paint using a hair dryer and further cleaning the peeled coating with a spatula.
A solution for softening and then removing layers of paint from walls.
— Chemical-mechanical method. In this case, a special stripping compound is applied to the wall, softening the paint layer, which under the influence of the drug is easily separated from the surface.
Cleaning the surface from old whitewash.
- It may not be difficult to remove whitewash from the walls, but you need to prepare for a lot of dirt. Therefore, before starting work, it is recommended to cover the floors along the wall with plastic film. If the whitewash has a fairly thick layer, then it is advisable to soak it abundantly with water and then remove it in separate fragments. A thin layer of whitewash is washed off with water, to which a little vinegar is added, which will degrease the coating, and it will be easier to remove from the wall.
Removing foci of biological damage and “treating” the wall
If, after removing the old coatings, mold stains are found on the walls, it will not be easy to get rid of them. But this must be done in any case, otherwise there is no point in taking on a new finish.
The problem with their removal is that this microflora grows deeply into the structure of the wall material. And if the stains are cleaned only from the surface, without taking any further radical measures, then after some time they will again appear on the outside, and will easily “eat up” the new wallpaper that has been pasted. Therefore, to remove mold, it is imperative to use special compounds that can penetrate deep into the material.
However, first you should determine the cause of fungal formations and take measures to eliminate it. If this is not done, the removed stains will soon return to their place. For example, if this is a wall bordering a bathroom or kitchen, then it is necessary to start processing from these rooms. If mold has occurred on an external wall, then it may be worth looking into the ventilation system in the house or apartment, and also checking the corners for through cracks.
Treating the area of the mold-affected wall with a disinfectant.
If mold has formed on the plaster layer, then it is better not to even treat it, but to remove it completely.
Today, specialized stores offer different options for fungicides for removing biological formations. The compositions can be sprayed onto the surface or applied using a brush or roller.
Examples of special compositions for “treating” affected walls
Mold solutions are sold in containers of various sizes. When carrying out this process, it is necessary to protect your hands, respiratory tract and eyes, since most solutions are made based on chlorine, used in high concentrations.
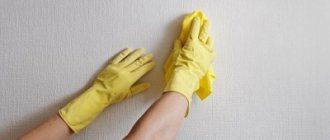
When treating walls with antiseptic compounds, the most serious measures are taken to protect the skin, eyes, and respiratory organs.
Most likely, the wall will have to be treated five to six times, since mold “goes away” is quite difficult. After waiting for the disinfectant to dry, the wall must be washed with water, removing any remaining stains with a brush.
If necessary, the process will have to be repeated, that is, apply the solution again, then rinse the surface well. If everything went well and the wall became clean, then it is recommended to dry it well with hot air by pointing a heater at it. A heat gun is best suited in this situation, as it is designed for directed action.
If after treatment the mold does not go away, then you should seek help from specialists who should cope with this task. But professional processing will cost much more.
At home, you can prepare a mold control agent that is less harmful to humans and does not contain chlorine. To do this you will need 200 grams of slaked lime and a liter of water. If more solution is needed, it is prepared in the same proportions.
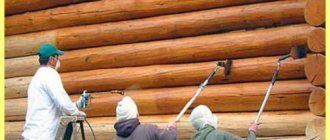
Even if there are no signs of mold damage, it will never be superfluous to carry out preventive treatment with a special primer. This is especially true for new buildings.
I would like to give advice to those who are moving into apartments in new buildings. To prevent mold from taking over the surfaces of your home, it is best to immediately, before finishing, treat the walls with a special primer, which will prevent the appearance of foci of biological damage.
Carrying out wall surface repairs
If cracks are found on the wall, which is not uncommon in old houses, they must be repaired. Otherwise, in the future they can ruin the appearance of the finish.
Special plastic, quickly hardening compounds are very convenient for wall repairs.
Wall repair work is quite simple to carry out, and this process includes the following steps:
- The detected crack is widened so that the material with which it will be sealed penetrates as deeply as possible into the wall.
- Then, it is cleaned with a brush, sweeping away dust, sand and fragments chipped from the edges of the crack from the inside.
- The next step is to prime the crack to its full depth. It is advisable to do this with a spray bottle, but if you don’t have one, then a soft brush will do.
- Next, the crack must be filled with repair material. It can be made on the same basis as the wall material. But modern polymer-based repair compounds are also very convenient, especially if the crack is small in width. To repair a wide crack, polyurethane foam with a low expansion coefficient can also be used.
- After waiting for the repair composition to harden, the protruding excess is cut off, and then the surface is sanded, since the applied “patches” must be brought to the level of the main surface.
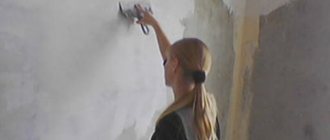
Surface priming
The next step is to treat the walls with a primer solution that contains antiseptic substances. Some consider the priming stage to be optional, but you need to know that it is thanks to this layer that high adhesion of any materials and protection against the occurrence of new mold formations is ensured.
Prices for primer for walls
primer for walls
High-quality priming of walls is the key to the durability of future finishing
Primer solutions can be of different types; they are divided according to the base on which they are made, as well as other criteria.
| Criteria for subdividing primers | Types of primer solutions |
| Based on manufacturing | Acrylic, mineral, alkyd and others. |
| According to the degree of penetration into the base. | Deep penetration, ordinary. |
| By purpose | For plastered walls, concrete, wood, metal surfaces and universal. |
| By area of application | For external, internal work, as well as universal. |
| By properties | Antiseptic, moisture-resistant, antifungal, anti-corrosion, fireproof, etc. |
Based on these characteristics, you can select the required solution.
To treat any walls, it is best to purchase a deep penetration compound. It will strengthen the base by filling the pores of the wall material structure. Based on the material of manufacture, it is recommended to choose an acrylic-based solution.
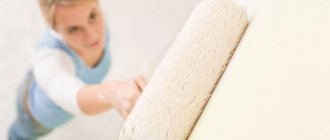
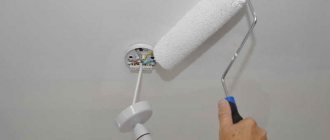
The primer is applied to the walls using a roller or brush in two to three layers, each of which must be dried before applying the next.
Leveling surfaces
The wall to be wallpapered must, of course, be very smooth. But it doesn’t really need perfect smoothness, unlike preparation for painting. Therefore, some roughness is quite acceptable.
The alignment process can be done in three ways. The optimal one is selected depending on the quality of the surface:
If the wall has strong curvatures, then you cannot do without applying a leveling plaster layer
- The traditional leveling method is wet plastering using a cement-sand mortar or a gypsum-based mixture. This method gives good results, but is not always convenient, is quite difficult to implement and requires certain skills. It should be noted that not every novice master is able to perform such work efficiently the first time. When choosing plastering to level walls, you should prepare for a lot of dirt, since the solution will be mixed in the room where the work is being carried out. Due to inexperience, a lot of plaster will end up on the floor. In order not to spoil the floor covering with the solution, it will have to be covered with polyethylene.
Most likely, the matter will not be limited to plastering - finishing putty will have to be done on top of this layer. Another disadvantage of this method is the duration of the process, since each layer of plaster, and then putty, must be thoroughly dried before applying the next one.
Prices for finishing plaster
finishing plaster
Plastering walls is not as easy as it might seem.
It would not be surprising if the first attempts are not entirely successful. There is no need to give up - experience will definitely come. And to help the novice master there will be an article from our portal “Plastering walls with your own hands .
- Leveling walls with plasterboard is perhaps a more accessible method for an inexperienced builder. Sheets of this plaster can be fixed to the wall using a special glue, also made from gypsum. This technology is well suited for use if the wall has slight unevenness. It will be problematic to fix a strongly curved wall by gluing drywall.
One of the difficult operations when using this leveling method is installing a sheet of drywall to the wall, since it is quite heavy and large and can easily break if handled carelessly. Therefore, when installing solid sheets to the wall, you cannot do without assistants.
You can stick drywall in small fragments, but this will introduce another kind of difficulty.
If the wall is relatively flat, then the sheet of drywall can be cut into several parts, but gluing them to one level will be more difficult. In addition, the volume of work will increase due to reinforcement and puttying of numerous joints.
The advantages of this method of installing gypsum boards is obtaining a perfectly smooth and even surface. At the same time, additional thermal insulation of the wall is achieved, since plasterboard has low thermal conductivity. If mold was previously found on the wall to be leveled and it has undergone antifungal treatment, then it is best to use a moisture-resistant type of material (GKLV) to level it.
How to install drywall with glue?
This technology allows you to achieve a smooth wall surface in the shortest possible time and at minimal cost. True, it is not suitable for all cases. More detailed information about the technology of frameless wall cladding with plasterboard using glue is available in a special publication on our portal.
Drywall prices
drywall
- The third method of leveling the wall is also using plasterboard, but with the sheets secured to the mounted frame. This technology is used if the wall has large distortions or if it needs to be additionally insulated.
The technology of leveling walls with plasterboard over a frame structure has many advantages, but “eats up” a significant amount of space in the room.
The curvature of the wall is leveled using sheathing posts aligned in one plane. And heat and sound insulating material is installed in the space between the frame elements and the wall.
The work, although not simple, is still accessible to even a beginner. It is enough for her to have the necessary tools, mobilize her attention and accuracy, and act in accordance with technological recommendations.
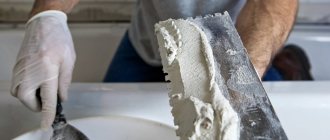
Surface putty
Whatever preliminary leveling method is chosen, the next step is to bring the wall surface to optimal evenness with a putty layer. Many people are perplexed why, for example, putty on drywall - after all, it is already even and smooth. However, this must be done - there are a number of important reasons for this.
Putty will make the surface smoother and more receptive for gluing wallpaper made from different materials. In addition, this layer will even out the color of the wall. At the same time, if necessary, the putty can be given the desired shade by adding color to the solution. Sometimes this is required to maintain the color scheme of the wallpaper.
Putty is applied, as a rule, in one or two layers, each of which is dried before applying the next. Due to the fact that putty compounds dry out quickly enough, the work will not take too much time.
The wall treated with putty must be sanded to remove irregularities that are invisible at first glance. This work is done using a construction float with an abrasive mesh or medium-grain sandpaper (approximately P120 ÷ P180), since the surface being prepared for wallpaper may have slight roughness.
Why and how to putty walls under wallpaper?
The process was described very briefly, but this is only because a separate detailed publication is devoted to the issues of puttying drywall under wallpaper on our portal.
Final priming of the wall
It is recommended to coat the leveled and puttied wall again with a primer, which will not only bond the leveling layers together, but also improve the adhesive ability of the surface. This will especially help in cases where non-woven or vinyl wallpaper that is difficult to paste is chosen for wall decoration.
There are primers that paint the surface. They are chosen for the final stage if the color of the wall after putty is uneven.
At this stage, the primer is applied in one layer using a roller. The work will not take much time if carried out on a well-prepared surface.
Prices for non-woven wallpaper
non-woven wallpaper
The best option for a primer composition applied to an almost finished surface would be a deep penetration acrylic primer with antiseptic properties. However, for the final priming of the wall at this stage of work, the same glue that will be used for gluing wallpaper is often used.
After the final layer of primer has dried, you can proceed to the stage of final finishing of the walls. Thanks to the work done, wallpapering will not cause any difficulties and will go quickly, and the result will please the eye for many years.
And at the end of the publication - a short video about preparing walls for wallpapering:
Let's get started
The following tools should be at hand:
- Bucket.
- Paint bath.
- Wide roller with a long handle.
- Brush.
USEFUL INFORMATION: Plasterboard putty technology
Pour the primer into the bucket and stir thoroughly. If the mixture is concentrated, dilute it with water to the desired condition, following the instructions on the label, taking into account your type of wall. We dilute the first layer (and there will be at least two of them) thinner so that the solution is absorbed deeper into the wall and firmly binds the surface to be treated.
Now you can start priming the walls before wallpapering.
- Pour the resulting solution into the bath, take a roller and carefully, without splashing, dip it into the dish, then slightly squeeze the pile of the roller on the grooved edge, this way the primer is used more economically.
- We start processing from the bottom, leaving about 5 cm to the edge of the floor, so that random dust does not fall on the roller pile: it will significantly deteriorate the quality of the coating. Then you can carefully work on this part with a brush.
- How to prime walls under wallpaper so that there are no gaps? It is more convenient to start from a corner, this makes it easier to control the density of application. Pressing the roller without excessive effort, we go from bottom to top. This prevents drops of primer from flowing down the wall onto the floor. We roll the roller several times from the bottom to the ceiling, making sure that the surface is well wetted and the primer layer lies evenly.
- So, stroke by stroke, we go over the entire surface, marking the surface being treated with a noticeable darkening from moisture. This will truly indicate a properly primed wall.
- When the main space is treated with a roller, hard-to-reach places remain, such as corners between wall and floor, wall and ceiling, various protrusions, areas near sockets and switches. Here we carefully apply the primer with a brush, taking precautions.
- Let the wall dry for 2-3 hours.
You can see all stages of work in more detail in the video.
[smartcontrol_youtube_shortcode key=”how to properly prime walls” cnt=”4" col=”2" shls=”true”]
Note: another way to apply primer is to use a spray bottle. Pros: ease of execution and saving on material. The solution does not spread and is applied in doses. Cons: excessive spraying over the entire wall area. The smallest suspension will remain in the air throughout the apartment for a long time and you will have to thoroughly ventilate the room several times.
What to do with mold areas
So, you've finally gotten rid of the old coating. But underneath they found intricate drawings of black color and unknown origin. This is mold. And it is imperative to get rid of it. Anyone understands that it is necessary to take some special steps before wallpapering. How to treat the walls in this case? Are there any special means for this or is it enough to just wash the surface to remove black stains? Of course not. You need to either purchase a special composition in the store, or try to somehow make do with improvised means.
Required Tools
Finishing walls before applying wallpaper is a complex procedure that requires patience and accuracy. In this case, a person has to use many additional building substances that he applies to the surface.
To simplify and speed up this procedure, you should stock up on several basic tools:
- Several types of spatulas. They allow for better surface treatment when leveling or dismantling the old coating. You will need both metal and rubber tools of various sizes.
- Construction mixer. The mechanisms allow you to quickly and efficiently mix solutions that will be used to treat the walls.
- Individual protection means. This should include everything from rubber gloves, glasses to protective respirators.
- Roller. Use it to apply primer or other liquid substances.
- Skins of various sizes.
- Level or plumb. If the walls are being leveled, then care should be taken to have special beacons to facilitate this procedure.
If you plan to remove old coverings or clean walls, then for such purposes you will need:
- Construction hairdryer. It is used to heat the paint to make it easier to remove from the surface.
- Grinder with several types of attachments. It is used for mechanical removal of paints or auxiliary leveling of surfaces. During operation of this device, a lot of dust is generated, so it is important to protect not only indoor furniture, but also the human respiratory system.
Stage three: putty
After the primer has dried, the preparation of the walls continues by eliminating irregularities, defects, and cracks. It is necessary to achieve as smooth a surface as possible. Before applying the putty, you need to make sure that there are no fasteners or fittings left in the wall, which will show up as rust through the wallpaper in the future.
Areas where the reinforcement is exposed must be puttied with special care. In order not to leave noticeable stripes, it is necessary to apply the spatula first in a vertical position, then in a horizontal position. To obtain a better and more uniform coating, it is recommended to use a wide spatula 30-40 cm and hold it at an angle of 25-30 degrees relative to the wall. To putty corners, use an angle spatula.
Getting rid of unevenness
Take a closer look at the prepared walls - do you see irregularities, holes, “potholes”? You definitely need to get rid of them so that the wallpaper lays on the surface flawlessly. There are only two methods that can be used to level the walls:
- plastering - the process requires skill and some experience, and may take several days;
- installation of drywall - financial expenses will be required, but the installation process is simple, within the control of every person and takes little time.
If you are installing drywall, then prepare putty and reinforcing tape in advance - this will need to be used to treat the joints/seams of the drywall.
If you decide to plaster the walls yourself, watch this video review: a master class on plaster is conducted by a specialist:
Whatever is chosen for leveling the walls, the next stage is primer, and it should not be ignored. When applying the primer solution to a cleaned and leveled surface, a thin film is formed - it serves as a factor in the strong adhesion of the wallpaper to the walls. Before priming, you need to clean the places where the putty was applied - this can be done with fine sandpaper manually.
It’s only after all the work mentioned above that you can prepare directly for wallpapering. But first you need to select them, and at the same time select the glue.