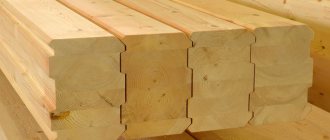
When choosing environmentally friendly wood as a building material for building your home, you need to take care of its protection. A wooden house undoubtedly has a number of key advantages over other building materials, but it also requires much more care than brick and concrete buildings. Before applying the finishing coat to wooden walls, the wood must be treated with special products that prevent wood from rotting, protect it from moisture, fungus and insects, and improve the adhesion of paint to wood. From the article you will learn how to treat timber before painting to ensure a high-quality and durable coating.
Preliminary processing
The preparatory process before coating a wooden surface with varnish consists of:
- Thorough cleaning of surfaces, removing dust, dirt and old paint. This stage is required, otherwise the coating made with varnish or stain will be uneven and will soon begin to collapse.
- Applying a protective agent. Which product is best suited in each specific case is influenced by the conditions in which the object being painted will be used.
- Primer treatment. This is required to improve the adhesion of the varnish to the wooden surface. For interior work, it is permissible to use only water-based products with a non-toxic composition.
Principles of coloring
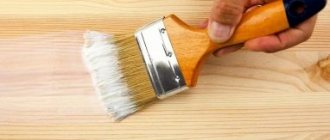
You can paint a metal surface without practical skills. It is enough to prepare the required materials, tools, coat the working surfaces with a primer, and apply paint.
Tools and materials
To carry out painting work you need to prepare:
- set of brushes, roller;
- paint container;
- stationery knife, masking tape;
- thick polyethylene film;
- primer;
- metal brush, sandpaper.
Sandpaper (Photo: Instagram / abraziv.by)
Preparation
Stages of preparing metal surfaces before painting:
- Rough metal processing. This removes serious contaminants and scale.
- Surface grinding. It is necessary to sand the metal with fine-grained sandpaper.
After stripping the metal, you need to cover the surrounding surfaces with film to avoid staining.
Puttying
If the surfaces to be painted are uneven and have many depressions, they need to be puttied. To do this, you need to buy a special mixture at a hardware store and apply it according to the instructions indicated on the container.
Padding
Surface priming is necessary to increase adhesion and increase the durability of the decorative coating
It is important to choose the appropriate composition so that the decorative layer maintains its integrity for a long time
Kinds
Types of primers:
- Inhibitory. If rust begins to form on the metal, the primer will stop the process of destruction of the material.
- Protective. Manufactured on the basis of phosphoric acid. After application, a strong, durable film is formed.
- Phosphating. Suitable for working with non-ferrous metals.
- Insulating. Manufactured on an alkyd or epoxy base. Form a durable film.
Primer for metal (Photo: Instagram / birgroupcompany)
Application principles
The principle of applying primer is simple:
- Remove any dirt and dust from the surface.
- Dilute the primer with water.
- Apply the composition using a roller. If you don't have a roller, you can use a wide brush.
Applying paint
Paint can be applied only after the primer has dried. Most coloring compounds are applied in one layer. For painting, you can use a spray gun connected to a compressor, a brush or a roller.
Safety precautions
Safety regulations:
- You should work in protective clothing, gloves, and a respirator.
- There should be no heating devices in the painting area.
- Do not use paint near open flame sources.
Girl in a respirator (Photo: Instagram / tkani_cochonnet)
To paint unprepared surfaces, you need to use anti-corrosion coatings. Instructions can be read on the packaging. It is better to use powder paint, but this requires a special camera and appropriate equipment.
Surface grinding
sanding wood
Work should be carried out in a room that provides optimal conditions for drying the surface. The temperature in the room should be constant, without sudden changes, approximately 20 °C. There should be no dust or dirt inside, since even the smallest particles of debris can spoil the coating and make it uneven.
Before you start work, you need to prepare all the necessary materials and tools:
- a set of sandpaper (fine-, medium- and coarse-grained);
- wooden rectangular block;
- rubber layer;
- stick of small diameter.
All surfaces that are planned to be treated with water-based varnish or stain must be thoroughly sanded, the resulting wood dust must be collected with a vacuum cleaner, and the surfaces must be treated with a cloth soaked in a solvent. The parts of wood to be painted are pre-treated with abrasive. First, use coarse-grained paper, then sand the surfaces with fine-grained paper.
grater for grinding
To simplify the work, use a block - it is wrapped in sanding paper and smooth surfaces are processed. In this case, the wood processing technology should be taken into account: movements should be directed along the fibers so as not to injure the surface.
For large areas, wrap rubber in sandpaper, and for holes, wrap a stick.
How to paint wood or a wooden surface with your own hands
Rating 3.70 (56 Votes)
| Wood products have always been valued for their naturalness, environmental friendliness, durability and simply beauty. Nowadays, when everyone strives to transform their home by adding interesting decorative elements to the interior, the topic of painting wooden surfaces or wood products at home is becoming increasingly relevant. At first glance, the process of painting wooden surfaces may seem quite simple, however, in order to get a perfectly smooth surface and a high-quality result, you need to take into account many nuances. |
Today we will find out how to paint a tree or a wooden surface with our own hands so that the results of our work are pleasing to the eye, and the product retains its attractive appearance for a long time.
What do you need to paint wood yourself?
Primer – you can use an acrylic primer Paint – alkyd, oil or acrylic, spray or regular Brushes and roller if you use regular paint rather than spray paint Acrylic clear varnish – it will protect the painted wood surface from damage, and will also add depth to the color and shine to the new one coating Respirator and gloves for protection during work Solvent for degreasing the surface before painting (you can use white spirit, kerosene or special degreasing compounds) Cloth napkins or just dry, clean cotton rags Masking tape and paper or covering film Very fine-grain sandpaper Spatula and putty, preferably automotive putty, will be needed if you plan to remove deep scratches or chips
How to paint a wooden surface at home? Paint selection
Today, the market for paints and varnishes for working with objects and structures made of wood offers many different materials: from alkyd and oil-based enamels to modern aerosol paints.
| Acrylic enamel dries quickly, has water-repellent properties and is universal - suitable for almost any type of wood, with the exception of wood species with high resin content. Oil enamels are suitable for working even with resinous rocks, but they take a very long time to dry. Alkyd paints are often chosen for their low cost and ease of application, but they do have some durability issues, especially when used for exterior applications. Alkyd paint has water-repellent properties, is used on all types of wooden products, dries quickly and is not deeply absorbed. |
However, if you are planning to work with wood at home - painting furniture, interior doors, wood products or decorative items, then aerosol acrylic paints will be the best choice. Working with them at home is surprisingly simple and convenient; the paint is non-toxic (unlike oil and alkyd enamels), it applies perfectly evenly, creating a smooth coating, and dries very quickly. Aerosol paint is suitable for both updating old or damaged surfaces and for completely painting/repainting wood. Aerosol acrylic paints due to their composition are excellent for application to wooden surfaces, while the spray from the can is evenly applied even to complex terrain. Aerosols will help you quickly and easily refresh an old table, chair, cabinet, bookcase, wooden objects and interior elements. The wooden surface, painted with spray paint, is completely protected from moisture, corrosion and dirt. Acrylic paint is environmentally friendly and non-toxic, does not contain fluorine and chlorine. Also, when working with a clean (unpainted) wooden surface, we recommend that you pay attention to modern tinting varnishes that allow you to tint the wood to match valuable species - oak, pine, walnut and others - while protecting the wooden surface from damage and abrasion.
When choosing a material for painting wood, also take into account the following points:
| 1 Conditions in which the wooden product will be used (climate, humidity, etc.); 2 Compatibility of the selected coloring material with the previous coating; 3 Possibility of re-processing in the future; 4 Type of wood you are going to paint |
Step-by-step instructions for staining wood
Step_1 Preparing the workplace. If you are painting wood at home, take care to protect the floor, walls, and home decorations from accidental paint splashes, use newspapers or covering film for this.
Step_2 Preparing the product for painting. Before painting wood or a wooden surface with your own hands, it is recommended to remove the old paintwork, as well as dirt and dust. You can remove old paint using special removers, or using a hair dryer, which “steams” the old paintwork. Such a complete removal of the old paint coating is necessary if the paint peels off a lot and lags behind, but if the old coating holds up well and does not interfere with you, then it is not necessary to remove it. In any case, you should even sand the surface with fine sandpaper. After removing the old paint and sanding, you need to thoroughly wipe the surfaces with damp cloths and dry it.
| Step_3 Degreasing. Before painting, degrease the surface using any suitable product - white spirit, acetone, etc. Step_4 ADDITIONAL STEP: If the wood product contains cracks, deep scratches or chips, you can remove them using putty and a putty knife. Upon completion of work, wait until the putty has dried, sand it with fine sandpaper and wipe clean with a damp cloth. |
Step_5 Before painting wood at home, cover the areas that are not to be painted with construction tape and remove it immediately after finishing the work. If you paint wooden furniture, protect or remove fittings and glass
| Step_6 For the best result, before painting, we recommend that you prime the wooden surface with literally one layer of primer. You can use an aerosol acrylic primer or a regular primer for porous surfaces. The primer forms a film on the surface, perfectly seals pores (thereby reducing paint consumption) and increases the service life of wooden products. |
Step_7 Now you can start painting the wood. If you choose aerosol paint, then before painting, shake the can thoroughly for at least 30 seconds and spray the aerosol paint from a distance of 20-30 cm from the surface. You need to apply the paint with smooth, even movements (brush or balloon). After the first layer has dried, which will take 15-20 minutes, apply subsequent layers of paint. When painting wood, it is recommended to apply at least 2 - 3 layers of paint. Proper painting of wood is a painstaking and unhurried task. Attention to detail, smooth movements, even distribution of paint over the surface - these are the main things that are required of you. Pay special attention to the end parts of the boards, holes for fittings and screws, joints, etc. - all this must be carefully painted over.
Step_8 After the paint has dried, apply acrylic varnish in the same way and wait for it to dry. Complete (final) drying takes at least 2 - 2.5 hours, after which the product is ready for use!
Painting wooden decorative items, furniture, etc. - this is a great way to give new life to your favorite things, an opportunity to stylishly decorate the interior, and harmoniously fit old furniture into a new renovation. As you can see, painting at home is not a difficult task even for a beginner; it does not take much time and does not require special equipment. Choose a sunny day, arm yourself with bright colors and start creating - now you know that painting a tree or wooden surface with your own hands is not as difficult as it seems. This interesting process will certainly give you new ideas in the design of your home and give you real pleasure!
If you found this article useful, please rate it (at the top of the page). Thank you!
Visitors to this page most often choose from the online store:
| Aerosol enamel universal | Aerosol varnish tinting OAK | Aerosol acrylic primer | Aerosol acrylic varnish |
Wood protection products
To prevent the wood from deteriorating, it should be treated with impregnation before coating it with varnish or stain.
You need to choose a product taking into account several factors: operating conditions (indoors or outdoors), temperature conditions and climatic features.
Antiseptics
Water-based antibacterial impregnations prevent the appearance of mold or fungi on wooden surfaces. Antiseptics have a very toxic composition, so it is not recommended to use them on products that are planned to be used in a residential area.
Wood protection products
Fire retardants
Such compositions significantly reduce the natural flammability of wood products, and if a fire occurs, they prevent its rapid spread. They are used for surfaces that are located close to fire sources.
Insecticidal compounds
They serve as reliable protection against insects. They are used to treat outdoor wooden surfaces, garden furniture and other items that will be outdoors.
Water-repellent impregnations
They are used to protect wood from swelling when wet, cracking and deformation when drying. Products of this type penetrate deep into the wood, filling the pores of the material, and after final drying they provide a reliable water-repellent layer.
Such impregnations can be used for surfaces of products used in damp rooms and outdoors.
Combined products
Liquids that perform two or more functions, such as preventing insects and mold. They are used in cases where surfaces need to be protected from several potential threats. Consecutive use of several products takes more time and effort, and is more expensive, and combined products in this case are the best choice.
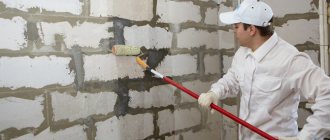
Preparation of concrete and plastered surfaces for painting
Cement coating is a cement-sand mixture applied to block or brick walls. After smoothing the mixture with a wooden trowel, a rough sandy surface is formed.
The cement mixture contains alkaline substances, which can severely corrode the paint layer. Over time, the coating ages and weathers; due to shrinkage of the building or coating, cracks form on it. If you plan to paint the coating, preparing concrete surfaces for painting begins with checking what this coating was applied to - blocks or bricks. The block surface is aged for 2-3 months before applying paint.
In mild and moderately mild climates, it is permissible to use emulsion paint until the surface is completely dry. Due to its permeability, the coating will dry while it is already painted. In unfavorable climatic conditions, the use of acrylic paint is also allowed, but only after the surface has completely dried.
The most common material in construction is concrete. It contains many ingredients, but the base is always the same - Portland cement, sand, stone mass and water. Wet concrete is classified as alkaline. Reinforced concrete can suffer due to corrosion of metal elements. Concrete surfaces most often deteriorate due to the ingress of chlorides and carbonization, a process that reduces the alkalinity of the material below pH10.
Special components are added to fiber concrete - asbestos and sawdust. Because these lighter additives are used instead of sand, the weight of the structure is reduced.
Glass concrete is reinforced with special glass fibers that can withstand the effects of alkalis. Most often this material is used as a facing.
Concrete mixed with pebbles has a structure similar to rough plaster applied to the surface with a sweep.
The stability of stones in the total mass of concrete is checked using a brush - there should be no loose stones. When preparing the surface for painting, it is not recommended to make a deep relief, otherwise much more paint will be consumed.
If the surface has been treated with turolin (a coating with its own color), the layer of material will be resistant to any natural influences, such as precipitation or weathering. Even if such a surface is not coated with paint or varnish, it will retain its properties for up to 12 years.
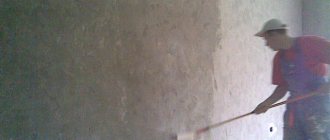
Surface priming
There are soil fluids on different bases.
wood priming
When choosing a primer, it is important to take into account not only the degree of toxicity of the liquid (it is unacceptable to use products that emit harmful compounds in residential premises), but also its structure. The primer must have a composition compatible with stain or water-based varnish. Otherwise, there is no guarantee that the coating will not begin to peel or bubble.
Alkyd
It is recommended for use in rooms with high humidity or for outdoor work. Most often it is used to prepare the floor or walls in a bathhouse or sauna before painting. Properties of this type of primer: filling the pores of wood, protecting against swelling of fibers.
Acrylic primer
Its main advantages: the ability to penetrate deeply into the structure of the material, the absence of toxic substances, and rapid drying.
Water-based acrylic primers can be supplemented with various components to improve their protective properties. For example, liquids for pre-treatment of wood can be added to them, in which case there is no need to coat the surfaces with impregnation.
Water-based primer is used for both exterior and interior work. It has an insignificant degree of toxicity, but requires careful and sufficiently long drying (at a temperature of about 20 C, the surface will dry for about 18 hours). Additional properties of the liquid are the protection of wood from fungus, moisture and rotting.
An alkyd primer should be used either in the warm season or under a canopy.
Epoxy primer
The priming liquid, which contains epoxy resins, creates a reliable moisture-repellent layer on the treated surface. Products of this type are toxic and quick-drying, so they can only be used outdoors. Suitable for areas with high humidity and frequent precipitation.
Using an epoxy primer requires some experience on the part of the individual as the coating consists of two components that must be mixed immediately before application.
Factors causing wood destruction
Over time, wood deteriorates and the rate of its destruction depends on the degree of protection.
Under the influence of precipitation and changes in air humidity, wood either swells from absorbed moisture or contracts after drying, resulting in cracking.
When water that gets into the cracks freezes, the ice expands and the fibers subsequently break.
Ultraviolet rays significantly affect wood and destroy lignin, which is its basis and is responsible for the density, hardness and color of wood. Under the influence of sunlight, the structure of lumber becomes loose and rough.
Timber is often affected by fungus, which stains the wood and destroys it over time. A favorable environment for active reproduction of fungal spores is high humidity and elevated temperature.
Often wood is affected by insects, which have found both home and food in it. These include all kinds of wood-boring beetles, weevils, borers, grinders and many others. Some settle in freshly cut trunks, others in the wood of already constructed buildings, but all of them actively destroy the wood and make it unsuitable for use in construction.
All of these factors, as a result of their destructive action, lead to a significant reduction in the life of wood.
Coloring
Polyvinyl acetate and styrene butadiene water-based paints are supplied to objects in a ready-to-use form. Before use, paints must be thoroughly mixed and filtered through a sieve of 900 holes/cm2. If necessary, they can be diluted with water to a paintable consistency.
Polyvinyl acetate paints, in addition, must be checked for the presence of a plasticizer - dibutyl phthalate.
In production conditions, this can be done as follows: paint is applied to the surface area, after which it dries (after 24 hours), the painted area is washed with water; If there is no plasticizer in the paint, the paint layer is washed away.
In unplasticized paint at 100 wt. h. you need to add 3.6 wt. including plasticizer, after which the paints are thoroughly mixed and filtered.
For better adhesion of the paint layer to the surfaces of plaster and wood, as well as gypsum parts, the latter are painted with paint diluted with water in a 1:1 ratio. Then it is painted twice with regular undiluted paint.
Sequence of operations when painting indoor surfaces with synthetic paints
| Name of operations | Plastering | That tree | ||||
| simple | improved | high quality | simple | improved | high quality | |
| Cleaning up fragile old paint | + | + | + | + | + | + |
| Washing surfaces with durable old paint | + | + | + | + | + | + |
| Cleaning | + | + | + | + | + | + |
| Cutting out branches and tars, sealing cracks | + | + | + | + | + | + |
| Proolifka | – | – | – | + | + | + |
| Priming with diluted paint composition | + | + | + | + | + | + |
| Partial lubrication | + | + | + | + | + | + |
| Sanding greased areas | + | + | + | + | + | + |
| Continuous puttying | – | + | + | – | + | + |
| Straightening and sanding putty | – | + | + | – | + | + |
| Second full putty | – | – | + | – | – | + |
| Sanding putty | – | – | + | – | – | + |
| Continuous primer | – | + | + | – | + | + |
| First solid coloring with fluting | + | + | + | + | + | + |
| Second solid color with fluting or trimming | + | + | + | + | + | + |
Notes:
1. The “+” sign means that the operation can be performed, and the “-” sign means that it cannot be performed.
2. Flattening or trimming is carried out only when painting with a brush.
Drying time for paint is 2-4 hours.
The consumption of materials per 1 m2 of painted surface is: polyvinyl acetate or styrene-butadiene paints—350 g, putty 300 g.
“Handbook for major renovations of residential buildings,” ed. Ph.D. tech. Sciences A.I. Lysova
Painting with silicate paints The surface to be painted with silicate must be cleared of weak and plaster deposits. If the texture of the plaster is uniform, then before painting the surface of the facade is primed with liquid potassium glass (γ = 1.15). If the rough texture is uneven, its surface is puttied with gesso. Painting with silicate paints is carried out twice with paint spray guns or brushes. The second coloring is done after 10-12 hours...
All photos from the article
Painting works are aimed at decorative design of building structures and increasing their operational and hygienic properties. The technology for painting wooden surfaces involves their preparation in accordance with the requirements of SNiP 3.04.01-87.
A strong and durable coating ensures the safety of the elements. It protects against warping, cracking and damage to wood by insects and fungi.
Painting work can be done with your own hands without the involvement of specialized craftsmen. Instructions for painting surfaces made of wood are given below. To perform such an operation, it is necessary to prepare a building structure, tools and materials. Application of paint and varnish coatings is allowed when the humidity of the base is not higher than 12%; accordingly, it must first dry.
Wishes
Modern paint and varnish compositions are capable of providing a wooden surface not only with a beautiful, decorative coating, but can also protect it from many negative factors. Wood is a unique living material that reacts to exposure to sunlight, precipitation, insects, mold fungi and as a result it deforms, cracks, and rots. But paints and varnishes containing antiseptic and other additives are not capable of providing reliable bioprotection for a long time. Therefore, it is advisable to treat logs or beams with high-quality antiseptics before painting. They should be applied to wooden material in several even and moderately generous layers.
After the wooden surface treated with antiseptics has dried, it should be impregnated with fire retardants. After all, wood flares up instantly when exposed to high temperatures, which is dangerous for a residential building and, first of all, for residents.
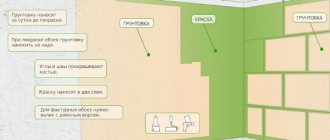
After applying all protective compounds, it is recommended to apply a primer. This will ensure a more uniform application of the paint. You should work with the primer at temperatures from +18 to +28 degrees.
What is the difference between primer and paint?
There is no need to confuse these concepts. Primer - a composition to improve adhesion and reduce consumption. The paint adheres much better with it. But paint allows you to protect the wood and give it a certain color.
It turns out that the primer is the base layer before applying any decorative material. And paint is a self-sufficient decorative layer. However, many people ask if it is possible to apply primer over paint. Yes, under certain conditions. For example, if the paint layer adheres well to the surface and is not too old. But not all mixtures can be applied over paint, because it creates a smooth surface. An adhesive and non-contact primer is used.
There is such a thing as primer paint. This is a substance that has both a coloring pigment and creates a protective film on the surface. However, as experts recommend, they should not be used. Firstly, the color range is too small, and secondly, the coloring matter in them is of low quality. The product price is low. It is better to prime the wooden surface separately and then apply paint.
Why do this at all?
- Wood is, first of all, a living material and, like any living organism, it lives, ages and dies. If you do not care for it and do not treat it in time, then these processes will go much faster, especially for wood that is in the open air and experiences the whole range of negative weather surprises.
- In addition, this living material is fertile ground for the development of various types of mold and mildew; whole hordes of pests enjoy it.
- Based on the colossal experience of human use of wood, modern science has developed many different compositions that not only improve the appearance of the material, but also make it possible to extend the decent life of wood for decades. Moreover, for each type of wood and type of its use they are different.
National painting on wood.
Why prime wood?
Wood primer
Before painting, the wood must not only be treated with additional and protective agents, but also thoroughly primed.
Why do this?
The primer consists of water and glue.
This composition is absorbed into the material by 5-7 mm, and ensures the strength of its structure.
That is, it provides additional protection against decay.
The film that forms as a result of priming provides reliable adhesion between wood and paint.
Experts say that wooden products that are pre-treated with primer require 20-30 percent less paint than pure wood. This is due to the fact that some of the paint is absorbed into the wood if it is not treated with a primer solution.