Preparing the base
Modern multi-storey buildings are equipped with floors made of high-strength concrete slabs. The final coating is laid on a solid base. To lay the canvas, preliminary preparation of the concrete floor for linoleum is required. First of all, we need complete dismantling of the old fabric and insulating layer. Then the surface is cleaned from dust, debris, and any contamination. Next, a screed is performed, which can be “wet” or “dry”.
Wet screed
Leveling with a solution is necessary for high-quality installation of the material. Procedure:
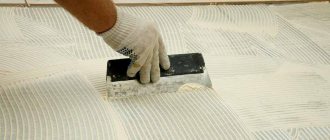
Screed with a mixture of cement and sand
- Remove the old coating, clean the concrete surface from dust, dirt, and debris;
- Apply sealant to the joints near the walls. Small cracks are sealed with cement mortar, large cracks are filled with foam;
- Lay a layer of waterproofing. The film is overlapped, slightly extending onto the walls;
- Lay the expansion tape along the walls. This is necessary in case of thermal expansion of the hardened coating;
- Mark the height of the future screed. The operation is performed using a level. The device shows a horizontal line on the wall, which is repeated with a pencil or thread. You need to determine the highest point on the concrete floor, then measure 3 cm up. This is the level of the future flooring;
- Install a perforated profile that will serve as a beacon. The height of the elements is adjusted by wedges. Wood chips or special construction tools are used here;
- Prepare the pouring mixture. The solution is mixed using an electric drill with a special attachment;
- Let the finished mixture sit, then gradually fill the areas between the beacons. The solution is poured first at the far walls, then the excess is distributed to free places using a metal rule. The edge of the instrument rests on the tops of the beacons;
- Wait until the screed has matured. At this time, the room is not ventilated. Sometimes the laid mortar is spilled with water.
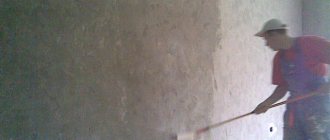
Leveling the surface with a self-leveling mixture
After the solution has matured, some irregularities often form on the surface of the base. Whether they need to be corrected or not depends on the type of linoleum being laid. The coating has a thick soft base, with a springy backing, which automatically eliminates minor differences in height. Laying thin linoleum on a concrete floor requires careful leveling of the base with a special water-soluble mixture.
This material is also used in self-leveling floors.
The solution itself spreads over the concrete base under the influence of gravity and does not require special leveling. After pouring, the surface is treated with a spiked roller. To reach the far corners with the tool, spiked shoes are required. After the mixture has hardened, the floor is primed twice.
Dry screed
Leveling a concrete base without using a liquid solution is done as follows:
- Remove old coating from concrete floor. Clean the surface from any dirt or debris;
- Apply sealant to the joints near the walls. To seal large cracks, polyurethane foam and a cement-sand mixture are used;
- Lay a waterproofing film. The edges of the material need to be brought slightly onto the wall;
- Place the beacons in the same order as for pouring the solution;
- Fill the space between the beacons with fine expanded clay or other insulation. Level the surface with a metal rule;
- Lay sheets of gypsum fiber board or any thick dense plywood on top of the beacon profiles. The slabs are laid in two layers so that the joints at different levels are further away from each other. Specially adapted floor elements equipped with a locking system are available for sale.
The process looks something like this
leveling with thin screeds
In this case, cement mortars and self-leveling mixtures based on polymers can be used. The mixtures are suitable for pouring in a thin layer with a maximum thickness of 1 centimeter and serve as a finishing finish. It is possible to use special compounds for stairs and treatment of serious cracks. The cement mixture can be poured to eliminate more serious defects and distortions.
When pouring different polymer mixtures, first the surface is treated with a primer, and then a screed is made. If there are irregularities above 2-3 millimeters, it is better to choose a cement-acrylic mortar, which can be used to create a layer up to 6 centimeters thick. Self-leveling mixtures are prepared according to the recipe specified in the instructions, poured in parts, and distributed with a needle roller. Step-by-step filling is carried out quickly, since the mixture sets in a short time.
To level the floor with concrete mortar yourself, you will need levels, plasterboard guides, screed mixture, spatulas, and the usual set of repair tools. Concrete is prepared according to the following recipe: 3 parts M200 cement to 1 part sand, 0.5 parts water. You can add gravel, glass, expanded clay to the composition. Prepare the screed in a concrete mixer, first mixing sand with some cement and then water. You will also need containers for mixing the solution.
The amount of screed is determined before pouring concrete based on the condition of the base - if the slope of the surface and potholes, bumps are no more than 3 centimeters, it is enough to fill a layer 7-8 centimeters high. When it is necessary to level out more serious distortions, a concrete footing is laid.
1) Dismantling the old covering, thoroughly cleaning the floor, removing dust.
2) Examination of all defects and irregularities, determination of the lower and upper points of irregularities, marking the floor using a laser level (you can use a regular level and a nylon cord), installation of beacon slats.
A straight line is drawn on the wall around the perimeter of the room, and distances are measured from it down to the slab itself. Where the shortest indentation is the top point of the unevenness, they retreat upward from it by 3-6 centimeters and draw a line. This is the height of the future floor, which is oriented towards when setting the guides.
Laying linoleum on a concrete floor
3) Reinforcement of the floor with metal reinforcement (if necessary) in a mesh format, the pitch and diameter of which are selected in accordance with the thickness of the screed.
4) A damper tape is glued along the lower edge of the wall just above the level of the future floor, which will help the screed survive the effects of external factors and help avoid the appearance of cracks.
5) Installation of beacons - this can be a moistened wooden beam, a profile for plasterboard sheets. The step between the guides should be smaller than the size of the tool chosen for distributing and leveling the mixture.
6) Dilution of the mixture (or preparation of concrete).
7) Pouring the mixture between the beacons. It is better to serve from the far corner of the room, gradually approaching the exit. When the filling is completed, the solution is distributed and the surface is leveled.
Cover the screed with plastic film for a day, then remove it, dismantle the beacons and rub the seams.
Laying single-layer linoleum on a concrete floor
The lack of insulation in linoleum means laying a backing to ensure comfortable living conditions in the room. Also, the option of additional insulation of a concrete floor is relevant in rooms located above unheated basements / cold basement floors.
READ Slope steepness of drainage ditch on embankments
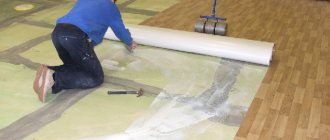
lay single-layer linoleum without a base using sandwich technology:
- roll out the insulation backing (solid rolled cork, jute, linen, etc.), the edges of which are glued to the floor with adhesive double-sided tape;
- treat the surface of the substrate with an antiseptic;
- apply glue (in small sections, bending the linoleum) and spread the covering;
- We install skirting boards and bring in furniture.
Summarizing all of the above, it should be repeated that linoleum should be chosen carefully, paying attention not only to the presence of the base, the hardness and durability of the coating, but also to the quality of the surface, antistatic properties, and tendency to shrink. Linoleum underlay is usually not used, but if absolutely necessary, it is better to use the most rigid materials that will not tear or wrinkle under heavy furniture
And the concrete floor itself should be carefully prepared for laying linoleum, because the quality and appearance of the floor, the level of comfort and durability of the floor covering depend on this.
Which linoleum to choose for concrete
The popular coating is available in a wide range of colors and varies in properties and cost. There are two main groups of materials - natural and synthetic. The first ones are made from natural raw materials - pine resin, crushed oak bark, etc. Artificial materials are made from polyvinyl chloride. It was synthetic linoleum that became popular due to its low cost. However, PVC material has an unpleasant odor and often shrinks over time.
There are many types of canvas
Linoleum has different thicknesses and is designed for a certain degree of load. Flooring can be commercial, semi-commercial, specialized, or household. The latter option has a low cost and is intended for rooms with minimal traffic. The household covering is suitable for bedrooms and children's rooms. For the hallway and kitchen, it is better to choose semi-commercial linoleum, which has increased strength.
When choosing a canvas, you should pay attention to the presence of a base. The soft underlay allows you to install a heated floor under linoleum on a concrete floor. A material with a bottom layer of jute, fabric, felt, foam or polyester retains temperature well. It is better to lay such a coating on a concrete base in a nursery, bedroom, or living room. The baseless material has good strength and is suitable for installation in high-traffic areas, for example, in the corridor.
A backing is needed in the bedroom
When purchasing linoleum, you need to pay attention to its dimensions. The material is sold in rolls ranging from 1.5 to 6 meters wide. It is advisable to purchase a coating of such a size that no joints are formed during installation. If you plan to install a concrete floor in a spacious apartment and the width of the linoleum is less than the width of the room, it is better to purchase the coating from one batch, taking into account the adjustment of the pattern. This way the laid material will look monolithic.
Which paint to choose?
While the floors are drying, you can think about choosing a paint for them. In this matter, you should be guided, first of all, by the performance characteristics of the product. So, the “correct” paint should be:
- Moisture resistant and vapor permeable. Increasing the strength of concrete, preventing its destruction due to the penetration of liquid particles into the pores of the material, is the main task of protective enamel. At the same time, good paint protects floors not only from water ingress, but also from the formation of condensation.
- Insensitive to temperature changes. Sudden heating and cooling are the enemies of concrete, which can greatly reduce its service life. A good coating should protect the material, among other things, from exposure to too low or, conversely, high temperatures. This is especially true in cases where we are talking about painting structures located on the street (for example, a balcony or a garden gazebo) and, accordingly, more susceptible to the negative effects of weather conditions.
- Wear-resistant. The ability of enamel to withstand significant loads without wearing out or chipping will significantly extend the service life of floors.
- UV resistant. Resistance to fading in the sun will allow the coating to maintain its beautiful appearance longer.
- Fireproof. For safety reasons, the paint should not contain flammable components that could contribute to the spread of flames in a fire in the house.
- Provides ease of application. Minimum drying speed and low product consumption per 1 sq. m of the surface to be treated, along with manufacturability (that is, the ability to work with paint with different tools in any desired technique) are not mandatory conditions, but a powerful argument in favor of the chosen option.
There are quite a large number of products on sale that meet all of the above requirements. To decide which one is better, it is worth considering in detail the advantages and disadvantages of each type of paint.
Oil paints: pros and cons
Oil-based products are the most affordable option for those who want to paint their floors on a budget. Such compositions are characterized by excellent quality for their price: they adhere well to concrete and create a durable coating that is resistant to environmental influences (including high humidity and sudden temperature changes) and can last for many years.
Perhaps the most attractive argument in favor of oil paints is their wide color range. With their help, you can not only paint the floor in almost any desired color, but also create some interesting design (for example, a marbled pattern). At the same time, the paint is not afraid of cleaning using gentle household chemicals, so washing structures treated with it is a real pleasure.
The main disadvantage of oil-based products is their high toxicity, which makes them completely unsuitable for indoor use. A similar composition is suitable for painting the floor on an unglazed balcony, but you should not try to treat the floor in a closed garage with it.
Among other things, the oil takes a long time to dry. It will not be possible to use the renovated premises for its intended purpose for at least 24 hours after completion of the work. At the same time, the specific smell will not go away even after this period.
Some visual characteristics of the product also leave much to be desired. Oil paints have an unstable color and gradually turn yellow during use. However, their structure is not elastic. Accordingly, any internal damage to the concrete will immediately be reflected on its painted surface: the enamel in the problem area will crack.
Preparing linoleum before laying
The material delivered to the installation site must be spread out and left there for a couple of days. The room temperature should not be lower than +18°C. This eliminates the possibility of material collapse. If this measure is not observed, waves and unevenness may appear after installation.
Spread out the roll a couple of days in advance
Before laying several rolls in a spacious room, you should roll out the material, press it to the concrete floor with a soft brush, and then carefully match the pattern along the edge of the adjacent sheets. If the coating is monochromatic, marble, it is better to lay it in the direction of lighting. Material with a pattern should be laid across the room. This way the joints will be hidden more effectively and the beauty of the canvas will be emphasized.
Substrate for linoleum
The issue of laying a substrate under linoleum causes a lot of controversy. Since the substrate is one of the stages of preparing the base, let's take a closer look at why it is needed.
- One of the functions of the substrate is to smooth out irregularities. Due to its softness, minor defects in the base are compensated for by these materials. But it is a mistake to think that the substrate will save the situation if there are obvious bumps and depressions. The underlay is not a substitute for leveling the floor.
- The underlay promotes sound insulation by absorbing and compensating for footsteps and falling objects.
- Retaining heat into the room is also the task of the substrate. It is especially important to use the underlay for residents of the first floor, or in the case of a concrete base.
There is no need to use a substrate for linoleum in two cases. If the base is previously carefully leveled and additional insulation and sound insulation are not required (private house). And also if you use linoleum, which is already supplied with a backing. Two layers (backing and linoleum) are already glued together in production, all you have to do is lay the material on the floor.
Laying technology
Installation of the coating should be carried out taking into account the characteristics of the materials used. The installation technology requires compliance with the following rules:
- When pouring the base with cement-sand mortar, you need to wait four weeks. During this time, the floor will dry out and gain strength;
- If you use a self-leveling mortar, you must begin laying the finishing materials after the time indicated on the packaging has elapsed;
- The humidity level in the room should not be higher than 60%. Recommended temperature - not lower than +18C;
- When using an adhesive, possible drafts should be eliminated during installation.
Floor marking
The material is cut in various ways:
- The covering is adjusted at the installation site, the edges are pressed at the junction of the floor and walls. When cutting, you need to leave a reserve in case of thermal expansion of the flooring;
- The markings are made on the material laid out in the room, after which the excess is cut off. No gaps are left;
- First, the protruding elements are marked if the room has a complex configuration. Next comes cutting;
- Cutting occurs using cardboard templates. This is required for flawless installation around plumbing pipes and any monolithically installed fixtures.
The flooring can be cut in different ways
On concrete floor without glue
Installation without fixing with glue is suitable for small spaces. The rolled material must be allowed to rest. Next comes cutting the canvas around the perimeter of the room. The correctness of cutting is checked with a meter ruler. The instrument is placed on top of the linoleum and pressed against the wall. After laying the covering, the skirting boards should be attached.
The material should be immediately pressed with a plinth
Installation using glue
The covering is fixed to the floor using special linoleum glue. The water-dispersion or other mixture is applied with a notched trowel. Then you need to wait a while for the chemical properties of the mixture to activate. The glue is applied in stages, in separate sections under the pre-cut material. For laying linoleum, bitumen mastic is also used, which is applied in the same way and requires preliminary priming.
You can use bitumen mastic
Using adhesive tape
Laying linoleum on adhesive tape is a good way to secure it for a low-traffic area. This fastening method is used in spacious and small rooms. Special tape is rolled out around the perimeter of the room, where the edges meet. The protective film remains until installation. The covering is rolled out and cut to fit the size of the room. The protective film is gradually removed, the canvas is fixed on a clean concrete base.
Scotch tape is suitable for low-traffic areas
Joining linoleum sheets
When laying linoleum in a spacious room, it is difficult to avoid joints. In such a situation, careful alignment of the pattern is required. The fit of the edges of the canvas should be tight, without gaps. If water gets into the joint, mold can form under the linoleum on the concrete floor. To create a strong, invisible seam, you should use a special glue - cold welding. The joining area is pre-cleaned and taped with masking tape. The edges of the canvas can also be glued by hot welding. This method requires special equipment and professional skills.
Application of hot welding
How to lay linoleum
Step 1. The linoleum sheet is cut in accordance with the geometry of the room. It is more convenient to do this if you spread the material on the floor in the room and immediately trim all the edges with a sharp knife.
Step 2. After cutting, the linoleum sheet is rolled up so that it is rolled into a roll located on the wall farthest from the exit from the room.
Step 3. Using a small spatula, apply adhesive to the subfloor. It is applied in an even layer, thoroughly coating the entire base.
Applying glue with a spatula
Step 4. The rolled linoleum sheet is rolled out onto the previously applied glue.
Step 5. The surface of the linoleum placed on glue is carefully and forcefully ironed. This procedure will help expel any air trapped in the glue.
Removing air from under linoleum
Step 6. Corners and places near the walls are additionally ironed by hand.
The area near the wall is ironed by hand
Step 7. The entire linoleum sheet is glued in the same way. You can walk on the floor only after the glue has completely dried.
Linoleum after installation
Important! Before the linoleum is laid, it must be rolled out on the floor and allowed to rest for several days. This will allow him to straighten out, and the result of all the work will be as good as possible. Also, when laying between the wall and linoleum, it is recommended to leave a small gap - about 0.5 cm. Then the material will not bend after final installation.
Video - Laying linoleum
Frequently asked problems and questions
How to glue linoleum to a concrete floor? There are many compositions for adhesive installation of coatings on the market. The choice of mixture depends on the characteristics of the base and the material itself. The safest and most universal is the water-dispersion composition.
There are many ways to stick
How to level a concrete floor under linoleum? Differences in the height of the base are eliminated using a scraping machine or by puttying. Other methods are laying plywood under linoleum or using a self-leveling mixture.
Is it possible to lay linoleum on a concrete floor? Before laying the coating, leveling the surface is required. This is done using a screed, self-spreading mixture or dry method.
Sanding machine
How to treat the floor before installation? The surface of the base is carefully leveled, otherwise all defects will be visible on the finish coating. In case of fixing with bitumen mastic, a double primer of the floor is required.
How to lay linoleum on a concrete floor? Laying the material is simple and does not require special skills. The coating is fixed in a floating manner, using glue or special tape.
Installation is simple and does not require special skills
When choosing linoleum, you should take into account the technical characteristics of the material and the operating features of the future floor. The coating is laid on a well-prepared concrete base. This is an important point on which the quality, service life, and comfort of the floor depend. Taking into account the technical features of materials and adherence to installation technology gives an excellent result in the form of a comfortable, durable coating.
Calculation of material consumption during installation
In order to calculate the cost of laying linoleum on a concrete floor, you need to sum up the cost:
- materials for leveling concrete floors;
- insulating materials and elements for their fixation;
- linoleum;
- fixative for linoleum (glue, mounting tape);
- skirting boards.
Calculation of materials for leveling the floor must be made depending on the condition of the concrete base. The consumption of cement mixture and primer is based on the square footage of the room. it should be remembered that the screed, if necessary, must be at least 3 cm in height. To prime the surface, one finishing layer of primer is sufficient, the materials for which can also be calculated based on the square footage of the room.
The calculation of insulating materials is also made based on the square footage of the room; sheet and roll materials must be laid so that there is a minimum number of joints, especially for chipboard and plywood, which are available in a number of standard sizes.
Particular attention should be paid to places where the material will need to be trimmed or cut into the shape of a protrusion or recess; it is highly undesirable to use small fragments of material from waste - it is better to cut out an unnecessary fragment from the main fabric. The joints are taped with masking tape.
When calculating linoleum, it is necessary to take into account the standard width of the roll - it is optimal if the width of the roll is greater than the width of the room, since by minimizing the number of joints, the service life of the material increases and visually the coating looks uniform.
If joints cannot be avoided, then it is better to place the canvas so that the length of the joint is minimal (parallel to the short wall).
You should also be very careful when calculating linoleum, which involves combining the pattern at the joint - the length of the covering cut in this case should be approximately 1.5 m longer than the length of the laying area. It should also be remembered that linoleum with ornaments is laid exclusively in the longitudinal direction.
The calculation of the fixative for linoleum depends on its type:
- mounting/painting tape - cheaper, more economical, but less durable - it is easier to dismantle if necessary. When calculating, you should take into account the length of the joints and the perimeter of the room for gluing the coating under the walls;
- linoleum glue or adhesive mastics are applied to the entire area of the floor base, which is covered with linoleum, and are calculated based on the quadrature. When working with adhesive and mastic-like fixatives, you should be very careful and work in stages, carefully leveling the surface of the coating to avoid the appearance of wrinkles.
When calculating the length and width of linoleum, it is also necessary to take into account a margin of 10 cm for trimming as it is laid - in this case, even some curvature of the walls can be leveled out due to a small supply of material.
For example, it is necessary to level a concrete floor and lay linoleum in a room with walls of 4 and 5 meters:
- Screed mortar = 20 m2 (room area) * 0.03 m (screed height) = 0.6 m3 or 600 l.
- Self-leveling mixture = 20 m2 (room area) * 0.02 m (fill height) = 0.4 m3 or 300 l.
- Insulation materials:
- Sheet = 20 m2 (area) + 10-15%.
- Rolled = 20 m2 (area) + 10-15% margin on the long side of the roll based on its width.
- Waterproofing film = 20 m2 (area) + allowances for overlapping 20 cm on the sides.
- Linoleum:
- Without the need to join the pattern, taking into account a 10 cm gap around the perimeter = 5.1 m * 4.1 m = 20.91 m2.
- Taking into account the need to join the pattern and a 10 cm gap around the perimeter = 26.65 m2.
- Fasteners:
- On an adhesive or mastic basis - on average 12-15 kg (more accurately calculated based on the manufacturer's specifications, which are indicated on the packaging).
- Mounting tape – 25-30 m.
- Consumables (average quantity, which largely depends on the condition of the floor base):
- Putty – 400-500 g.
- Rags – 100-200 g.
- Epoxy resin or cement mortar – 1-1.5 liters.
Primer for linoleum floors: types, preparation and application to concrete floors
Linoleum belongs to the category of the most common floor coverings due to its high performance qualities and presentable appearance. In order for the finishing layer to be reliable and durable, it must be laid in compliance with all requirements. One of the stages of preparing a rough base is priming. The service life of linoleum directly depends on how well the preparation is carried out. Therefore, it is worth understanding what types of soil should be used in this case, depending on its composition and type of base.
Why do you need a primer?
The service life of laminate flooring, like any other floor covering, depends on the strength of its adhesion to the floor. If the adhesion is poor, then after a short period of time the base used will begin to deteriorate and lose its properties. The primer is designed to prevent such adverse consequences.
This is the main, but not the only function, depending on the characteristics of the selected primer, it:
Makes the base more durable
It is especially important to prime the base if it has many pores or is flaky. Using a primer, all voids are filled and a uniform, dense base is obtained. Allows you to get rid of dust and other small deposits. Prevents the base from absorbing moisture.
Is it necessary to prime the base before laying the laminate?
There is no consensus on this issue, but most floor installers agree that it is better to prime the base. If the base is concrete, then priming is simply necessary, since concrete dust can ruin all your plans for a beautiful, smooth floor for many years.
Having become familiar with the properties of the primer, a good owner will not spare money and time, of which not much is required, and will prime the base to be sure of the quality of the result.
How to choose a primer?
A wide range of primer mixtures helps you choose the most suitable option for each specific case. The effect of different types of protective emulsion on the surface may differ, depending on its composition.
Main functions of primers:
· level the surface, filling cracks and chips;
· strengthen the base, penetrating deep into the material;
· improve the adhesion of layers;
· eliminate excessive porosity of concrete;
· provide waterproofing, creating a thin film on the surface.
There are several types of soil that must be used to treat floors under linoleum.
· Aqueous or water-soluble. This type is used most often due to its affordable cost and versatility of use. When applied to a high-quality screed, it dries quickly and smoothes the surface. Disadvantage: it does not penetrate deeply into the structure of the material.
Cold welding of linoleum
Scheme of arranging a concrete floor with layers of waterproofing.
Most often, the cold welding method is used for laying linoleum, i.e. gluing seams with special adhesives. This makes the seams almost invisible. This method is considered optimal for small rooms, the area of which is up to 20 m².
The process of gluing linoleum when laying it on a concrete floor is as follows:
- First you need to prepare the floor for linoleum. For this purpose, the old coating is removed and leveling is performed.
- A layer of underlay is laid on the floor. If thin material is used, then this stage cannot be excluded.
- The linoleum joints are glued using masking tape, and it is securely attached to the surface. After gluing, you need to use a sharp knife to cut the tape along the joint without damaging the linoleum itself. The needle of a tube with an adhesive composition is inserted into the resulting incision, after which the mixture is carefully squeezed into the incision. The tube is smoothly moved along the entire length of the incision.
- Next, the edges are pressed so that the two pieces of material can be welded together. The glue literally dissolves the edges of the canvases, which after hardening form a monolithic coating.
- When laying linoleum, different types of glue can be used, and its drying time is also very different. Therefore, you need to focus on the manufacturer’s recommendations. The tape is removed after the amount of time recommended by the instructions; this cannot be done before.
- Complete welding usually takes almost a day. Then the adhesive tape is removed and skirting boards are installed to cover the joints between the flooring and the wall.
Any floors, including concrete, can be used to lay linoleum. But before starting work on laying the flooring, it is necessary to perform a set of actions to prepare the base. For a concrete floor, a simple cycle of work is performed, most often it requires leveling and installation of a special substrate, which extends the life of the linoleum itself.
Features of choice
When choosing a primer for linoleum, you should also take into account the base material. To avoid mistakes, you should study the composition and manufacturer’s recommendations when purchasing.
Primers for concrete floors
The use of a protective suspension on a concrete floor can reduce the absorbent properties of the material. This is achieved by filling small pores and cracks. This function is best accomplished by deep penetration soils: polyurethane, latex-based, Concrete Contact with mineral additives.
Primer for polymer screeds
The use of primer allows you to achieve a perfectly flat surface of the base. This helps in the future to lay linoleum without much difficulty.
To process polymer screeds, it is necessary to use Betonkontakt, epoxy and polyurethane compounds.
For cement-sand bases
This type of base is characterized by increased porosity and moisture absorption. To avoid the development of fungus and mold, after laying linoleum, it should be treated with an acrylic primer. This protective mixture is distinguished by its strengthening composition and deep penetration into the structure of the material.
For plywood
In this case, deep penetration soils should be used. The protective layer helps reduce the level of moisture absorption, prevent the formation of fungus and mold, increase the service life and prevent the destruction of the material.
For plywood, acrylic, alkyd, polystyrene, and glyphthalic primers should be used.
Key points in preparing a wooden floor for laminate
Laying laminate flooring on a wooden floor is quite difficult, but it is by no means impossible. In this case, the base will have to be thoroughly prepared beforehand, otherwise the coating will simply peel off.
One of the leveling methods involves the use of chipboard
The procedure starts with:
- Thoroughly clean the floor. This seemingly simple step is extremely necessary! Everything needs to be removed: small chips and debris. Moreover, this must be done in several stages: first by hand, allowing the material to dry for several days, and then using an ordinary vacuum cleaner.
- Surface cleaning. Due to its structure, wood cannot be perfectly smooth, so it will have to be thoroughly processed with a grinding machine. You won't be able to achieve perfect smoothness, but you definitely need to try to get closer to it.
- Leveling the floor. The easiest way is to use a concrete screed. So the floor will become stronger and smoother. However, you will have to wait until it dries completely.
- Primer. If screed has been carried out, then priming the surface is no longer necessary. Otherwise, you can’t do without this stage!
On average, preparing a wooden floor takes several days. Then all that remains is to wait until the material dries and then begin the rest of the work!
Types of primers
Primer mixtures differ depending on the components they contain. Depending on this, the required mixture is selected for processing the rough base of the floor.
Acrylic
This type of soil has high penetrating ability and is used for different types of porous materials. The soil fills the pores of the base to a depth of 5-10 cm, increases its adhesion and levels the surface.
Alkyd
The suspension is used to protect concrete bases. Its use increases the strength of the material, as well as moisture and wear resistance. This is achieved through the formation of a protective film on the surface after the soil has dried. Alkyd primer is characterized by its versatility of use. The disadvantage is a pungent odor that disappears after drying.
Epoxy
This type of soil is used to protect concrete from moisture penetration. To apply, you must first dilute it with a solvent. The composition of the mixture has high chemical resistance, so the primer can be used even on a slightly damp surface.
Polystyrene
This type is used for processing wood flooring. But due to the strong toxic odor, it is not recommended to use polystyrene primer. Similar mixtures must be used to treat floors on verandas.
Shellac primer
This type of protective mixture is used for fresh coniferous wood. The soil is made on the basis of milky juice and methyl alcohol. Due to the peculiarity of its composition, it protects against the negative effects of moisture, disinfects the material, increases strength, and reduces absorbency.
Multi-grounds
This type of soil is quite difficult to find on the open market, because... It is produced only by some manufacturers. The mixture contains resins and polymers. Thanks to this, multiprimers have a protective property and are used for different materials, and they are also distinguished by their versatility of use.
Methods and types of creating a waterproof layer
The basic principle of applying any waterproofing under a self-leveling floor, regardless of the materials chosen, is its absolute continuity and tightness
It is especially important to follow these rules in those areas where the floor meets any vertical surface protruding above it, such as walls. To avoid water flowing there, the insulating layer there must continuously rise by at least 10 cm
above the level of the rest of the floor.
The main thing is to follow the rules of waterproofing the floor and then problems should not arise
There are four known types of waterproofing of the base under self-leveling floors, differing in the type of water-repellent element underlying them:
- polymer;
- bitumen;
- mineral;
- bitumen-polymer.
Each type of waterproofing layer can be implemented using several different materials and techniques, which we will describe in more detail below.
Different methods of waterproofing are interesting in their own way
Do I need to prime the floor before laying linoleum?
During the renovation process, many craftsmen skip the stage of priming the floor before laying linoleum, but this is wrong. Applying a protective layer helps prevent many problems later.
The main advantages of using primer for linoleum.
· The use of mixtures allows you to smooth out minor floor defects, such as cracks and chips. This allows further installation without much difficulty.
· If there is high humidity in the room, the rough base may become damp. This causes the development of fungus and mold under the decorative layer. Preliminary priming helps create a protective film on the surface, which eliminates the possibility of moisture absorption.
· If linoleum is laid on the floor using glue, then priming can increase the adhesion of the layers to each other.
· During operation, dust accumulates under the linoleum and over time it begins to seep into the room through the joints. Applying primer to the base helps to completely eliminate this problem.
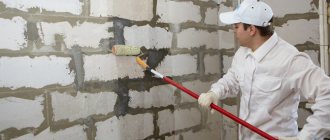
Treatment of concrete joints
Sealing butt joints on floor slabs
Preparing a surface made of concrete or concrete floor slabs begins with cleaning the surface from the remnants of old finishing material. All concrete slabs have shrinkage joints that must be thoroughly cleaned, then coated with a concrete primer and sealed with foam, putty or sealant. If there are small holes or cracks on the surface of the slabs, they must be sealed with moisture-resistant putty using a sickle mesh, which will prevent their further expansion and ensure the integrity of the putty. A similar sealing operation should be carried out at the joints between the floor and the wall using putty and sickle mesh.
How is the floor primed before laying linoleum?
The floor is primed immediately before laying the linoleum. But before this, the rough base must be completely cleaned of construction debris and dust.
If the soil was purchased in the form of a dry mixture, then it should be dissolved in advance to the desired consistency. The dosage of water, drying oil or solvent is indicated on the packaging. You should not ignore the manufacturer's recommendations, because... this will negatively affect the quality of processing. If the primer mixture is liquid, then it must be thoroughly mixed until the composition is homogeneous. Using a roller, the protective layer is evenly applied to the surface.
Preparing the floor surface before applying primer
The quality of the poured floor depends on the quality of preparation of the base coating.
The quality of the poured floor depends on the quality of preparation of the base coating. Therefore, a concrete or cement floor must go through the following processing stages before a primer is applied before self-leveling the floor:
- All old loose coating is removed from the surface to the base;
- The surface is cleaned of construction debris (dust, dirt, pieces of old mortar);
- A cement-sand floor screed is produced;
- After complete drying, the surface is cleared of sagging, the seams are smoothed;
- The entire surface is sanded and cleaned of dust using an industrial vacuum cleaner. The quality of the self-leveling floor depends on the correct grinding;
- When the surface is prepared for pouring the self-leveling polymer mixture, the surface must be treated with a special deep penetration primer.
At this stage of repair, many people have questions about whether it is necessary to prime before self-leveling the floor and what the benefits of treating the surface with primer will be.
How to prepare a floor for laying linoleum in a simple and cheap way.
Priming technology
The priming process requires preliminary preparation. Initially, you should purchase the necessary mixture, depending on the base material. It is also worth worrying about the tools in advance so that they are at hand during work. In addition, it is worth familiarizing yourself with the rules of the procedure in advance to eliminate possible errors.
Preparing a concrete floor for linoleum
Initially, you will need to remove all furniture from the room and remove old baseboards. When restoring an old floor, you need to remove the old coating manually or with a special grinding machine.
Deep cracks should be widened, treated with a primer and sealed with cement mortar. After preparing the base, you need to carefully walk over the surface with a vacuum cleaner.
What is required to prime a concrete floor before laying linoleum?
It will not be possible to apply a protective layer without the use of special tools, so they should be prepared in advance.
· brushes – for treating corners and hard-to-reach places;
Rollers – for uniform application of the mixture onto the base;
· roller tray – promotes uniform wetting;
· spray gun – significantly speeds up the application process.
Work order
Before laying linoleum, you need to analyze the condition of the surface. If the floor consists of a standard concrete floor with a seam between the slabs, then several preparatory steps will be required.
Work order.
1. Remove dust and debris.
2. Apply a cement screed to the base, having previously eliminated all cracks, chips and crevices.
3. Lay insulation or waterproofing layer on top.
4. Lay linoleum on top using double-sided tape.
Leveling a concrete floor
This step will help achieve a smooth floor surface. The easiest way to level is to use a cement-sand screed. It will eliminate differences from 3 to 7 cm.
Work technology
As mentioned earlier, laying linoleum on a concrete floor with your own hands is not difficult. After reading some recommendations, it is not difficult to lay such a covering without outside help.
Selection of materials and tools
The concrete field itself is quite cold, so when choosing a covering, pay attention to multi-layer linoleum on a felt basis. This coating is more expensive, but the price fully corresponds to the properties. Based on the size of the room, you should not take the material exactly as measured - it is better to take a few centimeters of stock. If the pattern is large, and one piece will not be enough to cover the entire room, take the material taking into account the fact that you will have to select a pattern.
You don’t need any special tools for DIY installation – just have a brush and rollers on hand. Only at the cutting stage you will need a knife (stationery or construction knife, depending on the thickness of the coating), a square and a ruler for accurately marking the lines.
Having unrolled the linoleum roll, transfer the floor plan onto it with chalk.
When purchasing linoleum, you can ask for it to be cut right in the store, but there is still a chance that you will have to cut it during installation. Cutting is not a difficult process; all errors and uneven edges will be hidden by the baseboards. If there are protrusions, columns, or pipes in the room, it becomes necessary to cut out some sections of linoleum in shapes. For such work, you need to prepare cardboard templates - then errors and irregularities will be minimal.
Before laying, linoleum with an exact pattern must be laid face up, the borders should be joined to ensure the correct placement of the pattern, and fixed with a heavy object to prevent the knife from slipping along the linoleum while cutting the material.
Actually, we have reached the main stage of work. There are several options for DIY installation - for example, in a low-traffic room with an area of up to 20 square meters. m do not require additional fasteners at all - just secure the linoleum with a plinth. For other cases when it is necessary to lay linoleum on a concrete floor, there are three most common, simple methods.
On a concrete screed
Craftsmen recommend making a concrete screed before laying the covering - this will level the base and the linoleum will lie more tightly. Before pouring the screed, there should be no debris or any debris on the concrete floor that could spoil the smooth surface. Pour the cement mixture, level it over the area of the room and wait until it dries completely. Next, it is recommended to carefully clean the surface with a brush and lay the linoleum, which has previously been left unrolled for several days.
We recommend: Laying laminate flooring without floor screed
Gluing with tape
This method is best used if you need to lay linoleum on a concrete floor, but the coating is not too rough. First, double-sided tape is glued to the prepared, cleaned and degreased floor, without removing the protective film on the other side. The strips of adhesive tape should form a kind of grid - this way the linoleum will hold more firmly. We spread the covering, fold one half and remove the protective film from the tape. Carefully unfold the canvas, then you need to level it, simultaneously pressing it to the floor - with your hands or with a roller. We do the same with the other half of the linoleum.
Using construction adhesives and mastics
It is best to buy adhesives in the same store where you buy linoleum - a consultant can tell you which product is best suited for this type of coating.
There are two types of adhesives, they are divided depending on the gluing method: for continuous and for fixation. The costs of the second are much lower, and application is less labor-intensive. Manufacturers offer the following types of adhesives:
- water-dispersed;
- one-component;
- two-component;
- on a solvent;
- polyurethane;
- for fixation.
When laying linoleum, glue is applied with a notched trowel, roller or brush.
The glue is applied over the entire floor area or pointwise around the perimeter of the room (adhesive for fixation). Due to the properties of moisture resistance and high strength, bitumen mastics are often used when laying linoleum. If the work takes place in a room with a large area, then the use of mastic is a must. In addition, with the help of this material you can isolate the floor from the harmful effects of moisture, level out minor defects and unevenness after concrete screed.
Before applying mastic, the floor must be well primed, the composition is applied to the floor and linoleum - a layer of about half a millimeter for a thin coating, for a coarser one - up to 0.9 mm. When choosing mastic, give preference to well-known manufacturers - their products are of high quality and reliability.
Welding joints
Exactly following the technique of laying linoleum with your own hands is not enough for a good result. Incorrect joining of the panels can ruin the entire appearance of the floor. There are two welding methods for joining linoleum sheets - cold and hot.
The advantage of this type is that it requires a minimum of time and effort. In fact, it is not much different from ordinary gluing. Tape is applied to the joints and cut along the joining line. Glue is poured into the resulting gap; after it dries, the adhesive tape is removed.
Hot welding of a freshly laid coating is not recommended.
Hot welding requires more time and precision when working, but this is justified by the result. The seams become almost invisible, the life of the linoleum is noticeably extended.
For hot welding, you must have welding equipment and a special fastening polymer cord. The work can be divided into two stages:
- Place the cord in the welding machine, heat to 350 degrees Celsius. The side from which the paintings will be fastened does not matter, but is carried out exclusively in the direction of the middle of the room. The melted cord is poured exactly into the gaps, after the product has hardened, the excess is cut off using a sickle-shaped knife (you can also use other types of sharp cutting tools).
- The equipment is transferred to the other side, and the polymer begins to be poured. The center seam should lie on top of what was just applied; after application, repeat the procedure for removing excess with a crescent knife.
It is more difficult to align joints on linoleum with a large pattern - make sure that the pattern matches correctly. And most importantly, this process cannot be rushed.
Do I need to prime the floor before laying linoleum?
If you want to lay linoleum with high quality, then you should adhere to several simple but very important requirements:
- the floor must be level, clear of protruding parts, and have no depressions;
- Before laying linoleum, the surface of the floor must be dust-free by applying a primer; before this, it must be washed of dirt and cleared of debris;
- Depending on the base (concrete floor, wood or pre-laid OSB), reinforcing impregnation may be required.
Before laying linoleum, the floor should be primed
Is it possible to pour a self-leveling floor without a primer, possible consequences
Theoretically speaking, the process of forming a self-leveling floor can occur without prior priming. But if we consider this possibility from a practical point of view, all masters agree that soil is a must. It guarantees long-term use of the surface. Otherwise, the new floor may not last even a year, as various defects will begin to form on its surface.
Application of a primer provides:
- high level of adhesion of the screed to the base;
- dust removal;
- reducing the absorbency of the base, in other words, the base of the floor will not quickly absorb moisture from the screed, thereby allowing enough time for complete drying;
- antifungal properties;
Why prime a concrete floor?
Often, in a hurry, home craftsmen lay linoleum on an unprepared concrete floor, forgetting to wash it from dirt and apply primer. This ends with the fact that after using the floor, sooner or later it will be necessary to remove the coating and treat it with primer. Why is this necessary? Regular loads, friction of the concrete base, temperature changes, and high humidity destroy concrete. This creates:
- Cracks and chips - this is especially often observed when using leveling compounds, leveling compounds, which simply peel off and chip after applying pressure to weak areas. Thus, visually noticeable holes appear, bumps appear, and even an unpleasant crunch of concrete chips under the linoleum. The primer strengthens the upper concrete layers and protects it from cracking.
- The appearance of a large amount of dust - before laying linoleum, the floor will definitely need to be washed from construction debris, dust, and sand. However, after this, a primer is immediately applied, which removes dust from the top layer of concrete. The result is a surface ready for laying linoleum. If you skip this stage, wash the concrete, but do not fill the soil, dust will begin to form and penetrate into the room from the ends of the laid linoleum.
Thus, the primer creates the thinnest protective layer on the concrete surface and improves the adhesion of the linoleum to the adhesive that may be used. This coating is quite durable, practically does not wear off, and after drying it is difficult to wash, since it adheres reliably to the surface.
Priming the concrete before laying linoleum will protect it from subsequent possible problems
Concrete has micropores in which moisture can accumulate, which will result in the development of fungus and mold. Linoleum itself is easy to clean; it does not allow water to pass through, since it is a solid hydrophobic coating, but moisture may appear under the linoleum. There are many such reasons: damage to a single sheet of flooring, flooding, moisture condensation, and its penetration through pores in the concrete. The application of primer closes most of the pores, which eliminates the long-term presence of moisture under a layer of solid coating.
How to cheaply and beautifully paint a concrete floor in a garage, on a balcony or in a house with your own hands?
During active use, any floors, even those made of such a high-strength material as concrete, quickly become unusable under the influence of humidity, temperature changes and mechanical stress. At the same time, painting surfaces, usually performed for purely decorative purposes, can significantly slow down wear and delay the need to restore the coating. Why is it so rarely decided to protect concrete with enamel during renovation of premises? The answer is simple: this material is extremely difficult to paint.
Priming technology
Before starting work, it is necessary to select the composition that will be used for processing.
Types of primer for linoleum floors:
- Aqueous (water-soluble) is the most popular type of soil, used not only for the floor, but also for the ceiling, walls, and other surfaces. It is inexpensive, dries quickly, copes well with the tasks, and does not have a pungent odor. The only disadvantage is its shallow penetration into concrete, but it is sufficient for working on a well-poured base.
- Organic soil - has a greater penetration depth, is used on the subfloor, the strength of the surface is greatly enhanced. This compound is ideal for loose substrates if you want to save money and avoid re-pouring. Disadvantages: high cost, poor assortment, composition is very capricious in technology and conditions of use.
- Polyurethane primer - used in places with increased operational load. It improves wear resistance, ideal for industrial linoleum Disadvantages: high cost, such a primer cannot guarantee the absence of cracks and chips in the future.
Use polyurethane primer in high wear areas
Types of Cement Floors
The composition of the self-leveling floor can be different and the main properties, parameters, and features of the future coating depend on it. The main characteristics of all floors of this type are the ability to level independently under the influence of gravitational forces and create a smooth, perfectly even layer.
The most popular self-leveling floors:
- Cement-sand is the classic and most popular option. In terms of parameters and composition, the mixture is similar to a conventional cement screed, but includes certain components that make the solution more plastic and self-leveling.
- Gypsum - dries quickly, is absolutely safe and non-toxic, successfully withstands loads, and is often used for furnishing residential premises.
- Methyl acrylate mixtures - demonstrate a very high setting speed, can be used as a finishing coating, poured in a thin layer, often as a protective coating to counteract chemical attack. The composition has the property of being absorbed into ordinary concrete, creating a wear-resistant, strong surface.
- Polyurethane - made from a polymer, a special hardener and several additives. Very fluid mixtures, can be used with various acrylic-based dyes. Strong, durable, withstands chemical and physical stress well, and is often used as a finishing layer.
- Epoxy - created on the basis of resins, the composition also includes a main component, a hardener and additional components. After the drying period of the composition has passed, a durable glassy surface remains, which is not afraid of the effects of even aggressive chemicals. There are special compositions for forming a transparent layer into which drawings and objects are poured, creating unusual effects and designs.
The last two types of self-leveling floors are often used in industrial premises where difficult working conditions are observed. A floor made from these materials has a seamless structure that is not afraid of even high levels of humidity and constant temperature changes.
What is required to prime a concrete floor before laying linoleum?
If you have chosen a primer, all that remains is to prepare the tool and begin surface treatment. You will need two types of brushes: a large one for processing areas, a small one for processing corners, joints, and abutments. Also prepare a container. It should be clean, capacity from 2 to 8 liters, convenient for use.
For many craftsmen, it is more convenient to use a roller instead of a brush; it guarantees uniform application of the composition and speeds up the work. Sandpaper or putty knife to remove bulges or imperfections in poured concrete. A broom and dustpan for cleaning the surface before starting work.
If you purchased the soil mixture in dry form, it will need to be prepared according to the manufacturer's instructions.
Your main task is to apply the primer evenly so that there are no areas without primer protection or puddles. Particular attention should be paid to corners and areas around the perimeter of the room.
If you use glue, it is important that these particular places are securely fixed. To do this, before laying linoleum, adhesion with soil is increased.
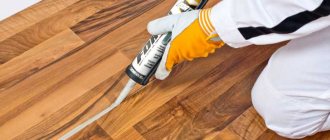
How to paint linoleum correctly
You can paint linoleum, you just need to properly prepare the surface. First, the base is cleaned; dirt, any stains, and wax need to be removed. You can use soap solutions, antiseptic, brushes, and at the end the floor should be clean and streak-free. Dry thoroughly.
The floor must be carefully inspected for any unevenness or cracks.
Fill imperfections with putty. Prime the base with varnish or primer. In this case, the paint will adhere better to the linoleum. When the primer is dry, then you can paint the coating.
Linoleum can be painted if the surface is properly prepared.
The tools should include the following:
- Dye;
- Brush or roller;
- Scotch;
- Paint tray.
The sequence of work is not complicated. Cover the walls below with tape to protect them from paint. Pour the paint into a tray and start painting from the wall opposite the door. Then wait until the first layer is completely dry and apply another layer. If you do everything correctly and according to the instructions, then the paint will delight you for a long time.