MesterulManole
12375 0 6
MesterulManole November 15, 2016Specialization: many years of experience in finishing works of residential and office premises, dachas, country cottages, etc. Hobby: cycling in all its forms
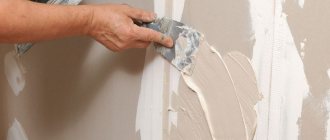
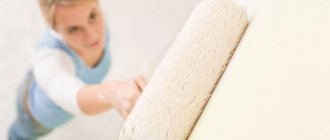
Gluing wallpaper onto a prepared surface is simple and convenient.
Greetings, readers of my blog. In this article I will talk about preparing walls for wallpapering. I will also explain whether it is possible to glue wallpaper onto the finishing putty and whether it is necessary to putty the building surfaces before gluing.
I hope the topic of the article will be of interest to many, since this finishing coating for residential interiors still remains one of the most popular finishing methods.
Is it always necessary to prime and putty the walls before gluing wallpaper?
Before you start renovating your home yourself, a person must decide a number of issues for himself.
They may concern not only what you would like to change in the interior of the house, but also the repair technology itself. After all, people always strive to carry out repair work correctly, so as not to regret it later. After you have removed the old wallpaper, the question arises: is it necessary to putty and prime the walls before gluing? We can say with confidence that this treatment will help achieve excellent results and protect the walls from the harmful effects of external factors.
The days of plastering walls and using newspapers are long gone. Nowadays, people are increasingly treating surfaces using new technologies using drywall, primer and putty.
Answers to popular questions
To obtain a high-quality result, several simple nuances should be taken into account. Here's what the answers to the most frequently asked questions look like.
Question 1: Is it possible to putty walls without first priming?
Answer: Regardless of whether preliminary plastering was carried out with the starting composition, it is advisable to prime the walls. Impregnation will bind dust, which will significantly improve the adhesion of layers.
Question 2: Is it necessary to putty the walls under wallpaper?
Answer: Not necessarily. The issue is resolved based on the quality of the base and the type of roll material that will be glued. If the defects are minor, and the wallpaper chosen is dense and with deep relief, it is enough to just prime the base.
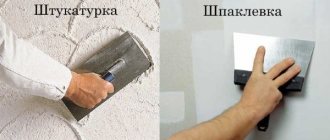
Question 3: Is it necessary to perform plastering under putty?
Answer: Not necessarily. It all depends on what kind of walls are in front of you. If you live in a large-panel house, then most likely you will not need to plaster or putty - you can immediately glue the wallpaper. Brickwork must be plastered, as it is almost never level.
Question 4: Do I need to putty the plasterboard sheathing over the entire area, or is it enough to just go along the seams between the sheets?
Answer: Theoretically, it is possible to glue wallpaper onto drywall without full puttying - unless this wallpaper is thin, light, through which the green or gray shell of the sheets will be visible. However, in this case, it will be impossible to replace the wallpaper when you want to update the interior without damaging the cardboard surface of the gypsum board. A layer of putty will allow you to carefully remove old wallpaper without the need to repair the skin itself.
Question 5: Is it possible to sand putty when it is still plastic?
Answer: No, you can't. The composition must dry completely, otherwise marks from the grater will remain on the screed. Simply, if you don’t have time to wait, select mixtures that harden the fastest.
High-quality preparation of walls for wallpapering
Let's get started
- Primer is an excellent material for protecting the walls of your home from mold and mildew. In addition, it has antiseptic properties and helps finishing materials adhere well to the surface. The walls must be primed if you want to make them smooth and remove all roughness.
- It is necessary to take into account that the putty is applied only after priming the walls (and after it the surface will need to be primed again). First of all, it is necessary to putty the walls in order to level the surface and give it a solid white color. This action helps to avoid dark concrete showing through the wallpaper, especially when the wallpaper itself is quite thin. To obtain a fairly smooth wall surface, it is advisable to apply putty in at least two layers.
Read detailed information about preparing the surface for wallpapering here.
What putty to putty on drywall under wallpaper: what is suitable
Firstly, it’s worth starting with whether plasterboard putty under wallpaper is needed at all. Definitely needed! Especially if you are going to glue thin, light-colored wallpaper, without putty the drywall seam will show through underneath it. And if you don’t putty, when changing the wallpaper you will have problems removing it.
Tips for choosing putty for drywall:
- Buy a ready-made mixture, if you have never putty before, you will have peace of mind about the composition;
- Do not use putty for outdoor use, as it is not safe for health when working indoors;
- You will need a little putty, so do not skimp on its quality, take the composition from a manufacturer with a good reputation.
Drywall joints must be puttied, especially if wallpapering is planned.
Before applying putty, the drywall must be primed. Next, a putty layer is applied; most often, ordinary finishing putty is used. Before mixing the dry mixture, if you use one, clearly review the instructions in the instructions, the proportions of water, etc.
Drywall needs to be completely puttied!
Sometimes people wonder if it’s worth putting putty on drywall, since it’s already perfectly smooth? And that’s true, you can only putty the seams and start gluing. However, it is worth considering that the wallpaper in this case will stick tightly. And when the time comes to change the wallpaper, you will need to glue it on top of the old ones, since they can only be torn off together with pieces of drywall. To avoid such an unpleasant situation, it is advisable to pre-putty the drywall.
Information about all the nuances of drywall putty is available here.
As you can see, finishing work not only helps to achieve perfect alignment of the walls, but also gives them additional protection from external factors. The priming and puttying procedures are not so difficult. Anyone can do them, armed only with the necessary tools. Wallpapering will definitely please the owner of the house with its result, if all the rules for preparing for it were strictly followed.
If the preparatory stage is completed, read on to learn how to properly glue different types of wallpaper.
Popular manufacturers and prices
Retail outlets selling finishing materials display a variety of putties from different manufacturers. Let's consider the most popular brands that are usually used when preparing surfaces for the purpose of further wallpapering them.
Vetonit KR. The mixture is intended for leveling brick, concrete walls and partitions made of gypsum, plasterboard, wood boards in rooms with normal humidity levels. Made using lime and organic additives. Used for wallpapering or painting.
Advantages:
- environmental friendliness;
- simple technology application;
- strength.
Minuses:
- high cost;
- mandatory grinding of the finishing layer;
- pungent smell of raw materials.
The cost of a 20 kg package is from 300 to 350 rubles.
Vetonit LR. Another putty from this manufacturer, specially designed for wallpaper. This dry mixture contains polymers and adhesive particles, which increase the degree of adhesion during gluing.
Advantages:
- ease of processing with sandpaper, after the putty has completely dried;
- excellent adhesion of putty and base;
- this type of putty is suitable for final finishing.
Minuses:
- price;
- there is difficulty in working with the mixture due to its increased viscosity;
- There are many fakes on the building materials market.
The cost of a 20 kg package starts from 350 rubles.
Kestonit LH. Polymer based product made in Finland. Designed for processing concrete and brick surfaces for further gluing or painting.
Advantages:
- ease of working with the material;
- optimal viscosity of the working composition;
- environmental friendliness.
Flaws:
- price;
- rarely found in domestic retail outlets.
The cost of a 20 kg package starts from 850 rubles.
Knauf Satengips. A universal putty for all types of surfaces based on gypsum with astringent mineral particles and other additives that allow not only finishing, but also minor repairs of cracks and chips.
Pros:
- the material is suitable for the starting layer and for finishing;
- this putty can eliminate differences in height from 5 to 8 mm;
- optimal viscosity of the finished mixture;
- low cost.
Minuses:
- the treated surface cannot be coated with primer;
- complex application technology.
The cost of a 25 kg package is 230-250 rubles.
Knauf HP Finish. As the name suggests, the product is designed for finishing substrates for painting or pasting. Suitable for civil and industrial buildings.
Advantages:
- affordable price;
- optimal viscosity of the mixture;
- simple application technology;
- long shelf life of the material.
Flaws:
- after completion of the work, it is necessary to carefully level the surface with sandpaper;
- dried putty has a yellowish color.
The cost of a 25 kg package is from 270 to 295 rubles.
Acryl-Putz. The product of the Polish manufacturer is intended for the final finishing of indoor surfaces. The base is gypsum.
Pros:
- the finished surface remains white without changes.
Minuses:
- insufficient viscosity of the finished solution makes it difficult to apply putty to the wall;
- high price;
- It is necessary to thoroughly clean the finished base with sandpaper.
The cost of packaging 30 kg from 730 rubles.
How to putty the walls before wallpapering
We would like to dedicate this article to those new to renovation work. It often happens that when repairing the walls of their home for the first time, many do not understand why, and most importantly, how to carry out this repair. Plasters, putties, primers - what needs to be done and what will happen if you don’t?
Actually the answer is quite simple.
A primer is a material designed to create an invisible film that has good adhesion properties, the so-called adhesion. Thanks to it, plaster and putty will firmly adhere to your walls.
Plaster is a material designed for leveling walls to give them a strictly vertical level. This will help in the future to install tall cabinets along the walls and avoid uneven gaps.
Putty is a finishing material that has a fine grain, due to which the walls are smooth and, after cleaning, you can glue wallpaper or apply paint on them.
Whether all this work is worth doing or not is up to you to decide; we will only tell you about putty work.
Is it necessary to putty the walls before wallpapering? Maybe it makes sense to save money? This question is often asked by those who are faced with repairs for the first time.
Putty work solves several problems:
- level the walls;
- create a uniform tone;
- improve adhesion.
You can do without putty work when putty work was carried out earlier. In this case, you just remove the old wallpaper, prime the surface and start gluing new wallpaper. Of course, in the case when the putty layer was damaged when removing old wallpaper, it is necessary to restore it. All dimples, bumps and cracks should be filled with putty.
What it is?
Puttying is the leveling of walls for wallpaper or painting. For this, putty is used - a plastic material that fills all the holes, cracks and chips, and compares the protruding parts of the wall with the base.
By the way, if liquid wallpaper is used as a finishing touch, then there is no need to level the base. Liquid wallpaper is a decorative plaster that itself is capable of performing this procedure. But before pasting the walls with paper, vinyl or non-woven wallpaper, it is necessary to fill up the uneven areas.
Many people, when renovating a room, erect partitions from a metal frame covered with sheets of plasterboard. And they have a reasonable question whether it is necessary to seal the seams and joints between sheets of drywall with putty. In fact, wallpaper can also be glued to plaster, but if you seal the seams and use fiberglass as a base, the pasting will be faster and better.
Which putty is best for walls under wallpaper?
Starting putty eliminates the walls from differences (pits and bumps).
Finishing putty is designed to make the surface smooth.
However, there is no particular point in using finishing putties if you decide to hang wallpaper. Nothing will be visible underneath them anyway. If you want to paint a piece of wall, you need to apply finishing putty.
Of course, it’s worth making a reservation here, because in the case of thin wallpaper, even a slight difference will be visible, while thick wallpaper will hide all the minor imperfections of your walls.
Starting and finishing putty
When you plan to hang wallpaper, then you simply need to putty the walls. Walls with severe flaws are first puttied with a starting solution, because it can be applied to brick or concrete walls.
The finished mixture is distributed in a thick layer, up to ten millimeters; if necessary, another layer can be applied.
If there is a need to apply putty in more than one layer, then a reinforcing mesh is used, thus improving adhesion.
Starting putty comes in both dry form and in the form of a ready-made mixture. Most people prefer dry powder for dilution: the advantages of dry mixes are an affordable price and the ability to prepare the solution yourself, making the putty the consistency necessary for comfortable work.
It is important to know that to use putty both indoors and outdoors, types of mortar with different characteristics are used. After leveling the walls with the starting mixture, finishing is carried out
This should be done only after the first layer has completely dried.
After leveling the walls with the starting mixture, finishing is carried out. This should be done only after the first layer has completely dried.
The finishing putty differs from the starting putty in its fine grain, as a result of which the composition is applied in a thin layer, approximately two to three millimeters.
Taking this factor into account, everyone should understand that finishing putty cannot be used to seal seams and rough surface irregularities.
Finishing putty, like starting putty, can be used for facade work and for interior work - do not forget about this when choosing, because mixtures for exterior and interior work have different adhesion and moisture resistance indicators.
Of course, you can make the putty material yourself, but the quality of the solution will be worse than purchased, so it is better to purchase a good factory-made product.
When purchasing material, you should immediately calculate the amount required for the work so that an unpleasant situation does not arise.
Experts recommend purchasing all the materials needed for repairs from one manufacturer, if such a possibility exists.
How to putty walls under wallpaper
Let's get to work!
First, remember, the drywall must be completely puttied! This rule is. If your walls are made of plasterboard, then they must be completely plastered, otherwise the next time you want to do a renovation, you will face big problems, because it will be extremely difficult to peel the wallpaper off the plasterboard. To begin with, a reinforcing mesh is applied to all drywall joints, and only then putty is applied. Otherwise, cracks may form at the joints.
conclusions
Thus, we considered the topic of puttying walls before wallpapering. If you still haven’t decided whether you need to putty the walls or whether plaster is enough, then we recommend that you first buy finishing materials.
If your finishing materials are thick wallpaper, then there may be no need to putty the walls, since the wallpaper will hide minor imperfections in the walls.
If you decide to paint the walls, then you should definitely putty them, otherwise the result will not be the best.
The only thing that makes no sense to skimp on is the primer. If you want paint or wallpaper to stick confidently to your walls, then they need to be well primed.
You can share this article on social media. networks if you liked it.
Features of puttying various materials
Depending on the material and quality of the wall surface, you will have to level it in one way or another.
Brick
Brick walls must be leveled. If there are large irregularities, the surface will have to be plastered and then treated with finishing putty (if you plastered well enough).
If the wall is fairly smooth, then you can do without plaster. After the primer, a starting putty is applied in several layers, and after it dries, a thin layer of the finishing composition is applied.
Concrete/cement
Sometimes you find walls that are so well made, smooth and durable that you can even do without putty. To do this, the following conditions must be met:
- The wall has a monotonous, even color;
- The room is heated, without high humidity;
- The wallpaper is thick and does not show through.
In all other cases, a finishing layer and, if necessary, a starting layer of putty are applied (chips and unevenness are repaired with it).
We recommend priming in any case: this will improve the adhesion of the wallpaper to the wall and prevent the accumulation of excess moisture.
Plaster
As mentioned above, the surface of the plaster can be perfectly smooth, but grains of sand will still appear on its surface, which do not allow the wallpaper to be glued properly. Therefore, it is treated with a thin layer of finishing putty to smooth the surface.
Old wallpaper
Sometimes people wonder whether it is possible to putty on wallpaper. Definitely not! They can be easily removed by wetting them with water or special liquids.
If you putty on the wallpaper, it will absorb water, bubble, and immediately fall off; in general, it’s unlikely that you’ll get anything decent.
Drywall
Definitely putty!
It's not even about the wallpaper itself; it will fit perfectly on drywall. The fact is that if you want to remove them, they will be removed along with the outer covering of the sheet. It is clear that the sheets will have to be changed after this. It will be much cheaper to apply a layer of finishing composition in advance.
Before puttying the drywall, all joints are glued with reinforcing mesh to prevent cracking.
Wood boards
They are puttied depending on the nature of the surface. For example, fiberboard or plywood do not require puttying; they are already quite smooth. But the OSB will have to be puttied, since the gaps between the individual shavings are quite large.
Chipboard or MDF without an outer protective layer will require a primer and possibly a thin layer of finishing putty.
If you already know the technology for applying putty, and you want to know how to glue wallpaper quickly and efficiently, then you can read our article, where we cover these issues: gluing paper-based vinyl wallpaper: how to glue and what glue to use.
What you need to know about puttying walls
Do I need to putty the base?
Many beginners are interested in whether it is necessary to putty the walls at all? To answer this question, you should understand that putty can solve the following problems:
- Provides a uniform light surface . If you stick thin, for example, paper wallpaper onto cement plaster or concrete, then gray spots will appear underneath;
- Levels the surface . Wallpaper cannot hide significant differences and unevenness of the base, therefore, if there are flaws, they must be eliminated with putty;
- Improves adhesion . If you are going to glue wallpaper on wood, OSB or concrete, then putty will improve the adhesion of the glue to the base;
The putty gives the walls a uniform white color
- Allows you to remove old canvases without damaging the base . This property is relevant for plasterboard walls. If you do not putty them, then later you can tear off the old wallpaper only with a layer of cardboard.
From this we can conclude that you can do without putty only if the walls are plastered with light plaster - gypsum or lime, and have a smooth surface. In other cases, it is highly advisable to apply an additional leveling layer.
To prepare the walls, use gypsum starting putty.
What putty to use
As you know, putty is divided into two types:
- Starting . Designed to eliminate large differences (up to 1 cm);
- Finish . Allows you to give the surface smoothness, applied in a layer of up to 1 mm.
I’ll say right away that finishing putty is completely unnecessary in our case. Firstly, under them you cannot see which surface is smooth or rough. And secondly, finishing putty will only worsen adhesion.
Therefore, wallpaper should be glued to a starting putty or universal putty, and the finishing putty is needed to prepare the surface for painting, since paint does not hide defects, but more often, on the contrary, reveals them.
Which finishing putty is better?
Putties from are the undoubted leaders in the construction world. Finishing mixtures are available in several types.
"Uniflot"
This type of putty has high strength indicators and cracks do not appear after drying.
Fugenfueller"
One of the most common putties from Knauf.
"Rotband"
It has low consumption. Knauf also produces ready-made solutions of the Multifinish type. This mixture contains polymer substances and limestone fillers. After painting, the surface becomes smooth and even.
Finishing putty "Knauf" is used in rooms where normal humidity is maintained. Therefore, it is better not to use it in the bathroom or kitchen. The mixture is packaged in bags weighing 30 kg. The maximum layer thickness is 4 mm. 0.9 kg will go per 1 square meter if the layer thickness is 1 mm.
Putty “Ceresit ST 225”
It can be applied to pre-primed walls. It is better to use the starting mixture from the same company. If the mixture is applied to brick walls or a porous surface, it is better to pre-moisten it.
When preparing the mixture, you will need 0.35 liters of water per 1 kg of mixture. The thickness of the applied layer will not exceed 5 mm. Fillers and other components that promote binding should not be added to the mixture. For 1 square meter you will need 1.8 kg of mixture, taking into account a layer thickness of 1 mm.
putty
It is worth saying that this mixture, along with Knauf, meets all standards and requirements. 84% is an indicator of the whiteness of the material. This is a very good indicator. It's better not to look for anything. A very plastic mixture, it has no off-putting odor and works well in combination with decorative surfaces.
Putty from "Weber vetonit" is not bad for its price category. Of course, it is slightly inferior in its properties to Knauf and Ceresit. For example, it cannot be used in rooms with high humidity. This putty dries in 24 hours.
Finishing putty made on the basis of limestone and cement. Used for application to concrete and brick walls. This type of mixture is not afraid of moisture, so it can be used in any room.
This putty also contains other additional components. It is better not to make a layer of putty more than 3 mm. The fact is that it shrinks; with a larger layer thickness, cracks may appear. 3.5 kg is consumed per 1 square meter with a layer thickness of 5 mm.
"Scanmix"
Polymer plaster, so it can be applied to any type of surface. The surface turns out so smooth and white that you don’t even need to glue it with wallpaper. The mixture does not shrink after drying and has high strength and water resistance characteristics.
The walls dry within 24 hours, after this time the surface can be painted or glued. Consumption is 1.5 kg per square meter with a layer thickness of 3 mm.
Before you start choosing putty, you should know under what conditions it will be used. Also consider the coverage area, only then buy the mixture.
Putty technology
The puttying process can be divided into four stages:
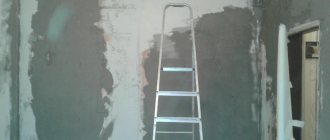
Stages of preparing walls for wallpapering
Next, we will take a step-by-step look at this procedure from start to finish.
Preparation of materials
First of all, let's look at what you need to putty the walls. So, you will need:
- White starting putty, it is best to use gypsum mixture as it is inexpensive and easy to work with;
- Acrylic universal primer (if the base is loose, deep penetration primer should be used, but if the surface, on the contrary, has poor adhesion, an adhesive primer should be used);
To prepare the base you will need an acrylic primer
- Abrasive mesh P80-P120;
- Set of spatulas;
- Paint roller with cuvette;
- Clean plastic bucket;
- Electric drill and special mixer attachment.
It is also advisable to have a long rule to control differences in the surface of the walls.
Preparing the base
Before you putty the walls, you need to prepare them as follows:
- Prepare the primer - shake it and pour it into the cuvette;
- Soak a roller in the liquid, squeeze it out lightly and carefully treat the surface of the walls with it;
- Wait for the surface to dry and repeat the procedure.
- If the walls are covered with plasterboard, it is necessary to cut chamfers from the smooth edges of the sheets;
- Then a sickle mesh should be glued to all joints.
Now you can start puttingty.
Puttying
The putty technology is as follows:
- Pour clean water at room temperature into a clean plastic bucket;
- Add the required amount of dry mixture. The manufacturer indicates the ratio of water and mixture on the packaging;
- Mix the solution thoroughly with a mixer.
Do not prepare gypsum putty in large quantities, as after 15-20 minutes it begins to set and, accordingly, it can no longer be used.
- If the base is drywall, first of all you need to putty the screw heads and also fill the seams with putty. To do this, you can use a narrow spatula. Try to level the putty immediately;
- After the putty has dried, it must be cleaned with a spatula to make the surface smooth;
- Then remove any dust that appears after sanding and prime the surface with a roller.
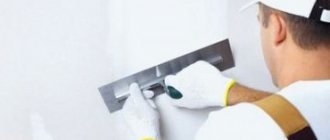
- Scoop the mixture onto a wide spatula using a narrow spatula;
- Grasp the handle of the spatula, placing your index and middle fingers on the spatula blade as shown in the photo;
- Run the putty knife along the wall. The movement should be smooth and fast enough. At the same time, pay attention to the pressure and angle of inclination so that the putty lays down in an even layer. Cover all walls with putty in the same way;
- To level the inner corners, use a special corner spatula.
This completes the puttying. Many beginners are interested in how many layers of putty should be applied to properly prepare the surface? It all depends on the condition of the base and the putty itself. If, for example, the differences are a centimeter, and the composition can be applied in a layer no thicker than 7 mm, then, accordingly, two layers will be needed.
If the differences exceed 10 mm, then plaster should be used to level the walls.
Therefore, you need to inspect the walls in advance and apply a rule to know how many times you will have to putty them.
Sanding and preparation for gluing
Now the final stage remains - sanding and preparing for wallpapering. This work is done as follows:
- Use a special mesh and a grater to remove any existing unevenness (marks from a spatula or other defects);
- Once the desired result is achieved, clean the surface from dust.
Beginners often doubt whether they need to prime the putty before wallpapering. The primer will improve adhesion, ensure uniform absorption of the glue and slightly reduce its consumption.
Therefore, it is highly advisable to apply a primer to putty walls. After they dry, you can start gluing wallpaper.
The best decorative putties
The mixture received this name due to the possibility of giving the coating a relief to perform decorative functions. Based on the results of testing and analysis of reviews, the material presented in this rating was recognized as the best putty.
Optimist-Elite Bark beetle XL for external and internal work
This paste is purchased only for decorative purposes, which it copes with adequately thanks to its interesting texture, like bark beetle marks on tree trunks. The design can be made in absolutely any way - circular, cross, vertical, horizontal, but to make the coating aesthetically pleasing it will require some skill. If necessary, it can be painted in any color.
Putty “Bark beetle XL” from Optimist-Elite is suitable for both interior and facade work. It is distinguished by its soft white color and vapor permeability, which increases the service life of the decorative layer. It is used for all types of surfaces - concrete, brick, plastered. The mass is applied quite simply using a spatula, trowel or roller. The solution dries quickly on the base and does not pollute the space due to its not very liquid consistency.
Advantages
- Looks beautiful under a layer of varnish;
- Gives a matte finish to the surface;
- There is practically no smell;
- Does not produce evaporation;
- Environmentally friendly material.
Flaws
Available in only one volume – a 7 kg bucket.
To achieve the desired results, the temperature in the work area should not go beyond +5-35ºC, and the maximum permissible humidity limit should be 70%.
Is it necessary to putty the walls under wallpaper?
Is it necessary to putty the walls before gluing wallpaper, and how smooth the surface is intended for gluing - you need to know this before starting repairs.
The overlapping gluing method, when one panel slightly overlapped the other, made it possible not to notice the joints of the paper covering.
Modern technologies provide that the material is glued end-to-end, and this forces extreme accuracy, which can only be achieved with a flat and smooth surface. Hence the urgent need to carefully level the wall.
Luxury or necessity
Modern technology for finishing walls with wallpaper requires the mandatory application of a leveling layer, which is due to new building materials used in repair work. The common practice of removing the old coating and applying a new one immediately after this process is not applicable when finishing work with OSB boards, plasterboard, concrete or brick walls.
The most fashionable and expensive coatings lose their appearance immediately after application if it is applied on an uneven surface with cracks, chips or pits. A smooth wall contributes to both greater preservation of the finishing material and less consumption of applied glue.
If you putty the walls under wallpaper, the applied composition promotes greater adhesion between the wall and the coating, significantly increasing the adhesive ability of the base.
This guarantees long-term operation without bubbles, peeling and deformation, which is especially necessary if you choose universal wallpaper, which has excellent properties, but is not nearly as cheap as paper wallpaper.
Leveling the surface is not just making it even and smooth, but also ensuring significant strength of the material used for rough finishing of the wall.
Choice of putty
Today, there are many methods that allow you to prepare almost any solution yourself. It’s just better to abandon such an idea immediately, especially if you don’t have the proper experience in this matter. The point is that you need to create a surface that will hold the wallpaper very well. You also need to take into account that many compositions absorb moisture from the air, which can also have a negative effect on the decorative layer.
Therefore, it is better to immediately opt exclusively for materials that are sold in special construction stores. This is the only way to be sure that the walls will be prepared as needed.
What is putty?
| Application area | Mixture characteristics |
| • Specialized finishing material. • Applied before wallpapering. • Removes all joining seams. • Evens out small wall defects. • Serves to create a perfectly smooth coating. | • Can be in the form of a paste mixture that does not require additional preparation. • Dry formulations require prior addition of water. • The elements that make up the material have a fine fraction. |
Accordingly, from the existing pasty and dry materials for preparing walls for wallpaper, it would be better to choose the former. They do not require additional manipulations and can be used immediately after opening. But for large volumes of work they are not very suitable in terms of savings.
Thus, drawing a conclusion about which putty is better based solely on its external characteristics will not be entirely correct. A clear understanding of this issue can only be obtained after a detailed study of the compositions of putty mixtures. And how they interact with wallpapering materials.
Advantages of wall putty
A renovation professional will insist on puttying the walls before wallpapering. Carrying out repairs with your own hands presupposes the quality of its execution, which can only be guaranteed by careful adherence to technology, completion of the necessary stages, and their order.
The use of technology in the “as for yourself” version provides that the wall must not only be puttied to remove noticeable unevenness in the relief and to even out the color, but also a finishing leveling layer must be applied.
After applying the putty, the adhesion of the wall will improve and the wallpaper will lie more firmly
This will provide the following prerogatives:
- the walls will absorb less moisture;
- will gain greater strength;
- will increase the adhesiveness and better hold the wallpaper;
- visual defects that spoil the final appearance will disappear;
- the amount of glue required will be reduced;
- the joints will become invisible and the glue will not protrude into them;
- The wallpaper will not be damaged in places where defects have been sealed.
Some modern wall decoration materials for wallpaper simply will not retain the decorative layer unless a protective coating is applied to them.
This is due to the raw materials used in them, which both provide excellent qualities and make them vulnerable to the application of wet glue. Puttying walls under wallpaper is a fairly simple process, but necessary when performing truly high-quality repairs or finishing.
In any case, high-quality finishing or repair work requires that the wall must be leveled and a finishing layer applied. Otherwise, expensive materials with a decorative function will not last the period that is guaranteed to them.
Type of putty and its purpose
Wall putty is selected according to two criteria: composition and functions. The mixture is selected based on its constituent components, because the quality of the final result depends on them.
So, putty is divided into the following groups:
- gypsum – levels the wall well and does not shrink in the future. The only disadvantage of such a mixture is that the composition is afraid of moisture;
- cement - has a high resistance to moisture, but may shrink over time. The negative aspects can be added to the long drying time;
- acrylic – moisture resistant, does not shrink. Perhaps this is the most suitable finishing option for both wallpaper and painting.
The list shows the three most common types of putty that can be purchased on the construction market.
The main thing is to remember that the purchased materials must be produced by the same company, which will affect the quality of the finished surface.
In order to ultimately get the result you want, you should consult with the seller and choose a putty that is suitable specifically for your purposes.
Regardless of the components present in the mixture, putty is divided into two types:
- starting mixture, which is used to smooth out large flaws and cracks on the wall. This type of composition can correct any errors in the walls, because the thickness of its layer can be five millimeters;
- finishing option - a type of material designed for repeated puttying in order to eliminate minor defects and give a smooth surface to the wall.
Sometimes a third type of putty mixture is used - universal. This product contains both finishing and starting putty at the same time.
The price of such material is much higher, but the quality is better. Which choice will be correct?
It turns out that all types of mixtures are good, and the question of which putty is best for walls under wallpaper remains unclear.
The answer can be obtained directly from the sales consultant, explaining to him for what purposes the putty solution is needed.
Specifics of materials used for wall panels
The most common types of wall panel finishing today, according to experts, require additional finishing. The technology and sequence of work depends on the type of panels used or the original wall material:
- Brick walls require applying a leveling layer in two stages. The first stage is that the starting layer is applied to the cleaned surface. The layer should be no thicker than 6 cm at a time. Starting putty smoothes the wall from uneven masonry using its coarse-grained structure. The finishing layer is applied to the dried starting layer, but only after the wall is completely dry.
- Concrete walls are finished in approximately the same way as brick walls, but here the old surface is easier to clean and the consumption of the starting layer is less. The question of whether it is necessary to putty walls made of concrete is not considered, because concrete is still a relatively rough surface.
- OSB boards must be treated in a special way, because glue cannot be applied to them due to their high moisture permeability. On OSB boards that are planned to be covered with wallpaper, a penetrating layer of resin-based primer is first applied, and only then a dispersion putty of a special composition and a layer of elastic reinforcement are applied. OSB boards can be covered with wallpaper only in this case, otherwise they will soon fall off, thereby deforming the original material made from wood shavings.
- Plasterboard boards also need to be treated. First, the joints between the slabs are leveled, then a thin layer of preparatory coating is applied to the gypsum board. It is necessary to putty the joints for visual and operational effect, and the top layer is a necessary measure for subsequent repairs.
If this is not done, the old wallpaper will be removed along with the top layer of plaster, and the panels will have to be reinstalled. A plastered plasterboard wall will easily allow you to remove the old coating.
Useful tips
Some useful tips to help you properly putty walls under wallpaper:
- For uneven walls, with cracks and other flaws, it is necessary to add a primer to the puttying process. First, the starting putty is applied, then the primer, then the finishing putty, and finally the last layer of primer.
- It is not recommended to take long breaks during the puttying process. The transition from one wall to another should not take more than five minutes.
- The putty is scooped out of the container using a small spatula. Then a wide spatula is leaned against the wall at an angle of 90° and the mixture is thrown onto it. After this, a layer of the required thickness is spread over the surface.
- It is necessary to apply putty on the walls from the corner and then move horizontally.
Conclusion. Don't be afraid to do putty work, even if you're doing a renovation for the first time. The main thing is to choose the right material and strictly follow the instructions. At the puttying stage before the mass hardens, any flaws can be corrected.
Possible defects in finishing work
Some repairmen insist on the ideal smoothness of the created top layer.
If, when applying the finishing layer, you distribute the material evenly with a spatula, and then level it using a special tool, you can do without sanding.
When deciding how to putty the walls before wallpapering, you should take into account the specifics of the material of the wall panels, selecting the appropriate brand of putty that has the necessary properties.
Using putty compounds for other purposes may lead to results that are opposite to those expected. The use of a protective layer allows you to avoid the usual defects that accompany wallpapering. For more information about puttying, watch this video:
Table of finishing defects when wallpapering.
How to properly apply putty on walls
It is impossible to “trample” the plaster into a thick layer in one application - when it dries, it will crack. The minimum and maximum allowable layers are different for each type of base. This is indicated in the recommendations on how to putty walls under wallpaper with your own hands. Each layer of material is applied to a dry coating.
Important requirements when puttingtying walls under wallpaper with your own hands:
- Optimal room temperature and humidity;
- High-quality batch;
- Primer of walls;
- Distribution of mass in thin layers using a tool;
- Coat in 2-3 layers with a smooth surface at the finishing stage.
When drying the layers, it is important to avoid drafts. Do not ventilate the room by opening windows or doors. A low temperature, within 8-12°C, is even better than heat and dry air, which will quickly “pull out” all the moisture from the walls. It is also better to turn off heating appliances.
When drying the layers, it is important to avoid drafts.
Surface preparation
Before you putty the walls under the wallpaper, remove the old paint, peeling plaster and the previous layer from gluing the rolls.
- It is easier to remove the paper after thoroughly soaking it with a sponge roller or spray;
- To remove paint you need a “wash” and a hairdryer;
- Peeling plaster is cleaned with a sharp spatula and a metal brush;
- A thick layer of building materials and cement at the seams of the brickwork are knocked down with a chisel.
Before you putty the walls under the wallpaper, remove the old paint, peeling plaster and the previous layer from gluing the rolls.
For those who decide to do the repairs themselves, it is recommended to purchase a set of new spatulas of different widths. In addition to them you will need:
- Electric drill and container for mixing dry putty;
- A plumb line (to check the vertical) or a universal level with a “laser” (horizontal);
- Sanding machine (coarse sandpaper or mesh grater) for final work;
- Foam roller (for soaking the old layer);
- Vacuum cleaner (removing dust from grinding);
- A broad rule, from the word “edit” (distribution of putty over the surface);
- Brush and roller for primer;
- Water containers for soaking brushes after work.
The surface of a good tool for puttying walls should be free of nicks and bent corners, otherwise marks will remain.
It is better to remove the remaining mass from the instrument immediately so that it does not dry out.
The surface of a good tool for puttying walls should be free of nicks and bent corners, otherwise marks will remain.
Working with starting putty
It happens that old wallpaper is glued very conscientiously. They should not be left as a basis, as beginners think. The paper layer will quickly shrink and peel off during pasting with new wallpaper.
The starting mixture should be free of lumps. If you prepare your own cement composition for sealing joints, white cement and fine river sand are recommended. With this composition it is easier to learn how to putty walls by getting your hand used to working with a spatula.
Preparing dry putty for work:
- Pour a small portion of dry matter into a mixing container;
- The volume of water must match the proportion indicated in the recommendation on the packaging;
- It is better to stir mechanically rather than manually (if you don’t have a construction mixer, an electric drill with a “stirrer” will do);
- It is better to add water to dry putty in portions, stirring thoroughly until there are no lumps.
Using a narrow spatula, scoop up the finished mixture from the batch and place it on a wide rule (tool). The mixture is spread with confident gestures over a small section of the wall, starting from the corner. Before re-application, the wall must dry for 12-24 hours, depending on the temperature.
The starting mixture should be free of lumps.
Finishing putty
The final stage of preparing walls for wallpapering is leveling with a finishing compound. The principle of preparation of the composition and application is not very different from the technology of applying the base coat. The recommended layer should not exceed 1.5-2 mm.
Under thin, light-colored wallpaper, careful work is done. Without putty, all the defects of the walls and joints made of different materials are visible. Wooden beams, metal corners and gray reinforced concrete products will shine through. Therefore, they must be coated with a universal or specialized finishing putty.
It is advisable to purchase primer, starting and finishing putty for concrete walls under wallpaper from the same brand of manufacturer. This guarantees excellent adhesion and high-quality coverage.
With a plastic finishing mixture in a plastic container, you can finish the job at any time without worrying that the remainder will dry out. However, the packaging must indicate the expiration date and storage conditions, which cannot be ignored.
With a plastic finishing mixture in a plastic container, you can finish the job at any time without worrying that the remainder will dry out.
What to do after finishing putty: grouting
The leveling process can be completed with the application of a base coat if there are no defects. On smooth walls under textured wallpaper there is no need to do thorough grouting. It is performed in fragments where irregularities are identified.
High-quality wall putty for wallpaper is also sufficient for lining with fiberglass rolls for painting. In other cases, it is recommended to thoroughly clean the walls.
Grouting is a smoothing of the surface performed with a special tool:
- Fine-grained sandpaper;
- Sanding mesh;
- Grouting block;
- Grinder.
When working with starting putty, tool streaks often remain, especially for beginners. They are removed during the grinding process. Upon completion of this stage, carefully vacuum the wall before priming and gluing the trellises.
Tool streaks are removed during the grinding process.
Types of putty and their intended purpose
The preliminary stage of wall preparation includes not only cleaning them, removing dust and removing remnants of old wallpaper and plaster. In old houses, there is a high probability of finding large surface defects that will have to be plastered.
Plaster is traditionally prepared from sand and cement in a 3:1 ratio. After everything has dried, priming is done, and only after that you can begin to apply the finishing coat. Walls after plastering certainly require priming, which ensures a strong bond between the surface and the applied layer of finishing coating. Otherwise, there is a risk of starting repair work all over again. For a detailed overview of the properties of putties, watch this video:
Whether such a staged finishing is necessary is decided on site, and in any case the putty must match either the ground layer or the type of panels used. To select the required type of composition suitable for the type of wall coverings, you must consult a specialized specialist.
Cement mixtures are suitable for finishing in damp areas
To purchase the necessary putty compositions, you should learn a little about their qualitative composition and intended purpose:
- containing cement, it is suitable for wet rooms, but is mainly used for exterior finishing after plastering;
- gypsum-containing ones are inexpensive, but are used where a stable temperature is maintained;
- polymer ones are not cheap, but they are versatile and economical when working with plasterboards;
- with the addition of latex they require a thin layer and are resistant to significant mechanical stress;
- acrylic can be used both as starting and finishing materials; they are widely used due to their suitability for any wall covering;
- For rooms with high humidity, finishing putty on the walls with the addition of oil or glue is used, but it is hardly worth gluing wallpaper on in such a room.
Putty can be purchased both dry and ready-made. Dry requires an additional preparatory step, but is stored longer and is cheaper. The finished product can be immediately applied to the wall, but its cost is higher, and it can be stored open for only a short time.
Types and classification
The main criterion for classifying the materials under consideration is the type of binder. Depending on this they are divided into:
- cement;
- gypsum;
- polymer.
Cement
The main advantages of this type of composition are its increased strength and moisture resistance. That is why the cement version is used in rooms with wet conditions.
The only thing that needs to be kept in mind when forming such a coating is its susceptibility to shrinkage and, as a result, the possibility of microcracks appearing in the finishing layer.
Plaster
The use of gypsum as a binder allows us to talk about high manufacturability and environmental friendliness of the finish.
Due to its hygroscopicity, finishing gypsum putty helps maintain a favorable indoor microclimate. So, with high air humidity, a material containing gypsum reduces it, while with excessive dryness, it releases moisture back. However, the presence of this property does not allow the use of this mixture in places with high humidity.
Quartz sand or marble flour is used as a filler. As in the case of a cement analogue, the thickness of the layer and the appearance of the finish are directly influenced by the fineness of grinding of the raw materials. An inherent advantage of compositions containing gypsum is the absence of shrinkage processes during drying, as well as relatively quick drying.
Polymer
Polymer finishing putty (Knauf, Bergauf, Sheetrock, Betonit and other brands) is the most advanced option for wall finishing, combining all the positive qualities of the two previous compositions. The binder is latex, acrylic or a combination of both. The latex base gives the solution high elasticity, but at the same time reduces its vapor permeability, and therefore has limited use in residential premises. Acrylic offerings are particularly homogeneous and dense in structure; they are versatile and easy to use. All polymers are absolutely non-shrinking, do not require additional plasticizers, are easy to apply, but are expensive.
Correct application is half the success
Wallpapering, especially when using plasterboard or OSB boards for walls, must be done with strict observance of the subtleties of the preparatory stage. One of its necessary components is the application of putty. Is it possible to do without it if there is not enough time or money? For more information on preparing the base for wallpapering, watch this video:
Some people apply wallpaper over a primer. You can probably do without wallpaper if the premises are temporary or the apartment is planned to be sold.
To avoid unnecessary expenses, you can buy not two types, but one - there is a special putty, universal, which is used in both cases - both at the start and at the finish.
You should buy the dry composition and prepare it at home.
An indispensable condition is the correct application of a professionally selected composition, which is selected taking into account the material of the panels and applied in an even layer. And it is also desirable that the work be completed in one day, and the walls dry evenly.
Applying putty to a surface to be painted
Before applying paint to the ceiling surface, it must be leveled especially carefully, unlike preparing wallpaper for gluing. Since coloring compounds do not have texture, they are not able to hide even the smallest defects, but on the contrary, they only emphasize them more.
First of all, you need to decide which putty to choose for the ceiling to be painted. As mentioned earlier, it is better to give preference to products from well-known brands.
It is necessary to putty the ceiling surface if:
- the building is old and cracks appeared on the ceiling as a result of fluctuations in humidity and temperature changes and the plaster began to crumble;
- the rough ceiling covering is too uneven or has a rough surface - in this case it needs to be leveled with a thin layer of finishing mixture;
- a suspended plasterboard structure was installed;
- The shrinkage of a newly built home causes the walls and ceilings to move, causing them to develop cracks that require repair.
Choose universal or good
How to choose the right mixture for puttying walls is decided not in the market, but at the site of repair work. And this choice is influenced by the required urgency of the work, the characteristics of the wall, the humidity of the room, and even the state of finances. To avoid a negative result, the choice must be carefully planned.
Experts are increasingly inclined to choose a universal putty, which combines the qualities of finishing and starting, can be used to treat any surface, is moisture-resistant and dries quickly and does not depend on room conditions. This is not the cheapest of those sold in construction stores, but a good thing, by definition, cannot be cheap.
If the repair is done with your own hands, and for yourself, then you must choose materials of excellent quality so that they are easy to use.
Step-by-step instructions for putty
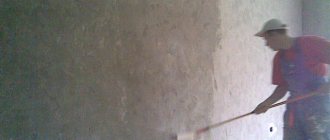
Preparatory priming of walls before leveling
The leveling process using a special compound is divided into 2 stages:
- Rough finishing or starting putty. This is the name given to the first layer of the applied composition with a thickness of 0.3–0.5 cm. This step accounts for the maximum consumption of the putty mixture: all holes, cracks, and chips are filled
- Finishing or final coat. Its thickness is no more than 10–20 mm and gives the final smoothness
Before rough application, it is worth carrying out one more stage, which can no longer be called preparatory. We are talking about priming the surface: this step is needed to eliminate chips, deep cracks, and gouges.
For interior work in residential premises, acrylic and perchlorovinyl primer solutions are used. They do not have a specific odor and dry quickly (from 1 to 5 hours).
After treating the surface with a primer and drying it completely, mix the mixture or take the ready-made composition and start puttingty.
Rough application
The composition is scooped up with a small spatula and spread over the wall with a wide one.
The first layer of leveling compound is applied as follows:
- Take a small amount of putty from the container onto a small spatula.
- The composition is transferred to the middle of the blade of a wide spatula
- The tool is carefully applied to the wall at an angle of 45 degrees (from the corner of the room) and with confident smoothing movements from side to side, the composition 3 mm thick is evenly distributed over the surface
- The processing is carried out with an overlap: each next layer partially overlaps the previous one
- Take a new portion of the mixture and repeat the steps, moving to the opposite corner of the room until the entire vertical plane has been worked out
- The corners of the room are worked out with a profile spatula. The movements in this case are made up and down, and not to the sides.
- The result obtained is checked according to the construction rules, by running it over a wet surface. This not only controls the uniformity of application, but also removes excess solution
- While the surface is dry, the wall is rubbed down: manually with a fine abrasive or with a professional sanding machine. Grouting is carried out in a circular motion counterclockwise
Untreated pits and cracks are not allowed on the surface. Professionals advise to check the surface by illuminating it at close range in order to identify all possible flaws.
Finishing layer
Finishing layer grouting stage
The finishing layer is thinner (15–20 mm) and is applied in the same way as the starting layer, but with some features:
- Before starting work, several multidirectional sources of artificial lighting are installed opposite the area being treated.
- Layers are applied from bottom to top from the window (or corner of the room) to the door
- After applying the first finishing layer, the wall is allowed to dry. The surface is then cleaned again
- Grouting of the finished base is done using a fine suede nozzle.
- The final stage is re-priming with two layers. After this, the perfectly flat wall is ready for hanging even the thinnest wallpaper.