Wallpaper is the most budget option for wall decoration. To glue them, only two conditions must be met: the surface must be smooth and dry.
However, putty is needed not only to seal unevenness in the wall. In this article we will look at why walls are puttied before wallpapering and how to carry out this operation correctly.
Do I need to putty the walls before wallpapering?
Is this necessary?
In almost all cases, it is recommended to putty the walls before wallpapering. Why putty the walls before wallpapering:
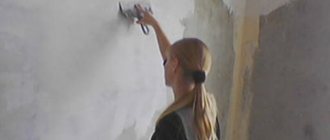
- When puttying, the wall becomes perfectly flat; this is exactly the surface needed for wallpapering. Even if the wall is perfectly plastered, the surface of the plaster contains grains of sand that do not allow the wallpaper to achieve good adhesion to the wall.
Uneven wall surface when plastering - The color of the wall lightens and becomes monotonous. If you glue wallpaper directly onto a cement surface or wood boards, dark spots will be visible through the wallpaper.
Whitening walls - Putty improves adhesion, the adhesive composition allows you to achieve stronger adhesion of wallpaper to the wall with less consumption.
Application of adhesive composition - If the wallpaper is removed in the future, the putty will protect the base from damage. This is especially true for drywall - its cardboard part can peel off when removing the wallpaper.
Removing old wallpaper
Please note: if the wall surface is initially perfectly smooth and white (for example, gypsum or lime plaster), then you can do without putty. Or if the wall has already been puttied.
Is it possible to putty the walls after removing the wallpaper?
Wall paint will allow you to realize any of your fantasies
Today we have to figure out how to paint the walls after wallpapering. We will discuss the choice of finishing materials and solutions to problems that may arise at different stages of this work. Let's get started.
Components of success
To begin with, let’s analyze the global task facing us into its components.
We have three stages of work ahead:
- Removing old wallpaper with minimal time and, if possible, without damaging the walls;
- Preparing walls for painting;
- Actually painting.
We will move on in this order.
Step 1: remove the wallpaper
The adhesives used to make modern wallpaper adhesives are starch and carbomethylcellulose.
Composition of wallpaper adhesives popular on the Russian market
They are of organic origin and, fortunately, cannot boast of water resistance. Therefore, to painlessly remove the old coating, we just need to soak the wallpaper glue with water.
How to do this depends on the type of wallpaper.
Paper, non-woven
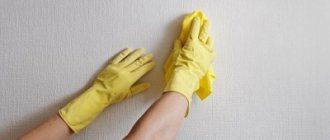
Wet the walls generously with warm water twice with an interval of 10-15 minutes. After another 10 minutes, start removing the wallpaper: they will come away from the base in whole sheets.
Wet paper will easily peel off wall putty
The scraps remaining on the wall are cleaned off with a steel spatula.
Hint: Interlining is made, like paper, from modified cellulose. However, due to their greater thickness, non-woven wallpaper takes longer to get wet. You may need to soak them in hot water or give the coating more time to wet the entire thickness.
Vinyl
Vinyl is called wallpaper with a coating (often textured) made of dense or foamed plasticized polyvinyl chloride and a backing made of paper or non-woven material (see Vinyl wallpaper based on non-woven material).
They can be removed in two different ways:
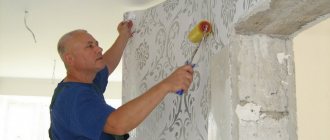
- Roll the surface with a needle roller, or make frequent cuts on it. In this case, the coating will lose its waterproofness, and the wallpaper can be soaked in the manner described above;
A needle roller will make the vinyl wallpaper permeable to water.
- Tear off the thick coating from the backing. To do this, you need to pry the strip of covering under the ceiling and pull it towards you and down. The backing remaining on the surface of the walls is removed in the same way as paper wallpaper.
Tip: if vinyl wallpaper is in good condition, it can only be partially removed (for example, from the top of the walls). The combination of wallpaper and paint on the walls will look most impressive if they are separated by a contrasting border or molding.
The bottom of the wall in the photo is covered with wallpaper, the top is painted with water-based emulsion
Glass wallpaper
They are rightfully considered the most durable and wear-resistant coating. The price of strength is the extremely difficult removal from the walls: if the wallpaper was glued with PVA or other synthetic glue, it can only be removed by abrasive sanding.
Hint: a fairly strong canvas can, of course, simply be torn off the wall by cutting it under the ceiling. However, this will inevitably damage the putty.
Don't rush to get upset.
We have two good news for you:
- Fiberglass wallpaper is often glued with starch glue or CMC. In this case, they will be easily removed after soaking. If the dense coating does not allow water to pass through, frequent cuts can be made on it;
- Many types of glass wallpaper can be painted multiple times. You can change the color of the walls up to a dozen times.
Glass wallpaper can change color many times
Advice: before starting work, if possible, remove the covers of sockets and switches from the walls (after de-energizing them with automatic circuit breakers), door frames and baseboards. They will interfere with you both when removing the old coating and during further work.
Before starting finishing work, turn off the power to sockets and switches, then remove their covers
Step 2: Preparing for Painting
To paint walls after wallpapering, you need to make them perfectly smooth and moderately absorbent. A surface that is too porous means a lot of paint is wasted.
What do you use to putty on the walls before wallpapering?
There are various putty formulations.
Firstly, there is a distinction between starting and finishing lineups. The first ones are for rough finishing, the second ones are for final finishing. If you have fairly smooth walls, you can get by with finishing putty.
Based on their composition, there are three formulations of putties:
- Plaster. The most common option, it is convenient to work with, does not shrink, but excessive humidity harms it. Recommended for residential areas with moderate humidity. It's inexpensive.
- Cement. More resistant to moisture, after application it shrinks slightly. It's inexpensive.
- Polymer (the base can be different - for example, acrylate polymers). Such compositions provide a coating of the highest quality, do not shrink, are resistant to moisture, the only negative is the high price.
Material options
Question to an expert
Can I use starting and finishing compositions from different manufacturers?
I don't recommend it. For more reliable and high-quality work, purchase both from the same manufacturer.
Do I need to prime the walls?
Question to the expert
Do you need a primer? Is it possible to do without it in some cases?
Regardless of how you plan to finish the walls in the future, we recommend that you prime them first.
A primer is a material that will improve the adhesion of finishing materials to the wall, be it putty or wallpaper. The surface layer of the material is strengthened, which reduces the likelihood of chips and cracks, or peeling of putty or wallpaper.
Also, antiseptics and fungicides are added to modern primers, which will help avoid problems with mold and mildew.
The primer reduces the consumption of wallpaper glue and does not allow excess water from the glue to be absorbed into the wall.
The ideal option is to apply a primer before puttying and after, before wallpapering.
Primer of walls before and after puttying
Part I: removing wallpaper
What you need
- Film;
- Mask or respirator;
- Putty knife;
- Cord brush;
- Paint brushes;
- Wallpaper steamer;
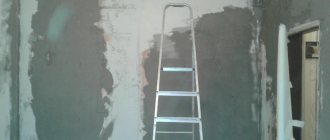
- Ladder;
- Bucket and sponge;
- Wallpaper removal solution;
- Putty.
Why you shouldn't paint over old wallpaper
In some cases, this option seems to be the only option, but it is usually temporary. For example, you bought an apartment, set a date for renovation, but it’s not tomorrow, and the idea of living a “flowery” life is perceived as aesthetically unacceptable. Remember: in the future it will take much more effort to remove wallpaper primed in this way: when paint is applied, it becomes waterproof, and you will need special tools to work with it. We will tell you which ones below.
If there is no question of spontaneously painting the wallpaper over the pattern, then the wallpaper can be safely removed. Firstly, this will make the surface of the wall smoother and easier to accept the new coating, be it putty, primer, plaster or paint itself. Secondly, this is the only way to remove the “cultural layer” that certainly accumulates under the wallpaper: dust, whitewash, small fractions of cement, mold and other unpleasant formations.
Preparation for the process
We start with preparatory work: we cover the surrounding area with a protective film. We pay special attention to the area of sockets and switches, close the wiring (just in case, you can turn off all the “automatic machines” on the panel). We wrap furniture and lamps with film if they have not been removed. We put on a respirator or mask, gloves and work clothes. Do not have illusions about your accuracy: repair compounds have a completely different view of things.
Removing wallpaper: the old fashioned way
If the wallpaper is really old, made of paper, and is peeling away from the wall in places, you can try to carefully “pick up” it with a spatula: sometimes old coatings can be easily removed. It’s another matter if the wall has been pasted layer upon layer for decades. In this case, there is a risk that the spatula will either not remove the wallpaper at all, or will remove it from sections of the wall. Therefore, to the question: “Is it possible to remove wallpaper from a wall with your own hands?” the answer will be: “Yes, you can, but it’s better not to risk it.”
Removing wallpaper: using a solution
The solution for removing wallpaper is usually mixed with alkali or a mixture of solvents. The composition exists in the form of liquid or powder. When treating walls with such a product, be sure to use a mask, since the liquid can be caustic. Please note that heavy textured wallpaper or wallpaper applied in several layers usually require several treatments, and one bottle may not be enough.
An analogue of such a solution is sometimes made at home: the composition is based on vinegar, water and washing powder. However, given the relatively low cost of factory-made solutions, it is hardly worth the effort. Moreover, washing powder is also a chemical composition.
Before applying the solution, you need to make cuts in the wallpaper through which the liquid will interact with the wall, then apply the product and wait. Afterwards, the wallpaper can be removed with a spatula, rubbed with a stiff brush or sandpaper. If at the same time you still have potholes or cracks on the wall, get ready to putty on top of them.
The solution works great if the wallpaper is thin. If we are talking about several layers of paper, painted or simply thick textured coatings, you will have to use other methods.
Wallpaper removal: perforation and steamer
For multi-layer coatings, vinyl, textured wallpaper or painted wallpaper, you will need auxiliary tools: a needle roller or a stationery knife, as well as a steamer. An average steamer will cost 3-4 thousand rubles, a standard roller costs around 500 rubles.
A perforation (aka needle) roller is sold in regular building materials stores. Its purpose is to make holes in the surface of the wallpaper to facilitate access of solutions and steam to the lower layers (if the wallpaper is vinyl) or to the adhesive composition. Sometimes the roller is replaced with a stationery knife, but this is not very convenient and, most likely, more thorough puttying will be required before painting.
A steamer is a kind of “iron” for wallpaper, or more precisely, for the glue under it. The device works in the same way as a large amount of boiling water poured onto the wall at once: the wallpaper glue simply does not withstand the effects of steam and loses its structure.
Stages of work
- We go over the wallpaper with a roller and make holes;
- We connect the steamer, treat the wallpaper with hot steam, starting from the ceiling;
- Remove the wallpaper with a spatula and remove any remaining glue with sandpaper.
Usually everything works out the first time. Vinyl wallpaper consists of several layers, so you may have to treat the wall twice. If there was a pasting ground paper under the wallpaper, then it usually comes off from the wall relatively easily.
Features of puttying various materials
Depending on the material and quality of the wall surface, you will have to level it in one way or another.
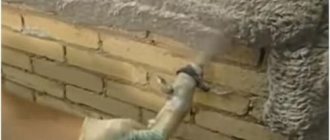
Brick
Brick walls must be leveled. If there are large irregularities, the surface will have to be plastered and then treated with finishing putty (if you plastered well enough).
If the wall is fairly smooth, then you can do without plaster. After the primer, a starting putty is applied in several layers, and after it dries, a thin layer of the finishing composition is applied.
Concrete/cement
Sometimes you find walls that are so well made, smooth and durable that you can even do without putty. To do this, the following conditions must be met:
- The wall has a monotonous, even color;
- The room is heated, without high humidity;
- The wallpaper is thick and does not show through.
In all other cases, a finishing layer and, if necessary, a starting layer of putty are applied (chips and unevenness are repaired with it).
We recommend priming in any case: this will improve the adhesion of the wallpaper to the wall and prevent the accumulation of excess moisture.
Plaster
As mentioned above, the surface of the plaster can be perfectly smooth, but grains of sand will still appear on its surface, which do not allow the wallpaper to be glued properly. Therefore, it is treated with a thin layer of finishing putty to smooth the surface.
Old wallpaper
Sometimes people wonder whether it is possible to putty on wallpaper. Definitely not! They can be easily removed by wetting them with water or special liquids.
If you putty on the wallpaper, it will absorb water, bubble, and immediately fall off; in general, it’s unlikely that you’ll get anything decent.
Drywall
Definitely putty!
It's not even about the wallpaper itself; it will fit perfectly on drywall. The fact is that if you want to remove them, they will be removed along with the outer covering of the sheet. It is clear that the sheets will have to be changed after this. It will be much cheaper to apply a layer of finishing composition in advance.
Before puttying the drywall, all joints are glued with reinforcing mesh to prevent cracking.
Wood boards
They are puttied depending on the nature of the surface. For example, fiberboard or plywood do not require puttying; they are already quite smooth. But the OSB will have to be puttied, since the gaps between the individual shavings are quite large.
Chipboard or MDF without an outer protective layer will require a primer and possibly a thin layer of finishing putty.
If you already know the technology for applying putty, and you want to know how to glue wallpaper quickly and efficiently, then you can read our article, where we cover these issues: gluing paper-based vinyl wallpaper: how to glue and what glue to use.
Checking the quality of preparation of walls and ceilings
There are two ways to check the quality of smoothness of a putty surface - instrumental and organoleptic.
The following tools and accessories are used for instrumental testing:
- Level;
- Powerful lamp with reflector;
- Rule;
- Square;
- Pencil.
The organoleptic method consists of a visual examination of the surface being tested under lateral illumination with a strong light source.
Problem areas in the form of bumps and depressions will be clearly visible in the form of shaded areas. In addition to inspection, the test is carried out by feeling the plane under study with the palms of the hands.
Minimal defects found during inspection of the quality of preparation are eliminated by re-applying a thin layer of finishing putty to uneven areas of walls and ceilings.
We recommend watching a video on the topic:
More significant irregularities of 0.3 mm and above will require repeated puttying of the entire plane.
Putty application technology
Next, we will look at how to putty walls before wallpapering yourself.
Materials and tools
First of all, you will need the putty itself. Suppose you have already decided on the material, now we will outline a number of points that you should pay attention to when purchasing.
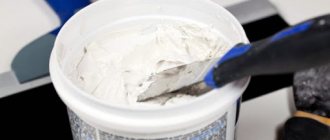
- Firstly, the compositions come in powder form and in the form of a finished mass (this applies more to polymer putties). It is easier to work with ready-made material, but it also costs more.
- Take the packaging and look at the manufacturing date and expiration date. The “fresh” the composition, the better. Naturally, there is no need to buy expired goods.
- If the mixture is powdery:
- Pay attention to the integrity of the packaging and the lumpy nature of the mixture itself, as it deteriorates due to moisture.
- Find out how long the prepared solution “lives” and how quickly it begins to set. In the future, you will know what volumes of solution to prepare for one batch.
- Also find out what volume the composition is diluted to.
- Find out how long it takes for it to set completely.
- If you take the matter seriously, we recommend that you study reviews about the selected material.
- Finally, the primer - it must be of good quality and compatible with other materials. You can take a universal acrylate-based primer.
If you use powder, you will need a container for diluting and a stirrer: usually a drill with a special attachment is used.
It will be difficult to achieve a homogeneous consistency of the mixture manually. You will also need:
- Roller for applying primer;
- Various spatulas (wide – to work on a plane, small – to fill in irregularities);
- Trowel (aka trowel) or trowel;
- Aluminum rule (one and a half to two meters, maybe a level);
- Container (flat for a roller - for example, a canister cut lengthwise, a bucket of sufficient width - for spatulas);
- Sandpaper (if you have a sanding machine, that's cool!)
- Place something on the floor to prevent it from getting dirty.
Surface preparation
If there are old coatings left, they need to be removed. Old paint can be treated with paint remover or annealed with a hair dryer and then scraped off; or remove with a grinder.
Old wallpaper is usually removed by soaking it with water; the swollen sheets are lifted with a spatula and removed.
Old peeling pieces of plaster, etc. must also be removed. They can be soaked in water or beaten. If necessary, the entire old layer is removed.
So, what was left was a bare wall. Contaminants must be removed from it. You can use a vacuum cleaner and then wash the wall with a wet cloth. You may have to wait until the wall is completely dry, depending on the type of primer,
Prepare a primer (if indicated in the instructions, dilute with water) and use a roller, pouring the primer into the tray, and carefully treat the walls with it. It’s better to do it twice, the second layer – after the first one has completely dried.
If you are putting putty on drywall, cut small chamfers at the joints (with a stationery knife) and stick on the reinforcing mesh. This is done to prevent cracking.
Tip: Find out in advance where your uneven areas are by applying a rule or level to the wall.
Puttying
We begin to lay the starting layer.
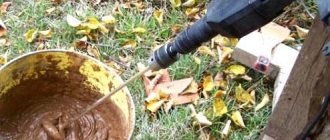
Prepare the required amount of mortar (taking into account the setting time, for example, gypsum mortar begins to set after 15 minutes; first do less, then you will understand how much is needed).
To do this, take a clean container, add the required amounts of water and powder, according to the proportions on the package, and mix thoroughly with a drill.
Mixing plaster mortar
Now, using a small putty knife, fill in any obvious unevenness, seams and joints. Using a spatula, immediately level the applied layer.
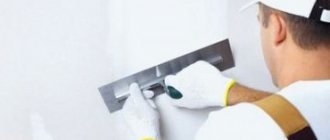
Let's get started with the main part of the work. Use a spatula with a wide blade (30-40 cm). Pour the solution onto it and spread it over the surface of the wall in semicircular movements. Hold the spatula at a slight incline so that the solution is evenly distributed, and press with medium force. Then level the mortar with a trowel or trowel.
Start working from the bottom up, from the far corner to the door.
Periodically check the evenness of the coating using a rule (you can also quickly level a large area with it).
Final stage
So, you have applied the putty, wait for it to dry. At this time, it is recommended to open the windows so as not to create excess humidity in the apartment.
All that remains is to sand down the unevenness left during the work. To do this, use a block and sandpaper, sanding in a circular motion. Coarse-grained sandpaper is used for the starting mixture, and fine-grained sandpaper for the finishing mixture.
After finishing sanding, remove all dust from the apartment.
Depending on how uneven the wall is, several coats of putty may be required. The optimal thickness of one layer is 2-3 mm, no more than 5. Each layer must dry completely naturally.
If the wallpaper is thick enough, then it is not necessary to achieve a perfectly even coating; it will still not be visible under the wallpaper. You can generally get by with a starting layer.
Finish coating
If the wall is fairly flat, you can get by with just this.
The finishing putty is applied to the concrete wall in the same way as the starting putty, but with a smaller layer thickness.
Alternatively, you can use a roller to apply the solution: roll it over a small area, then scrape off the excess solution with a wide spatula at an angle of 90 degrees. A thin layer remains, filling surface defects. Allow it to dry and repeat if necessary.
A rubber spatula works well for working in corners.
Check the evenness of the coating using a rule and a flashlight. You can use it to illuminate yourself from the side to better see irregularities.
Sanding – soft, after drying. Finally, apply a layer of primer, and after it dries, you can paste the wallpaper.
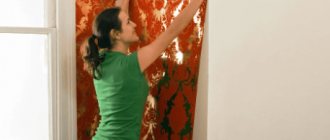
How to remove old wallpaper from walls
Today, so-called removable wallpaper is available for sale, which can later be easily removed without the use of water or special products. You can determine them as follows: run a spatula along the seam at the bottom of the wall, pick up the canvas and pull it. If the entire tape can be easily removed, then you have removable wallpaper and removing it will not be difficult.
Removal with water
To do this you will need a liquid wallpaper remover. Dilute it with hot water in the proportions indicated on the package. Using a wide sponge or sprayer, apply the product to the canvas from the ceiling to the floor. Do not apply the product to the entire surface at once, otherwise while you are tearing off one section, all the rest will have time to dry. Wait a few minutes for the product to absorb, then use a spatula to remove the old wallpaper.
If you notice that the paper is not completely saturated with moisture, take sandpaper and run it over the surface. After the wallpaper is completely saturated with water, apply the product again and leave for 30 minutes.
Removing wallpaper with a removable top layer
For such samples, the top vinyl layer can be removed quite easily, but the bottom paper layer remains, tightly glued to the wall. After you have removed the top layer, treat the wall with a special wallpaper remover as described above, then remove the remaining paper.
Removing washable wallpaper
Such wallpaper has a special top layer that makes it easier to wash, but complicates the removal process. To do this, you need to “break through” the plastic layer so that the paper base can be saturated with water. Using a special puncher, make holes in them, and using a sprayer, treat the surface with a special product. If the walls are covered with plasterboard, then the hammer drill can damage the cardboard. In this case, use a knife or spatula and make shallow cuts. Try to direct the jet directly at the holes made. Wait 10 minutes.
Steam removal
This method requires certain skills and effort, since you need to steam the wall and peel off the wallpaper almost simultaneously.
The steamer turns water into steam, which softens the adhesive between the wallpaper and the wall. If you are going to remove vinyl wallpaper this way, first use a putty knife or knife to make holes so that steam can penetrate under the vinyl covering. Carefully read the instructions that come with the steamer, since different models have their own specific details. But the general principle is this:
- make sure the steamer is turned off;
- fill the tank with warm water;
- turn on the steamer and wait until the water boils;
- bring the steamer nozzle to the area to be treated and hold for about 30 seconds, then remove the wallpaper using a spatula.