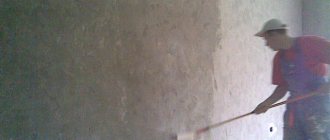
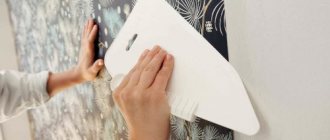
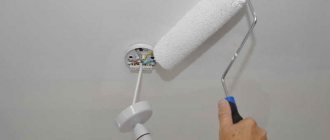
If you've never hung wallpaper, this doesn't mean you won't have to do it one day. Still, despite the large number of materials that can replace them qualitatively, the popularity of wallpaper is not waning at all. On the contrary, a large number of new options are being released with even more attractive performance characteristics. However, all the numbers contained in the specifications can safely lose their meaning if the instructions for correct gluing are neglected. And it says that the key to the successful completion of this repair operation is high-quality preparation of the walls for wallpapering. We offer you step-by-step instructions with photos and videos - nothing superfluous, just specific actions in a given order.
- Removing old material;
- Surface cleaning;
- Primary treatment with a primer;
- Surface leveling;
- Final treatment with primer;
- Conclusion.
The main types of white primers for wallpaper
The base material, varieties and further surface treatment influence which composition to choose in a particular situation. All types of white primer have their own characteristics, positive and negative sides.
Acrylic
This type of white acrylic primer has become quite popular. Universal compounds penetrate as deeply as possible and help eliminate dust. Old and loose plasters receive additional strengthening thanks to acrylic compounds. Water absorption of walls and ceilings is reduced, and adhesion, on the contrary, improves.
The porosity of the walls determines the consumption, average figures are 100-200 grams per m2.
These primers for white wallpaper contain only water and acrylic polymers. Sometimes they are diluted with antibacterial and antifungal components. An important indicator for selection is the amount of dry residue.
Alkyd
Protects wood from rotting and metals from rust. Can be used on plastic surfaces and substrates with fiberboard, chipboard, fiberglass or regular glass. When applying, you can use any convenient methods, including spraying, rollers or brushes. The pigmented white primer solution can be diluted with white spirit.
Universal
Suitable for application on surfaces of medium to small porosity. Helps even out colors and cover up various stains. At the preparatory stage, it can be applied to various types of surfaces. How long the composition will dry depends on the specific base.
Latex
For treating surfaces with a porous structure. Fills all gaps in the walls, providing reliable adhesion to any materials that are used in the future.
Preparing a wall with oil paint or enamel
If oil paint and enamel adhere well to the base, you don’t have to think about how to apply wallpaper to painted walls: in this case, you will only need proper surface preparation.
- The wall must be thoroughly sanded to a matte state. This is done for better tenacity of materials;
- The surface must be washed and dried well. In order to properly apply wallpaper, painted walls must be thoroughly cleaned of dust;
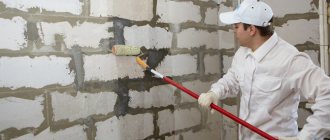
- Treating the wall with a primer is also important: it will not only provide improved adhesion, but also prevent the appearance of mold. This stage is done in two approaches until completely dry;
- There is a recommendation from the craftsmen: before gluing wallpaper on painted walls, add PVA to the wallpaper glue. This will help the material set faster and more firmly.
Preparations for wallpapering are carried out in the same way as with oil paint. Details on how to putty over paint.
The whole question of how to stick wallpaper on a wall painted with enamel lies in the technologically correct preparation of the surface.
We are preparing the walls in a new building.
Preparing the walls in a new building can take quite a long time. When purchasing an apartment in a new building, everyone dreams of seeing a ready-made home, completely suitable for moving into. Something that requires very little time and effort to arrange. But when crossing the threshold of a new apartment, crookedly installed sockets, bare concrete floors, and uneven walls appear before your eyes. Of course, it won’t be possible to immediately put wallpaper on such walls. All upcoming work will have to be divided into several stages.
Easily and quickly clean walls from old wallpaper
The initial stage of preparing the walls will be to apply a spray with a layer of 3-9 mm. This layer should be something like thick sour cream in consistency, so that it can penetrate into all sorts of unevenness and roughness of the wall without any problems. How the plaster will lie on the wall depends on the consistency of the spray.
The second stage will be priming the walls. The thickness of the primer applied to the wall should not exceed 6 mm. The primer can be applied to the wall in several stages.
The third stage of wall preparation is covering. This is the last, thinnest layer of plaster, 2-4 mm thick. This layer of plaster creates a thin film on the surface of the wall, which is rubbed off at the next stage of preparatory work.
The fourth and final stage is leveling the walls using fine-grained sandpaper.
Stages of preparing walls for wallpaper and features of the work
In the process of preparing walls for wallpapering, it is not enough to simply buy high-quality materials. It is important to correctly perform the preparation technology, adhering to the following steps:
- Cleaning the wall of old wall materials;
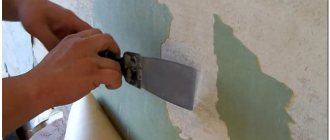
Old wallpaper or painting must be removed 100%. The wall must be perfectly clean.
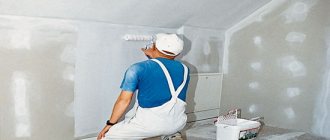
- Initial application of primer. The first layer of primer is applied as an impregnation in order to eliminate microcracks and neutralize the surface from moisture. It will give the surface a slight smoothness and will be completely translucent;
- Sealing cracks and defects;
- We carry out the most important stage - finishing and preparing the wall: we fill existing cracks and chips with a gypsum mixture, plaster the surface and putty;
- Leveling the surface using sandpaper or other abrasive material;
- Secondary application of primer. It can act as the best finishing composition for adhesion of the wall to the wallpaper and gluing dust residues.
Preparation for wallpapering painted walls.
Wallpaper glued to a smooth or previously painted surface adheres very poorly. Therefore, before gluing wallpaper, the wall must first be cleared of the paint layer. Removing paint from walls is not a simple task and will take quite a long time. There are times when people, wanting to make their life easier, simply sand the painted surface, make notches on it, or apply a layer of primer to the paint. Wallpaper glued this way can fall off the wall at any moment.
A fairly common method is to use a hair dryer. Indeed, this is an effective method, but not harmless. To clean the walls using this method, you will need a hair dryer. The painted area of the wall is heated with a hairdryer; when the paint becomes soft, it is removed with a spatula. During this work, it is necessary to provide the room with a constant flow of fresh air, since when the paint is heated, it begins to evaporate harmful chemical compounds that can cause poisoning.
To clean the wall of paint, you can also use a grinder or grinder with an iron brush. This method is very dusty. Before you start work, you need to open all the windows and tightly close the doors to other rooms, thoroughly plug the cracks through which dust can penetrate. Having done all this, you can begin cleaning the walls.
One of the most effective ways is to use special washes. When carrying out this type of work, you need to observe some safety measures: use rubber gloves, a respirator and safety glasses during the work. After the paint layer is removed, the walls are leveled, if necessary.
A separate and more complete article about how to remove old paint from walls.
How to hang wallpaper alone. Practical advice.
If the paint from the walls is not removed by any of the above methods, try covering the wall with a concrete-contact primer or use vinyl wallpaper adhesive. But remember that only complete removal of the old paint layer can give you an excellent result. After the wall is completely cleaned, visually inspect it and evaluate how ready it is for wallpapering. If in front of you is a wall with pronounced unevenness and pits, proceed to putty.
Advice from professionals
A new product – primer-putty – combines the properties of two coatings. Allows you to save time on finishing and money on materials. Apply when high demands are placed on the evenness of the base, under thin light wallpaper. It is a thicker mixture than a primer, which is applied to the base layer of putty, fills all microcracks and creates a smooth surface. It differs from finishing putty in depth of penetration and ease of application. The process is the same as priming the walls before puttying.
Professionals can check the quality of the primer experimentally. A drop is applied to the thumb, dries for a minute, then pressed down with the index finger. When unclenched, you should feel the stickiness and tenacity of the composition. For visual comparison, it is better to use several samples.
Primer adhesive
Some people prefer to prime the walls before wallpapering with glue. For priming, either choose PVA glue diluted with water, or treat the surface with casein (wallpaper) glue. Many people are attracted to this option due to its relatively low price, ease of preparation, naturalness and environmental friendliness. Let's look at the features of each option.
Priming with wallpaper glue
There are many pros and cons to this type of wall preparation for finishing. If you nevertheless decide to use wallpaper glue as a base before gluing, it is better to choose it in accordance with the type of wallpaper. To find out whether such a composition is suitable for priming, you need to refer to the packaging. The instructions for some types of glue contain recommendations for dilution and proportions specifically for using the glue as a primer. It is better not to use glue that is not suitable for these purposes, as this can lead to disastrous consequences and repeated repairs.
Some brands produce wallpaper adhesive with a color indicator to help you apply the product evenly over the entire surface. In order to prepare a base mixture from glue, no special skills are required. In addition to being easy to dilute and apply, this method is also very economical.
It is important to understand that wallpaper glue cannot hide visible flaws and make the surface perfectly flat and smooth. If the room humidity is high, you should choose formulations with antiseptic additives. They do not promise complete protection against mold, but the likelihood of its occurrence is significantly reduced.
Priming with PVA glue
PVA glue has been used as a primer since USSR times. This universal adhesive, which stands for polyvinyl acetate, is used in everyday life, creativity and the construction industry. The glue is a thick white suspension that becomes transparent after complete drying.
There are many types of PVA glue , differing in properties and purpose (construction, carpentry, furniture). Both universal and specialized versions of the product are produced. PVA glue contains mineral particles, which increase its adhesive properties. It is added to construction concrete mixtures and putty to increase strength.
To prepare the primer mixture, PVA glue is diluted with water in a ratio of 1:2. However, many experts do not recommend using glue as a primer in this form. Firstly, over time, the film of hardened glue runs the risk of peeling off along with the decorative coating, causing you a lot of trouble. Secondly, over time the composition becomes yellow, which can cause it to show through the wallpaper. This may ruin the appearance of the finish.
Therefore, if we are not talking about quality, but about quick and budgetary repairs, this option can be considered. When using expensive materials and painstakingly and carefully achieving an excellent result, this option should be postponed and purchase professional specialized products.
Features of repainting dark wallpaper in a light tone
With dark wallpaper, which was painted a different color several years ago, the situation is somewhat different. To lighten such canvases, more effort must be made. First of all, you need to lighten the tone. To do this, paint a wall with dark wallpaper with white paint. Do not try to seal all visible gaps the first time. It happens that even after adding a second layer, streaks remain.
Apply the paint using gentle, non-pressing movements. Apply each layer of lightening only after the previous one has dried. Only after obtaining a uniform white shade, proceed to pigmentation of the surface.
Please note that wallpaper that has a shallow pattern will have a smooth, non-relief surface after applying several layers of paint. Therefore, in this case, it is better to think about re-gluing.
What to do if the wallpaper is see-through
If the unpleasant effect of translucence is revealed at the initial stage of work after gluing 1-2 canvases, and it is not possible to cover them with furniture or decorate them, then it is worth removing the pasted wallpaper and leveling the surfaces of the walls. It’s better to buy one roll and work a little extra than to worry about the whole room being ruined.
- The uneven color of the panels can be evened out by painting them with liquid water-dispersion paint using a roller, and after drying, pasting them over again.
- Another simple option is to level the walls with a high-quality primer, such as Tikkurila Varma, which has pigment added to give it a color that matches the tone of the wallpaper. This primer is easy to apply, compares the absorbency of different textures, and does not become wet from water or glue.
If the see-through appears later, when the entire room has already been covered with wallpaper, you can try other options to solve the problem.
Vinyl
You can paint them with acrylic or dispersion paint to match. The paint adheres well to the vinyl surface and will even help give the interior a new look.
Non-woven
It all depends on the type of canvas - if it is non-woven wallpaper for painting, then 2-3 layers of paint applied on top will definitely solve the problem. If the finish is not intended for painting, the coating will have to be changed.
Paper
It is not advisable to paint such materials or seal them with other layers on top - the thin fabric will get wet and the situation will become even worse. You can consider decorating the spots using appliqués, panels, or other solutions (paintings, watches, photographs). If none of the above is suitable, all that remains is to change the wallpaper to a denser one, or level the walls.
Shines through wallpaper for painting
If the coating was glued to a poorly prepared surface, and after painting all the irregularities and stains appeared, you will have to apply two or more additional layers of paint on top to eliminate the problem.
Don't worry in advance if the paint hasn't dried yet. It will become more uniform after drying completely.
How to speed up the process of cleaning walls from wallpaper and what will be needed for this?
For work you will need: a small spatula, a roller, a spray bottle, water and auxiliary products (vinegar, washing powder or dishwashing detergent, etc.). Having prepared all this, you can safely get to work. Do not forget that near heating radiators and under window sills, the wallpaper does not stick too tightly - in these places you can easily remove it by hand. If this does not work for you, then wet the surface of the wallpaper with hot water and after a few minutes try to remove it with a spatula. Vinegar previously added to the water will act as a solvent for old wallpaper glue. Wallpaper removers are available in stores, but they are quite expensive.
Paintable wallpaper - pros and cons
For more information on how to quickly remove old wallpaper, follow the link.
Choosing wallpaper for painting
To reduce the number of joints on the surface of the walls, wallpaper for painting is produced wider than regular canvas. Painting the coating without spoiling the work done is only possible when using wallpaper with special markings.
There are 3 types of wallpaper for painting, differing in composition:
- Paper wallpaper for painting . An environmentally friendly option that does not contain hazardous ingredients. Paper wallpaper consists of two layers of paper, between which there is a sawdust filler. Thanks to this structure, the wallpaper is dense, soft and thick. After gluing to the wall, the joints are leveled and become invisible. Withstands staining up to 7 times. The disadvantage of paintable paper wallpaper is its fragility and the lack of the necessary strength for pasting walls with increased load.
- Non-woven wallpaper for painting . The most common option for residential use. The inner layer of such wallpaper is non-woven, the outer layer is vinyl. The undoubted advantage of non-woven wallpaper for painting is its strength compared to paper. The canvas will not tear when pasting the walls, will not stretch or sag over time. The disadvantage of wallpaper is the fragility of the vinyl covering. To ensure that the canvas retains its original appearance, do not place furniture close to the wall, and avoid mechanical stress on the wallpaper.
- Fiberglass wallpaper for painting . The fabric is a weave of glass fiber. Strong, durable, fireproof, have increased wear resistance, and are often used in rooms with additional loads on the walls (corridor, children's room). Resistant to moisture, suitable for finishing kitchens and bathrooms.
Paint or glue - which is better?
It is necessary to add up all the pros and cons again and draw the appropriate conclusion. If you decide to paint, it is better to hire a team of craftsmen to level the walls and prepare them for painting. The coating procedure itself is also not simple; a beginner cannot cope with it efficiently, so again hired labor is required, and qualified ones at that.
Wallpapering walls can be done by an ordinary home craftsman, even alone. At the same time, there is no need to buy complex home appliances that are used extremely rarely. Here you can get by:
- scissors;
- with a knife;
- brush;
- brush;
- roller;
- a basin for applying the adhesive mixture.
In terms of financial investment, it is better to say “yes” to wallpaper rather than paint. When preparing the walls with a hired team, you will have to spend a lot of money. But it’s worth noting that if you paint walls that were perfectly aligned in previous renovations, then buying the required amount of paint will probably be cheaper.
It all depends on the material used. When calculating, it is necessary to take into account that high-quality paint is no cheaper than expensive non-woven or vinyl wallpaper.
In terms of the durability of paint or wallpaper, nothing definite can be said. Currently, wallpapers are produced that are so strong and durable that they will give a head start to any paint. On the other hand, it is easier to change the interior by simply painting the walls a new color.
